Monthly Archives: July 2024

Romana’s cake, aka traditional Italian cake for everyday occasions

Growing up with a Mamma who was an excellent cook, we had largely home made everything. But the cakes and biscuits we did have were nothing fancy, because they were things my mother learnt in her own mother’s kitchen. Looking back at my own cookery books, from my own adolescence, I was struck by how basic the recipes were.

I had a Katie Stewart cookbook which I thought was the height of sophistication but looking back at it now, the ingredient list was small and simple. Everything has evolved to be so much more sophisticated, and complicated now. That’s not a bad thing.

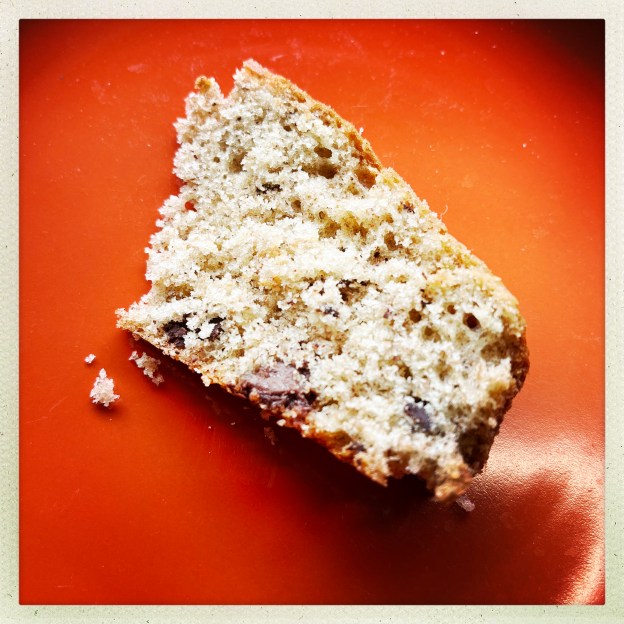
In February I went to visit my north Italian family in Parma. Romana, my cousin, had made this cake. It was plain and simple but we loved it, especially my youngest who ate it for breakfast and for tea.

It’s very usual to have such a cake as this and it be presented at various times during the day, until there’s nothing left. It’s part of its life journey that it should go slightly stale towards the end, so you can refresh it by giving it a hot dunk in morning caffe latte or tea-time lemon tea. I asked Romana for the recipe and here it is, I’ve put its most basic incarnation here plus a few small additions (in brackets) which make it a bit extra special. But don’t veer too far from the original. This cake is not fancy, doesn’t want to be and therein lies its beauty.

Oven to 180C you need a tin of about 9″/23cm, base lied with baking parchment.

300g of 00 or plain flour (I sometimes use 200g white flour and 100g wholemeal)
180ml of whole milk (semi skimmed will do)
150g caster sugar
2 eggs
100ml of olive oil (you can use extra virgin if you are so inclined, I’ve also used 50ml of lemon infused/50ml of normal olive oil)
3 teaspoons of baking powder
100g chocolate chips. This cake really benefits from those store board tiny chocolate chips but I have so much chocolate that I just chop up that)
(A really fabulous addition is to use Bakery Bits’ Fiori di Sicilia essential oil, this elevates it massively as well as smelling amazing and making the cake taste SO Italian.)

Mix the caster sugar with the oil, add the eggs, then the flour, then the milk and baking powder. Finally mix in the chocolate chips and the Fiori di Sicilia if using. Put in the tin and bake for about 40 mins. Check after 30.

This is great for taking to work/school in lunch boxes as it’s a very well behaved cake when travelling.

Also if anyone is interested in the approx macros for this whole cake they are:
Total weight: 931g
Protein: 60.2g
Fag: 157.7g
Carbs: 430.2g

Fibre: 29.5g
Sugars: 189.6

Update August 2025.

I now make this in my mini loaf cake tin to make..mini loaves and they are so cute and take about 20-25 mins.

Cheesey, pleasey buns. Excellent with soup

Despite loving home-made soup, I often feel it’s not ‘enough’ for a meal. Sure, crusty sourdough is more than acceptable. But when you want to up the calorie or yum factor, these are the things to make. An enriched brioche dough made into buns, which yield and ooze with cheese. You can make these rolls separate, as stand alone buns on a tray, but I like making them together in a round tin so you have to split them after baking. You can make them the day before you need them, or start them early in the day if you want them for the evening. But either way think of these a good half a day before you want to eat them.

These were originally in Delicious magazine.

Oven when you get to that bit: 180C.

For the buns you will need:

250g plain flour
Half a teaspoon of salt
One teaspoon of fast-action dry yeast
15g sugar
125ml whole milk
Two large eggs
50g unsalted butter, at room temperature and diced.
A bit of extra butter for later, melted

The filling:

100g ricotta
50g mozzarella cut into little pieces
25g parmesan grated, plus extra to sprinkle atop
One tablespoon of ground black pepper

I use my Kenwood stand mixer for this. You could of course also do it by hand.
Put the flour, salt, sugar and yeast in a bowl (the stand mixer bowl if that’s what you’re using), make a little well in the centre and then add your milk and one of the eggs. (Don’t add the butter just yet.)

Using the dough hook (or a fork and then your hands but if you do this the recipe recommends you mix the butter into the flour first, before adding the egg and milk) mix everything together until a smooth and elastic dough forms. I know mine is done in my stand mixer because it all groups around the hook. This takes about ten minutes. If you do it by hand it make take more or less time, depending on how angry you are and how ferociously you knead.

Now, if using a stand mixer, add the butter a few pieces at a time and continue kneading/mixing until everything is incorporated. I find it goes really greasy and there are a few moments of panic but everything does come together eventually.

Form a dough, put it in a bowl, cover and refrigerate overnight or for a few hours.

A couple of hours before you want to eat them, take out the dough and make the filling by mixing together all the ingredients in a bowl. Then divide up the dough into six pieces, roll each piece out into a rough circle. You will need to put an equal amount of filling into each them pinch the roll shut and put each bun seam side down in the tin (which you have lined with parchment paper). Because I can end up with unequal amounts of filling, I usually portion it up separately so I know I have enough filling for each and one bun doesn’t end up with too much/too little dough.

When you’ve done these to all the buns, cover with a tea towel and leave for about 90 mins (will depend on how hot or cold your kitchen is) until about doubled in size (this is always so hard to tell but do your best). About ten mins before you think they are done, preheat your oven to 180C.

Beat the remaining egg, brush the buns with it and then bake for about 20 mins, until golden. When out of the oven brush with a little melted butter and sprinkle with parmesan just to up the fat content here…ha ha..Allow to cool ideally before eating. Any that are left over can be kept in the fridge and softened in a suitable microwave setting for about 10-15 seconds to 40 seconds (know your microwave!)