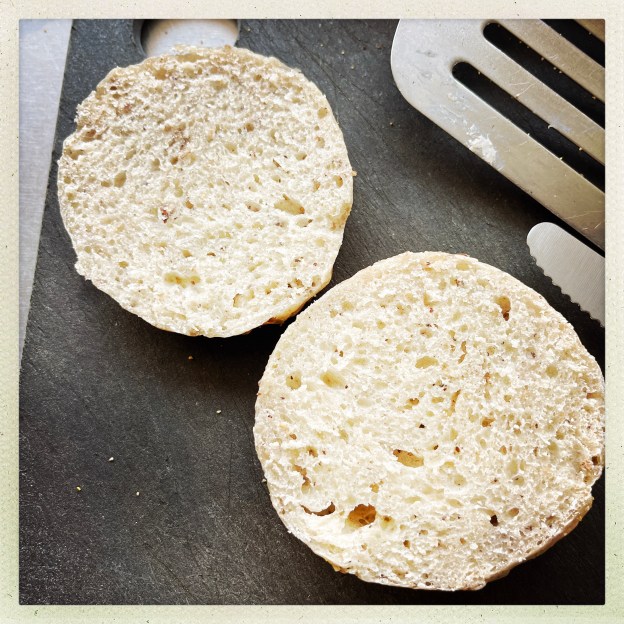
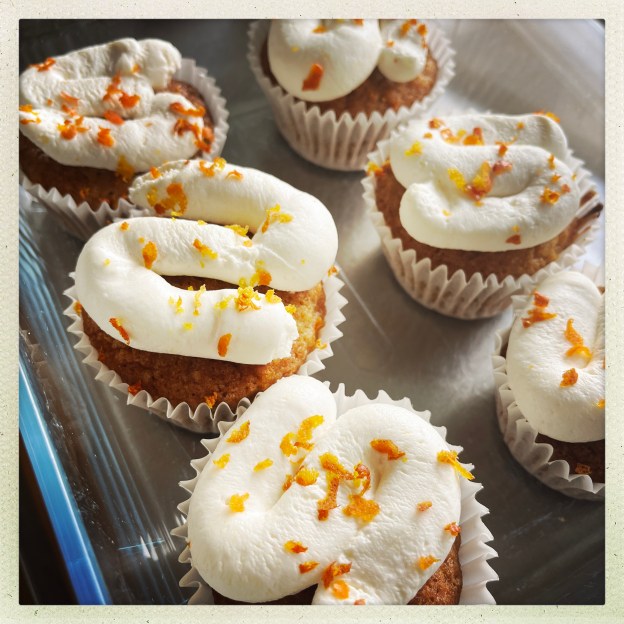
Bakewell slices (for a picnic, updated)

I first wrote about these back in 2010. I haven’t made them for years. I used to bake Bakewell tart a lot and I thought I didn’t like it anymore. But it’s late September, our government is currently shit, I can’t escape to Italy as Mussolini is basically back in power and the news is too much.

So in order to escape I got up early to make these for a craft morning tomorrow (which is mine and my youngest’s way of escaping the world).

The pastry:

200g plain flour
2 tablespoons icing sugar
100g cold unsalted butter, cubed
2 egg yolks if you want to be true to the recipe but I now just use one egg

I whizz the flour, sugar and butter in a food processor, then add the egg until it all comes together. You can do it with your hands too of course.

I never roll out pastry. Life is too damn short. It’s not too short to make your own pastry though cos shop bought really isn’t the same and how long does it take to weigh out a few ingredients and slam them in a gadget?

When it’s blended, I just take bits of the pastry and flatten it out into the bottom of whatever tin I’m using, welding it all together with a thumb like a giant pastry jigsaw. I use a square tin that’s about 21cm. Line the bottom well with baking parchment, first though, if possible with some ‘overlap’ to help you lift it out when it’s done.

Then when you’ve covered the bottom of the tin with pastry in this piece meal (no gaps though) but completely acceptable fashion, chill the pastry for about half an hour (perfectly do-able to chill for longer of course).

In the meantime, preheat the oven to 190C. When the pastry has rested, cover with foil, pour on baking beans. Bake blind (this means with nowt in it but the baking beans on the foil) for 15 mins. Then remove the beans (take care they’ll be hot) and bake for a further five minutes.

The filling

I use Bonne Maman Black cherry jam, about a third of a jar.

frangipani filling pt 2:

125g caster sugar
100g very soft unsalted butter
3 eggs
half a teaspoon of almond extract
150g wonderful ground almonds (I LOVE ground almonds)

Mix the butter and sugar together until it’s light and fluffy, this is quite a good work out for your arms and you’ll expend about 12 calories to offset against the calorific value of these slices, then add the eggs, one at a time, mix well, then the almond extract and finally fold in the ground almonds.

When the pastry base is out of the oven and cooled just a little, spoon the black cherry jam onto the pastry case, then on top spread the frangipani topping.

I also like to top it all with flaked almonds, like a handful scattered on top. You can never have enough almonds, rich in protein (so they bring down the GI of anything), calcium and essential fatty acids. How can you go wrong. Unless you’re allergic to nuts of course.

Cook for 20-25 mins or so, the top should be definitely golden, not pale blonde. When out, tie your hands behind your back and dive in face first. Or alternatively, slice into Mr Kipling type slices. I top mine with a mixture made of 50g icing sugar and 50g cream cheese, drizzle on top.

These keep lovely in an tin for a few days.

Pea and ham pasta

This is surely a nursery stalwart, and I cut this out of a BBC Good Food magazine earlier this year and hid it as it’s pasta and it’s too easy to eat pasta. But, as I seem to be on a carb fest I scheduled this for dinner last night and it was absolutely delicious. Warming, comforting, cosy, just as our government crashes and burns the economy. We ate it in front of the fire trying to keep sane (and warm). I have changed this slightly as don’t agree what they did with the peas (they say cook them in the last few minutes of the pasta cooking but this is impractical if you want to then puree the peas, see later).

This serves two but as a small dinner, augmenting the pasta to 250g, it served three of us fine.

200g conchiglie pasta (don’t fight it like I tried to, this is a great shape for this dish, we used the smaller-size shells, not tiny tiny but just normal, recipe calls for conchiglione which are the big mofos but we didn’t use them)

160g cooked peas
1 red onion, finely chopped

A slosh of olive oil

100g cooked ham

150ml double cream

Juice of half a lemon

40g parmesan, plus extra to serve

Cook the pasta according to the packet instructions, which we know always lie.

At the same time, because cooking is all about multi tasking, heat the oil in the frying pan and fry the onion until soft. Add the ham, cream, lemon juice and parmesan, then season and mix together well. Remove from heat, try not to pick at the bits.

The recipe says to puree some of the peas which you can do if you want (we did). Drain the pasta loosely (ie keep a tiny bit of the water on it) then tip everything into a big pan/frying pan and mix together, serve from the pan if you want and add extra parmesan.

Customise your chocolate chip cookies

Yum yum yum

So many places promise that their cookie is the best, or their recipe will spring forth the best cookie. But in lockdown, my youngest and I sought to find a way to make a recipe for what WE wanted in a cookie. We started with an amalgam of cookie recipes we had made (see Hugh’s Ten Minute Cookies as a starter, ) and then we looked at this excellent ‘parametric’ of how to make cookies just as YOU want them, and we experimented.

You may need to sign up to read all the data but it’s free and I think Chef Steps is brilliant. We specifically wanted to ‘step up the chew’ and Chef Steps told us that to do this we could do all, or one, of a few things, namely: increase the hydration. In our case we added an egg white. Melting the butter also releases the water in it so we know do that instead of just using softened butter. Change the flours, we introduced bread flour – I know! – into our recipe. Change the sugars, we upped the brown sugar to white sugar proportion. By carefully decreasing the cooking time you can also add to the chew, but if you get this wrong – dah dah DAH – you’ll just end up with a soft cookie. That ain’t no bad thing but it won’t be che-wy.

Anyway, I’ve had this recipe under a magnet on the fridge for two years now and I live in fear of losing it. We took ages to get it how WE wanted it. So I’m committing it to here so it’s forever saved. You may also enjoy it but you can now experiment and make YOUR cookie the best.

125g butter, melted and cooled. I use unsalted but if you use salted butter don’t add the salt mentioned later.

150g soft brown sugar

75g granulated

1 whole egg and one egg white (I save the yolk for brushing atop bagels and these ‘almost’ brioches I make regularly)

Two teaspoons of vanilla extract

75g white bread flour

75g wholemeal spelt (I tend to use Baker’s Blend as that’s what we have which is mostly wholemeal with some white spelt)

Half a teaspoon of baking powder

A pinch of salt if your butter wasn’t salted

150g chocolate chips

100g chopped nuts

Oven to 175C fan so you can do two trays at once. Bake time is 7/8 minutes.

METHOD

Cream together the 125g melted and cooled butter and the 150g of soft brown sugar and 75g of granulated sugar. You can do this by hand or in a freestanding mixer with the whisk attachment. Then add your one whole egg and one egg white (you don’t need to whisk the egg white first or anything like that). Then the two teaspoons of vanilla extract.

Now add your 75g of white bread flour and your 75g spelt with half a teaspoon of baking powder and the pinch of salt, if using. If you’ve been using a freestanding mixer, untether the bowl form the mixer and manually mix in the chocolate and nuts.

Use a tablespoon to put dollops on a baking tray lined with baking parchment and bake in a preheated 175C fan oven for 7/8 minutes. This mixture keeps in the fridge for a few days so you can have fresh cookies in an instant.


Really good focaccia

Beautiful focaccia

I am not short of focaccia recipes. I have ones that use a sponge starter, a sourdough starter, fresh yeast, dried yeast…but this one that I happened upon in Delicious magazine is my favourite to date. it is absolutely…delicious. And fairly quick and easy.

The dough is – be warned – incredibly frisky and difficult to handle, almost impossible to handle at the beginning. But don’t panic and use plenty of oil for your hands (and oil the surface you’re using). You’ll find you have to wash your hands a lot.

I used to do this in a mixer with a dough hook but a note here that the dough is easier to handle if you do the whole thing by hand.

The baking tray I use is approx 37cm by 28cm. It yields a focaccia which is a perfect depth for me.

Ingredients:

500g strong white flour

One and a half teaspoons of fine sea salt

3g/one teaspoon of dried yeast

400g water (make sure it’s not cold, I leave mine out for about 20 mins)

80g of extra virgin olive oil (note: you’ll use this during the stretching process but you’ll have quite a bit left which is okay, you use it just before baking)

toppings: salt/rosemary/chargrilled veg/olives/mozzarella (I use Mozzarella Cucina as it’s a lower hydration cheese but regular mozzarella is fine, just make sure it’s well drained)

Method

Put everything EXCEPT the oil in a bowl, mix up with a fork until it’s all come together, then add a handful of oil from the measured out oil and amalgamate as best you can, then leave it for about 20 mins.

After this, oil a surface/chopping board, again using a bit of the measured out oil to lubricate the surface you’re using (and also your hands) – or you can even use a large shallow tray. Turn the dough out, and gently stretch it out and fold it over on itself a few times. Leave for 30 mins and do the same thing again – stretch, fold. It’s nothing dramatic but you’re trying to get some air bubbles into the dough. Do this once or twice more (leave for 30 mins, stretch and fold) depending on the temperature of the room. You want it a bit bubbly and excited looking.

The recipe says to now put the dough in the fridge for 10 mins. I don’t really do this. After the final rest I pop it in the tray I’ll be using to cook it (I line mine with baking parchment but you don’t have to). Put the dough in, stretch it, fold it, stretch it fold it and then I leave it for about 20 mins to relax. I then stretch it to reach into all four corners of the tin, massaging in all of the left over oil and stick my fingers in to dimple it. At this stage I cover it with oiled clingfilm/more baking parchment (tea-towels tend to stick) and put it in the fridge overnight (I make it in the afternoon if I want it the next day) and cook it in the morning.

If you want to cook it straight away then give it about 30 mins to an hour at room temperature to rest.

I add my toppings before I bake it, top it with salt and bake it in a preheated 220C oven for about 20 minutes. The recipe says to put an oven-proof bowl of water with about 150ml of water in the oven too. Sometimes I do, sometimes I forget. It’s fine.

You want it golden on the top. When it comes out of the oven, brush it with more oil – this is important.

It’s really delicious. Makes excellent sandwiches but isn’t that great the next day (sure you can griddle it to make toasted sandwiches, but…nothing beats what it’s like on the day) – so don’t feel guilty if you eat it all.

It makes a great centre piece for informal dinners/lunches with cheese and cold cuts and if you add chargrilled veg – and I thoroughly recommend you do (chargrill first) it’s a meal in itself with some crispy green salad.

Here’s a pic of it with some toppings, it makes for a really gorgeous meal about 20 mins out of the oven.


I can tell you how good this was: really bloody good.

Possibly the best socks in the world

My mum introduced us to bamboo socks, she bought my eldest a pink striped pair. They soon became the socks my daughter looked out for in the clean laundry. Earlier this year I decided to buy myself some, and then some more and they are amazing.

They are super comfy, soft, fit really well and come in various permutations. I use the trainer sock-size for the gym, the classics (called Amazing) for every day, and the walking socks for…walking. The sign that I was a grown up is when I bought myself five of the black classics to have as my every day socks, thereby making redundant all the M&S socks I had that had shrunk or needed darning after a few week’s wear.

Bam socks aren’t cheap but they are, IMO, good (I paid for all mine this isn’t an ad!). The only downside is that they aren’t very quick to dry, so not great if you’re trekking and need socks to try quickly, look at merino wool for that; I recommend Icebreaker for that, I wore all their merino wool base layers when I went to the Swedish Arctic and they may have saved my life.

Note: I wash mine on a delicates wash and line dry.

https://bambooclothing.co.uk

Quick spelt pizza

This is a Donna Hay recipe which makes a really quick, light, and slightly flakey pizza. It’s not pizza as you may know it and I find it best if you fold over the finished product and eat it like that. But it is delicious. And fast. I’ve reproduced the recipe more or less as she originally gave it but you can customise it with any topping you like. This makes two pizzas which we divided up to have half each and I found that was plenty for dinner with a green salad.

The base

1-2 fennel bulbs thinly sliced

Four tablespoons of olive oil

260g white spelt flour plus a little extra

Half a teaspoon of sea salt

250g Greek yoghurt

The Topping

300g soft mozzarella (ie not the block kind, Hay calls for burata but i didn’t use it)

6-8 slices of Parma ham or equivalent

Some fresh basil to scatter atop

Method

Oven to 200C, I put mine a smidge lower and on fan so that I can do both at the same time. Put two large baking trays in the oven to heat up.

Toss the fennel slices in two tablespoons of the olive oil and set aside. To make the pizza dough put the flour and salt in a bowl, stir, make a well in the middle and into that put the yoghurt and the remaining two tablespoons of olive oil and use a fork to mix it all together. Tip onto a lightly oiled board or work surface and gently knead until a smooth dough forms – this doesn’t take long. Now divide into two.

Roll out each piece between two pieces of baking parchment. This always seems wasteful to me but it’s needed and you’ll use two of them for final baking. (I use three piece in total, as I move the top sheet from one piece of dough to the other.) Roll out until, Hay says, they are about 35 x 25 x 0.5 cm. I just did mine until they seemed right (and they were!).

Keeping the dough on the bottom sheet of the baking parchment (you’ll transfer the whole thing onto the baking tray), remove the top piece and arrange the fennel slices on the top. If you’re using something else that needs to be baked – pepper slices, tomato sauce, you’d add that here too. Don’t over do it though, think of this pizza as something you do partly in the oven, partly you top outside of it. But the beauty is that you can also experiment.

When you’ve done that, take the baking trays out of the oven, slide the topped pizza on top, repeat with the other one and then bake for 15-18 minutes until the base is crisp and golden.

Remove from the oven and top with the slices of mozzarella and Parma ham or other toppings you’ve chosen that don’t need cooking. And scatter over Basil leaves if you have them.

Bay-crushed roast potatoes

This is such an easy, but delicious, way to do roast potatoes if, like me, roast potatoes slightly daunt you (so many people have a theory on which way is best!). They’re also quite forgiving and if you can’t decide between roast/baked/mash, this is a bit of all of those.

Because, unlike with roasties, you don’t have to worry about breaching the crispiness, these lend themselves particularly well to meals where there’s juice or gravy to mop up. That said, the smashing does give these potatoes bits to delightfully crisp up. I originally got this from Delicious magazine.

For about four people you need:

1 kilo of small-ish waxy potatoes – I use Charlottes

Four tablespoons of olive oil (I use extra virgin but you don’t have to)

6-8 fresh bay leaves, ripped if you like

Method:

Oven to 200C. Get a roasting dish and line it with baking parchment – this really makes a difference. Wash but don’t peel the potatoes, put them in the tin with one tablespoon of the oil, mix well and roast for 30-40 minutes.

Now take the dish out of the oven and with a potato masher or a fork press down on the potatoes to gently smash them, you’re going for a genteel muddlement not Trump-style devastation. You want them flattened and a bit broken up to give you nice peaks. Now add the bay leaves and drizzle on the rest of the oil, add salt and pepper and mix together gently.

Put back in the oven for another 20 minutes, remove, toss them one more time and return them to the oven for another 10 minutes. If they’re not crispy around the edge and you’d like them to be you can turn the oven up to 220c for the last five minutes.

Crème brûlée rice pudding

Sometimes you keep a recipe hanging round for years, meaning to make it. And then you do, and you’re glad you did – keep the recipe and, eventually, make it. This is one such. Like a lot of people, I was late to like rice pudding. In my Italian family we tended to have more of a rice cake – served sliced. I mean I liked it but I didn’t love it. And then of course, the more sloppy rice pudding was served at school and was, like everything about school dinners aside from the fluted shortbread rounds we were occasionally served (which were nectar) – awful.

Anyway when I finally made this it was supremely good. The original recipe calls for light brown sugar for the topping for brûlée-ing but I don’t think it worked great. We have three blow torches, of various degrees of industry and I couldn’t really get any of them to do what I wanted, so in the end I shoved it under the grill. This recipe is originally from BBC Good Food, some time ago now..

75g butter

175g short-grain pudding rice

140g light muscovado sugar

500ml double cream

1 teaspoon of vanilla extract

500-600ml full fat milk

Demerara for sprinkling on top to make the brûlée topping (optional but really good)

Get a large-ish sauce pan that can eventually take all the ingredients. Melt the 75g of butter until it starts sizzling and then add the rice. Stir the175g of rice around for 4-5 minutes until the butter starts to turn golden, then stir in the 140g muscovado sugar and cook for a few minutes more until the sugar starts to dissolve.

Now pour in the 500ml of cream, stir and boil gently unil all the sugar has dissolved and you have a thick butterscotch sauce, now gradually stir in 500ml of the milk and the vanilla.

Simmer all of this for 45 minutes, I stirred every three minutes to stop it catching at the bottom as it has a tendency to at the beginning. Towards the end the rice should feel cooked – not mushy – and if you need to add the extra 100ml of milk (I never need to). You should have what looks like a creamy risotto.

When it’s done pour into a shallow heat proof dish – I use a square Le Creuset. Sprinkle the sugar over the top and either blow torch or put it under a grill for about 5 minutes until the top is golden and set. This might not happen uniformly: don’t worry. It’s still delicious. TBH it’s still amazing without its brûlée hat.

I like this about 30 mins after it’s done, but it’s also good later, if kept at room temperature. It can of course be stored in the fridge – and should be if you are leaving it for more than a few hours – but give it a quick blast in the microwave before eating to loosen it, if you don’t have time to bring it back to room temperature. That said my eldest loves it cold. I don’t.

It’s delicious and comforting and that’s what I need right now.

Lemon bars

I needed to make “something lemony” for someone. And whilst I love lemony things I just couldn’t think of anything immediately, that wasn’t a huge lemon curd filled cake and ergo difficult for them to take home (I like to think of a present’s impact beyond the mere eating of it). I asked a bunch of people for their favourite lemon recipes, then decided to ignore all of them (sorry about that) and remembered seeing these amazing lemon bars somewhere.

I remember seeing Pioneer Woman (yes I love her) making some lemon bars and although her recipe looked good, and easy, and used a sheet pan (I love sheet pans) I just couldn’t be bothered to translate the recipe from cups ‘n’ spoons ‘n’ sticks into ounces so I went to good old BBC Good Food, which is where this recipe comes from.

Anyway, these are so good. I mean so good that they should be much harder to make. I use organic lemons for anything that uses zest since I read about how many chemicals citrus gets sprayed with. Shall we get on with the recipe?

The base

175g plain flour (I increasingly use spelt now)

50g rice flour

85g caster sugar

140g cold, diced butter

1 tablespoon of milk or cold water

Tiny pinch of salt

The filling

The zest of three lemons

200ml of lemon juice (for me this was the juice of four lemons)

3 eggs

200g caster sugar – don’t skimp on this

25g plain flour

Icing sugar to dust although good luck getting yours to settle, mine didn’t, it was like December snow.

Oven to 200C. Line a 21/22cm square tin with baking parchment. It’s really worth cutting out the bottom and sides so you get nice, neat, sides. I didn’t. I was lazy and just scrunched a sheet in there so it sort of bunched up round the corners and ended up with unsatisfactory lemon bar-sides. Tsk. Dot a tiny bit of butter to the baking parchment so it sticks to the tin, otherwise when you pour in the lemon mixture the parchment sides will collapse and you will cry.

Put the flours, sugar and butter in a bowl and cut with a pastry cutter or put in a food processor and pulse until it’s like fine crumbs. Now add the milk/water. The beauty of this is no rolling out. Just pile everything into the tin and press down well. Bake for 15-20 minutes until lightly golden.

Remove the base from the oven, and lower the oven down to 180C.
Now whisk together the lemon juice and eggs and into that sieve the flour (do this otherwise: danger of clumps, trust me), add the sugar and zest. Whisk away until all nicely combined. Pour this onto the base. If there are white specks this is because you didn’t sift the flour so don’t blame me.

Bake for 15 mins, maybe a tad more depending on your oven. It should be just set, but look a bit wobbly. But the surface MUST be set/slightly dry to touch. Cool in the tin until really cool, then either slice and eat, try to dust with icing sugar, or store in the fridge if you plan to keep them for a while. Let come up to room temperature before eating. Truly gorgeous.

Sourdough doughnuts

I first made these in the summer of lockdown 2020, when we would ‘go’ for a picnic each Wednesday, which involved us getting into the car, basically driving into the turning circle on our drive and then getting out and having a picnic.

Listen: you make your fun where you can. My friend T gave me this recipe which I have tweaked a bit. It makes a lot – about eight. And they don’t really keep, they’re not the same even two hours after making them. You can use only half the dough at a time and make the rest the next day. (Note: I have pushed these to a 144 hour prove at 4C and they are delicious, so you can absolutely make the dough, cut into doughnuts and keep in the fridge and make in batches, the 144 prove doughnuts were amazing – they puffed up to life-saving-rubber-ring size and tasted amazing.)


Warning: you need to start these the day before you need them.

This doughnut had a 144 hour prove.

These are the ingredients:

240 ml whole milk warmed to 50C (I use a thermapen for all my kitchen thermometer needs)

1 large egg at room temperature

Four tablespoons of melted butter, cooled slightly

225g sourdough starter, also at room temperature. This should have been recently refreshed – about 5-6 hours ago at room temperature, the day before if kept in the fridge

500g plain flour

110g granulated sugar

1 teaspoon of salt

1 teaspoon of cinnamon

You’ll also need quite a lot of oil for frying (try not to think about it, I am not a fan of deep frying but you need to for this) and some caster sugar mixed with cinnamon for coating later.

Once the milk has reached 50C mix it together with the butter, starter and egg. You can do this by hand or in a mixer with the whisk attachment. Then add the sugar and the flour.

Now with this bit you can either mix it all up and knead on an oiled board, leave for ten minutes, knead for ten seconds, leave for ten minutes, knead for ten seconds, leave for ten seconds until you have a smooth elastic dough (so repeat one more time if needed). Or you can do it all with a dough hook attachment in a mixer for about 15 mins until it all clumps together.

Once this bit has been reached you get a big bowl, oil it and put the dough in, cover it and refrigerate it overnight/until the next day when it’s needed.

About 2-3 hours before you want to eat your doughnuts, take the mixture out, roll it out on an oiled surface until it’s about 3cm thick. I use a round cookie cutter to cut the doughnuts out, using a small one to make the ‘hole’. See what sort of size you want them to be, mine are about 10cm with the hole in the middle about 2.5cm. You can also do them as round doughnuts but I like ring ones best. The first time I made these I tore the edges slightly and was really upset that they wouldn’t be all perfect but actually, those little tears made (see main picture) something gloriously layered and even tastier! I’ve tried to recreate it ever since and can’t..

Put them on an oiled tray, or one lined with baking parchment and cover with cling film which you can also lightly oil if you are nervous (tbh I cover mine with a tea towel). Leave to rise for about 1-2 hours – depends on how warm your kitchen is. You know the dough is ready when your finger gently pressed makes an indentation but also don’t sweat it.

Fry a pan of oil up (use something light and not highly flavoured: I use a blend of olive oil and sunflower oil). Now here it depends a) how brave you are b) how wasteful you want to be with the oil c) how many you have made and intend to cook d) how many you want to cook at once. I tend to use about a litre of oil in a medium sized sauce pan and cook two at a time. DO NOT OVERFILL and of course be sensible, this is oil you are heating up. When it reaches 175C (use your thermometer) you’re ready to go, using a slotted spoon lower down however many doughnuts you intend to cook. Like I said I do two at a time. They take about 2-3 mins per side, flip with the slotted spoon; the colour is the guide here: you’re looking for a true golden brown. Take out using your slotted spoon and immediately flop the doughnut into caster sugar and cinnamon in a bowl.

Then place on a drying rack. When all are done you’re about to experience something wonderful so take a moment to enjoy it.

And try not to eat more than one.

And try not to eat more than one.