Monthly Archives: March 2013

Hot cross buns, and Easter baking

I have never made hot cross buns, but always wanted to. A few weeks ago, I spied a recipe in Waitrose magazine for Brandy-spiced hot cross buns (on the cover of the March issue if you fancy picking up a copy). The recipe is by someone called Lily Vanilli, I must confess I’ve never heard of her but will certainly look out for her things from now on as these turned out amazingly well. My partner gave a little whimper as he ate one, warm from the oven, split and buttered.

Lily Vanilli says to soak the sultanas overnight. I did, but if you don’t have time, leaving them for a few hours will I’m sure be fine.

No recipe on the Waitrose site so I can’t link to it.

I found it made 12 buns.

for the brandy spiced sultanas

225g sultanas (I ran out and used some raisins in there too, fine)

100ml of brandy (I didn’t have brandy so used half marsala and half orange vodka)

1 star anise

quarter of a teaspoon of ground cinnamon

quarter of a teaspoon of freshly grated nutmeg

Zest of one orange

2 tablespoons of plain flour

for the buns

600g white strong bread flour

50g caster sugar

7g sachet of easy blend yeast

Freshly grated nutmeg

1 teaspoon of salt

50g soft dried figs or prunes

50g soft dried apricots (see note below called Update March 2020)

250ml whole milk

80g unsalted butter

1 egg

for the crosses

50g strong white flour

60ml of water

a piping bag and a very fine, writing nozzle. I used one that was a bit too thick and ran out so some of my buns – shock horror – were uncrossed. Vanilli puts hearts on them but I’m Catholic and you know..

for the glaze

3 tablespoons of apricot jam, and you really do need 3 good tablespoons, nothing worse than a dull bun

1 teaspoon of brandy, don’t sweat it if you don’t have this

1 tablespoon of water

The very first thing to do is put the sultanas to soak. So put those ingredients: ie the sultanas, spices, zest etc, except the 2 tablespoons of flour, all together in a bowl and leave overnight or for a good few hours.

Then, when ready to start baking, strain the sultanas. Discard the liquid and the star anise; although personally I don’t see why you can’t DRINK IT the liquid. It’ll be very alcoholic though so you know, not before the school run or before the social worker calls.

Now scatter on the two tablespoons of flour and mix around. This soaks up any excess juice.

Put the milk and butter on and heat gently until the butter has melted, stir around. You need to get this to lukewarm, not hot so you may need to set it aside to cool a bit. Don’t let it get cold either. Ooh the pressure (it’s fine don’t worry).

Get a large bowl, put the strained sultanas in it and now add the flour, sugar, yeast, nutmeg, salt, figs and apricots. Mix it around, thinking of Easter eggs and having a lovely weekend.

When the milk is lukewarm, whisk in the egg and then add this milk, butter, egg mixture to your sultana, flour etc mixture. Mix it around until you get a dough.

Give it a little knead on an oiled board. Leave it for ten minutes. Give it a little knead, leave it for ten minutes, give it a little knead, leave it for ten minutes. The timings are important (Vanilli just kneads for ten minutes flat out, I don’t do this) as you’re dealing with commercial yeast. Now knead for one last time and leave it for about an hour.

IMG_0535

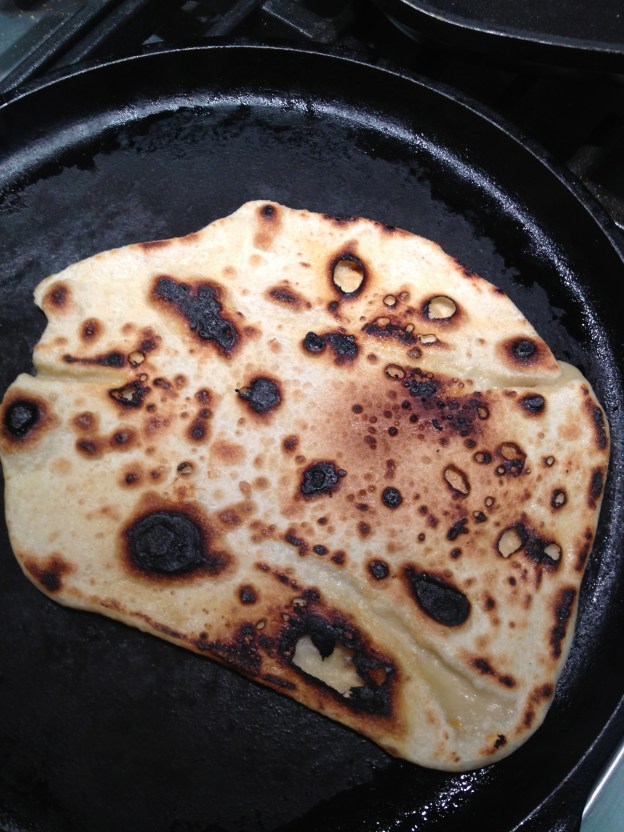
Here’s a pic of the dough just before I shaped it.

Now, either gently knead it again and shape it into buns and cook it (more on this in a mo) or shape it into buns and do as I do, put it in the fridge to prove overnight. I took it out for a few hours before hand to bring to room temperature, but only because the youngest woke me up at 4am. Otherwise I had every intention of just putting them straight in the oven.

If you don’t prove overnight in the fridge, shape them into buns and place onto a greased baking tray. I got 12 out of them, it figures that you can make these fuckers as big or as small as you like. And then leave until doubled in size. God they always say this don’t they, but who remembers what size they were in the first place? I always leave for longer than 45 mins as I live in the country and it’s cold here. So use your common sense. 45 mins, an hour, maybe longer. As I said, academic as I did them in the fridge overnight with two hours to get to room temperature.

When ready to cook, preheat oven to 220C, mix together the 50g of flour and the 60ml of water and pipe a cross onto the buns.

Cook for ten mins at 220 then lower to 200 for another 10 mins. Whilst they’re cooking, mix together the jam and water and brandy.

When out of oven, immediately brush the tops with the jam mixture to make a lovely glossy top.

IMG_0536

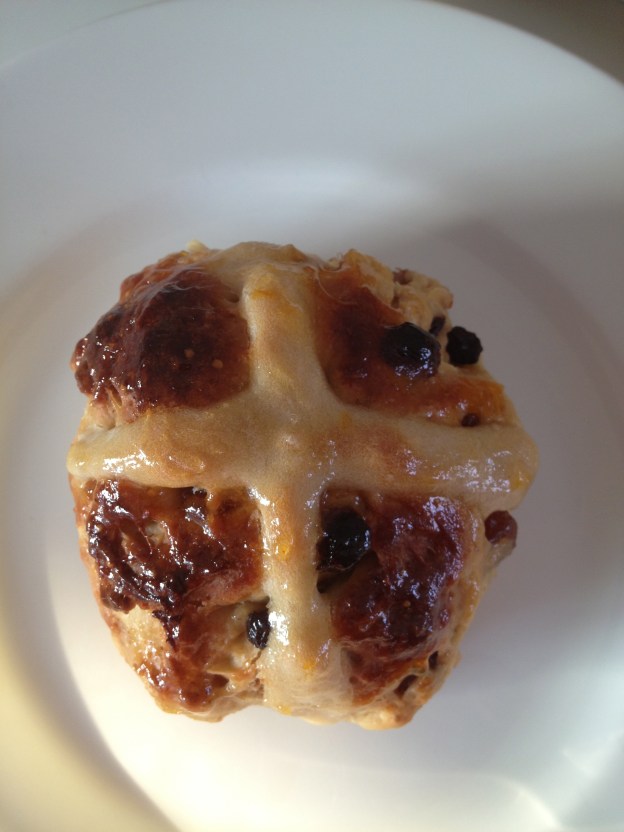
Here they are glistening in the morning sunshine. I really had no idea they would be so good. These are the best hot cross buns I’ve ever eaten. I hope you enjoy them! Happy Easter.

If you fancy something a bit more continental this Easter, try panettone tea cakes or colomba. Or even torrone!

Freezing note: These freeze really well. The only note I’d add is that the ‘cross’ part doesn’t survive freezing too well, it goes hard. So if you do plan to freeze these, don’t decorate the ones you plan to freeze. If you freeze excess ones and they have decoration crosses on them, then be aware of this. We ended up picking our crosses off (sorry God). The rest of the bun was still delicious!

Update March 2020

Two things I’ve found, one quite by accident, which I think makes these a bit better. One is that I soaked the sultanas as described, but, by mistake I also put the two tablespoons of flour in at the same time (you’re meant to put it in after you’ve strained the sultanas). This means you can’t drink the alcohol when you drain it but it did seem to make the sultanas extra plump and juicy! So give it a try.

The other thing is that I have reduced the dried fruit in the actual bun, from 70g (which was the original recipe) of each to just 50g of each (ie 100g in total of figs/apricots). I’ve also made these with prunes instead of dried figs (and amended the recipe) as I actually prefer them. But see how you go!

Polenta, that which binds us to the stove.

So. My dad is from the north of Italy. Parma. Yes where parmesan comes from and Parma ham, which obviously we just called prosciutto crudo (‘raw’ ham, as opposed to cooked ham: ‘prosciuto cotto’). And polenta is a big thing up there.

I’ve never made polenta. We always have some in the house, but I just sprinkle it onto trays before I make sourdough bread or pizzas. I love it though and far from being the peasant food of yore I see it as a real treat. Today, I saw this recipe from Angela Hartnett. Chard with polenta and blue cheese.

Looked nice. Looked easy. Looked warming.

“Cook the polenta according to packet instructions,” says Harnett, after you’ve added the milk and butter she recommends “the coarser type takes longer – about 20 minutes compared to five – requires more attention and stirring, but in my opinion is far better.”

Waitrose sells a polenta that is £5 for a bag. But hey, I thought, it’s the main component of the meal, I’ll get it. Bound to be nicer. Organic. Nice bag, from Italy.

What could possibly go wrong?

Lots. I’m not going to tear apart a recipe written by a Michelin starred chef, because I haven’t made it and if you make it with the readily available polenta it’s probably delicious and entirely do-able. I’ll never know. What I can tell you is that the polenta I bought – the lovely old fashioned kind – requires 90 minutes NINETYFUCKINGMINUTES of cooking. And it sucks up the liquid Hartnett tells you to put in within five seconds.

I rang my mum. This couldn’t possibly be true. She talked me through how you cooked polenta. You boil the water until it’s really angry boiling, put some oil in, then you sprinkle in the polenta and stir. If you get lumps in it at this stage, they never come out. Then she regaled me with tales of how in the old days, you had to cook it for two hours! And stir it continuously because otherwise it lumped up and if it lumped up at, say, the last moment, it was as if those preceding 119 minutes of stirring had never happened. She said this with a laugh as if she were telling me about how people used to send telegrams and could now just pick up a phone.

“I bought polenta that takes 90 minutes to cook” I told her.

“Whya didn’ta youa buy the quicka cooka polenta Annalisa?” she said, incredulous, quite rightly thinking what was the POINT of progress if her daughter had just spent so much money to go back in time, and not in a good way. Not to see Jesus and find out if he was, as I have always suspected, married. Or shoot any number of dictators or find out what happened to Lord Lucan. But to root myself to the spot for an hour and a half, stirring, have I mentioned, continuously.

I had no answer. I had created my own ball and chain.

As regular readers of this blog will know, I am no slackard in the kitchen, but this was insanity. The fury of generations of Italian women before me welled up. (No wonder women didn’t have bingo wings back then. Stirring polenta for ninety minutes is a serious work out.)

My mum gave me this advice: “Just stirra it for as longa as you can stand it, then put itta in a tray, leave it and cooka it in the oven or slicea itta up and fry it.”

And this is what I’ve done. I’ve rebelled.

Be warned people, if you buy this polenta be prepared to spend 90 minutes chained to the hob. If you hate someone, buy it as a present for them.

Filling nozzle, the right equipment for the job.

Now that I have become quite, quite obsessed with eclairs and profiteroles, I realised quite quickly that I was lacking a vital piece of kit.

A piping nozzle that was long enough and thin enough to penetrate the choux pastry, but with the hole large enough to let the cream out.

Cheap icing/piping nozzles are a false economy because the really good ones don’t cost that much, about £4-£5 a piece. And most people don’t need that many nozzles because they don’t ice/pipe much. So you don’t need a payday loan to fund this particular habit. And if you do ice/pipe a lot then you must surely appreciate the benefit of having good tools.

Anyway, the one for this job is the Wilton Tip 230. It’s available in lots of places for £4ish. But you can also get this kit for not much more, £6.27 at time of writing, and yet you get four Wilton nozzles and some disposable icing bags. NOTE: the description says ’12 piece set’, well it is if you count the icing bags but you only get four nozzles. One of which is the filling nozzle.

So if you don’t want to slice your eclairs or profiteroles, you simply make a little hole with a skewer or some such, insert this and squeeze the cream in until it starts to come out. It is a bizarrely satisfying ritual, which probably says something more about me than I should let on.

Roasted pepper, mint and halloumi tart

Don’t you think it’s kinda rich, when someone asks you what they can cook for lunch guests when you’re not one of the lunch guests?

This is how this post came about. My friend Marcus, who I’m going to now name and shame, is having people for lunch and the Barbieri family are not amongst the invited.

Shocking.

But I forgive him because whenever I need a chainsaw, he’s round with his special trousers on, and the chainsaw. He’s also a very good garden photographer who works for all those flash magazines that show garden porn and even though I have almost zero gardening recce skills (‘grass’ and ‘roses’ are the only two things I can name), I do appreciate a beautiful picture of pretty garden things.

So, he asked, what can I cook that’s easy? The two things that came to mind were either Gnocchi and Chorizo, which is delicious and really easy. Or my mint and halloumi tart which I’ve been making for ten years now, ever since I saw the recipe in Sainsbury’s magazine. However, for whatever reason, I’ve never posted about it. Probably because, rather shamefully, I’m a bit possessive about the recipe which is a meanness I have to fight against.

The mint and halloumi tart looks tricksy but it isn’t really. You can do it in stages, and I suggest you do. It absolutely isn’t something to start cooking an hour before your guests come. If that’s the sort of time you have then the gnocchi dish can be knocked up in ten minutes.

You can – and I do – make the pastry for this tart the day before. You can indeed cook the tart (it needs to be baked blind) the day before. You can also make the mixture the day before, keep it in a covered bowl, and an hour before your guests come, you bring the two together, pouring the mixture into the tart case and putting it in the oven. This tart tastes best when it’s about half an hour out of the oven: warm not hot. Anyway here we go.

the pastry

200g plain flour

25g polenta (I use the easy cook one that comes in packets but any kind will do, it’s to give the pastry a good crunch and I urge you not to leave it out)

125g butter, diced

1 egg

1 teaspoon of olive oil, just regular not virgin

For the filling

3 red peppers, now by all means buy some red peppers, roast them skin them and slice them up yourself but otherwise just by a jar of roasted peppers and cut them up if they’re not already cut up.

1 x 15g fresh mint, chopped up into nice small bits

1 x 250g halloumi, drain any excess liquid off, coarsely grate (the grating is my least preferred job)

3 eggs

284ml of single cream or half cream half milk which is what I use

freshly ground black pepper

to make the pastry

Put the flour, polenta and butter in a food processor and pulse briefly.

If you haven’t got a food processor you can do this bit with your hands, rubbing the butter into the polenta and flour whilst gazing out of the window or something.  Add the egg and then oil (just enough to bring it all together and remember it may take a bit of time to come all together) and it should all come together into a ball. If you do this in a processor, as I do, it comes together in about a minute. Don’t overwork it.

If you do this in a processor you should really take out the pastry and finish it off with your hands, take it out when it’s almost a ball, starting to clump, so you don’t overwork it. Less is more with pastry, it’s not a Versace dress we’re working on.

Shape the pastry into a disc and put in clingfilm or in a bowl or whatever and put in the fridge to let it rest for about 30 mins. You could easily leave it for a day or two if need be. But what I do, increasingly, is press it into the base of my pastry tart tin now, see below.

When you’re ready to cook the base, take the pastry out of the fridge. You need a tart tin. I know what you’re thinking, what size? I don’t know and I’m too lazy to go downstairs and measure mine.

Okay. It’s about 23cm, it’s one of those fluted numbers. I have two, a ceramic one and a tin one with a removable base and which I use depends on nothing more than whim.

Preheat the oven to 190C.

Now, you’re meant to roll out the pastry. I never do for bases of things. I take bits of pastry at a time and flatten them over the base and sides of the tin. This is very unorthodox but as I’ve mentioned before, I have cold hands and a cold heart so in my kitchen, this means the pastry gets worked less than if I rolled it out. Plus, you know, strictly speaking you should never put an Italian woman in charge  of a rolling pin.

When the base and sides are covered, line the base with foil and put baking beans in.

This isn’t the same as baked beans. Baking beans weigh down the pastry so it doesn’t rise. I’ve had baking beans since I was seven. I think mine are made of something highly toxic like lead but these days they are ceramic.

Cook the pastry case in the oven for fifteen minutes. Then take it out, take out the foil with the beans, and put the now naked case back in the oven for another 5 or so minutes.

Remove and cool the case. At this stage you can store it in the fridge, or a cool place like a larder if you’re posh, for a day or two.

Now to the the filling which, if you are making this tart all in one go you could have made whilst the tart case was cooking. If not just make it in advance and store it covered up in the fridge.

You basically whisk up the eggs, grate the halloumi, mix with the eggs, ground black pepper (you don’t need salt as the halloumi is salty enough), chopped mint, cream and lastly mix in the peppers.

It’s at this stage, when everything is mixed together, that you can store the mixture in the fridge, covered up, for a day. But when ready to cook, poor it onto the tart base, level out, stick in oven for 30-35 minutes until it’s nicely brown on top. Take it out and leave it for about 30 minutes. You can eat it cold too of course. But, it’s particularly delicious eaten warm with a crisp, slightly bitter salad. Or steamed asparagus, a new potato salad, etc.

You can also take it on picnics or sliced up in a lunch box.

Sorry for no photo of an actual one I’ve made (it’s a photo of a photo, shocking), but I’ll take one next time I make this baby. [Several years on and I still haven’t taken a photo of mine.]

The Tripp Trapp (high) chair. The best chair for babies and children ever in the history of the world.

By the time my eldest was two, I had heard enough about the bloody Tripp Trapp chair. At the time, I co-ran a parenting board (it no longer exists but was fabulous) and all I heard was how AMAZING the Tripp Trapp was. On and on and on the owners would bleat. “Best chair ever,” “amazing, little Johnny can join us at the table, he’s always at the right height for eating and drawing and everything.”

SHUT UP!!! I wanted to cry. I am so contrary that the more people tell me to buy something the less I want to buy it. There are a few, choice, individuals by whom I am insanely influenced. But not many.

My daughter had two Ikea high chairs and perfectly good they were too. One was the Antilop, hugely popular and a best seller. The other was the Blames, but in oak (no longer available). The Antilop lived at my parents’ house, the Blames was at ours. They were fine.

Fine.

But when my daughter got to be two years old, she was too big for the highchairs and wanted to be more independent (actually this happened way before then but I ignored it because goddamit these were the highchairs I had committed to, what did it matter that she couldn’t get in and out of them by herself?). She could of course climb on an adult chair, and she did, but it was big for her and she was never at the right level for eating or drawing or counting her money.

It was at this point that I gave in and bought a Tripp Trapp,  quietly and without telling many people because I was so ashamed. And of course, I realised what all the fuss was about. They are fabulous chairs and had I not been so pig headed or “with a head not even the pigs would eat” as we say in Italian (but we say it in Italian) then I would have had two more years wear out of it. As it is, my eldest is now nine and uses her Tripp Trapp every day, several times a day and has done for the past seven years.

The youngest was in hers from a very young age, about four/five months, when she could sit up unaided, with the babyset attachment. Tripp Trapp now does a newborn set so you can actually put then in it from birth, not that they can eat at the table from birth though, but they can join the family at the table.

So, what’s so goddamn great about this chair?

Well it grows with the child. As they get older you take off the babyset (if indeed you ever used it, obviously I didn’t first time round), you move the seat and footrest up and down according to need.

It looks great, being of northern European design of which I’m so fond.

It comes in lots of different, plain wood finishes/colours.

It’s so easy to clean, unlike some hideous highchairs I’ve seen.

So it’s not as cheap as some highchairs, from £120 new, but you can pick them up on eBay (they hold their value). Personally, I think it’s worth every penny as even adults can use it, so it need never go out of use.

Because it’s height adjustable, children are always sitting in the correct position (well, they are if you adjust it right) with their feet supported.

I think the Tripp Trapp has a smaller footprint than other highchairs. I can’t swear to this, but because of the design it doesn’t seem to have as big a footprint as others with their giant foot span. It also slides very neatly under the table, unlike almost all other highchairs that have a front to them.

My children sometimes sit on the footplate, facing the seat part and use the seat part as a table. You can’t do that with other highchairs.

There is a video in circulation that purports to show a Tripp Trapp falling backwards (the child pushes his feet against the table). Perhaps this is possible, but neither of my children have ever managed this and neither have I, I just slide when I try it. But I thought I’d mention it in case any of the Tripp Trapp haters mention it.

But the biggie for me is something quite subtle. The Tripp Trapp doesn’t come with a tray, in fact a tray goes against everything the makers, Stokke, believe in which is that a baby/child should be at the table, en famille, being part of everything. Not separate.

Anyway. I paid full price for both of mine from Back in Action. What I mean by that is that I didn’t get any special journalist offers or back handers.

I can’t recommend them highly enough. Although it’s taken me seven years to get round to writing this up. If you are thinking of a getting a highchair, don’t be an idiot like me and give in, GIVE IN NOW and buy one.

Flatbreads, can also be used to make very fine chicken wraps

I LOVE these. I love them just as they are, sprinkled with some olive oil and salt. But you can also make them go really crispy and use them in dips. Or with Indian food (sorry I don’t know how authentic that is). But in our house, they are  mostly used to make wraps.

Wraps are great things. You can buy them ready made in the supermarket but have you ever read the ingredient list? Horrifying. So we make our own. They are easy, so easy my nine year old makes them. Granted the rolling out and cooking them takes a bit of confidence and practice. But not much. Just remember not to muck about with the dough too much at the end because the more rested the dough is the stretchier you can make the wraps. If you’re finding it too hard to roll them out, give them a rest for five minutes and go back to them (careful if you’ve put the frying pan on to warm up!). This shouldn’t happen however, unless you’ve panicked and tormented the dough too much. That said, if you let it relax too much, it’ll be really stretchy and difficult to handle. Now I’m talking too much and you’ll think this is hard. It isn’t.

You need:

250g plain flour – not strong

a teaspoon of sea salt ground up in a pestle and mortar

150ml warm water

1 tablespoon of olive oil (not virgin)

Put the oil in the water and pour over the dry ingredients. Or just mix them all together as we frequently do, use a fork for the last bit. It will make a sticky dough. When it’s all together let it rest for ten minutes.

Then, turn out onto an oiled chopping board or surface. Knead gently for ten seconds. Leave for ten minutes under an upturned bowl. After ten minutes, knead gently for ten seconds again. Leave for ten minutes.

I think you know what’s coming up next? Knead for ten seconds, then leave it for 15 minutes or even a bit longer. When you’re ready to go put a large, heavy based frying pan (I use a cast iron skillet) on a hot heat. Cut a bit of the dough off, roll it into a ball and then roll it out onto a lightly oiled surface until it looks like, you know, a wrap shape sort of. If you make it too thin once it’s cooked it will go brittle and break, too thick and it will be a bit doughy but experiment with what works.

Put the wrap into the pan – no oil, nothing – and after about a minute, check underneath. You’re aiming for cooked brown spots as in the picture. Flip over and cook until the other side is like that too. Sometimes they puff up beautifully, other times not. Whilst you cook the others place them under a clean, damp tea towel. Very important or they’ll go cold and brittle.

Use as you wish. I make little bowls of shredded chicken, salad, julienned carrots (get ME) for my children to serve themselves and then roll it all up in the wrap to eat in front of The Simpsons.

This makes about eight wraps.

Variations: you can add half wholemeal and half white (always plain flour, not strong), you will need to add a touch more water. These are still really nice but I find they take a bit longer to cook. You can also just halve everything if you’re cooking for just a couple of you.

Chocolate ganache – a great filling for doughnuts or eclairs

Continuing with my slight eclair obsession…I’ve been wanting to try a darker chocolate cream, as opposed to my white chocolate cream, for some time now in an eclair. Except I trialled it in a doughnut, first. But you could use this in anything that needs a gooey chocolate filling. It tastes like chocolate ice cream. Except not cold..

The recipe for the doughnuts is here, and of course you’ll notice immediately that these are not deep fried doughnuts. This honestly doesn’t matter. The doughnut here is simply a receptacle for the chocolate. Just like it really doesn’t matter what a drug mule looks like, they’re there to just, you know..

The topping you see above is just melted dark (70%) chocolate – about 50g – with a teaspoon of vegetable oil.  And sugar sprinkles of course. I’m not a man fan of them to eat. The conflicting textures confuse me: soft doughnut, soft cream, crunchy, sugary, balls. But the children love them.

For the chocolate ganache filling, all you do is (for 12 small doughnuts) put about 100ml of double cream and 50g of dark, 70% cocoa chocolate, in a bowl over some boiling water. Stir until the chocolate is melted. It should be thick. Chill. Then add about another 100ml of double cream and whisk until really thick. I then added two teaspoons of icing sugar, because I was after a very particular taste – just sweet but not sickly and without the sugar it was simple too ‘dark’. But do taste as you go. Put in an icing bag with an appropriate nozzle – depending on what you’re doing, eclairs, doughnuts etc. Chill the icing bag and the cream for half an hour. Then use.