Author Archives: Annalisa Barbieri

In search of the perfect vanilla ice cream

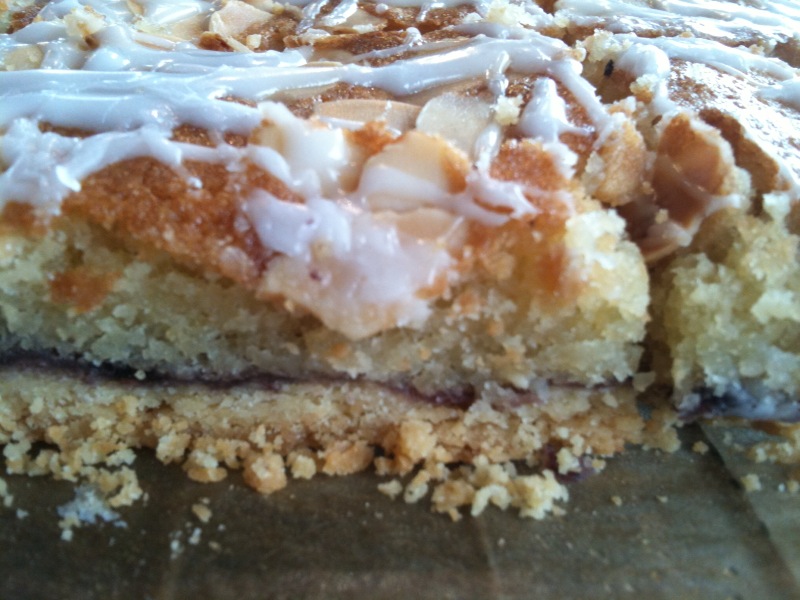
I’m aware this is my second food post in as many days. And I want to stress this isn’t a food blog, but just random things I use and consume that come into my head.

Vanilla ice cream is the most basic of flavours, and because of this, it gets overlooked. I’ve made many vanilla ice creams and they have varied from too vanilla-y to what tastes like little more than flor di latte (which means flower of the milk and is the plainest ice cream flavour you can get).

Heston Blumenthal has a recipe for vanilla ice cream that involves coffee beans, and sounds interesting, but I haven’t made it yet because it involves six vanilla pods. Heston’s recipes are amazing, but they don’t work out cheap (he has a current recipe in Waitrose for Banana Eton Mess which works out at £18 for the ingredients, Heston love, don’t you know there’s a recession on??).

My beloved Panasonic ice cream machine came with a humble little paper recipe pamphlet that, nevertheless, has proved to have some of the best ice cream recipes on it (I still think its chocolate ice cream recipe is unsurpassable).

This is what it suggests for vanilla ice cream:

120ml double cream
2 large egg yolks
50g granulated sugar
80ml milk (I always use semi-skimmed, to no obvious detriment)
1-2 tsp vanilla extract

You beat the egg yolks and sugar together, until pale and fluffy. If you don’t want to do a big work out (and really, you should, it’s the little jobs like this that our grandmothers did that all added up to keeping them fit, that and washing clothes by hand and turning mattresses etc). Add the milk and mix together well. Place this mixture in a saucepan and stir over a low heat. Don’t boil (but if it starts to boil a bit don’t panic, just turn it down and mop your brow and pay more attention next time). When its thickened to form a custard (which I find needs quite a vigorous heat), remove it from the heat and let it cool. Make yourself a cup of tea or something.

In a separate bowl, whisk the cream up, then add the vanilla extract to the custard mixture, then the whipped cream. Chill then churn in the machine.

Now a few notes about this recipe. You’ll see it tells you to whip the cream and then add it. I’ve done it without whipping it and the result has been the same. But try it the proper way first (I find the whipped cream flattens anyway when you mix it into the custard mixture). You’ll also see later that, although similar ingredients are used in other recipes, the way they’re put together varies. I guess it goes to show it all amounts to the same thing.

I found 2tsp of vanilla extract waaaaaaaaaaay too vanilla-y for this amount of ice cream (which doesn’t give you much, but just scale it up for more), so you may need to experiment.

This recipe above was my standard vanilla ice cream recipe for ages.

Then I started getting lots of books about ice cream. One which is pretty good is called Ice Cream. In it there is a recipe for vanilla ice cream which uses:

300ml full cream milk (again, I say, I always use semi skimmed milk and it’s just fine)
1 vanilla pod
4 large egg yolks
100g vanilla sugar
300ml double cream

What you do with it all is put the milk and the vanilla pod, which you’ve split in half length ways, in a pan and heat gently then remove it from the heat and let the pod infuse for 15 mins. With this one, in a separate heat proof bowl, you beat the egg yolks and sugar until thick and pale.

Remove the pod from the milk, scraping out all the seeds and slowly beat the milk into the egg mixture.

Place the bowl over a pan of simmering water, stir mixture until it coats the back of a wooden spoon (which it pretty much does straight away but you can carry on stirring as it’s fairly calming and you can day dream, the mixture won’t come to much harm as it’s in a bain marie).

Remove bowl, cover surface with cling film or grease proof paper (I am so lazy, I have pre-cut baking parchment circles for cake making and I use one of those) and let it cool, then chill for an hour or so. Then stir in the double cream and sling the whole lot into the ice cream maker.

All good. Ish. The ice cream is perfectly fine, but nothing special. A few notes about the ingredients. Vanilla pods annoy me. They’re expensive, sometimes, even if correctly stored, they go brittle and don’t work with you. I manage to leave behind half the seeds and all in all, I think are a pretty imprecise way of using vanilla. Do not buy vanilla sugar! It might as well be labelled “food stuff for stupid people with too much money”, just get a container, put some caster sugar in it, and lob a vanilla pod in it.  Keep it like that forever and ever. When you take some sugar out to use it for a recipe, put a bit more caster sugar in. Vanilla pods are great at this, they infuse the sugar with their bossy vanilla-y-ness. When you remember, replace the pod with a fresh one. If you’re reading this recipe and thinking “but I want to make vanilla ice cream NOW and I don’t have time to infuse my sugar with a vanilla pod”, then I applaud your enthusiasm but say: just use regular caster sugar this time. I swear you won’t notice much difference, which just goes to show what a terrific waste of money shop-bought vanilla sugar is.

So I decided to slightly adapt the above recipe. And when I say slightly, I really do mean slightly.

I bought some vanilla paste.  The one I used is by Taylor and Colledge and I buy it from Waitrose. It’s not a cheap alternative, at about a fiver for a small pot but I reckon you get more value from it as you can  use the whole product, none of that scraping etc, see above.

Now, my Ice cream books says that one tablespoon of vanilla paste equals one vanilla pod. The Taylor and Colledge website says one teaspoon. I used one tablespoon, which did seem like a lot. But for just over a pint of ice cream, it resulted in a very, very good vanilla ice cream. It was speckled, pale yellow, very vanilla-y tasting without making you want to grab the table for support; overall, almost buttery. In the way that people use buttery to describe something delicious, I don’t mean it tasted buttery literally as that wouldn’t really be that great. You experiment with how much vanilla paste to put in according to taste.

Try it and let me know what you think and also, what’s your favourite vanilla ice cream recipe?

Best banana chips

I’m not a huge fan of banana chips. This is due to a legacy of over dosing on them when small (sadly the same effect was not forthcoming for cake, or chocolate). They – the banana chips – sort of suck you in with their super sugariness, fooling you into thinking they are in any way healthy (I’m talking about the coated ones) when they’re not.

My daughter regards banana chips as the ultimate treat. I am not sure how I’ve succeeded in conning her into believing that dried fruit trumps Haribo* sweets (which I never, EVER buy her since they have zero nutritional benefit unless you’re stuck in a lift and about to die and they’re all you have in which case I guess the sugar would keep you alive) but I have.

Every Saturday we go to the local market and I let her buy 20p of banana chips, which are of the coated variety and taste, to my mind, of shite. But she likes them and the occasional treat ain’t bad. When we go to Waitrose she sometimes asks if she can have the more expensive banana chips in packets and which aren’t coated with loadsa sugar, which I sometimes let her have even though they are, have I mentioned, expensive: like £2 for what amounts to about five pieces of dehydrated banana, which gram for gram must surely make it more expensive than, perhaps, gold or something.

Last week when we were in London, we went to the John Lewis Food Hall, aka the poshest Waitrose you can get and I bought her some Slow Dried Cavendish Banana. They aren’t chips at all (sorry about the misleading title, but “banana bits” might not have registered in the same way) but chunks of banana that look, frankly, like shite.

Voila the packet, they cost £1.99 or so for 200g. For those of you interested in such things, they contain 385kcal per 100g, 3.9g protein, 82g carbs (of which 74g are sugars), 1.8g fat and 7g of fibre.

This is what’s inside. Looks like a piece of poo init? But trust me much more yummy.

But God they were delicious. They’re ‘slow dried’ and don’t have anything added to them, but they’re chewy, naturally very sweet and just really pretty fucking delicious. So much so that I ended up eating way loads more than I planned and ended up with really sticky fingers before I’d even got back up to ground floor in John Lewis, which I then plastered all over the escalator rail (sorry about that).

In fact, as I photographed the packet, there are two pieces left which I would have snaffled and stolen from my own flesh and blood, had I not just eaten two pieces of dark chocolate.

Talking of chocolate, and talking of Zotter chocolate as I was last month. When I was back at the JL Food Hall I bought another flavour: 70% cocoa with wine and pumpkin. It was just GREAT. Although my parents weren’t impressed. My mother took one bite and it launched her into a tale of some chocolate she once had which “wasa so awful, I hadda to spitta itta out”.

You really have to try this – Zotter – chocolate if you come across it.

Anyway the banana bites/bits. Would be really good for packed lunches and the like. So, er kinda topical in that tedious back to school way…

*When I was chamber-maiding during school holidays I once went in to clean someone’s room and they had a packet of Haribo sweets and I couldn’t stop eating them, so much so that I ate about 3/4 of the packet and had to then carefully position each sweet in the packet to make it look like there was more than there was. I so get how people like the chewiness, very addictive. But I still won’t buy them for my children.

Starting to experiment pt2: potato bread with a 36hr prove

Because we had guests coming for Sunday lunch, I decided to make a double batch of potato bread on Saturday. I had an inkling it would be good, because the dough was really frisky: I could barely contain it on the chopping board I use to knead my dough. It was so alive there was no way I could knead it and leave it on the board, covered with a large stainless steel bowl, as I normally do, because it would have pushed right out from the bowl.  So instead I had to put it back into the bowl, and cover it with a tea towel whilst it rested.

I also discovered that it’s so much easier to fold dough, in the fancy way they tell you to (basically folding the dough into three, so take one third of it, fold it into the centre and then the other side, fold in on top) with so much dough. It was really easy to fold in this way, although not easy to keep in any sort of shape. I practically had to pour it into the bannetons.

I cooked one lot in a 1k round on the Sunday but the other I left in a 600g banneton (in the fridge at 4C) til this morning. It had risen hugely and spread out lots on the baking tray the moment I turned it out. I slashed it four times and it looked very collapsed, but I’m used to that with long-prove breads now and hoped it would revive in the oven. It did.

Instead of what I usually do, which is put it in the oven at the highest temperature and then turning it down, I’ve been experimenting with putting the bread in the oven at 220C for the first 8-10 mins, then putting it up higher to 250C, then back down. This is what I did this time.

The bread rose beautifully, had a great crust (heavier and darker than the one I did for Sunday lunch, probably cos of the shape) and OMG it tastes divine. The longer prove has definitely improved the flavour.

I’d go as far as to say it’s very probably the best tasting bread I’ve ever made. I will try to photograph the crumb later (if there is any left), it’s really good. Not overproved (as I feared), kinda waxy, very white. And so moist.

Swoon.

Great girls’ mac

Some years ago, I bought this great mac from Mini Mode the now (almost, as of the end of this month) defunct brand you could only get at Boots. It has a hood, which you can’t see, and was pretty hydrophobic and it looked good with most things. I always got asked where it was from. I loved this mac. My daughter loved it (although if I remember rightly, like most things, she had to be coerced to wear it). My partner/her father loved it. Even my parents thought it was pretty cool, although not actually pretty cool as that would reinforce their idea that I don’t dress my daughter warmly enough, ever. It had done many years sterling service, but even if Mini Mode were still going, it only ever went up to age six and my daughter is nearly seven. So the hunt for a new mac was on.


The lovely mac from Mini Mode which did gave many years of service through snow ‘n’ wind ‘n’ rain.

Nice, stylish girls’ macs are not easy to find. They’re either too cutesy, too pink, too branded or just plain rubbish. My mother, when not feeding my daughter two Bahlsen plain chocolate biscuits sandwiched together, had, she said, spied a really nice mac in Zara but hadn’t bought it yet.

Last week my eldest and I went to London. She came with me whilst I went on my appointments, aka going to get my hair done at John Freida and meeting up with the totally fabulous perfumier Roja Dove at the reading rooms in Claridges (ha! you thought my life was all making bread in Suffolk, wrong, wrong, wrong!). Because we then decided, quite ad hoc, to stay the night in London I decided to go shopping with her for school shoes at Johnny Lou Lou’s. As we were leaving there I spied Next.

Now, lots of my friends seem to find nice children’s clothes in Next. I never do. But that’s mostly cos I don’t really look and I don’t order from the catalogue because last time I did they opened a credit account for me and started sending me scary statements that made me fearful and it took me ages to cancel it.

Anyway. I thought I’d give it a go by actually going in there and looking around properly. And I found what I think is a great little mac/trenchcoat for girls. It’s camel coloured (so, like, bang on trend for this season if you care about such things, which I really do not), has little details like slightly puffed sleeves and a dotty lining. It’s really cute, and looks well made and isn’t too expensive.

It’s 100% cotton and is billed as ‘shower proof’ and is of course washable at 40 degrees.

Stone Trench Coat for girls” by Next, in sizes to fit ages 3-16 and costs  from £21-£27.

Testing testing

I’ve installed various things on here and this is just to see if they work. Which I’m sure they won’t. If anyone understands Google Analytics and/or how to get my ‘subscribe to this blog via email’ thing to actually work, please tell me!

Starting to experiment pt1: white sourdough 36 hr prove

Now that I’m getting a bit more cocky confident about sourdough bread making, I’m starting to experiment a bit more. I know that the bread geeks might poo-pooh at my experiments, and how tame they are. But I’m new to all this and hoping to help other rookie bakers, not really teach anything to anyone, let alone seasoned bakers. Although if I manage that, too, then hoo-RAH.

I wrote in another post about long proving of loaves. I regularly prove our ‘house bread’ (Dan Lepard’s Mill Loaf) for 72 hours now. But thus far I’d only proved white sourdough for about ten hours regularly, and 24 hours max.

So the other day, my partner (I’m so fed up of saying boyfyhusband, it sounds so fucking twee) was going to London and I decided to send my Italian Daddie – who lives there with my Italian Mamma – a loaf of my bread.  He’s the sort of man who eats bread at every meal and he buys his baguettes from the supermarket, and I think they’re a poor substitute for the sort of bread he grew up with.

He likes his bread to be white and crusty. So I made a batch of sourdough, shaped one into a round for us, and one into a baton for him, proved it overnight and got up at FIVE O’CLOCK IN THE MORNING to cook it as my partner was leaving at 6am. I kept the other loaf and cooked it yesterday morning, after a 36 hour final prove in the fridge at 4 degrees.

I am pleased to report that it was splendid. I cooked it for only 20 mins, 15 mins at 250 and 5 at 220, as I was after a slightly softer crust than the usual blackened, sour crust I go for. It was delicious, delicate and here it is, photographed in the morning sunlight.

White sourdough, cooked after a 36hr prove.

Steamin’

One of the reasons I started this blog, was that, being a consumer journalist, I get a fair amount of calls/emails from friends asking me about stuff they want to buy: “Should I buy this, should I buy that, what’s the best one to get” etc. Or, from  my friend Mark (I was SO going to name you in full but shan’t) “do I need an electric food steamer? (no, just use a pan with a steamer on the top); do I need an electric rice cooker? (no, just use a pan FFS); do I need a cappuccino machine (yes).

I’m not complaining, it’s a privilege, etc, but when you’ve got two young children, it’s not always easy to chat. So much easier to say “go look at my blog”.

Many moons ago, I used to write a column called Dear Annie in the Independent on Sunday (and, for a bit, the Observer); it was like being a doctor at a party (except SO much more important). I’d get people coming up to me saying “I need a dress for a wedding a week Saturday, what do you suggest?” I still get emails from readers asking me about clothing issues, even though I stopped writing the column some years ago. When I was fishing correspondent of the Independent I used to get people phoning me up in a panic at the supermarket: “Can I buy cod?” “The prawns are from Madagascar, is that okay?” “What is it about farmed salmon that I should know?”

Now that I’ve neatly told you some of the things I used to do, as a by the by, I can also slip in another one, as co-founder of a parenting website (no not that one, this one: www.iwantmymum.com) I’ve been hugely fortunate in learning lots from other mums. Nothing like a bit of collective wisdom is there? And one of the things I learned, luckily fairly early on, was that steam is a valuable tool in the fight against snot.

This is relevant because the question I’ve been asked three times so far this week is about babies or children having colds. Now, do I need to point out, (do I really need to? I guess so) that I’m not at doctor. I have no idea if you should take your child to the doctor or not. But when my children have colds one of the things that helps is a steamer. You know, a slightly more sophisticated approach than standing over a sink full of boiling water. Which is a perfectly acceptable thing to do except it’s not a great mix: young children and boiling water. And anyway, you get only a short amount of time between the water being so hot you can’t get near it or too cold.

The Vicks Warm Steam Vaporiser, about £30

For the night time, this steamer by Vicks is really worth getting (it makes a great, if boring-looking, new baby present). Don’t be fooled into thinking it’s anything special: it ain’t. It’s a big hulk of plastic that sits on the floor, heats water up and lets warm steam out. There’s a little compartment where you can put essential oils ‘n’ stuff. When the water runs out, it switches off. The lid is sort-of locked down but I still wouldn’t risk it with very young children (what I found was that the steamer was great when they’re babies and trapped in their cots, and when they’re older and you can say “look it’s hot, don’t touch it” but there’s a period in the middle, where they’re mobile but have no sense, where you might not be able to use it). You put it on at night and it fills the room with warm steam, making it easier for them to breathe. It’s not a miracle cure, but it can really help, especially with coughs.

For older children, and adults, this electric steam inhaler by Vicks is a good addition, you put your face right over it and inhale. (Note: I have no experience of the site I linked to, I got mine from Amazon but it doesn’t seem to sell it anymore, or at the moment.) It’s highly recommended if you have sinus problems (I find steam, and sinus massage one of the few things that work when my sinuses are inflamed and I can feel my teeth). And especially useful when you’re pregnant and get a cold/sinus inflammations and can’t take much.

It holds a small amount of water – enough for about fifteen minutes of steaming. It heats it up and lets it out a consistent temperature, and you can control how fierce it is by shutting down some vents. Or something like that. You do have to stand over the counter top (you can’t really do it whilst watching TV unless you get an extension cable out), but it’s really great to do before bed as it helps you breathe. I use it on my six year old when she has a cold but she gets bored after about ten seconds.

I hate to think about the seasons changing and colds a-visiting. But it looks like they might be and when you’re bunged up you can’t really eat or enjoy cake so much.

The Flour cupboard

We re-did our kitchen last year. Where once there was carved, dark oak cabinet doors there is stainless steel. Where once there was a dark brown (yes) sink with dark brown tap (yes) there is stainless steel. Where once there was the ‘smashy floor’ as my eldest called it (tiled and mean) there is wood. Where once there were three rooms: kitchen, loo, my study, there is now just one great, big muthaloving kitchen.

I joke that, had I got into bread baking before the kitchen was done, I’d probably have had an entire bakery area. It’s only part-joke since if I had the space, I’d surely do this. But I don’t do too badly. I have an entire cupboard dedicated to flour, all labelled. People laugh when they see this except they don’t seem to understand I do all this cos I’m lazy. I’m too lazy to be faffing around searching through identical-looking packets of flour, held chaste with Klip-its. I find organisation comforting, or as I often say to my boyfyhusband:

Organisation brings you freedom.

I find nothing odd in Monica from Friends behaviour. I have a labeller, too. With a labeller chaos is tamed.

Organisational beauty.

So anyway. I have these Lock and Lock Counter Top boxes which store about two bags of flour . I have four of these, for the four flours I use most and keep a stainless steel scoop inside to make life even simpler (do you have ANY idea how hard it is to find stainless steel scoops these days?). And then for the flours I use less frequently, such as rye and barley, I have the 1.8 Lock and Lock, which is incidentally, also the size I keep my sugars in. But they’re all in the Sugar Cupboard, which has no place here.

If you think I’m mad, have a look at this:

These are Martha Stewart’s ‘Creative Containers’.
You think these scissors ever get out of control? On the right are small spice jars containing glitter. Imagine IMAGINE if someone spilled any.

If you’d like to see more of Martha’s Craft Room, and believe me you do, then go here. If ever I feel like the world is too big and things are getting on top of me, I go and look at pictures of Martha Stewart’s estate and it makes me feel better knowing that in a large corner of Connecticut, a staff of 127 can keep order. Don’t forget to check out the ‘equipment barn’ whilst you’re there.

Cherry Bakewell Slices for a picnic

The Bakewell slab, before it was liberated into slices. Please note how crumbly my pastry is thanks to my super cold heart and hands.

We went to Southwold at the weekend, and central to this, central to most trips in my life, was a picnic.

We had everything other than something treaty to take with us (like sourdough bread, home made coleslaw and pork pie aren’t treat enough, spoiled bastards that we are). I had some ground almonds I wanted to use up and decided to make individual little clafoutis, until I found out that mostly the recipes I had for clafoutis didn’t really involve ground almonds and anyway I didn’t have enough cherries. But I did have a can of ‘black cherries in syrup’ and lots of ground almonds.

What could I make?

I make a really superb (look, there’s no immodesty in the truth) Bakewell Tart, the recipe for which came from the Waitrose magazine long ago. Believe me when I say you don’t need to search for any other bakewell tart recipe as the Waitrose one cannot be beaten.

But I didn’t want a bakewell tart. I wanted little individual things to pick up. So I thought: bakewell slices.

So I adapted the recipe slightly. First I made the pastry:

200g plain flour
2 tablespoons icing sugar
100g cold unsalted butter, cubed
2 egg yolks
(you may also need a bit of extra water).

I whizz the flour, sugar and butter in my Magimix, then add the egg yolks and a bit of water if necessary. Don’t overdo it with the water and try to keep the pastry so that it’s just holding together, it shouldn’t be all smooth and one big ball. If you haven’t got gadgets of course you can do this with your fingers and then use a fork to mix the yolks in or something. I don’t know, it’s ages since I didn’t have gadgets.

I never roll out pastry. Life is too damn short. It’s not too short to make your own pastry though cos shop bought really isn’t the same and how long does it take to weigh out a few ingredients and slam them in a blender?

When it’s blended, I just take bits of the pastry and flatten it out into the bottom of whatever tin I’m using, welding it all together with a thumb like a giant pastry jigsaw. In this recipe I used a small Mermaid roasting tin which is about 30cm by 23cm. I lined it first with baking parchment/paper.

Then when you’ve covered the bottom of the tin with pastry in this piece meal but completely acceptable fashion, chill the pastry for about half an hour (perfectly do-able to chill for longer of course).

In the meantime, preheat the oven to 190C. When the pastry has rested, cover with foil, pour on baking beans (sorry, apparently you can use rice too, never tried it, I’ve had baking beans since I was seven, I’ve always been very serious about pastry). Bake blind (this means with nowt in it but the baking beans on the foil) for 15 mins. Then remove the beans (take care they’ll be hot) and bake for a further five minutes.

The filling part 1

Now I have a problem with jam. It’s just too damn sweet. The only shop bought jam I really like is Bonne Maman’s apricot conserve, although I can’t eat the chunky bits of apricot as they scare me. When I make my Bakewell Tart, I use strawberry jam, very thinly spread. But I had that can of black cherries in syrup that I was determined to use up.

So I poured the whole contents of the can into a saucepan and boiled it until it was mush. This takes about 10-15 mins. It makes for a really nice fruity layer which isn’t too worthy (it has got syrup in it after all) but isn’t as teeth-jarring as jam. *See note at bottom. Just use jam or compote if you don’t have cherries in a tin.

Whilst you’re reducing the cherries in syrup, make the filling pt 2:

125g caster sugar
100g very soft unsalted butter
3 eggs
half a teaspoon of almond extract
150g wonderful ground almonds (I LOVE ground almonds)

Mix the butter and sugar together until it’s light and fluffy, this is quite a good work out for your arms and you’ll expend about 12 calories to offset against the calorific value of these slices, then add the eggs, one at a time, mix well, la la la,  then the almond extract and finally fold in the ground almonds.

Spoon the black cherry mush onto the pastry case, then on top spread the topping. It looks like you might not have enough but unless you’re using a giant tin, in which case you haven’t read my instructions, you’ll be fine.

I also like to top it all with flaked almonds, like a handful scattered on top. You can never have enough almonds, rich in protein (so they bring down the GI of anything), calcium and essential fatty acids. How can you go wrong. Unless you’re allergic to nuts of course.

Cook for 25 mins or so, the top should be definitely golden, not pale blonde. When out, tie your hands behind your back and dive in face first. Or alternatively, slice into Mr Kipling type slices, big or small depending on what suits your psyche. You can also drizzle some icing on in that fancy filigree way (50-75g icing sugar with a few teaspoons of water, do it slowly so you have a fairly thick mixture, not too runny but not so thick it blobs on). I do like icing, but remember you’re adding on a whole heap of sugar for that bit of icing, so go easy.

These keep lovely in an tin for a few days and make lovely treats. My boyfriend cries slightly when he eats one.

*update. March 2014. I made these today and I did exactly what it says up there. But. I found that this time, the cherries weren’t enough to cover the base. I’m not sure if the tin was smaller (I don’t think so). I did use a different make so maybe they were just different. Anyway, the point is that I realised that not all tins are equal and I’d hate for you to make this and it not work. So have some jam or compote on stand by just in case, or you know, FORGET THE GODDAMN cherries in a tin altogether and just use jam or compote. It’ll be cheaper, too.

Chanel’s Paradoxal nail varnish: the new Rouge Noir.

I have about thirty bottles of nail varnish in my fridge*. Nearly all of them Chanel. I’m a total sucker for its nail varnishes. I love the colours. I love the bottles. I love feeling a bit posh for having it.

But of all its shades, the one I still go back to, again and again, is Rouge Noir. That gorgeous black/red colour perfect for girls such as I who just don’t do, and never did do, bright red. (Tis the shade Uma Thurman wore in Pulp Fiction. When it launched in early 1994, it sold out almost immediately, and then there were waiting lists of up to a year; it’s still Chanel’s best seller in terms of units sold.)

Each time I get a new shade I think “this might be the new Rouge Noir” but it never is. I’ve done the blues, and the greys and the pinks. I’ve done the glitters at Christmas (always a bugger to get off) and they’re all lovely. But they’re not Rouge Noir. The thing about Rouge Noir is that it’s perfect. It doesn’t look too dressed up, whilst still always looking groomed and fabulous.

This Friday, Chanel launch its latest shade: Paradoxal. I’m guessing, so named cos it’s hard to label. In certain lights it looks violet, or metallic purple, then grey, then brown. I love it. (Yes I have some, I’ve been wearing it for a few weeks now.)

Okay so it probably won’t trump Rouge Noir, but nothing else has come this close in sixteen years.

*they last longer that way.

Chanel’s latest nail polish launches this Friday 13th August. And yes it’s important.