Category Archives: Children

How to make your own jaffa cakes

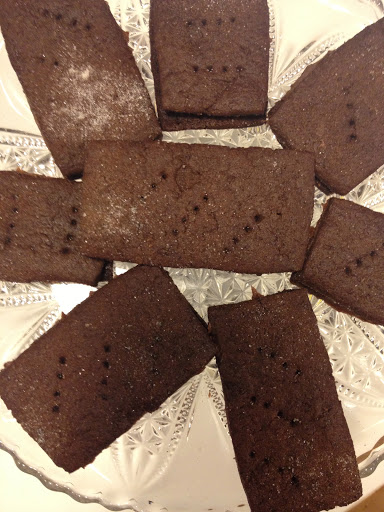
Inside. Luscious. The perspective makes these look giant, they are in fact the same size as regular jaffa cakes. And that’s a three year old holding one.

I bake, not only because I love cakes ‘n’ stuff and I prefer home made, but I bake when I need to feel safe. I find baking immensely therapeutic. The fact that I’m quite skilled at it is helpful because when I’m, say, grappling with a difficult deadline, as if it were a salt water crocodile (and we know how slippy they can be)  I have a need to achieve.  I have an almost pathological need to achieve. Something. Anything.

And when that something happens to result in baking a good biscuit, just baked into a chewy crispness, with hidden little bullets of chocolate. Or a fluffy, jolly cake, heavy with a mascarpone frosting stained red with raspberries, so large that you have to dislocate your jaw to get a slice in…well where’s the fucking harm in that.

When the news makes me feel like the world is too big, baking reminds me that the gentle stirring (or sometimes, vigorous whisking) of a few fine ingredients, can come together to make something good.

This is how I found myself making jaffa cakes.

Jaffa cakes. I don’t even really like jaffa cakes. But they seemed tricky enough to take my mind off all the bad news.

This recipe is from Jamie magazine. They weren’t tricky at all, but they did result in something so excellent and delicious and authentic (similar enough to shop bought ones to not alienate fans, different enough from to entice the not so keen) I had to keep eating them to make sure.

You need:

1 egg
50g caster sugar
65g self raising (I never sift flour but I guess you should)
butter for greasing
250g marmalade
100g 70% cocoa chocolate, chopped
Finely grated zest of half an orange
2 teaspoons of vegetable oil
 (the original recipe also asks for a tablespoon of water to use when melting the chocolate) but I didn’t use it and never use water in when melting chocolate).

You need a jam tart tin or shallow ‘bun’ tin with 12 holes. Grease this well, I also dusted it with flour (not from the 65g!)

Oven to 200C.

You do:

Okay so whisk the egg and sugar together, using an electric mixer if you have one (don’t sweat if you haven’t, you think sponge cakes were never made before the advent of the electric mixer?) if not by hand. Get those biceps and triceps working. Beat until the colour has lightened and the mixture has thickened. I’ll admit this is a a hell of a lot easier with an electric mixer.

Now stir in the flour by hand.

This is so easy isn’t it?

Now dollop about a tablespoon of the mixture into each hole, evenly. So if you get it wrong you’ll need to go round and nick a bit from the moulds that have too much.

Bake in the oven for 8-10 mins. Be careful: you want them lightly golden.

When done turn out and let cool. When cool slice in half horizontally. Are you seeing these jaffas taking shape?

Hopefully you’re the sort of person who reads recipes through before embarking on making something. And therefore you’ll know that whilst the cakes are cooling, put the marmalade in a pan, on the stove. I didn’t use the whole 250g but if you have any left over, once cool, you can put it back in the jar.

The sponge cakes fresh out of the oven.

So, heat the marmalade until it’s melted and stirrable and all one big thing and not little clumps of marmalade skulking round the pan, like nervous teenagers circling each other at a party, and then take off the heat and leave to cool. You can leave it for a good 20-30 mins, perhaps more and in fact it’s easier to use when it’s cooler. You could sieve out the peel in the marmalade but come on! Butch up and leave it in. I did and it was delicious.

Note the bit with a slice off? I ate it. Couldn’t wait.

Now. Take a teaspoon of the marmalade and dollop it in the centre of each sponge.

Melt the chocolate, with the orange zest and oil (oil not essential but gives a nice gloss), in a bowl over a pan of water. When melted, spoon over each marmalade covered sponge. What I did was put the cooling rack over a baking tray to catch any drips (ahem, I took it away for the photo below for better contrast), and then pick up each sponge and spoon the chocolate over, spreading it delicatedly with the back of the spoon – you don’t want to compromise the blobs of marmalade – then putting each back on the rack over the tray to catch any drips. And there were hardly any drips. I guess you could be more slap happy and just spoon the chocolate over each sponge whilst they’re sat on the rack and let the chocolate drip gaily.

Just one left to do.

But I think that’s more wasteful.

I ate at least six of these waiting for the chocolate to set. My youngest went potty for them. My eldest doesn’t like jaffa cakes and wasn’t convinced by these.

Make them and tell me what you think.

Laptop lunches, the best lunchboxes ever

The Laptop Luncbox. Clockwise from top left: a popping candy chocolate lolly; grapes; fennel; ham sandwiches. Most of these inner boxes also have lids. But we never rarely feel the need to use them as the main lunch box has a lid that closes down on everything.

I need to warn you, immediately, that these lunchboxes are neither cheap, nor easy to get.

But they are worthwhile if you can get hold of one. Let me tell you about them.

Some years ago, in early 2008 to be precise, I was still co-founder, and a very active part of an excellent parenting website called I Want My Mum. It doesn’t exist anymore as we shut it down last year. But it was a great place for collective wisdom.

When my eldest was due to start school, I asked the mums and dads on there what lunchboxes they’d recommend and a few of them said Laptop Lunchboxes. Which were, then, available to buy in the UK.

LLBs consist of a main lunch box with a lid, and in this are four other boxes, some with lids, some without. The whole lot sits in an insulated, zip up bag. The beauty of it is that it helps you think outside the box (yes, yes) with what you put in the lunchbox, and also you don’t end up with loads of un-eco wrapping or loads of renegade plastic boxes. Of course, despite best intentions, our eldest still goes to school with sandwiches 99% of the time, but she also has crudites, potato salad, orange segments, grapes etc. They all fit beautifully inside and are protected from the disdain that a young child, quite rightly, treats its lunchbox. Her lunchbox (made mostly by her father) is a thing of beauty and the one I’ve photographed above is my youngest’s first lunch made in her lunch box. It was incredibly boring but she wanted something fast to take on a great cycling expedition around the garden and it’s the only photo I have. But imagine colourful wonderfulness spilling from every box and beautifully cut sandwiches that perfectly, perfectly fit the boxes and you’ll get an idea of the care taken by my partner in making his daughter’s lunch.

That first lunchbox cost about £25 as I remember. Not cheap but really good. It was so good I decided to buy us all one, but when I went to reorder, the website no longer did them and instead were offering frankly vastly inferior things that were little more than stacks of plastic boxes. I found LLBs in the States and emailed them. Good news! I could order direct from them! Bad news? With taxes and shipping it came to about £70.

It’s a good lunch box, but not that good.

My youngest is due to start school in a year’s time. My excellent friend and Godmother to one of my daughters, CC, was in American and due to come home for good. This was an excellent time to ask her if I could buy one and get it shipped to her and she could bring it back for me.

This is what happened and hence the youngest now has her own, and it cost £25-£30.

Of course, in the way of things, my eldest went through a stage of hating her lunch box and wanting one like everyone else. But now has come round to the fact that her lunch box is really cool and looks like new, after four years of continuous school service (she has a packed lunch every day, occasionally she will have soup in a food flask). This is something to remember when you buy something cheap that might not’t last. I reckon I’d have spent more than that by now on replacement boxes.

So I know this is a bit of an annoying post, but look, we live in the world of travel and have foreign friends. If you are going to America, or live there or know someone who does and can get it shipped to them and they send it on to you,  this is feasible.

And these are really good lunch boxes.

The selection is a bit mind blowing, you can get just the bag, just the box etc; but the ones I got were in the Bento Kit (bag, box with compartments, knife and fork). And although the colourway we have isn’t shown at present, this is identical to ours in all but colour: this one, with the bag with shoulder strap which I think is useful for children.

I had really good service from this company. There was a problem with my payment and a real person answered my emails and tried to help.

Hot chocolate pops

A hot chocolate pop

I cannot lay claim to this. Hot chocolate pops are all over the place. But I’d never tried them before and I gave them a go.

Here’s what you need:

Some milk or plain chocolate. I used plain, 70% cocoa
Some white chocolate, I always use Green and Black’s
Some marshmallows
Something to make them in, either cake pop moulds or something similar. I do, of course, have a special mould just for these which is just a round chocolate mould but bigger than what you’d use for chocolates.

Put the marshmallows at the bottom. Small ones work best so you can pour the chocolate around them.
Melt the dark chocolate (either milk or plain) and pour on, half way up the mould.  Put sticks in, I put mine so they stick out at the side (as seen) not so they come out perfectly at the  centre as I have no way of keeping them upright and I like the off-centeredness. Set in the fridge.
Melt the white chocolate, pour on til it comes to the top. Fridge until set.

When ready to eat, heat some milk and dip in. I can’t pretend it’s the best hot choccie you’ll ever have as the chocolate melts in bits and it’s not all homogenised. You could, I guess, whizz it up. But really the fun here is in half licking, half stirring the melting pop.

Thermals for girls, or pyjamas

Autograph for M&S girls’ thermals. Not overly easy to see design but pretty floral stuff.

As a veteran fisherman, I can tell you that no-one makes thermals as efficient as Damart. But the problem with Damart thermals is what makes them so good: what works outside doesn’t really work inside and you end up sweating like a pig on market day indoors.

Anyway. For every day wear I wear Uniqlo heat tech. But this isn’t about me, it’s about thermals for children or more specifically, girls (much as I’d love to say boys too, the set I’m going to suggest is flowery and no boy I know would wear them under the age of five. If yours would then great).

When my eldest was small, I’d buy her thermals from Petit Bateau. They are brilliant: wool on the outside and cotton next to the skin. But expensive. All her old PB thermals have passed onto the youngest now.

What I was looking for were some thermals as layers for my eldest, for when it gets really cold here in the country and I found these in M&S Autograph section. The reason I want to tell you about them is that they have proved a huge success with my girls. I ended up buying them for the nine year old, but the youngest wanted a pair too and even though she has the Petit Bateau hand me downs, I ended up buying her a pair too. I even bought myself a pair in age 15-16 and they almost fitted but not quite..

They are comfortable, really cosy, warm, pretty and they wear them as thermals, PJs and the tops as outwear too. So a pretty hard working two-set. I recommend. Buy.

In sizes from 18mths to 16 years, £11-£14.

Head torches

Petzl Tikkina XP 2. My headtorch. Pick it up for between £35-£50.

Whenever anyone asks me what they should someone for a present, be that person a child or an adult, the first thing I always say is: a head torch.

They are fab. Admittedly if you live in a city, and are an adult, you probably don’t fully understand the need for them; but if you’re a child they can be used in tents, hidey holes, under bed clothes etc. And if you’re an adult and you live in the country they are, I think, essential for getting firewood, putting the bins out, getting to your car (this will sound crazy to those with street lighting…). I also use mine when cycling or running.

The one I have is, of course, top of the range with a price tag to match: the Petzl Tikka XP 2 (but I have just the head torch, not the charger etc). Mine has three different white light permutations (bright, economy, flashing) and it can also go to a red light (which preserves night vision) in constant or flashing. It tilts (a really useful facility so you can look at things on the ground or straight ahead) and is very bright. Most normal people don’t need this but as I also use mine for the aforementioned cycling and running, it’s pretty imports for me. Mine costs between £35-£50 (do a search on Google they’re not difficult to find), but although it’s top of that range, there are others that go up to £200, but really for people climbing Everest..

Petzl Tikkina 2, for about £15.

Otherwise the Petzl Tikkina 2 is the one to get. It has two white light modes (strong or economy) and tilts and is really everything you’d need. You can pick them up for about £15 and they’re – Petzl’s -vastly superior to any other head torch I’ve tried. Also comes in pink, blue, green, gold.

Hot Dog and Hot Duck

Hot Duck and Hot Dog. 

I bought these last Christmas for my girls to give each other in an incredibly contrived gift exchange.

They are cuddly toys with some sort of stuff inside that you can heat up in a microwave. Hence why these are called Hot Dog and Hot Duck.

Living in the country it’s colder here, sooner and for longer than in the city. Plus I keep the heating right down, because I’m mean like that. So Hot Dog and Hot Duck make a nice companion at bedtime, or on cold early morning car journeys; my youngest has even been known to take it with her in the front of my bike. They feel like bean bags so are actually pretty tactile. I am not a cuddly toy person but have even been known to treat these quite well.

You chuck them in the microwave for a couple of minutes and bingo. I got mine from a large organisation which is now being investigated for tax reasons, but you can get these anywhere. Perhaps even support your local shop…Mine cost under a tenner each and are made by Intelex and the range is called ‘Cozy Plush’ (sic).

Home made bourbon biscuits

Although I make almost all the biscuits and cakes we eat, I do think there are some things that are just better shop bought. Shop bought custard creams are just what they are and impossible to replicate at home. (This doesn’t mean I won’t try but I won’t expect to get them to compete with shop bought and compete is the right word here.)

But a few weeks ago, I was out for brunch and gossip a very important business meeting with my friend Fiona Hughes and we went to the Orchard Cafe in London’s Holborn.  On the way out, after we’d devoured extremely good scrambled eggs with home made bread and smoked tomato ketchup, I spotted a giant bourbon biscuit, filled with salted caramel goo.

Now. I don’t eat biscuits and cakes ‘n’ stuff like that, during the week, only at the weekend. And as this was a Tuesday, I couldn’t justify it.

However, because I am a greedy thing at heart, the memory of these biscuits scratched away at me, like a sticky out label on a T-shirt, and eventually I decided to try to make my own.

I finally found a mention of an edition of Jamie Magazine that had a recipe for home made bourbon biscuits and so determined was I, I tracked a back issue down, paid for it and waited for it to arrive.

These biscuits are great. Really, really good. I do of course want to get a specialist rectangular cutter and maybe a Barbieri stamp. [Update: believe it or not, I now have both of these.]  But until then, I just cut a line of these, and then cut the rectangles by hand. It made for a very artisan finish but no less impressive.

You need:

For the biscuits:

50g soft butter, unsalted
50g soft brown sugar (I used dark)
1 tablespoon of golden syrup
110g plain flour
20g good cocoa powder (don’t go using any of that ‘bad’ stuff)
half a teaspoon of bicarbonate of soda
a bit of caster sugar for sprinkling

For the filling:

75g icing sugar
50g soft butter
1 tablespoon of cocoa powder
1 teaspoon of cold, strong coffee (use milk if you don’t like coffee, but the coffee really, really adds something)

Put the oven on to gas 150C. You need a baking tray lined with baking parchment.

Either cream the butter and sugar for the biscuits by hand, or use an electric whisk (the recipe calls for latter, I did former). Do this until pale and fluffy. I love the word fluffy.

Then beat in the golden syrup using a wooden spoon (even if you’ve used an electric whisker you’re now instructed to STOP and use a wooden spoon and put your arms to work). Then sift in the flour, cocoa powder and bicarbonate and beat into an even dough. You may need a few drops of milk. Try not to use it but if you do, literally put the milk in half a teaspoon at a time, you want a fairly dry, low hydration dough not something really sticky.

Turn it out onto a piece of baking parchment and top it with more baking parchment so you roll it out between two sheets of baking parchment. Roll until about 3mm thick. Because you want the biscuit to be crisp, don’t make it too thick, although you can’t make it too thin either. Get the ruler out, this is biscuits for goodness sake. It’s important to get it right.

Cut the dough, however works for you, into about 24 fingers of about 5cm x 3cm. I cut long rectangles and then cut into smaller rectangles. Place on parchment lined baking tray, with about 1cm gap in between (they do rise a bit but not much). I prick with a fork for a birruva pretty pattern.

Sprinkle with caster sugar and cook for 8-10 minutes. Make sure they are cooked, not soft as they won’t harden up much and you really do want these to be crispy not cakey. But of course, don’t overcook (am I being too bossy? I want you to get these right you see).

When done, wipe the sweat from your brown, transfer to a wire rack etc. Cool.

For the filling mix the sugar and butter together, add the cocoa powder. At this point it will look pale and unpromising and you may start to panic. Have faith! When you add the milk (a scant teaspoon, just to bring everything together), it will go dark and glossy and glorious and you will be SO pleased with yourself.

Spread on one biscuit, sandwich with another. Daintily arrange. Eat and be amazed.

Snuggle suits, aka all in ones

Fleece snuggle suits. Be warned, they also come in adult sizes.

All in ones are an inescapable feature of your wardrobe when you’re a baby. But as you get older, these frankly super useful items of apparel are jettisoned in favour of separates.

Some years ago, Gap sold waffle cotton all in ones for grown ups. Think cowboy style long johns and long sleeved vest combined, in jolly colours like red. Reader, I had some and they were fantastic. I wish I could tell you that I saved them for nights in alone. But no, I didn’t.

I won’t go into any further detail on this.

Last year my mother, who is able to find items of clothing I never find in shops, that my children both love and find incredibly useful, found an all in one navy PJ thing for my eldest (who is eight). Okay, it had a picture of Mickey or Minnie Mouse on it but my daughter loved it. She felt all cosy in it and it was great for after a bath in the way that draughty separates just aren’t.

We live in a small, draughty house in the country and after a bath, I wanted something for my children to be able to put on that would be snug, so I was thinking: fleece. These all in ones with a front zip are so easy to find when your child is under 24 months, but over that? Forget it.

I eventually found the All in One Company.  I ordered two – made to measure as they all are. I ordered them in a colour that had chocolate in the title, because you can’t really go wrong with this I thought. I was right. Although my children do look like small bears wearing them.

Do please read the sizing instructions as you can’t return them unless they are faulty, but you have to order a basic ‘age’ size and then you can customize it so if your child has particularly long legs or arms or bodies – they can do it accordingly. The variations – colours, combination of colours, add ons (tails!?), etc, are a bit mind boggling. But you’ll get there in the end.

They are all made in the UK, so they’re not the cheapest you can get. But let me tell you that the customer service was INCREDIBLE and the quality of the finished items superb. The only extras I had were hoods, to keep the costs down.

Light ‘n’ fluffy vanilla ice cream

Never underestimate how hard it is to be a food photographer.

There are two people I discuss ice cream making with. My father and my friend Lucy. Recently Lucy told me about an unassuming little recipe she had come across for vanilla ice cream that was different to the way we usually made ice cream: instead of the custard method (which uses just the yolks of the egg), it used the whole egg. This was of particular interest to me as I make lots of ice cream and my freezer is overflowing with egg whites. There are only so many madeleines I can make.

This vanilla ice cream recipe is also great because it’s quick, easy and makes a lovely light vanilla ice cream that scoops straight from the freezer and children, in particular, seem to love. I would probably go with my more luxe version if the ice cream were being served at a really posh dinner party, atop, say, some exquisite piece of patisserie.

I’ve adapted the recipe slightly (lowered the sugar from 100g to 80g and slightly changed how you make it).

4 eggs, separated
80g icing sugar
teaspoon of vanilla essence
300ml double cream

Get three large bowls. Separate the egg yolks and egg whites into a bowl each. Put the cream into the third bowl.

Add the vanilla essence to egg yolks. Do it NOW or you will forget and without it, you have Fior di Latte ice cream, not vanilla. Add the sugar to the egg yolks too.

Take an electric hand held whisk. Whisk the egg whites until stiff. Then the cream until it holds itself properly, like a well trained ballerina. Finally the egg yolks, sugar, vanilla essence.

Now gently fold the cream into the egg yolk mixture and finally the egg whites. Put in ice cream maker. If yours is very small, you may have to do this in two batches. I have a Magimix and I put it all in, it comes right up to the top but it reduces as it’s being made.

You can of course have this on its own. Make tiramisu with it, it goes great with a fruit salad. Or fold in some chocolate coated popping candy for something a bit Heston.

Fantastic, fun, outdoor chalky crayons

I recently took advantage of having four strapping men round to lunch (with their partners) to move our very large outdoor table off the patio. Revealing a moss, alge covered set of paving stones which I am currently blasting with a pressure washer (Karcher, fabulous). I intend to turn this into a back yard kinda thing for the children to play in. I am all about giving my children more fun, outdoor things to do. It has, of course, absolutely nothing to do with them but everything to do with the inner child in me who was brought up in a two bedroomed flat WITH NO OUTSIDE SPACE.

Anyway. The therapy has been booked and I’m working through it. In the meantime, when I went to some friends for lunch recently they had a set of giant crayons and the children were going crazy graffiting all over the yard (I love the word yard, it featured large in my childhood stories of Mrs Piggle Wiggle). I got these which are really bright chalks rather than crayons (not sure why they are called crayons) but all you need to know is that they are REALLY BRIGHT, fun, and it says washable but I like to live dangerously and haven’t tried that yet.

I paid 10p under £7 for a packet of 15 from Amazon. I think these are a perfect thing for your children to do in the autumn.

You’re welcome.

2016 note: for some reason the crayons above are now £63 from Amazon which is, of course, madness. I think it’s because you can’t really get them and they have been replaced by these.

Save

Save