Category Archives: Children

Revolutionary new treatment for verrucas!

Bet you’re glad you discovered this blog. It’s so full of useful, glamorous things. Don’t worry. I’m sure I’ll sneak a designer bag in next week.

Maybe.

In the meantime, something more useful. How to treat a verruca without spending very much money at all.

Despite growing up next to a swimming pool (and using it regularly) I have never had a verruca. But my eldest caught/grew/developed one a few months ago. Now for those that don’t know, a verruca is simply a wart that grows inwards (because the weight of walking on your foot means it can’t grow outwards), and those black bits you see are the blood vessels.

So we did the usual and bought Bazooka that Verruca and nothing really happened. Then another verruca grew and I started to worry that my child would become like one of those freaks that has a verruca farm on her feet (this happened to my cousin, she had about eighteen of them). So after a few months of painting on Bazooka and nothing happening I texted my friend Mary, who is a GP, and asked her if I should take my daughter to the docs to have the verruca frozen off with liquid nitrogen. “Yes, you can,” she texted back, “or you can try something else that seems to be having lots of success.” I bit my fingers whilst I waited to hear what that something else was. Perhaps something illegal. That would be exciting.

“Electrical tape” she texted.  She said it would take a few months, but the Bazooka had done nothing in a few months so thought it was worth a try. So I bought some, from the market stall. It was 35p (yellow, if it matters) and I swear in less than a fortnight, all the verrucas had gone.

This is, of course, ground breaking news because it could bring down the fortunes of various over the counter remedies. I don’t know, perhaps it was fluke, but try it. I’m guessing electrical tape works the best as it’s very sticky and watertight, but all you do is cut a little piece, stick it over the verruca and replace every day/few days.

Let me know how you get on.

A 2014 update: we only use this now for verruca treatment and it’s amazing, especially if you can catch them early. For us it’s effective in less than a week.

Home made Nutella

Not the most amazing pic but it’s real life home made Nutella-type spread in a jar, look!

I know this doesn’t look good; two consecutive posts concerning chocolate.  There is tons of other stuff I could be writing about, I’m just not very fired up about them though. And as this is a blog, and I’m not being paid, it has to be a bit enjoyable for me.

In Italy Nutella comes in glass jars you can use, when you’ve scoffed the lot, as glasses to drink out of. They come in pretty patterns. I think you could get them here at one point too, but I don’t see them anymore.

I used to eat Nutella out of the jar, on a spoon. I can’t believe this now as I find it quite disgustingly sweet. The ads sell it to you as having slow release energy thanks to the 1.5 hazelnut you get in every serving…we have Nutella in our house but I loathe it now. It’s laden with sugar.

So when I saw Annie Rigg’s book about Edible Presents and saw there was a recipe for Chocolate and Hazelnut spread in it, I jumped.

You probably can do this without a food processor, but I don’t.

Makes 1x 450g jar

75g blanched hazelnuts
100g 70% cocoa chocolate
100ml condensed milk
1-2 tablespoons of hazelnut oil
a pinch of salt
3-4 tablespoons of hot water (if you even need this much)

The recipe asks for you to use sterilised jars. I use them straight out of the dishwasher, if it’s good enough for Nigella, it’s good enough for me.

Toast the hazelnuts; you can do this in an oven or in a dry frying pan. Until they’re golden. Cool slightly and then  grind to as smooth a paste as you can get in your food processor.

Melt the chocolate, condensed milk and hazelnut oil, very gently, in a saucepan. When the chocolate has melted and it’s all mixed up nicely, pour this into the food processor, add the pinch of salt (I always use ground up rock salt in sweet things) and blend. Add as much hot water as you need to give it a thick, spreadable consistency. Don’t panic if, like me, you see it has gone really runny. It firms up in the fridge. That said, you shouldn’t overdo it, I’m just saying don’t go into a tizz if you have (you can always use it as super luxurious ice cream topping if it does go wrong).

Spoon into a jar and keep in the fridge. Rigg says it keeps for up to two weeks. I doubt it will last that long.

Now, I didn’t want to interrupt the recipe further up, with my tales of hazelnut essence, but I bought some from Bakery Bits.  I was wary because, unlike the excellent other ‘essences’ I have from there (Aroma Panettone and Aroma Veneziana are exceptional) which have natural oils in them, the ingredients listed seemed decidedly un-natural. Stupidly I thought it was like extract of hazelnut or something (this is probably impossible to do). Anyway, the jury’s out on whether it’s nice or not but my verdict is: disappointing. Its aroma is rather synthetic and artificial. I liked it at first, but you need to go really easy on it as it can become very overpowering; and I’m not sure I’d use it again. My partner’s nose is far more sensitive and he found it overwhelming.

This recipe doesn’t call for essence of any kind, but because I had it I added a few drops – about four. My seven year old loves this spread but says it’s too ‘hazelnutty’ which is probably accurate. I think this essence is good for when you really need to convey ‘this is made of hazelnuts’ without actually adding that many real nuts and that isn’t the case for this spread, or anything I’m likely to make.

This spread is, anyway, delicious and whilst still not a health food, is a damn sight healthier than shop-bought.

Mmmmm. Eat on toast, or on a croissant or straight out of the jar with your fingers.

Pete’s pizza dough

This isn’t sourdough, and it’s a bread machine recipe. But it’s a lovely pizza dough, and one which Pete, my partner, has perfected over the years.

I don’t understand people who ooh-ahh over the fact that we make our own pizzas. It’s simplicity itself and you can make them in advance.

I make these in two Mermaid trays – but I like them thin. If you like your pizzas thick well, I’m not sure I have much to say to you really. Pizzas shouldn’t be thick.

From start to finish you can have pizzas on the table in about fifty-five minutes. The pizza-dough cycle on my bread machine takes 40 mins, then you just roll out, put toppings on and they’re cooked in 8-10 mins. And for those of you who have children, this is a lovely thing to get them involved in.

Here’s what you need (Pete works in ounces, I work in grams, I’ve kept true to his recipe here):

8floz hand hot water
2tablespoons olive oil
12oz of plain white, soft flour (note: not bread flour)
1teaspoon caster sugar
1teaspoon salt
2teaspoons yeast

You put all the ingredients in your bread machine in the order the manufacturer recommends, above is the order I put mine in as that’s what Panasonic recommends. The pizza dough cycle is, as I said, 40 mins long on my machine. (The regular dough cycle is 2.20mins so that should give you an idea, you don’t want a long cycle.)

The pizza dough before rolling

When it’s done, oil a suitable surface (I use a very large chopping board so that I can move it about if need be) and your hands, and take the dough out. Sometimes this dough is really sticky, other times more manageable. It makes for a better dough when it’s stickier (higher hydration) so there is a compensation.

Because I use the dough across two baking trays, I cut mine in half; but if you’re making – say – four round pizzas, cut into four..etc. I’m sure you can work it out..

Roll out the dough, as thin as you can, to fit your tray/tin. If you can do that thing of throwing the dough up in the air to make it thin, great: do teach me how to do it too!

When it’s rolled out to an approximate size, I lay it on the tray (note: I oil the tray and coat it with polenta/cornmeal), rest if for five mins and then stretch it into the corners/sides.

Now you can, at this stage, go straight into doing the toppings and either cook it or put it in the fridge (naked or with all the toppings on, I put mine in naked). You can also freeze it (in which case cook straight from frozen, just give it a few more mins). I cover mine with cling film place one tray on top of another (if no toppings on) to save space in the fridge.

When you’re ready to cook, if you haven’t already, put on whatever toppings you want. For the tomato bit on the top, I use Waitrose Sundried Tomato paste – a tiny amount spread on the pizza base (it’s quite salty so go carefully). Then I put on artichoke hearts, salami slices, olives, ham, mushrooms, mozzarella, asparagus if in season etc. Or just the tomato paste and some mozzarella for those who like it really simple (boring..) Just before it goes into the oven, splash some olive oil on it and cook it for 7-10 mins. My oven is very hot and has a pizza setting, yours might too. You can tell when it’s done as it will have bubbled up and be golden.

Take out and slide onto a chopping board, slice up, eat and feel very virtuous. Pizza doesn’t have to be unhealthy..or at least whilst not pretending this is a health food, it’s as healthy as pizza can be.

La pizza, I put the rocket on after it came out of the oven

The best chocolate ice cream in the world.

There is no easy way – unless you’re a professional food photographer in which case you’d be using anything other than actual ice cream – to photograph chocolate ice cream without  making it look like…something else…
See? Here is the same ice cream but photographed at night, by artificial light after we’d had some. See how glorious moussey it looks? That’s how it tastes if you eat it not long after making it. Even a few days’ later it’s still delicious.

I hesitate not in saying this is the best chocolate ice cream you can get. I mean, very probably my dad’s chocolate ice cream was better. And his chocolate chestnut ice cream was damn brilliant. But aside from that, you can search high, you can search deep but you won’t find a better, simpler, chocolate ice cream recipe.

I know because believe me – credemi – I’ve tried.

And, how sweet that this recipe didn’t come from some vast volume of ice cream recipes. I didn’t steal it from a gelateria, or my dad’s shop. It was in the fold out pamphlet of recipes that came from my Panasonic ice cream maker.

I’ve doubled the quantities, because the original made about two portions’ worth (how is it that doubling it seems to make more than double if you see what I mean?). If you can, make this in the morning for eating in the evening. That way it will have had a chance to set a bit, but not go rock solid. It will never be that good again although of course, like all ice cream, it will keep in the freezer for weeks/months.

This last batch I made was using eggs from our own chickens. Coincidence or not it was the best I’ve ever made. So tasty I wanted to eat the whole lot.

You will need:

4 egg yolks – freeze the whites to make madeleines or macaroons or friands another time
100g granulated sugar
160ml of milk – I use semi skimmed and it’s always been fine
2tbsp cocoa powder – I always use Green and Black’s
100g good plain chocolate – I always use Waitrose Continental  (70%), the packet looks unassuming (black with a vanilla coloured banner across the middle) but don’t be fooled, it’s superb chocolate
240ml of double cream, although I have just chucked the entire 300ml tub in there as this is what Waitrose’s comes in and 60ml of cream left in a tub is of no use to anyone.

Beat the egg yolks and sugar together until pale. Do this in a heat proof bowl or a bain marie. You can do this by hand using a little whisk. Don’t be a cissy. You don’t need an electric whisk.

Mix the milk and cocoa powder together to make what looks like a birruva mess. Add this mixture to the egg mix. Place the heat proof bowl over a pan of simmering water (or put the bain marie on the stove if you’re posh and have one, a bain marie that is). Stir until it thickens.

When it’s done, take off the heat and chuck the chocolate in and stir gently but firmly. You will have at the very least broken this into pieces, or if you can be bothered, cut it into smaller pieces. I never can be bothered and it goes in in big, chunky, pieces and it’s fine. You get the occasional shard that doesn’t melt but I quite like that as it’s a bit choc chippy in the final ice cream.

Put it aside to allow to cool – whilst it’s doing this cover the actual surface with a layer of baking parchment. Because I’m posh, I have ready cut circles for just this purpose. Whisk the cream until it’s thick and stir into the chocolate mixture. Refrigerate for a couple of hours before placing in your ice cream maker.

This is no time to be wailing that you don’t have an ice cream maker. YOu’re not taking this seriously enough. You need one. When it’s done decant into a suitable freezer container and freeze.

Eat with abandon and try to forget about the fact that you don’t have a pension. If you eat enough of this ice cream, anyway, you probably won’t live that long.

Bagels – not sourdough

These bagels are not just not sourdough, they’re made in a breadmaker. Nevertheless, here they are, all blousey and almost industrial compared to my artisan sourdough.

But look: they’re delicious. Nothing at all like bought bagels which may look surgically enhanced but are as interesting as dust to eat (although if you remember that fantastic sketch from Little Britain, dust is a valuable diet food…). The only memorable bagel I ever had out was at the Geffrye museum cafe, I had it with smoked salmon and a very fine cappuccino. A memorable little lunch that shows food doesn’t have to be fancy to be remembered.

So, my bagels. I’ve been making them for years and the recipe is from some bread machine book I had but adapted slightly (in what way I can’t remember now but anyway it works which is what matters). They don’t look pretty – ignore that and just enjoy the taste.

These are excellent for children – they just love them. In which case I make them smaller and end up with 12-16.

For eight large bagels you need:

2 teaspoons of dried yeast
450g strong white bread flour
1 1/2 teaspoons of salt – I grind up Maldon sea salt
1 1/2 tablespoons of sugar – I use caster
230ml water, whatever temperature it comes out of the cold tap.

egg or malt wash – see later

baking tray
clean tea towels
saucepan and slotted spoon

I put it into my bread machine, which is a Panasonic bread machine and the only sort I recommend. Your bread machine may ask for the ingredients to go in in a different order but mine asks for the yeast first. You then select the dough cycle. Mine is 2hrs 20mins long. Be careful not to put it on a short dough cycle (mine also has one for pizza which is 45 mins long) as it won’t work.

In the meantime, get a baking tray

When the dough is ready, you divide it up into how many bagels you want. This mixture makes eight regular sized bagels, but I have made more mini ones. I roll each piece of dough between my palms to make a ball. I rest them for a few minutes (in reality you can start on the first one by the time you’ve done the last one if you follow), then roll them into sausage shapes and loop the ends around. This isn’t a regular bagel shape – none of that perfect roundness – but honestly once baked you won’t care. It’s the best way, I’ve found, of keeping the hole intact.

As you shape them, place each one on a lightly oiled baking tray or one with baking parchment on it – make sure they’re not touching or you’ll have a hard job separating them and they might collapse as you manhandle them. When they’re all shaped, leave them to rise, covered with a dry, clean [why do they always say this, does anyone use a dirty one?] tea-towel ** for about 10-30 mins (30mins if your kitchen is cold, 10mins if it’s warm or you put them in a warm place). There’s a lot of yeast in them so don’t overprove.

**Note here: you can – and I regularly do – also put them, at this stage, into a refrigerator overnight for their rise, and then go straight to boiling them. I think this gives them a nicer flavour and chewier texture and it also means you can have freshly baked bagels for breakfast.

Whilst they’re resting and puffing up, put a big saucepan of water onto boil and preheat the oven to 220C/Gas 7. I use a casserole dish pan which is shallow, but wide. You don’t need the water to be deep deep, as the bagels will float, but if you have a wide aperture then you can get more in at once.

When they’re done and the water is on a rolling boil, put the bagels in to the pan. Unless your pan is a huge paella pan, you will have to do them in batches – that’s fine. You boil them for about 30 secs each side (so turn them over with the slotty spoon). Watch them puff up more. Take them out one at a time with the slotted spoon and place on a clean tea towel to drain them and do the next batch til they’re all done.

Either get a clean baking tray and oil it lightly, or wipe off the last one you used and re-oil it. OR if you’re like me and have one of those reusable baking sheets that you used to prove the bagels on, you just now put them back on them. But either way, place the boiled bagels onto the tray. It’s fine if they touch, because once cooked they’re more stable than at the proof stage, so you can tear them apart. But if you can do them so they don’t touch all the better. Mine are always crammed together as that’s the only way you can get them cooked all in one go and at this stage – i.e. proved and boiled – you don’t really want them hanging round waiting to be baked for longer than necessary.

Once the bagels are on the tray, you’re on the home run. Either make an egg wash of beaten egg, or use this fabulous dried malt extract which I mix up with some water and brush on. You can then either cook the bagels plain or scatter on some sesame seeds, pumpkin seeds, sunflower, linseeds etc.

Cook for 12-15 mins (this is in my oven, yours may differ). They’ll be a lovely dark golden brown when they’re done.
These keep for a day or two but are best eaten on the day of being made and toasted thereafter. They freeze really well – just freeze when cooked to have lovely fresh bagels another day!

The shaping is getting better..

Chocolate Ganache Hot Chocolate

I was going to write about Fruit Leathers aka Fruit Roll ups. But I just can’t be bothered. It’s too cold (at least where I am, which is in Suffolk) to write about blackberries and fruit stuff.

Instead I want to write about hot chocolate.

I’ve never been satisfied with commercially available hot chocolate mixes. My dad, in his coffee shop that he used to have, used to make the most exquisite hot chocolate – made with Cadbury’s Hot Chocolate syrup which you couldn’t buy it in the shops.  Cadbury’s has stopped making it now anyway. My dad would make me a cup of half hot milk with the syrup and half ‘schiuma’ – what you English call ‘foam’. It was the best ever hot chocolate and has never, really, been beaten. I’m guessing that if I tasted it now I’d think it was really sweet. But memories, and all that..

For a long time, in the absence of Mr Cadbury’s syrup, the way I’d make hot chocolate was by heating up some milk with some 70% cocoa content chocolate in it, then whisking it all up. It would be dark, rich and not too sweet.

When I was out and I could get it (and you can’t here in Suffolk, please could you open up a branch Antonio), I’d drink Carluccio’s Cioccolata Fiorentina, which is served in espresso cups and is dark and custard-thick. It’s delicious – I urge you to try it if you are ever in a Carluccio’s. You can buy the powder to recreate this drink at home, but it’s hard to replicate what they do in the shop and to have any hope of success you need to make it in large quantities. Also, don’t look at the ingredients as it will put you off.

But the idea of a small cup of something that really hits the spot appeals. I’ve never been a fan of large, mediocre drinks: small and potent is what I’m after.

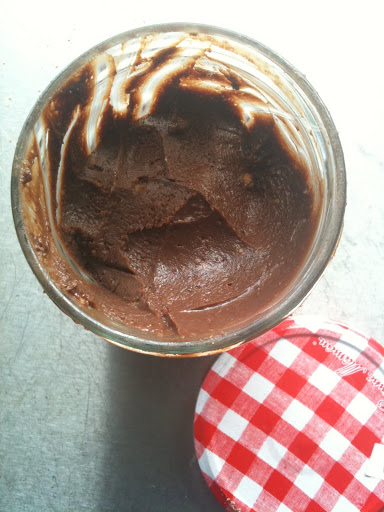
Last year my youngest daughter was baptised. For the cake part of the party, I made lots of chocolate cupcakes using Nigella Lawson’s recipe (Nigella Domestic Goddess p.168). The icing was chocolate ganache – chocolate melted with cream (I don’t really do sugar or buttercream icing, I mean, it’s nice, for the first mouthful but then it leaves you in a diabetic coma). Nigella’s recipe always makes more ganache icing than you could possibly ever pour onto the cupcakes (as it is, the  icing is a good centimetre thick), but I always make the amount she recommends because I live in fear of my cupcakes one day going naked cos I skimped. On this occasion I had plenty left over, so I kept the rest in the fridge.

(For those interested, I topped the cupcakes with an orange wafer rose from Jane Asher. The effect – orange on a glossy dark brown cupcake in brown paper holders – was smart and sleek which is just what I wanted).

As the party wore on, some die-hards remained. It was October and the evening air was fairly fresh and I fancied hot chocolate. I looked at my now set-solid chocolate ganache in the fridge. I wondered what would happen if I melted it again, added some hot milk and whizzed it up with my Aerolatte frother wand-thing.

It made hot chocolate that was so superb that everyone commented on it, even though by that stage they were fairly tipsy and deep in conversation. Everyone said it was the best hot chocolate they’d ever tasted, even those I didn’t get in an arm lock.

I served it in little ceramic cups so you got just a few mouthfuls, which is all you’d want as it’s imaginably rich…

Chocolate Ganache Hot Chocolate

I’ve adapted this from Nigella’s original recipe as otherwise you’d be drinking it for a week…

90g 70% cocoa chocolate (I use Waitrose Continental – which comes in a black, rather unassuming wrapper – it’s very good)
40g milk chocolate (I use Green and Black’s as it’s a higher percentage cocoa than most milk chocolates, but I don’t use its plain chocolate as I don’t like it as much as Waitrose’s)
100ml double cream
a few drops of vanilla extract (about quarter of a teaspoon).
Milk to suit

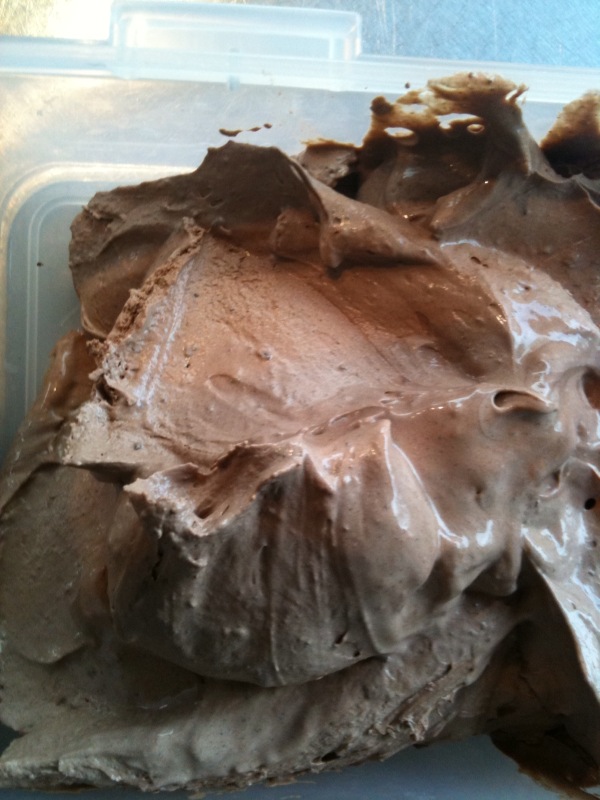
Melt the milk and dark chocolate with the cream. You can do it straight in a pan but you may feel safer doing it in a bowl, above a pan of boiling water. Stir until melted.

You should have a very thick mixture. Warm up some milk separately, then carefully and slowly add it to the chocolate/cream mixture. What you’re aiming to do is loosen up the ganache, but you don’t want to add so much milk that you change it into a really runny mixture. You want to end up with something that’s thick: so thick you could eat it off a spoon, but is still drinkable.

Look, no-one said this was going to be easy. If you want a normal, easy to make hot chocolate drink, get any old shit from the supermarket. This is proper stuff that will warm your body and your soul because it requires a bit of care in the making.

It will be worth it.

If you need to homogenise the mixture, you can whisk it up. I use my Aerolatte whizzer thing.

Serve in small espresso cups. If you don’t want to use all the mixture, just refrigerate it before you add the milk; and if you don’t end up eating it straight out of the fridge with a spoon, just melt it down and add warm  milk and whisk it up like that. This way you can actually make just one cup at a time.

Enjoy it. It’s good.

Mint choc chip ice cream

 Mint choc chip ice cream. I know this isn’t the best picture in the world but it was hard to get a six year old to keep still. It’s presented in a mini cone. 

Here’s the gelato in a bowl. See how delicate the colour is? You can also see I have a LOT of stainless steel in my kitchen!

This is my current favourite ice cream. I would never buy mint choc chip ice cream, because it’s just not my thing, but this home made version is, I promise you, delicious. Unless you really hate the taste of mint, but even then I’d urge you to give it a try.

You can easily leave the chocolate out, but together this makes for a near perfect ice cream in my blog. Which this is.

I tend to make my ice cream in small quantities as the fresher it is, the nicer it is. By all means double or treble the amounts, it’s easy to do. This makes about half a litre, which I find is ample for four greedy people.

375ml of cream and milk. You need cream AND milk. Don’t be tempted to use one or t’other because to make ice cream you need both (i.e. not just this flavour). This has something to do with the way the fats mix up and interact. Don’t ask me cos I never listen properly when my dad tries to explain it to me in the same way that I still don’t really understand about what that white powder is he’s given me to put into sorbets. Because I never have whole milk in the house, but I nearly always have double cream, I tend to use 250ml of double cream and 125ml of semi skimmed milk. If you have more or less of one or t’other don’t worry. I’ve also done it with 300ml double cream and 75ml semi-skimmed milk. You get the idea.
15g mint leaves. Don’t be tempted to use anything else, such as mint flavour. Urgh, forget it.
70g caster sugar
1 egg
50g 70% cocoa chocolate if using

In a blender or food processor (I use the little chopper attachment on my Braun MultiStick thing), blend together the milk, cream and mint leaves. The mint leaves should go down to tiny pieces, but don’t over do it or the cream will curdle (however, you’d have to be really stupid to go this far). Pour the whole lot into a sauce pan, and bring to just below boiling point. Turn down the heat and simmer for 5-10 mins. Don’t let it boil, stir it a bit. You’ll see the cream/milk mixture become infused with the mint colour and it will go to a lovely green colour. However, it won’t be that lurid dark green pretend-mint-colour you get in shop bought ice cream. Think Farrow and Ball hues instead.

Turn off the heat and let it cool for a bit. Now you can either strain it so that the leafy minty bits stay out or leave them in. Try both and see how you prefer it. Obviously one will give you ice cream speckled with tiny green bits, one won’t. Perhaps if you’re adding the chocolate then having the mint in as well might be overkill.

Whilst that’s cooling, get a heat-proof bowl (important) that will fit over the sauce pan (important) and take the whole egg (not just the yolk, which is usual in custard-base ice cream) and whisk up with the sugar until it’s light and thick. Then slowly mix in the (sieved if you’re going to) milk/cream/mint mixture into the egg/sugar mixture. Pour some water into the pan which just had the milk/cream/mint mixture in (doesn’t matter that it’s dirty you’re not drinking it) and place the bowl containing the ice cream mixture on top. The idea is to make custard, so stir as the water underneath boils, and keep stirring until the mixture coats the back of a wooden spoon, which it will do pretty quickly really. Whole process should take about 5-10 mins. Now you’re done, so take the bowl off the sauce pan, let it cool for a few minutes then cover the actual surface with cling film/baking parchment. The reason you need it to touch the actual surface is so a skin doesn’t form.

Let it cool for about an hour, then put it in the fridge. You can keep it for up to 24 hours before making ice cream but once it’s cooled right down in the fridge (say a few hours) then you can whack it in the ice cream maker.

Once that’s churning, chop the chocolate really small. I sort of semi shave it. When the ice cream has finished, you can just stir through the chocolate. The ice cream will be pretty soft still as all ice cream out of an ice cream maker is soft-ish. Either eat it now or put it in a freezer container and let it harden up more for later.

If you want to read about ice cream makers you can do so here.

Lutyens Children’s bench

I recently went to see my friend Susie, who had a really cute miniature children’s bench in her garden, like a scaled down park bench. My youngest loved it and spent many a happy time sitting on it, getting up, sitting on it, getting up.

Susie was also the friend at whose house I saw the fly curtains that I then bought. Nothing like going round to your friends’ houses to nick ideas. Anyway, in this instance, Susie couldn’t tell me where the mini bench was from so I searched on line and asked all my FB friends where they thought I could get one from. The only place I found was Robert Dyas, it says it’s normally £50 but I’ve never actually seen it for sale for that much, it’s always ‘knocked down’ to £30. Now for some reason this seems a lot to me. Further searching showed that at some point, Tesco’s had had one for the knocked down price of £10 but no more. Of course, I loathe Tesco and never shop there on principle unless it has something I really, really want to buy in which case I forget my principles momentarily..

In our garden we have a Lutyens bench, adult sized. So I was really pleased to see a website that makes them in small size too. In the end, this is what I got because it seemed better value for money, even though it was double the cost of the Dyas bench. I bought it with my birthday money, for my girls. I was going to have it engraved with something cheesy but that cost almost as much as the bench again.

Lutyens children’s bench .

The MaltEaster bunny

According to The Grocer magazine, in October 2008, this bunny was launched, by Mars, for the Spring 2009 market.

I never saw it. Did you?

It was/is aimed at the “25-44 year old woman”. That seems improbably precise. Also not true since this is an ideal sweet for children but obviously they can’t say that. It was also backed up by a 1m campaign which was surely a waste of money as I’d never heard of them. But then last year I had just had a baby so maybe was too busy stuffing croissants down my face to notice new chocolate launches.

I’m not a fan of Maltesers. Or I haven’t been since I was about 22. They’re really sweet, although I don’t mind finding one in my Revels. So I wasn’t really ready for becoming addicted to this.

It’s not even cos it’s cute. We have hundreds of feral rabbits in our garden and believe me when I say I’d shoot any one of them without a second thought if I had a gun. Which I haven’t had since I was 18, but that’s another story for another time.

So these bunnies came on display in my local Waitrose just as soon as the December page was turned on the calendar. At first I despaired. Easter egg-type things, already? Then I saw the hot cross buns and realised we really were, fully, on the flight path to Easter. My first Easter confectionery purchase was the two-pack Cadbury’s Caramel bunnies. I like a bit of Cadbury’s Caramel. The bunnies were 59p for two and I like that the damage is limited. By that I mean I’m the kinda girl (unfortunately) that can eat a whole bar of something, (well, up to about 100g, I’m not a total pig, but 100g is easy to consume in a day, especially if you have deadlines to avoid). So something small, treaty, but not diabetic-coma inducing is a good idea for someone like me. Incredibly, one Caramel bunny seems to satisfy me and I even sometimes go as far as sharing/saving the other for my boyfy-husband.

But then, because the MaltEaster bunnies were on special (two for £1) I bought them. They’re not like Maltesers, or whatever it is about Maltesers that I don’t like is remedied with this bunny.

Anyway, the upshot is that you should try them. For one, it’s a chocolate that’s not by Nestle – and that’s getting harder to find. For two it’s nice. For three it’s like a giant, chocolate, jelly baby, albeit a bunny, but you get that moment of indecision where you feel slightly psychopathic as you decide whether you go for the ears or legs first. I always eat the ears first.

I will buy one and take a picture of it, if it can live that long, and put it up later.

Chilly children’s cheeks

I’ve written about beauty products for fifteen years. I’ve always been fascinated by them; where this comes from, I don’t know since my mother (a Napolitan) has never used face cream, even when I’ve given her some. I once gave her something for tired legs which had something in it which was stimulating and reviving, when she still worked in my father’s cafe and after a while she said to me “Annalisa, thata creama you gavea mea, it stingsa my facea.” Then again, I’ve given her a pot of £180 cream for her face that she’s put on her knees. I kinda love that.

Since I had children, and I’ve had two particularly buttery specimens, I’ve realised that although babies are like big balls of juicy fat, as they grow up into little children they get chapped cheeks and lips. The latter especially bad since they constantly lick and bite at their lips.

As this is my first blog about skincare stuff, I need to put in a rider here. No-one is telling you to spend your week’s food shopping budget on a cream, unless YOU want to. Some creams out there are silly money. If you can’t afford them, if you’ve found something that works just as well for less: great. Buy it. But I think you get what you pay for, and this is more or less my whole ethos on spending (not just skincare). I believe in buying well and buying less. I’ve spent more money on various cheap alternatives only to be disappointed. I hate cheap crap.

So. Yes I know. You can’t beat Vaseline, but whilst I find it protective on lips, it’s not particularly restorative. Jo Malone does one of the best lip balms. It’s not cheap, but I’ve had mine for years and as it costs you’re more likely to keep track of it and not lose it. If you think that’s expensive, I’d best not tell you about Sisley’s Nutritive Lip Balm.

This is thick, and works better if you warm it in a pocket before application.

Knowing what to put on a child’s face is a harder option.

Weleda’s Dr Greenfingers used to do a fantastic product called Nose and Cheek Soother that came in a little tube which you could slip into your pocket and apply as you were walking out of the door. Perfect. Why don’t they make it anymore? Who knows.

There is Mama Mio’s Wonder-Full Balm, now renamed with the prefix of OMega. Again it’s not cheap, but nothing I’ve ever found that is, works anywhere near as well and/or smells horrible.

Talking of Vaseline, in a cupboard in northern Italy there is still a round glass jar from my childhood of the stuff. On it there are various glorious illustrations of what you can and can’t do with it, all shown to you by a 1950’s looking housewife.