Category Archives: What’s for dinner?

A simple paella

Spanish folk: don’t judge me too harshly. I know this isn’t authentic. But it’s still delicious.

I first ate paella when I went to Spain with my homegirls, aged 18. What a holiday we had. Insane. Six girls in a non-tourist region of Spain…there was this little restaurant which made absolutely fantastic paella. And chips. The best chips and the best paella. I absolutely adore dishes that you can eat with just a folk, and not have to worry about gristle or bones or fat or nasty bits. Okay so we did have to shell the huge prawns that sat atop their rice deathbed, but stuff like that doesn’t scare me. This recipe doesn’t use shell on prawns so you can sit, cross-legged on the sofa and eat this with one hand, preferably with a fork in it.

Before this, I had never attempted to make paella at home. It seemed so scary, and it involved paella pans that you had to treat with love and care, lest they rust. Then I saw this recipe in Donna Hay’s Simple Dinners and we made it and we loved it. My children aren’t so mad on it, but the beauty of this dish (and oh there are so many beauties to it) is that you can pick out the bits you don’t like and eat those you do.

This is the perfect dish for when you don’t really know what to eat (meat? fish?) and don’t have much time, but still want something relatively healthy and comforting. If you ate everything in it you could get those ‘seafood pie’ mixes from the frozen compartments.  We don’t because my partner can’t eat bi-valves and those things usually have tons of mussels in them. But we did, as sharp eyed readers may note, add squid rings into this one.

Don’t be tempted to use chicken breast meat, it’s all about the tasty thigh meat here.

What you need for four good portions:

1 red onion which you have sliced

1 teaspoon of dried chilli flakes (leave out for those that don’t like it)

1 teaspoon of smoked paprika

Half or so of a chorizo, it really depends how much you like it and what you’ve got

4-6 chicken thighs, de-boned, skin off, made all nice so you can just eat them without fear of scary stuff and cut into bite-sized chunks

250g short grain rice (no expensive paella rice, you don’t need it, but it must be short grain not wild or basmati or anything healthy, save that for another time)

1 litre of chicken stock

A quantity of raw prawns, again depends how much you like them. We use about 150g

A handful of coriander leaves, chopped up

200g or so of cherry tomatoes, halved

Lemon wedges

What you do:

Heat a large, deep non-stick frying pan over a good strong heat. add the onion, chilli if using, paprika and chorizo and cook for 3-5 minutes until it’s all golden looking. Now add the chicken and cook for five minutes, turning it so that all sides get lightly browned. Add the rice and stir until all coated, now add the stock and bring to the boil and cook for ten minutes. Add the prawns and cook for a further five minutes until they are pink and the rice is tender. Serve with the coriander sprinkled on top and the cherry tomatoes and a lemon wedge each.

Roast sea bass, with lovely potatoes and vegetables, all done in one tray

This is a deceptive recipe, taken from the BBC Good Food magazine last year. Deceptive because, despite the relatively simplicity of ingredients, everything mixes together to produce something rather good, rather, as my friend Linda would hate me to say, lovely.

(She is not keen on the word lovely, and now, every time I use it, I think of her and the disdain she must hold me in for not thinking of something better, but, to me, when you need to say something is lovely there is no better word.)

Anyway. The price of seabass doesn’t make this a cheap dish*; nevertheless, what you get is something very tasty and that needs very little further accompaniment, save for some green vegtables. So it’s not the world’s most expensive dish, either, and, I would suggest, you can make this for an alternative to a ‘big roast’ for someone who doesn’t eat meat, or is gluten free, and they wouldn’t feel in any way cheated.

You can, and I have, substituted sea bass for cod – as you can see in my picture where there is a mix of the two – but the bass has the edge here in delicate flavour.

This recipe is for two, but you can double or treble it at will.

300g of red skinned potatoes. Important, the flavour of the potatoes is a valuable scaffold to this dish. Wash and dry the potatoes, you don’t peel them, and then slice them very thinly (don’t be a wuss, you don’t need a mandoline) into rounds.

1 red pepper cut into slices

2 tablespoons of olive oil

1 rosemary sprig, you’re meant to remove the leaves and chop finely. I go into the garden, pick two or three sprigs and shove them in. This does, however, mean that when I made this recently, my youngest asked why I’d put the Christmas tree in the dinner.

2 sea bass fillets

25g pitted black olives, sliced or halved

half a lemon, thinly sliced

basil leaves to scatter (don’t fret if you don’t have them, the dish can survive without)

You need a large baking dish. Note that if you are making this for lots of people, you need lots of oven capacity, and more than one baking tray, as it’s important you space out the potatoes so they crisp up. This doesn’t mean each and every slice needs its own zone, but they shouldn’t be crammed together – gently overlapping is what you’re aiming for. The more crammed together they are, the less the moisture can evaporate and the soggier the potatoes will be. You want something that’s crisp on the outside, soft on the inside and for this to happen the potatoes need space, man.

Oven to 180C.

Lay the sliced potatoes onto the baking tray with the pepper slices. Drizzle over one tablespoon of the oil and scatter over the rosemary, add a pinch of salt and a good grinding (snigger) of pepper. Toss everything together, rearrange so that they take up the maximum amount of tray space and aren’t all bunched together and roast in the oven for 25 minutes. Turn over half way through. If the edges aren’t brown, give it a bit longer than 25 mins.

Then, arrange the fish fillets on top of the potatoes, scatter over the olives, and place lemon slices on each fillet. Drizzle the fish with the remaining oil.

Roast for a further 7-8 minutes and you’re done.

*Waitrose sells frozen farmed seabass fillets for £4.39 for two (at time of going to press).

Pancetta, thyme and chestnut pappardelle

This is a delicious, easy, stand-by meal. The ingredients all have at least a week’s life-span (the majority a lot longer) so you can get them in, and when you want to eat something delicious but fast, you can.

I use fresh pasta for this. Dried pasta has a lower glycaemic index, but there is no greater lie in all the world, than the cooking times advertised on the front of dried pasta packets.

Although chestnuts make it festive, you could cook this at any time of year and if you were to do some prep before hand (not that you really need to) you’d have this on your plate in minutes. It’s a great thing to throw together for friends who you weren’t expecting to stay to lunch/dinner, or when you fancy something really flavoursome and delicate. It’s so much better than you think it’s going to be.

Adapted from Delicious magazine.

Serves 4 for moderate appetites, two if you’re greedy pigs.

Ingredients

300g fresh pappardelle pasta – fret not you can also use tagliatelle or spaghetti or really, let’s face it, any pasta. But pappardelle is a great shape for this recipe. And using fresh just makes the whole thing faster and easier.

1 tablespoon of olive oil (not virgin)

1 onion, finely chopped

200g ready cooked chestnuts, roughly chopped

A few sprigs of fresh thyme, leaves taken off the woody stems

100g thinly sliced bacon, not too much fat on

a garlic clove, finely chopped

200g frozen petit pois. Make sure they are petit pois and not normal peas and you cook from frozen

a jar of 20cl Isigny Creme Fraiche  any other creme fraiche would do but I really love this one and the glass jars make great little storage pots, not least, they perfectly hold one cupcake.

Method

If you are using dried pasta, put it on to cook now because we know those cooking times are all damned lies. If using fresh pasta, don’t put it on yet but have a pan of water boiling away in the background.

Heat the oil in a large frying pan (at the end everything will end up in it) and fry the onion for a few minutes until soft. Add the bacon strips and fry for 5 mins, then add the garlic, chestnuts, petits pois and thyme.

(Put the fresh pasta on to boil for the 3-4 minutes it needs.)

Fry for a further 3-4 minutes. Drain the pasta then stir the creme fraiche through the stuff in the frying pan and finally add the pasta. Season with salt and pepper and serve.


My meatloaf

My mother’s meatloaf is the stuff of legend. In the past, whenever we had meatloaf at my house my children would look up, all eyelashes and downy cheeks and say “is this Nonna’s meatloaf?” and I would have to say that no, no it wasn’t, it was mummy’s. And they would look down and  eat it, making approving, encouraging noises but they would know, and I would know, that it wasn’t comparable. Every meatloaf I’ve tried, until this one, was just not right.

The thing about my mother’s meatloaf is that she minces her own meat, so it’s silky smooth and sublime. I like my meatloaf like I like my sausages: not coarse. I want it to be an easy transaction. And all the meatloaves I’d made before were too coarse, too dry, trying too hard.

Last year I bought Donna Hay’s Simple dinners, from whence this recipe comes.  It’s a great book. Her recipes are genuinely tasty, pretty healthy, made from a clever combination of not too many ingredients and easy to follow. She is, to my mind, just about the best cookery writer of the day (for meals ‘n’ stuff. Dan Lepard is still my man for bread). I’ve adapted it here because I’ve been making this meatloaf for over a year now and I’ve made it my own: I’ve adapted it slightly to suit our needs.

As such, this is now my meatloaf recipe, in that it’s the one I use as my go-to meatloaf recipe. I can’t imagine it will ever be made better by anyone else’s meatloaf recipe. Except, naturally, my mum’s.

(What I also love about it is, if you make this for a Sunday lunch, and it’s very good at Sunday lunch, you can make it in advance or the day before, keep it in the fridge and put it straight in the oven. Just give it 5-10 mins more in the oven at the lower temperature i.e. the first round of cooking.)

This is great served with the usual stuff, but I particularly like it with mash for a real comfort, fork-only meal.

You need:

a packet of thinly sliced pancetta, about 20 slices

110g breadcrumbs

60ml milk

400g rose-veal mince (all veal sold in Europe is non-crated, but I only buy higher welfare British veal, if you are not sure, substitute beef mince)

500g free range pork mince (I never, ever buy any other sort of pork)

1 tablespoon of Dijon mustard

1 large egg

a tablespoon of thyme leaves, stripped from the stem

salt and black pepper

2 tablespoons of maple syrup

What you do:

Oven on to 160C if you intend to cook it straight away. Get a loaf tin which is about 22cm by 8cm and line the bottom with the pancetta (line across the width, not length if you follow). If you imagine that the meatloaf will be turned upside down on serving, this will be the top of it. Don’t sweat it if you don’t have enough pancetta to cover the whole bottom/sides, and ditto if you have a bit too much, I also line the side/sides not just the bottom. If you have very long slices then don’t worry, you can just overlap them when the tin is full of the mince. It doesn’t have to be perfect.

Because I rarely have properly stale bread, and even if I did I hate grating bread (my mum always, always has properly stale bread which she grates), I put some day or so old bread into a food processor and whizz it up. Take it out then pour the milk over it and give it a little stir.

Now, what I do to make it all super smooth is this. I put the milky breadcrumbss back into the food processor with all the mince, the mustard,the thyme leaves and the egg. Add a bit of salt and black pepper. And then I whizz it all in the food processor. It comes out looking like awful meat slurry.

Don’t worry. You know it’s not.

Now, pack this into the loaf tin. It will seem like too much but keep the faith, pack it in, press it down, tuck over any overhanging pancetta slices if you have them. Then, either put in the oven or cover with cling film and put in the fridge for a day or so (obviously not over what the sell-by date of the meat is).

When you are ready to cook it put it in the preheated 160C oven and bake for 30-35 minutes until the meat is just cooked through. (If you’ve had it in the fridge then increase this time to 35-40 minutes maybe a tad longer, use your common sense.)

Now, take it out and onto a baking tray, invert the meatloaf. Obviously the tin will be hot so take care with oven gloves, etc. Onto the inverted meatloaf brush with the maple syrup. Turn oven up to 180C and now bake for 15-20 minutes.

Serve. It’s delicious.


Posh “Pot Noodle”

This isn’t of course, anything like pot noodle. I’m not even sure why I call it that other than, when there are left overs, I put it in a glass Weck jar/pot and it’s so easy to reheat and before you know it you have something ludicrously tasty and nutritious to eat.

My children love this. The original recipe calls for chilli (1 red, sliced), salad onions and pak choi. You can still add the former at the same time you add the star anise, if you wish, and the latter when I add the ‘veg’.

It’s wonderfully fragrant, really amazing smelling, the kind of soupy meal that feels like it’s doing good just by raising a bowl of it to your nose and sniffing it in. If you’re going out for a family day out/walk (or even, you know, by yourself) it’s great to make in advance, stick in the fridge, and within minutes of coming home you can have something to eat.

Its original name is Fragrant Chicken Hot Pot and it’s adapted from a Waitrose magazine recipe from last year.

Serves 4

2 teaspoons of vegetable oil

4-6 free range chicken thigh fillets (or still on the bone see note later) cut into chunks

2 garlic cloves, chopped

4 star anise

1 tablespoon of light brown muscovado sugar

500ml chicken stock

1 tablespoon of fish sauce

Some green veg: spinach or French beans, whatever you like: a big handful.

Two nests of Vermicelli or other noodles (or more than that if you want a more noodley experience)

This is what you do:

Heat the oil in a large saucepan, then fry the chicken for about 10 minutes until browned.

If using whole thighs on the bone (see my note later) do this for the same amount of time but to make sure the chicken is cooked simmer the actual soup for longer than the ten minutes recommended below.

Now stir in the garlic, star anise (and chilli if using). Fry for a couple of minutes, then add the sugar and stir around for a minute or so until melted.

Now add the stock and fish sauce, cover the pan and simmer for ten minutes – fifteen if you’re using chicken thighs on the bone.

Whilst this is simmering, prepare the noodles according to your instructions. The vermicelli nests I use just have to sit in boiling water for five minutes, so are simplicity itself.

Now add any veg you are using and cook for a further 2-3 minutes, depending on what you are using. Taste and add more seasoning if needed (I never need to). Serve! It’s delicious. Any left overs can be stored in the fridge for a day or two and just reheated well making for a really lovely, quick, meal.

A note about the chicken. Ready filleted chicken thighs make this more expensive, but easier. I tend to use thighs on the bone with the skin on. You could either skin and fillet them before cooking or, what I do, is just take the skin off (otherwise it makes the dish way too fatty) and cook the thighs on the bone. I think it also adds to the flavour. Then when cooked, I take the chicken out of the stock (whilst the veg are cooking, say) and take off the meat whilst trying to not scald my fingers. This is also a good way to make sure the chicken is cooked as chicken thighs vary in size and you need to be sensible.

Because I make this to last over two meals, I can get away with just taking off the outer meat to get a meal ‘for now’ and then when the meat has cooled down, I strip it all off the bone, add it to the broth and then store ready to go, like that, in the fridge.

A very good shepherd’s pie for when the weather’s bad.

I cut this out of the Independent magazine last year. It’s called Bill’s Shepherd’s Pie, but I’m afraid I know no more than that. It seems a convoluted way of making a shepherd’s pie, but you need to trust me when I tell you that it’s very very good. Leftovers seem even better, of course. And the whole thing freezes beautifully for resuscitation just when you need it.

It doesn’t have a mash topping – gasp – but chunky potatoes on top. Try it. I don’t make shepherd’s pie any other way now.

It apparently serves four, but this really depends on the size of the lamb shanks. I find it generally serves at least six, with left overs.

2 tablespoons of olive oil, plus a little extra

1 large carrot, chopped up into the usual sized pieces

1 onion, same

2 celery stalks chopped up fine

3 tablespoons of plain flour

200ml of dry white wine, or vermouth, or low alcohol cider (these latter two are what I also sometimes use)

500ml chicken stock, I tend to freeze my stock in 600ml portions so I add 600ml of stock and 100ml of vermouth/white wine

3-4 lambshanks

4 sprigs of thyme

800g-1K Maris Piper or other floury potato, these you need to have peeled and cut into chunks that are, you know, chunk sized. We tend to use 1kilo as a) we are quite partial to a potato and b) the dish I use is quite large.

A handful of parsley leaves, chopped up

The zest of 1 unwaxed lemon

2 garlic cloves, crushed or finely chopped

Now, this is what you do. I have given the conventional method first, then the slow cooker method.

You preheat the oven to 160C. You heat the oil in a large casserole dish – with a lid which you’ll need later – that can go in the oven.

Into this large casserole dish you add the chopped up carrot, onion and celery and season with salt and pepper (be aware the stock cube may also be salty). Cook until soft, about seven minutes.

Now add the flour and stir around and cook for a minute or two. Now you add the wine/vermouth/low alcohol cider, stock, shanks and thyme and bring it to the boil.

No, you don’t have to brown the shanks first.

Now cover the casserole and put the whole lot in the oven for two hours *, until the meat is tender and falling off the bone. Take it out, put it to one side for a moment, and turn the oven up to 200C.

*set a timer for about twenty minutes before times up, and put the potatoes into salted, boiling water for 20 minutes, until very tender. Drain then return them to the pan and add half each of the parsley, lemon zest and garlic. Add salt and pepper to taste and stir in a glug of olive oil, breaking up the potatoes a bit as you go. You want to rough them up a bit in an ‘Eastenders” way, not obliterate them entirely.

Lift the lamb shanks from the casserole dish, trying hard not to think of them as baby sheep’s legs. Let them cool so you can handle and then take the meat from the bones (if the meat didn’t fall off when you lifted the bone up) and break the meat up into bite sized chunks with your hands.

Return the chunks to the casserole it cooked in and now stir in the remaining parsley, garlic and lemon zest and simmer for five minutes or more until the sauce has reduced (you may need to do it for longer than five minutes). Now spoon the whole meat-sauce lot either into individual dishes, or into a suitable oven proof dish. Top with the roughed up potato chunks and bake for 20 minutes in that 200C oven until you get lovely golden bits.

Slow cooker version

I am presuming your slow cooker also has a saute function, if it doesn’t then do that bit in a conventional pan.

Put the slow cooker onto saute function and put in the olive oil. I put mine on low. Now add the chopped up carrot, onion and celery and season with salt and pepper (be aware the stock cube – if using – may also be salty). Cook until soft, about seven minutes.

Now add the flour and stir around and cook for a minute or two. Now you add the wine/vermouth/low alcohol cider, stock, thyme and lamb shanks. Don’t worry if the lamb shanks stick out a little, just try to submerge as best you can. If you cook this for a very long time (see later) then you may want to lift the lid and turn them round so that they all get a go in the juice.  Bring the heat up (still on saute setting) so it starts to bubble.

(No, you don’t have to brown the shanks first.)

Now switch off saute function, select slow cooker mode low (or medium or high if you don’t have too long) close the lid, and set for as long as you’ve got. I have done this in two 12 hour batches so that the lamb cooked for 24 hours. But you can do it on high for two hours or medium for four etc. I prefer a long, slow cook for this.

When time is up, lift the lamb shanks out – they fall apart – and put in a separate dish. Leave the juice in the slow cooker for now. Skim off the fat – there may be lots – and discard into the bin (not down the sink! We don’t want fatbergs).

Carefully take all the meat off the bones and separate out from any undesirable bits, tear the meat up into bite-size chunks and put back in the slow cooker. When all is done add half the parsley, lemon zest and garlic (the other halves will go with the potatoes) into the meat ‘n’ ting.

Now select the reduce function (again if you don’t have it at this point decant into a large pan) and reduce down for about 20 mins. It’s at this point I start attending to the potatoes, but you can do it before if you are more co-ordinated.

Now preheat the oven to 200C.

Put the potatoes into salted, boiling water for 20 minutes, until very tender. Drain then return them to the pan and add the other half each of the parsley, lemon zest and garlic. Add salt and pepper to taste and stir in a glug of olive oil, breaking up the potatoes a bit as you go. You want to rough them up a bit in an ‘Eastenders” way, not obliterate them entirely.

Pour the bite-size meat and juice into your casserole dish for the oven and top with the potatoes and cook for 20-25 mins until potatoes are tender and golden (if you have a fancy oven that can put the heat on the top only you can give them a blast for the last few minutes).

**Eat with some fortifying green veg and serve with my chocolate sponge and chocolate custard recipe.

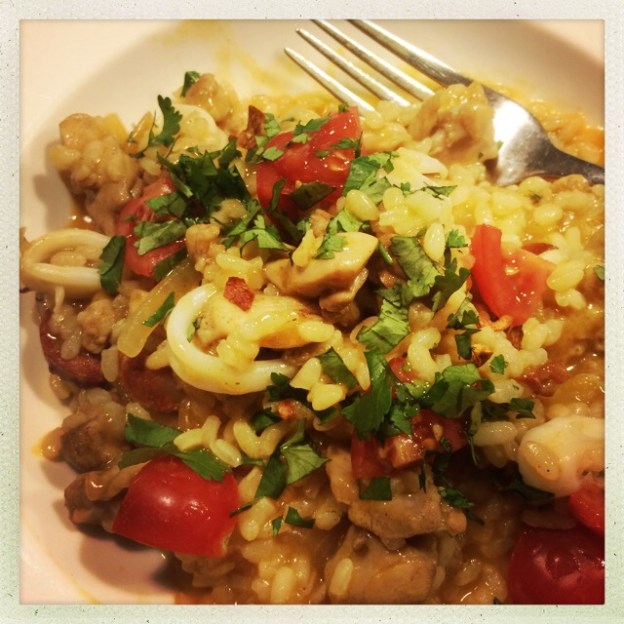
Apologies for the picture. It’s not easy taking one that looks really good, but don’t let it put you off. At least my pics aren’t as bad as Martha Stewart’s photos of what she’s eating.

Soy and ginger chicken

This is a fantastic recipe. So easy to put together, so tasty and pretty healthy too. It’s from the excellent Donna Hay magazine. I’m sure you could make it with cheaper chicken cuts too, like thighs or drumsticks. You may need to give it a bit longer if so.

I found that my chicken was done but the sweet potatoes weren’t quite as frazzly as I wanted them, so I took the chicken out and turned the heat up for another five minutes. You could easily prep it when you’re not so busy and put it all together at the last minute. Which means you’ve pretty much got dinner on the table in 25mins. Even if you don’t, the most tiresome thing is the peeling of the sweet potatoes. I served this with wilted spinach. Serves four.

for the marinade

60ml soy sauce

finger’s worth of fresh ginger, peeled and grated or chopped finely

2 cloves of garlic, crushed or finely chopped. I HATE garlic crushers so I chop mine

60ml of vegetable oil

2 teaspoons of caster sugar

the rest of it

4 x chicken breasts with skin on or other chicken pieces

The recipe calls for 600g sweet potatoes, scrubbed clean but unpeeled and thickly sliced. I only used two for us (four of us), peeled them and sliced into thin wedges

1x 400g chickepeas, drained, rinsed

sea salt and black pepper, natch

A cup of chopped mint leaves – save this til last

Green stuff to serve

Preheat oven to 220C if you’re going to cook this straight away. Place the marinade stuff in a jar and mix together.

Place the chicken, sweet potatoes and chickpeas in a large baking tray. Drizzle half the marinade over the top and season with salt and pepper. Roast for about 20mins or the chicken is cooked and the potatoes are as you like them.

Now, add the mint to the rest of the marinade, mix together and pour over just before serving.

Delicious.

Polenta, that which binds us to the stove.

So. My dad is from the north of Italy. Parma. Yes where parmesan comes from and Parma ham, which obviously we just called prosciutto crudo (‘raw’ ham, as opposed to cooked ham: ‘prosciuto cotto’). And polenta is a big thing up there.

I’ve never made polenta. We always have some in the house, but I just sprinkle it onto trays before I make sourdough bread or pizzas. I love it though and far from being the peasant food of yore I see it as a real treat. Today, I saw this recipe from Angela Hartnett. Chard with polenta and blue cheese.

Looked nice. Looked easy. Looked warming.

“Cook the polenta according to packet instructions,” says Harnett, after you’ve added the milk and butter she recommends “the coarser type takes longer – about 20 minutes compared to five – requires more attention and stirring, but in my opinion is far better.”

Waitrose sells a polenta that is £5 for a bag. But hey, I thought, it’s the main component of the meal, I’ll get it. Bound to be nicer. Organic. Nice bag, from Italy.

What could possibly go wrong?

Lots. I’m not going to tear apart a recipe written by a Michelin starred chef, because I haven’t made it and if you make it with the readily available polenta it’s probably delicious and entirely do-able. I’ll never know. What I can tell you is that the polenta I bought – the lovely old fashioned kind – requires 90 minutes NINETYFUCKINGMINUTES of cooking. And it sucks up the liquid Hartnett tells you to put in within five seconds.

I rang my mum. This couldn’t possibly be true. She talked me through how you cooked polenta. You boil the water until it’s really angry boiling, put some oil in, then you sprinkle in the polenta and stir. If you get lumps in it at this stage, they never come out. Then she regaled me with tales of how in the old days, you had to cook it for two hours! And stir it continuously because otherwise it lumped up and if it lumped up at, say, the last moment, it was as if those preceding 119 minutes of stirring had never happened. She said this with a laugh as if she were telling me about how people used to send telegrams and could now just pick up a phone.

“I bought polenta that takes 90 minutes to cook” I told her.

“Whya didn’ta youa buy the quicka cooka polenta Annalisa?” she said, incredulous, quite rightly thinking what was the POINT of progress if her daughter had just spent so much money to go back in time, and not in a good way. Not to see Jesus and find out if he was, as I have always suspected, married. Or shoot any number of dictators or find out what happened to Lord Lucan. But to root myself to the spot for an hour and a half, stirring, have I mentioned, continuously.

I had no answer. I had created my own ball and chain.

As regular readers of this blog will know, I am no slackard in the kitchen, but this was insanity. The fury of generations of Italian women before me welled up. (No wonder women didn’t have bingo wings back then. Stirring polenta for ninety minutes is a serious work out.)

My mum gave me this advice: “Just stirra it for as longa as you can stand it, then put itta in a tray, leave it and cooka it in the oven or slicea itta up and fry it.”

And this is what I’ve done. I’ve rebelled.

Be warned people, if you buy this polenta be prepared to spend 90 minutes chained to the hob. If you hate someone, buy it as a present for them.

Flatbreads, can also be used to make very fine chicken wraps

I LOVE these. I love them just as they are, sprinkled with some olive oil and salt. But you can also make them go really crispy and use them in dips. Or with Indian food (sorry I don’t know how authentic that is). But in our house, they are  mostly used to make wraps.

Wraps are great things. You can buy them ready made in the supermarket but have you ever read the ingredient list? Horrifying. So we make our own. They are easy, so easy my nine year old makes them. Granted the rolling out and cooking them takes a bit of confidence and practice. But not much. Just remember not to muck about with the dough too much at the end because the more rested the dough is the stretchier you can make the wraps. If you’re finding it too hard to roll them out, give them a rest for five minutes and go back to them (careful if you’ve put the frying pan on to warm up!). This shouldn’t happen however, unless you’ve panicked and tormented the dough too much. That said, if you let it relax too much, it’ll be really stretchy and difficult to handle. Now I’m talking too much and you’ll think this is hard. It isn’t.

You need:

250g plain flour – not strong

a teaspoon of sea salt ground up in a pestle and mortar

150ml warm water

1 tablespoon of olive oil (not virgin)

Put the oil in the water and pour over the dry ingredients. Or just mix them all together as we frequently do, use a fork for the last bit. It will make a sticky dough. When it’s all together let it rest for ten minutes.

Then, turn out onto an oiled chopping board or surface. Knead gently for ten seconds. Leave for ten minutes under an upturned bowl. After ten minutes, knead gently for ten seconds again. Leave for ten minutes.

I think you know what’s coming up next? Knead for ten seconds, then leave it for 15 minutes or even a bit longer. When you’re ready to go put a large, heavy based frying pan (I use a cast iron skillet) on a hot heat. Cut a bit of the dough off, roll it into a ball and then roll it out onto a lightly oiled surface until it looks like, you know, a wrap shape sort of. If you make it too thin once it’s cooked it will go brittle and break, too thick and it will be a bit doughy but experiment with what works.

Put the wrap into the pan – no oil, nothing – and after about a minute, check underneath. You’re aiming for cooked brown spots as in the picture. Flip over and cook until the other side is like that too. Sometimes they puff up beautifully, other times not. Whilst you cook the others place them under a clean, damp tea towel. Very important or they’ll go cold and brittle.

Use as you wish. I make little bowls of shredded chicken, salad, julienned carrots (get ME) for my children to serve themselves and then roll it all up in the wrap to eat in front of The Simpsons.

This makes about eight wraps.

Variations: you can add half wholemeal and half white (always plain flour, not strong), you will need to add a touch more water. These are still really nice but I find they take a bit longer to cook. You can also just halve everything if you’re cooking for just a couple of you.

Poor man’s roast chicken

This recipe was one of those happy mistakes. Except I don’t, now, remember what I was trying to do that I erred at.

The reason it’s called poor man’s roast chicken originally came about because this isn’t a whole chicken dish, but one made of pieces and I thought that looked like a poor man’s version of a roast chicken dinner. But given that, these days you can often buy fairly cheap whole chickens, even in posh stores like Waitrose, and chicken pieces aren’t as cheap anymore, I’m not sure that still holds true.

However, it also conveniently covers up a slight, controlled fear I have of cooking whole roast chickens. Even though they were one of the first things I learned how to cook, as a child. When my mum was at work, I’d quite often start the dinner off and it was usually either roast chicken or bolognese. I’m also a bit scared of roast chicken because I never really know when it’s done (my mum was always home for that bit). If you overcook it it’s awful and like eating the contents of your shredder, undercook it and everyone dies. Plus I really HATE carving up a cooked chicken or jointing up a raw one.

So I always buy chicken pieces if I can, even though my partner always, always says “but you can buy a whole chicken, it’s better value and I’ll joint it for you”. This is a nice gesture, isn’t it? Utterly lovely. But it makes me feel wretched because I feel at once dependent and useless. Which is a hideously bad combination for me, like smocks and dirndl skirts. So when he is away, I rebel and BUY CHICKEN PIECES.

Thighs are best for this recipe because they are the tastiest meat I think. They are also not mentally expensive. But whatever you use, you do need chicken pieces with bones in. Leave those breasts for something else.

This is what you do. There are no exact measurements, sorry. Today I used six thighs and this is what I did.

Get a roasting tray with sides. The idea is to have just enough room for the meat, so not too big, otherwise you need to use a bucket load of stock. Now, put the meat in and then some lengths of carrot and celery. Over the top, pour about half a litre of stock made using a stock cube. Stock cubes scare me (there does seem a high level of fear in this post doesn’t there?), so I always, always buy organic ones, even though we’ll probably discover, in time, that they contain MDF dust. You want enough stock so that it comes about half way up the chicken pieces, no more. The idea, you see, is to keep the chicken moist. As it cooks, the stock renders down, and the whole thing goes really wonderfully concentrated.

Put it in the oven, uncovered at 200C on FAN. You want the stock to evaporate. The other beauty of this dish is that you really don’t have to be madly accurate about timings and I never am. I probably cook it for about 60 minutes, maybe even longer (don’t tell Heston). You will need to turn the chicken pieces regularly, so set a timer, and each time you do, baste the chicken. Ideally, you cook this until the stock has rendered down to a slick at the bottom of the tray – see pic above – but you may need to use your common sense here. If the chicken is starting to desiccate, you know, stop before this. But this is why you don’t want to put too much stock in.

Now, if you’re serving this up as roast chicken, serve up a piece per person or whatever. If you’re going to use the chicken for sandwiches or wraps, then take the meat off the bone, and throw the discarded bones, skin etc in a pan with whatever’s left in the roasting tin: carrot, celery, the almost not there anymore stock juice. Add about 500ml of water and simmer for about two hours. To give it even more oomph, I put in half a stock cube.

Even if you serve it up as roast chicken, when people have finished eating put all the detritus in a pan to make stock as above. And the stock you get from this is glorious stuff. However, if you serve this up as a roast chicken dish, back up a bit. When you take the chicken out of the roasting tin and you leave behind the cooking juices/carrot/celery, put the roasting tin on the hob, add a bit of water to loosen if up only if you need it, but then swirl everything around, mashing the carrot and celery up as you go. When it’s all bubbly, take off the heat and put through a sieve and serve this as gravy. It’s delicious (put through a fat separator jug if you want, so you take off the fat).

Chicken done like this is so easy and really, really tasty. It probably has posh, kennel name. I don’t know what it is.