Pete’s pizza dough

This isn’t sourdough, and it’s a bread machine recipe. But it’s a lovely pizza dough, and one which Pete, my partner, has perfected over the years.

I don’t understand people who ooh-ahh over the fact that we make our own pizzas. It’s simplicity itself and you can make them in advance.

I make these in two Mermaid trays – but I like them thin. If you like your pizzas thick well, I’m not sure I have much to say to you really. Pizzas shouldn’t be thick.

From start to finish you can have pizzas on the table in about fifty-five minutes. The pizza-dough cycle on my bread machine takes 40 mins, then you just roll out, put toppings on and they’re cooked in 8-10 mins. And for those of you who have children, this is a lovely thing to get them involved in.

Here’s what you need (Pete works in ounces, I work in grams, I’ve kept true to his recipe here):

8floz hand hot water
2tablespoons olive oil
12oz of plain white, soft flour (note: not bread flour)
1teaspoon caster sugar
1teaspoon salt
2teaspoons yeast

You put all the ingredients in your bread machine in the order the manufacturer recommends, above is the order I put mine in as that’s what Panasonic recommends. The pizza dough cycle is, as I said, 40 mins long on my machine. (The regular dough cycle is 2.20mins so that should give you an idea, you don’t want a long cycle.)
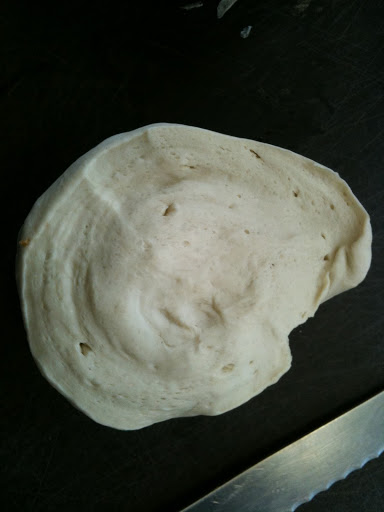
The pizza dough before rolling

When it’s done, oil a suitable surface (I use a very large chopping board so that I can move it about if need be) and your hands, and take the dough out. Sometimes this dough is really sticky, other times more manageable. It makes for a better dough when it’s stickier (higher hydration) so there is a compensation.

Because I use the dough across two baking trays, I cut mine in half; but if you’re making – say – four round pizzas, cut into four..etc. I’m sure you can work it out..

Roll out the dough, as thin as you can, to fit your tray/tin. If you can do that thing of throwing the dough up in the air to make it thin, great: do teach me how to do it too!

When it’s rolled out to an approximate size, I lay it on the tray (note: I oil the tray and coat it with polenta/cornmeal), rest if for five mins and then stretch it into the corners/sides.

Now you can, at this stage, go straight into doing the toppings and either cook it or put it in the fridge (naked or with all the toppings on, I put mine in naked). You can also freeze it (in which case cook straight from frozen, just give it a few more mins). I cover mine with cling film place one tray on top of another (if no toppings on) to save space in the fridge.

When you’re ready to cook, if you haven’t already, put on whatever toppings you want. For the tomato bit on the top, I use Waitrose Sundried Tomato paste – a tiny amount spread on the pizza base (it’s quite salty so go carefully). Then I put on artichoke hearts, salami slices, olives, ham, mushrooms, mozzarella, asparagus if in season etc. Or just the tomato paste and some mozzarella for those who like it really simple (boring..) Just before it goes into the oven, splash some olive oil on it and cook it for 7-10 mins. My oven is very hot and has a pizza setting, yours might too. You can tell when it’s done as it will have bubbled up and be golden.

Take out and slide onto a chopping board, slice up, eat and feel very virtuous. Pizza doesn’t have to be unhealthy..or at least whilst not pretending this is a health food, it’s as healthy as pizza can be.
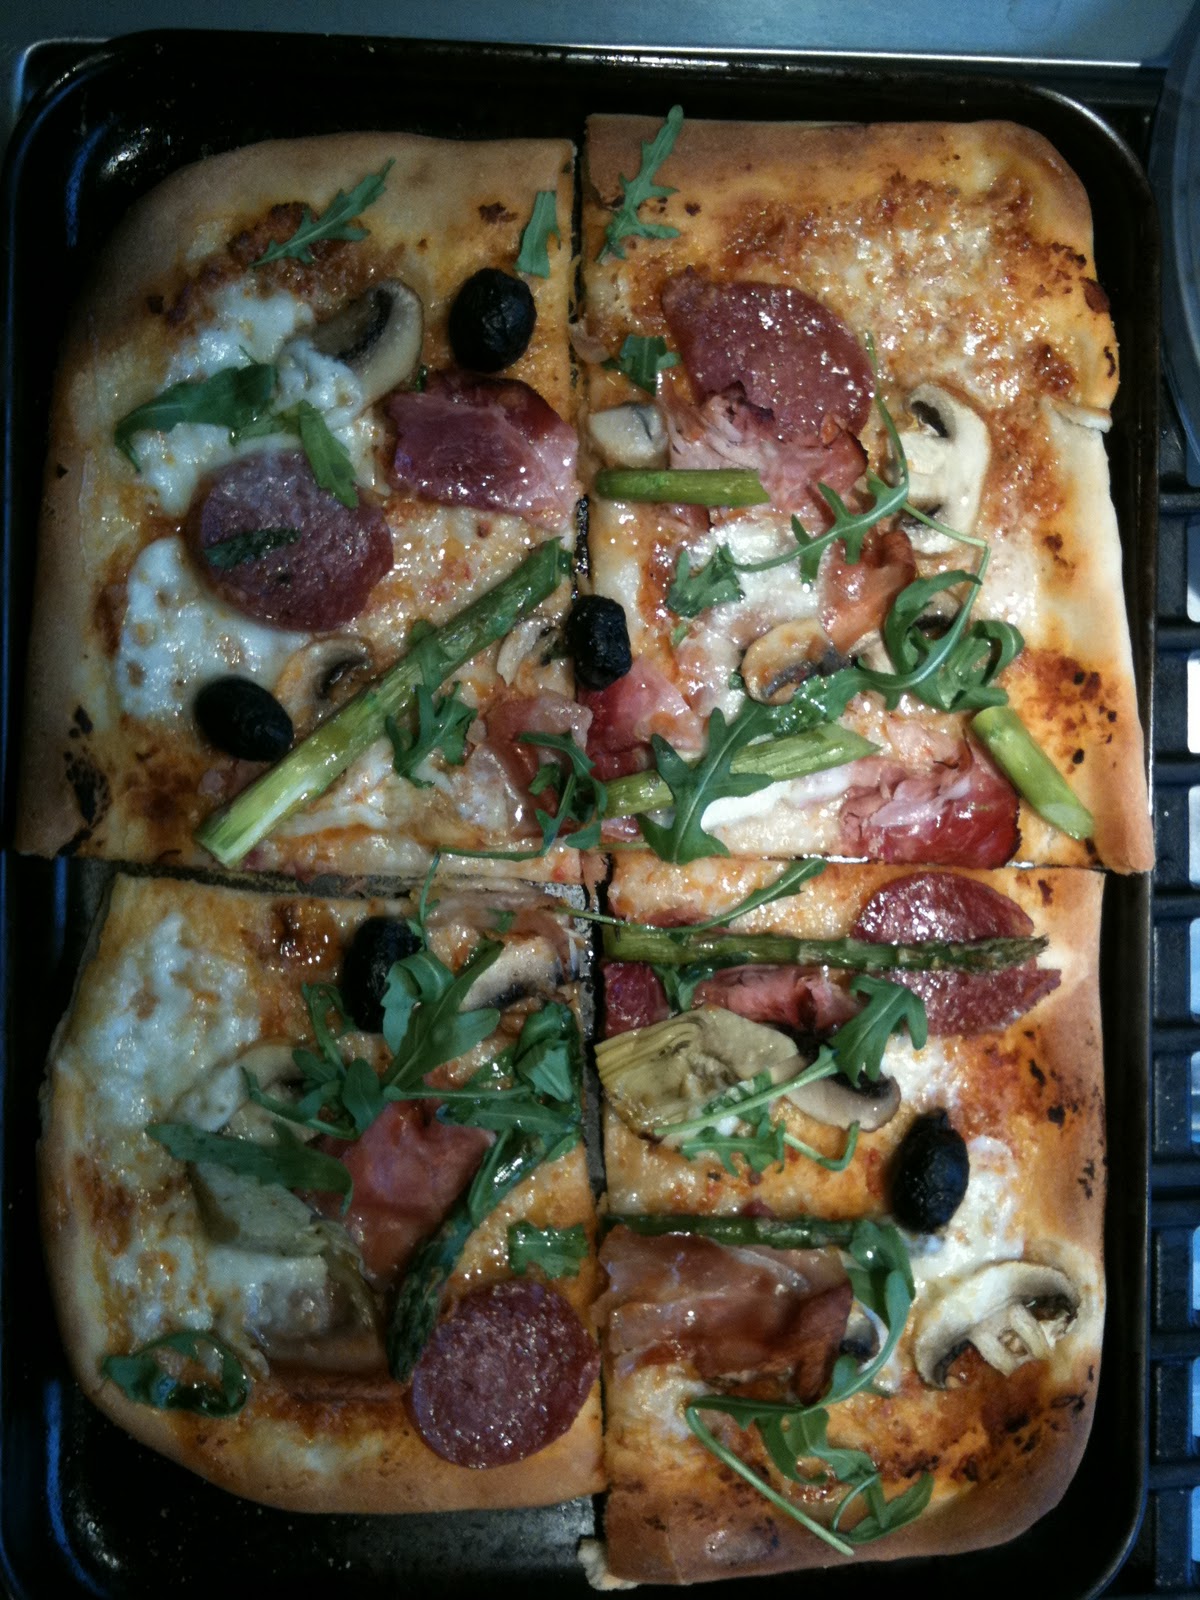
La pizza, I put the rocket on after it came out of the oven

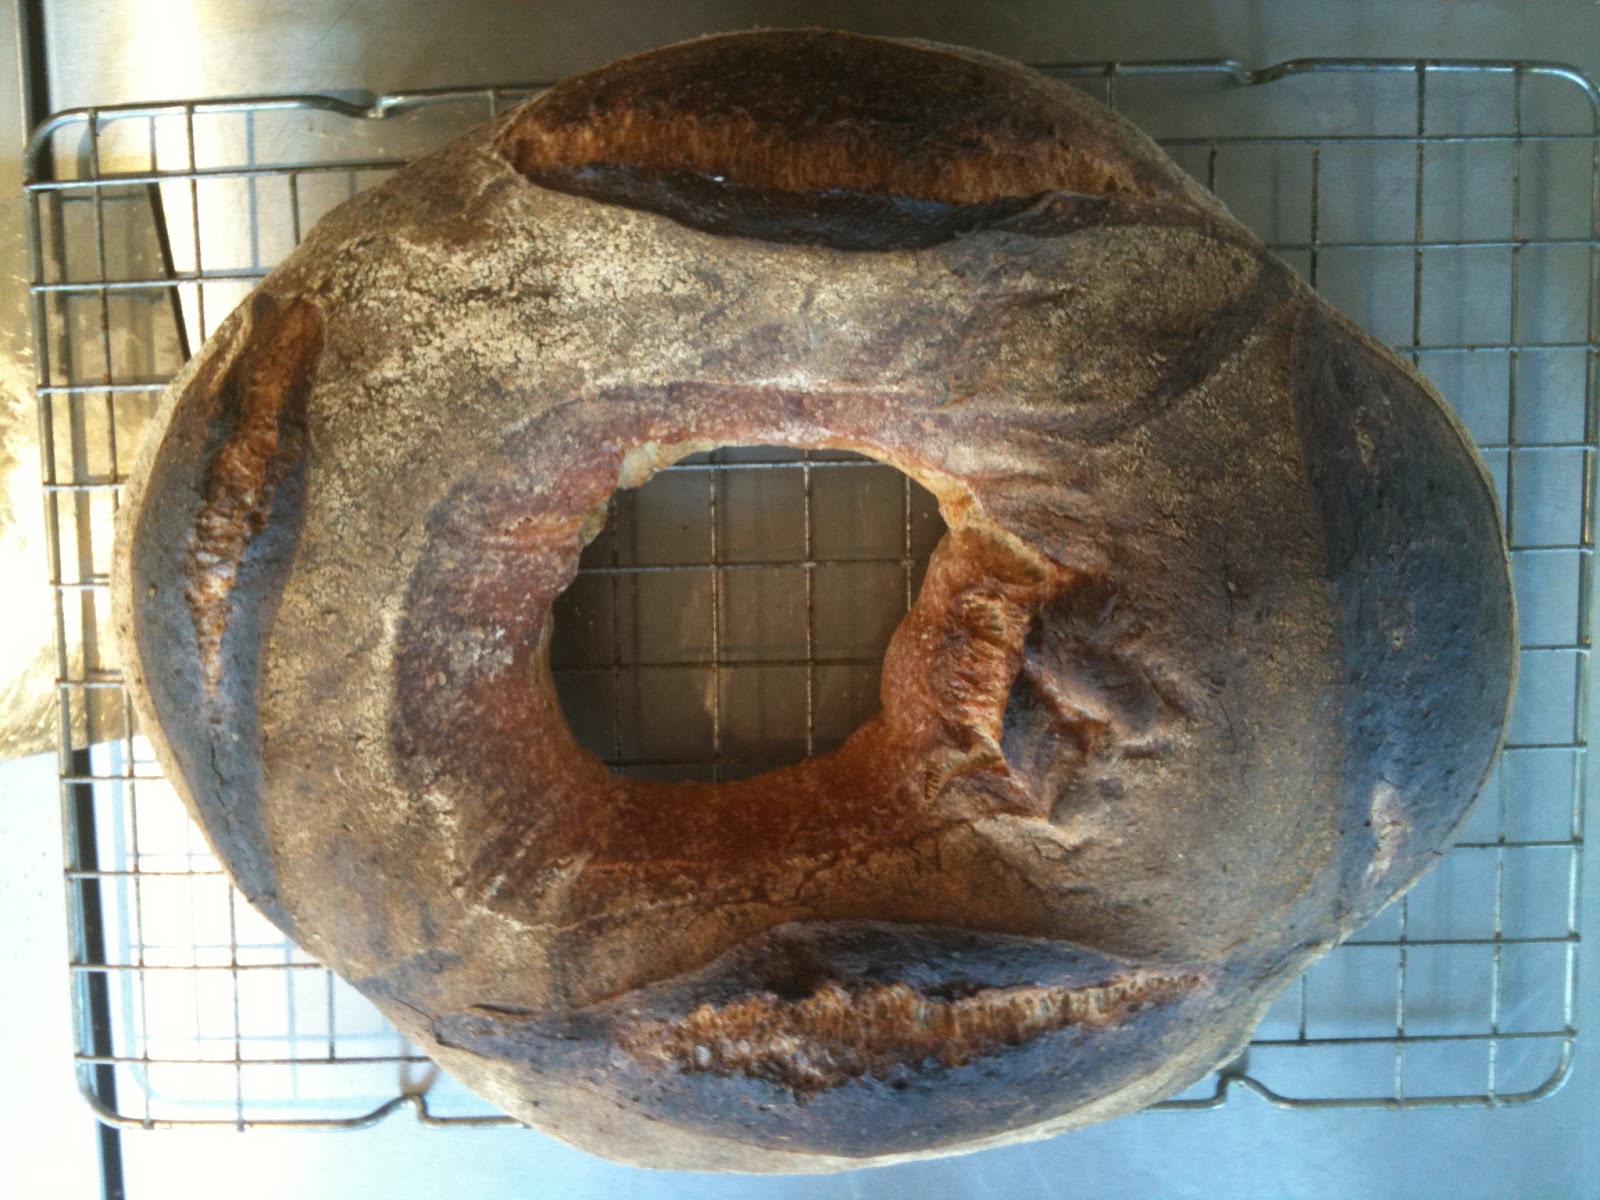
Le Couronne, or the loaf with the hole

I got really excited when Patrick from Bakery Bits, tweeted to say he had a new banneton in stock in a couronne, or ring shape. It was in cane, which I’ve never used before (all my bannetons are wicker and lined in linen).

I’ve a healthy collection of bannetons that I’ve built up over the last year, but in baton and round shapes. I really fancied a couronne shaped one. (I’ve been obsessed with round bread with a hole in it since my purchase of a Tortana from Flour City.)

So I bought one, and also took the opportunity to replenish my Aroma Panettone, which immediately transports me back to my childhood (you seen that scene in Ratatouille where whathisface the restaurant critic, goes back in time to his mother’s kitchen? That’s what this does to me).

Anyway, I was EXCITED about it. Made a batch of my every day bread, put it into the fridge for a retarded proof and got up in the morning.

First thing: the dough stuck to the banneton (the middle bit is wood). Not a good start. I slashed and cooked it and the hole completely closed up so that I ended up with a round loaf with a tiny dimple.

Not good.

I emailed Patrick. He recommended rice flour to aid non-stick (I had used rye). That remedied the sticking situation, but I just couldn’t get the hole to keep. (Sadly no pictures of bread proved in this banneton as I just never had a camera handy.)

When you cook bread, you want it to rise, but you can’t choose where it rises, so any hole you make (like in bagels) has to be bigger than you want it to end up with. But I just couldn’t get the hole to stay.

I knew the fabulous (and far more experienced baker than I) Joanna from Zeb Bakes had also bought one, so I asked her what she thought. She was also struggling with it. We both thought the middle bit should be thicker.

Patrick was v.helpful and kept going back to the manufacturers who said it should work. But it didn’t. Patrick got another banneton in, this time in linen lined wicker. He sent it to me free of charge. This banneton just looked much better, the middle bit was thicker and the whole shape was more promising.

It worked much better, too. Here is the loaf I made that first time. I did however, enlarge the hole once it was on the baking tray, which isn’t for the nervous. I haven’t fully got the hang of slashing the dough however (any thoughts anyone?) as I find it quite hard to make slashes on such a small ring of dough, such as it is before it puffs up.

First loaf using linen-lined wicker couronne banneton. V.nice.
Second loaf in the couronne, this was a white dough

Second time I made a white loaf but was more gung-ho didn’t enlarge the hole on the tray. This is what happened:

Hmm.

The third time I tried sticking a muffin ring in the middle. This did indeed hold the middle open, but a) the middle didn’t crust up properly and b) the ring sort of got swallowed into the bread. It was fine, and a really great loaf. I’m going to carry on experimenting with a tin in the middle and maybe even – gasp – put ice cubes in there. Just till the bread has developed a crust and then remove the tin.

In the meantime, if you’re careful you can get a really nice ring shape, but you need to play around with the dough on the tray. I do love the couronne bread shape however as you get maximum crust, not great for children who are fussy about these things, but good for me, who does.

Any more experienced bakers out there with any tips, I’d welcome them. Grazie!

The Kindle

When the Kindle launched in the UK last September, I had one on pre-order. I quietly fretting for days about its purchase, feeling distracted with the guilt of it, and then cancelled it. But the urge never went away.

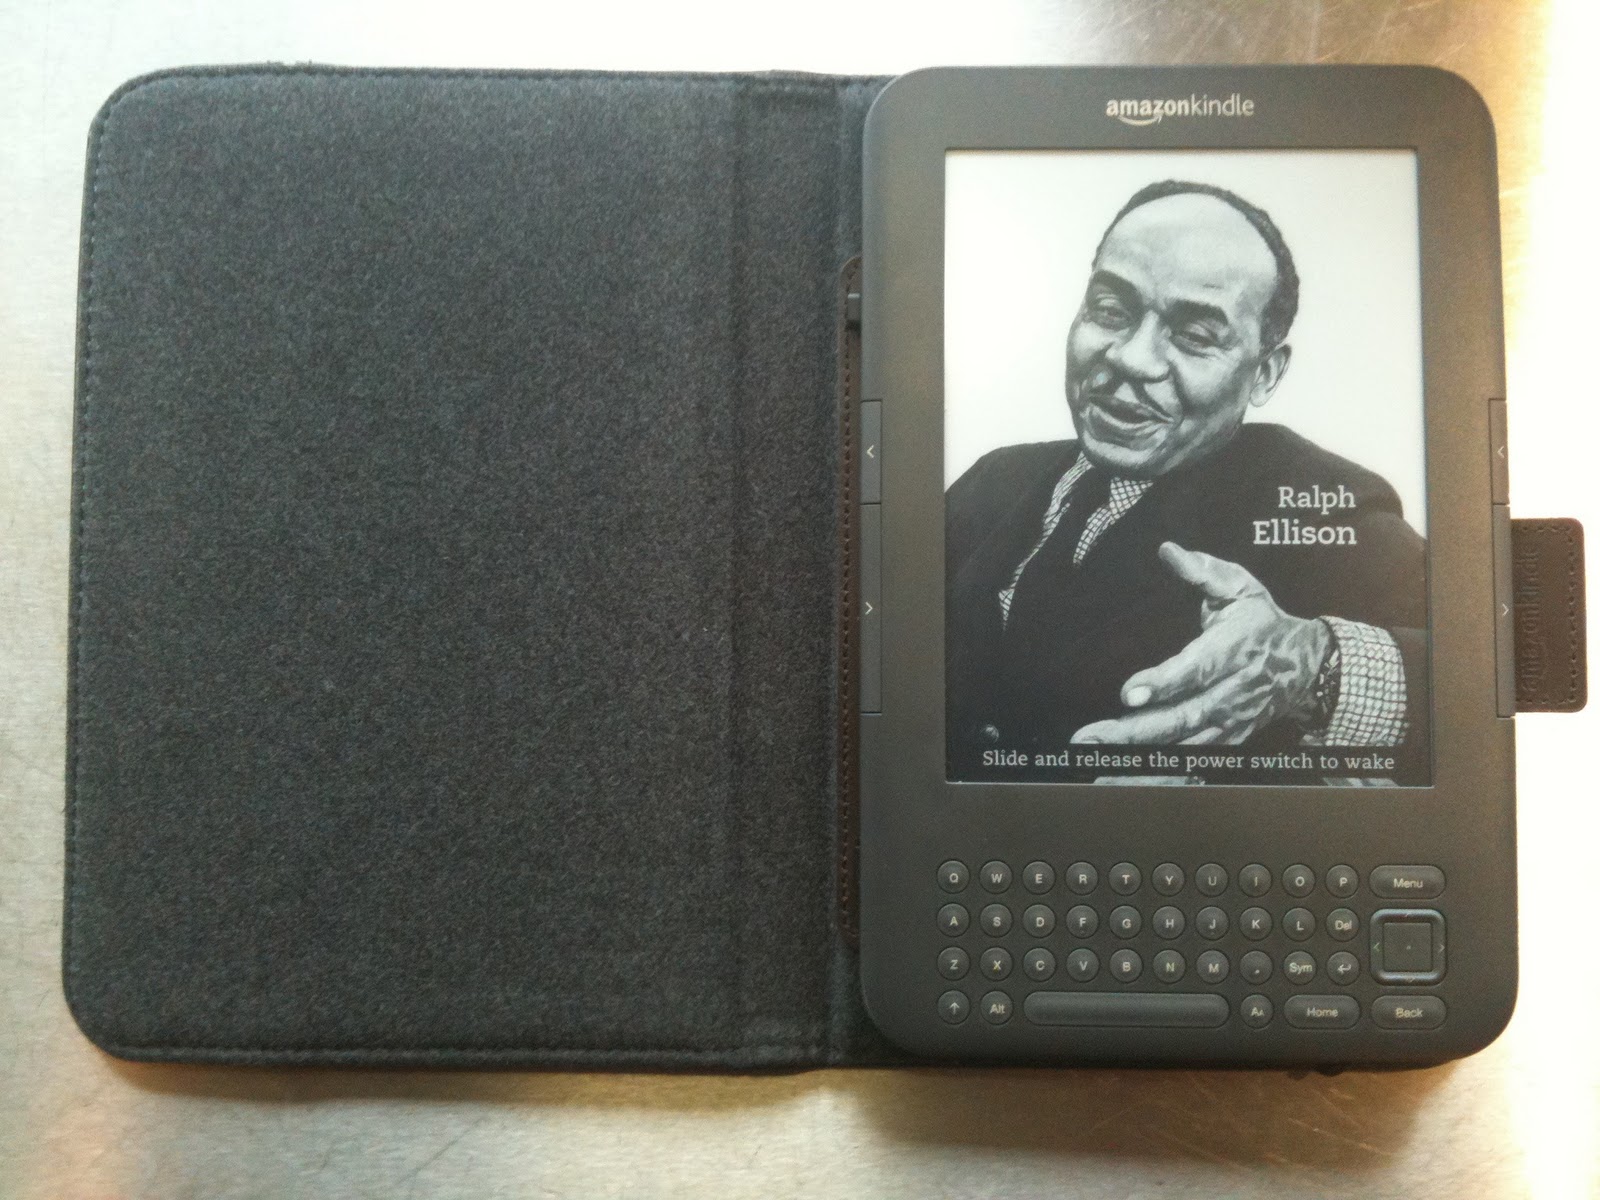
Here is the Kindle, in its cover, open. This is it in its sleep mode, it throws up random literary pictures which are rather nice.

I did lots of research into the Kindle. Canvassed my friends that had one. I was curious about just how much they seemed to love it, which seemed odd. I love books, especially picture books or ones you can dip in and out of. But I don’t read (didn’t read..) fiction, not since the heady days of going to Callosa D’Ensarria with my girly friends and devouring Jackie Collins in between tormenting the local boys.

I read loads, but just not fiction.

My best friend, Emma, regularly devours novels. She loses herself in them. I see people on the train lost in paperbacks, chunky as bricks. The odd time I have picked up a novel and managed to finish it, I’ve loved having this whole other world to escape to.

But I’m not what you might call, a natural novel-reader.

So what the fuck would be the point of me having a Kindle?

This was why I cancelled my order. But then, but then..

So I ordered one again and before I could cancel it, it arrived. And God, I love it.

It’s not an iPad. I mean, that’s obvious, but if you’re wondering “should I get an iPad or a Kindle”, you really haven’t understood the difference at all. The Kindle is rudimentary compared to the iPad, it’s nothing like it. Whereas the iPad is what it is – like the screen of your computer that you hold in your hand, and able to do more or less what your computer can do, the Kindle is an electronic reading device in black and, er, grey. You can read newspapers on it, but really, this doesn’t work (yet, I’m sure it will). You’re much better off reading newspapers n’ stuff on line, on a regular computer/laptop/iPad/iPhone type thingy.

Here’s a Kindle page. It’s not back-lit (like the iPad or a computer screen is, so easier on the eye).

So the Kindle is, really, for books. Word books. I can’t imagine anyone buying a cookery book for the Kindle, that would be really wrong I think. So the Kindle is not going to replace you having to buy any books, but if you read novels: great.

Here are some observations on it, some of them are obvious but heck, I’m gonna make them anyway:

  • You can store loads of books on it.
  • You can change the size of the font or spacing of lines – brilliant if you’re short-sighted.
  • No wastage. No ‘what do I do with this book now that it’s read’, although no lending to friends, either.
  • Not every book you will want is available as a Kindle version, yet.
  • Books that are out of copyright are free.
  • It’s not good for pictures, but great for older children – in fact I think its use for older children has been underplayed.
  • It has an inbuilt dictionary – which I find super useful, children will too.
  • You can make notes and see notes others have made.
  • It automatically notes what page you last read, no matter how many books you have on the go at once.
  • Although the ‘turnpage’ buttons are on the left and right, the up and down controls are bottom right, left handed people might find this frustrating (I don’t know, I’m right-handed). I’m thinking there should also be a LH version.
  • You can download various Kindle apps for your computer/phone and it all syncs so you can access your books anywhere, if you’re desperate. 
  • The battery lasts for weeks.

If you’re fairly wealthy, I think it’d make a great present to load up a Kindle with the sort of books you think your friend would like. The novelist and journalist India Knight did this for a friend (although to be completely accurate I think she loaded up her own Kindle) who was poorly, which I think is a great idea.

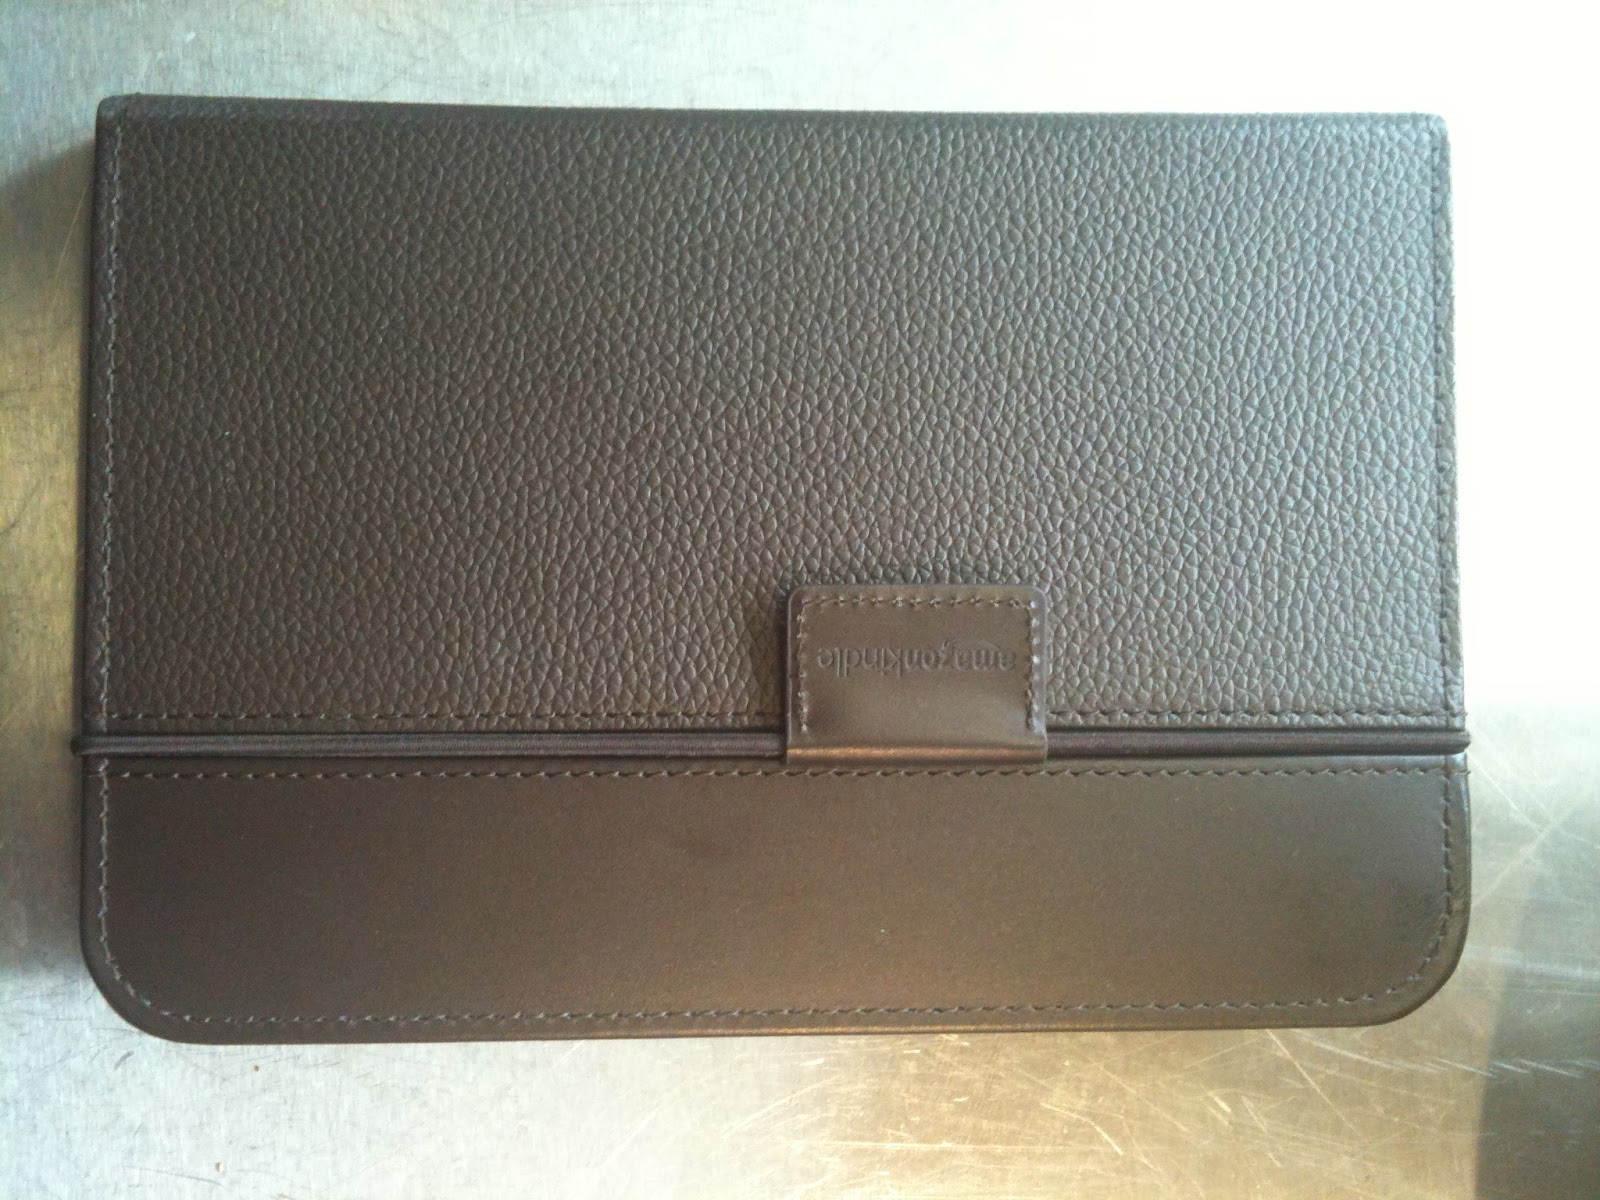
I wouldn’t, personally, get the 3GS version. Honestly how desperate do you have to be to get a book? Most places have Wi-Fi, so save your pennies. What I would spend money on is the official Kindle cover that Amazon does which is an EXTORTIONATE £50. But it’s fabulous. Leather and has an inbuilt light which is just great if you read at night (you can’t read the Kindle in the dark, it’s not back-lit like the Ipad is, which is also why it doesn’t give you eye-ache after a while).

Here’s the Kindle, in its cover (chocolate brown since you asked) with the inbuilt light. The actual light shining on the Kindle is actually from an overhead light so don’t be confused. The Kindle light is plenty sufficient to read by.

I’ve started reading voraciously (so anyone who wants to buy me a present: Amazon vouchers are a good idea) and I love having my Kindle to escape into on the train. Plus with the cover it looks more like a book so you don’t feel as much of a wanker on the Tube. It’s invaluable, for me, when I’m breastfeeding in the middle of the night/trying to get the baby to sleep, as I just don’t mind if she wants to feed for an hour, as I can just read read read.

The Kindle, all snug and safe in its cover, it has a rather nice elastic band fastening with tab, which you see above.

I love it…in a way that’s curious..

ps: I forgot to add, you can get sample pages from the Kindle store for free, so a try before you buy kinda thing.

Lovely little cakes for a celebration

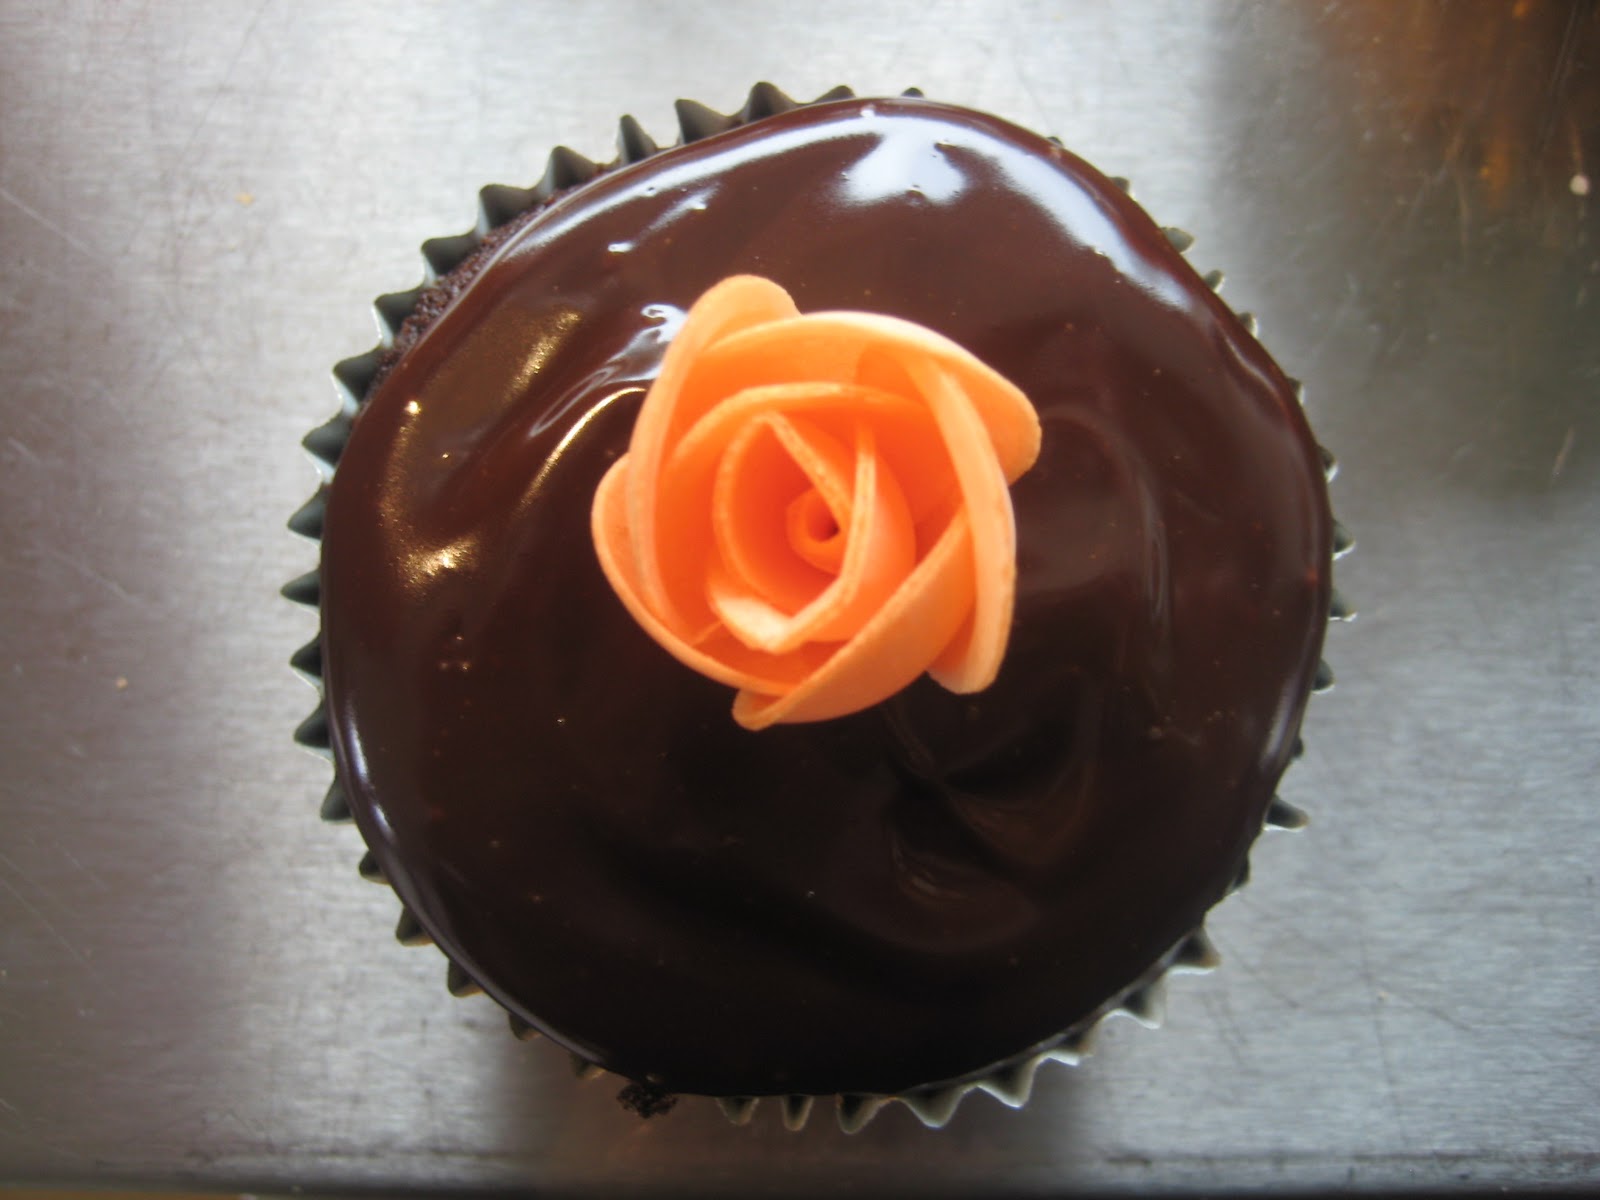
The perfect, je pense, small celebration cake.

I first came up against the possibility of making a ‘celebration cake’ when my eldest was baptised at eleven months. I’d seen (and heard) of heroic cake making efforts by other mothers. It usually involved icing. And I’m no good at icing. Not that fancy pants icing that is all super smooth and then you  make little characters to stick on the top.

This isn’t me being coy. I’m pretty fucking fantastic at cooking (look, I’ve long said: there is no immodesty in the truth), and baking in particular. But I know my limits, and mine don’t reach to the royal icing aisle (I don’t really even know what royal icing is, please don’t try to tell me either, I’m not listening).

I knew that I could make some pretty good cakes but they weren’t really up to ‘celebration standard’. So I decided to make lots of little cakes instead, figuring that if a few got spoiled, it wouldn’t really matter. I guess the same thought goes behind laying carpet tiles, the wretched things. So, for the baptism, I made some fairy cakes with fondant icing and iced my daughter’s initial atop each one. And, for extra flourish, put a silver ball – those tiny things that break your teeth- on top. I say this, contained in a cuppla sentences, but the reality of it involved several packets of icing sugar, a neighbour’s flat (thanks Sarah) and lots of beads of sweat on the forehead. Fairy cakes tend to cook to a peak – no good for a smooth finish. So each fairy cake had to be beheaded. This involved lots of eating of the remnants. Anyway, the important thing – of course! – is that they looked spectacular all piled up. People could eat one or two or FOUR (that was my brother in law).

They were an enormous, runaway, apron-lifting-in-triumph success.

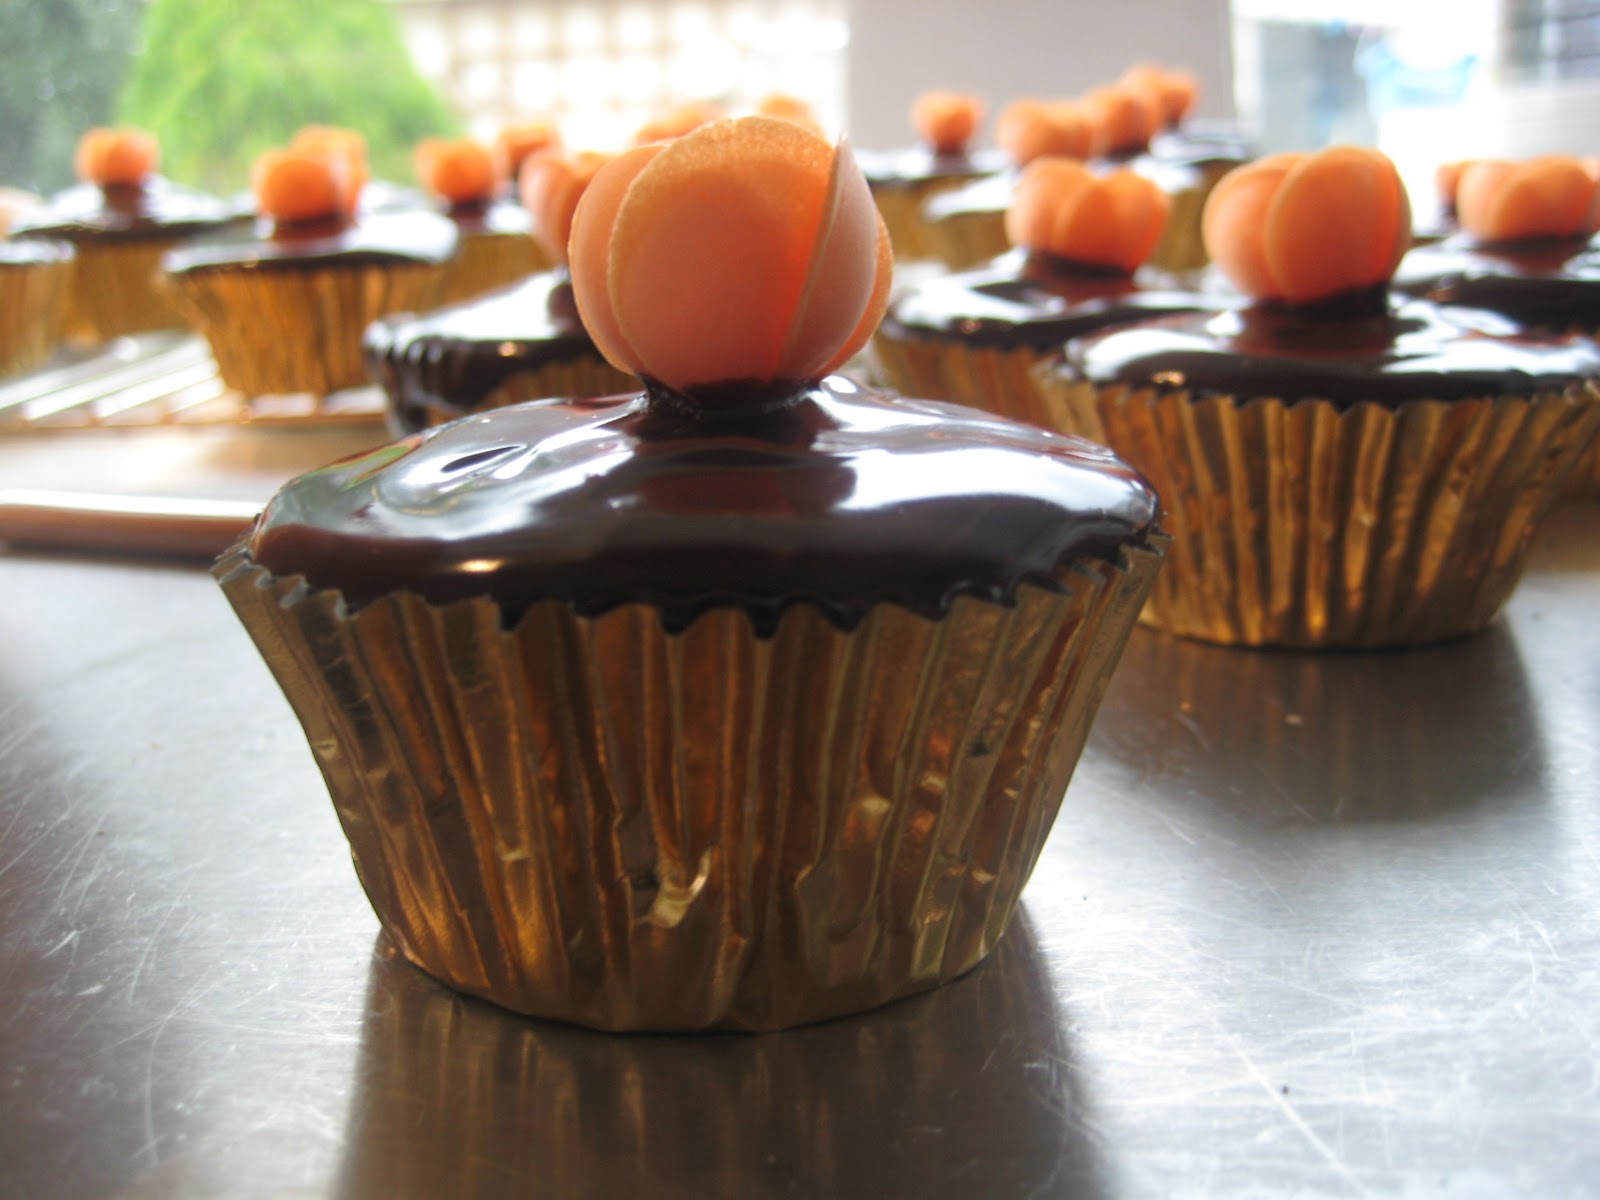
Ever since then, for big gatherings, I’ve made lots of little cakes. As my eldest got older, and I acquired cake stands, I started buying things to go atop the cakes, like little roses. By the time my second was born, and baptised, I was on a roll. For that, I made the same cakes you see  here, but with a brown paper cases, which worked really well – not least you can’t see the drips of icing, not that you get many with this glorious icing.

This is a Nigella recipe, hidden in the depths of one of her books, there is no picture to accompany it so you may have missed it. Now is its moment.

Chocolate cupcakes

Nigella says this makes 12. I say it makes 14 and it’s better to make 14 as you don’t want them too high up in their cases (see later). However, because most bun trays come in 12s, this means you have to make the last two separately. You decide if you can be bothered…


The little cakes

110g unsalted butter
155g dark muscovado sugar (the original asks for 225g)
1 large egg, preferably from your own chicken (arf arf)
half a teaspoon of vanilla extract
50g dark chocolate (70% cocoa), melted and cooled
100g plain flour
half a teaspoon of bicarbonate of soda
125ml boiling water

The ganache

175g dark chocolate
75g milk chocolate
200ml double cream
half a teaspoon of vanilla extract

Note: in my experience of making these cakes, which is extensive…this makes far too much ganache.

But that’s okay because you can chill the extra and use it to make Chocolate Ganache Hot Chocolate.

Preheat the oven to 180C. Line your (deep) bun case with 12 muffin cases.

Cream the butter and sugar together. Add the egg and vanilla, Fold in the melted/cooled chocolate, alternate flour and bicarb with water. By that I mean, put the bicarb in the flour, then put a spoon of that into the cake mixture, stir, then add water, then more flour etc. Do not over beat them. I don’t know why, I’ve never dared trying to overbeat them.

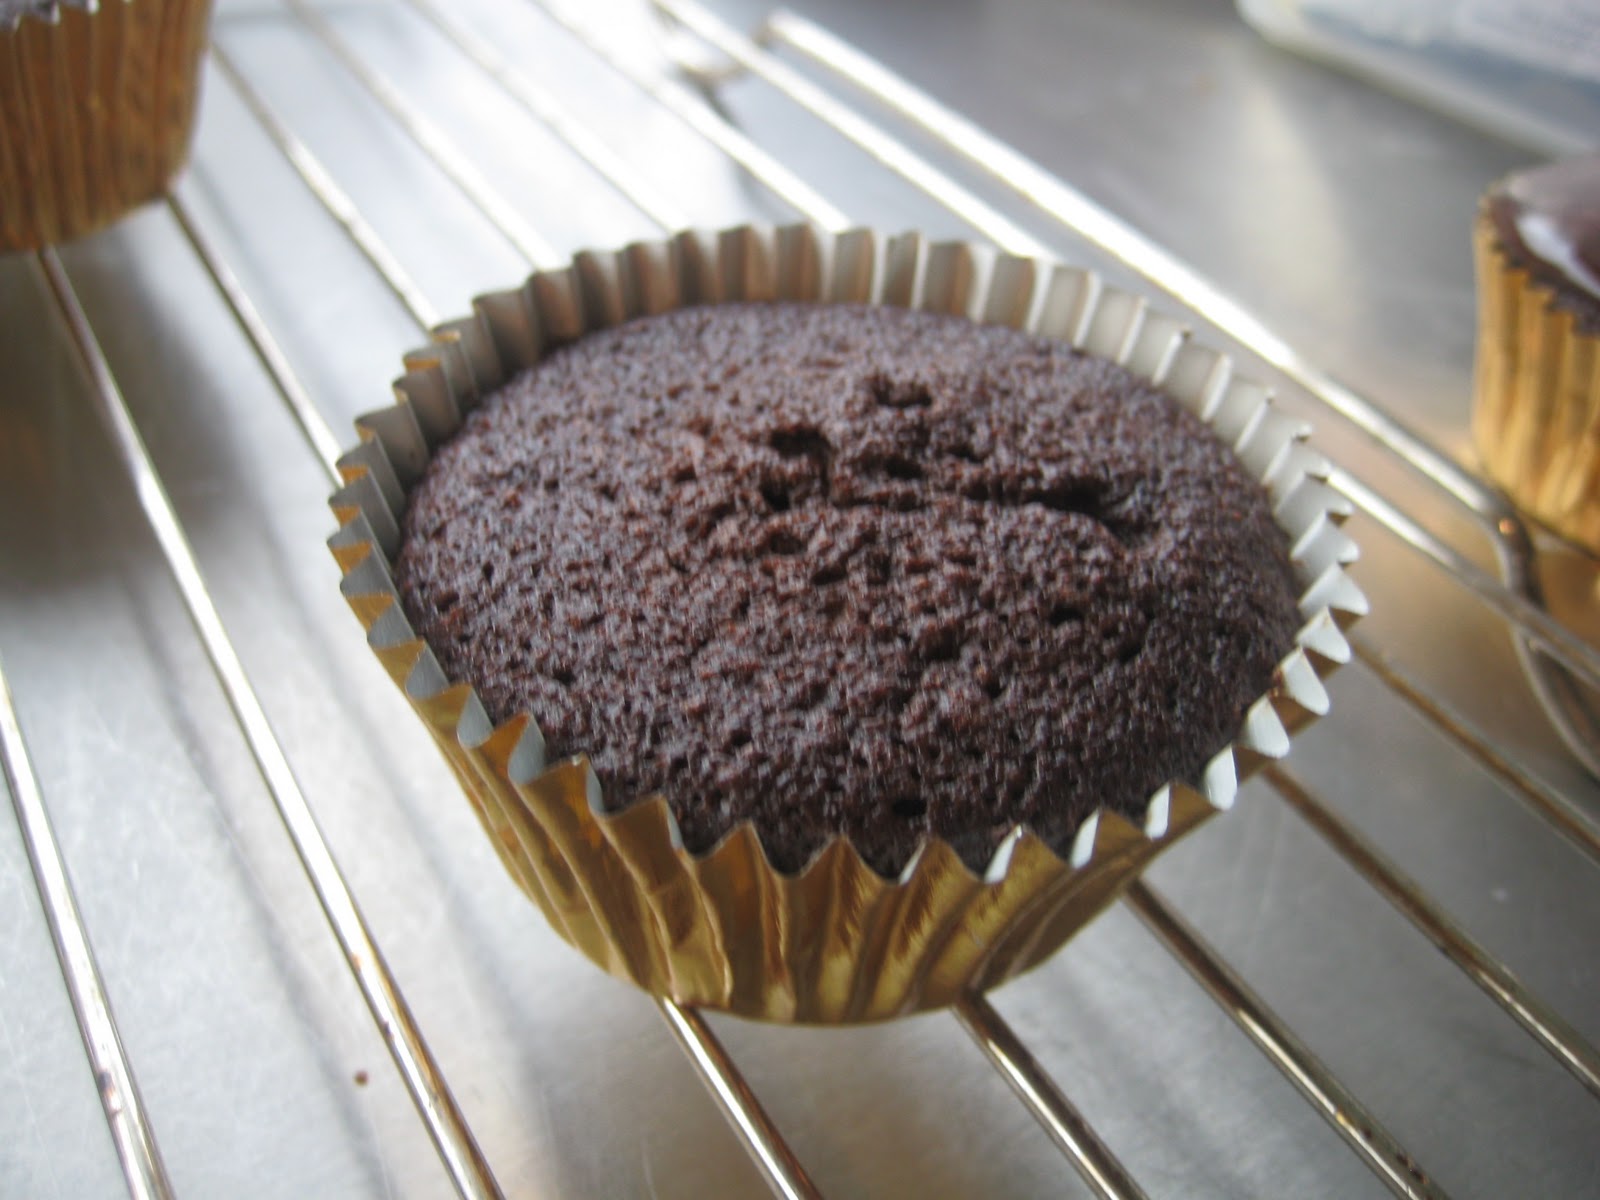
This is the ideal height for the cooled cake, so that you can slap on a good layer of chocolate ganache.

This is a fluid mixture, like a batter. Carefully spoon mixture into the cases. I’ve found that it’s best to fill to about 2/3 full which is why you might find you could easily make 14. It’s up to you. If you make 14, you fill them up less, and this leaves more room for the icing. However it’s a faff to leave some mixture and then have to put in 2 extra. So up to you. The icing still works beautifully with a fuller cupcake.

Cook for 30 mins, leave to cool.

You make the icing by shoving all the ingredients into a bowl atop a saucepan of simmering water, melt then whisk til thick (it’s pretty thick anyway, so the whisking is almost unncessary). When the cupcakes are quite, quite cold, take one in a quivering hand and take a spoon, dip it into the icing and spread over the top as thick as you can get away with. Leave to cool, but don’t put in the fridge.

Eat as soon as possible, and that’s an order..

Here they are all lined up, ready to perform.

The best granola you will ever taste

Home made granola – no dust
All wrapped in a little cellophane bag with a chic black ribbon. A nice present to take to someone if you’re stuck for ideas.

Granola is one of those things it’s so worth making yourself. The shop-bought stuff is either purse-clenchingly expensive or fairly full of dust-type ingredients. Or sometimes, both.

I first started making granola from a Nigella Lawson recipe. It was great. Then I started having babies and for the duration of my pregnancies, and about a year post-partum, all I wanted were two croissants and caffe latte (in a big bowl) for breakfast. Granola? Far too crunchy and munchy.

Then I got the first Ottolenghi cookbook and made his granola. And all other granolas faded into memory. I’ve been meaning to put this recipe up since last year, but some how never managed it. But I went to lunch at my friend Mary’s house the other week, to discuss the Global Agenda for Women and Children 2011 (you mean you don’t discuss stuff like this at lunch?). And I thought, what on earth can I bring her? I’m of the mind you can’t turn up for lunch empty handed. I didn’t want to bring a loaf of sourdough, cos so many people don’t eat wheat these days. I wondered if she’d think me terribly gauche if I turned up with some granola. I’d just made it. I have some nice cellophane bags and lots of ribbon. I asked my partner what he thought. “What can I bring?” I lamented. “What about some granola?” he ventured.

So I knew it was must be a good idea.

When I got there I was so glad I’d brought it as Mary said she loved granola and then, a few days later, she emailed me to say it was the best ever and it had all gone already.

Anyway, here is the recipe. The original recipe doesn’t call for linseeds, but as they are the highest vegetable source of omega 3s, I add ’em. I’m not always exact with the recipe. Sometimes I chuck more almonds in, or more brazils. You can tailor it to suit. But if you start really adding tons to the ‘dry stuff’ then it won’t be so gloriously crispy or tasty (because there won’t be so much wet stuff to coat it, of course you could just up that too, but I think if you play around with some things too much, you lose the essence of it), so don’t go crazy.

The dry stuff

60g whole, unskinned almonds
40g brazils
40g cashews
300g  rolled oats
120g seeds – mixture of sunflower/pumpkin/linseeds depending on what you like

The wet stuff

quarter of a teaspoon of salt (I use rock salt, ground up in a pestle and mortar, I think rock salt adds a sweeter, more complex taste, probably rubbish but that’s what I think)
3 tablespoons of water
4 tablespoons of olive oil (not the super virginal stuff)
120g maple syrup
120g honey

The after stuff

120g dried fruit – Ottolenghi originally asks for 60/60 of dried cranberries and blueberries, I use those and/or figs or raisins etc. Use your imagination and also what’s on offer.

Method

Preheat the oven to 140C. You’ll need two baking sheets lined with baking parchment.

Roughly chop the nuts and put them in a bowl. This is the hardest, for me, part of the recipe. I HATE HATE HATE chopping nuts. But don’t be tempted to do this in a food processor cos you’ll end up with tiny bits of nuts. And that’s really not what you want. When my mum is visiting, I ask her to do it for me and she’s great at it – you can tell she was a professional cook because she chops them evenly. I get all frustrated at the nuts richocheting off the chopping board and end up with tiny chopped bits and huge bits. But I tell myself it adds to the character of the granola.

To the nuts, add the seeds and the oats. Set to one side. This is the dry stuff.

In a sauce pan, put all the wet ingredients and put over a low heat until everything has melted together. You just need to heat things up gently. Pour the wet stuff over the dry stuff (DON’T ADD THE AFTER STUFF YET! THAT’S FOR AFTERS). Mix with a wooden spoon until everything is nicely coated and then divide up over the two trays. Don’t spread too thick a layer or the granola won’t crisp up. I put one on the top tray of the oven (don’t use a fan oven, just a regular oven is fine) and one on the bottom. It takes about 40 mins to be ready – the granola should be golden brown. Obviously the top tray is done quicker, so when that’s done put the bottom tray on the top shelf and give it like another 20 mins or so.

Then you just mix the cooked dry stuff with the after stuff. The granola will crisp up as it cools. Wait for it to be absolutely cool, then put in an air tight container. It keeps for weeks but it won’t last that long.

You can eat it as it is – like a snack. You can eat it just with yoghurt. I eat mine, of a morning, with a dollop of live yoghurt, a handful of fresh blueberries/fruit and some organic semi skimmed milk. I still drink a giant bowl of caffe latte too, since some habits die hard.

2016 update: I have smidged the recipe around a bit but it’s still very true to the original and, I think, still the best granola you can make.

Bravissimo – bras ‘n’ stuff for big-breasted women

This swimsuit goes up to a GG cup.

When I first started writing the Dear Annie column, in 1995, a DD cup was considered large. Back then, in mainstream shops, bras went up to a D cup if you were lucky. Anything beyond that was classed as special and you had to go to special shops. (Or a wonderful woman in Wiltshire called Margaret Ann.)

This was, I often lamented, because most women were wearing the wrong size bra. I had many aunts who swore they were a B-cup, and, because they were Italian aunts, they’d lift up their sweaters, or hastily unbutton their blouses, to show me their ample bosoms, nestled in between layers of vests and petticoats and, sometimes, corsetry devices.

And I could tell immediately that they were wearing the wrong size bra. That they weren’t B-cups at all. Because the middle of the bra didn’t press against the sternum, as it should. But, rather, was held aloft of it by a good few inches of very-much-not-B-cup bosoms.

Everyone I met professed to be a 36B.

Because I’ve been properly measured since I was in my early 20s, when I first sprouted breasts, I knew my proper size. And because I was a D-cup from about the age of 26 I was considered a freak.

Of course, things have improved oodles since then. And I like to think Dear Annie was partly responsible for this.

I’ve known about Bravissimo since it launched in 1995, so I often take it for granted everyone does. But every few weeks I find myself recommending it to someone and then I realise that, actually, loads of people still don’t know. So I thought it was worth writing about. I never got on with Rigby and Peller. I’ve always been treated rather shabbily when I went in there and so I stopped going. Plus the assistants (always middle-aged and always hurrying me so) never brought out anything but the most Hattie-Jacques style bras.  Things have probably changed but I don’t go there to find out anymore.

I used to go to Selfridges to be measured by the wonderful Dianne (I don’t know if she’s still there, she worked part time), who introduced me to a particularly fantastic every day big-bra by Fantasie. And M&S and Agent Provacateur also make bras in bigger sizes these days.

I have a friend who has all her bras hand made by Cadolle in Paris. Or another who buys from Mimi Holliday.

And all of those have some great bras. But the thing I love about Bravissimo is that it devotes itself, entirely to big breasts: bras, swimsuits  (great swimsuits with proper bra cups), nightwear, maternity. If you’re an F cup, you’re considered average, not huge and certainly not a problem. And if you’re a D-cup, well that’s the smallest cup size they do! So you’re like a size zero..All the assistants who fit you are large-breasted and really cool and funny and never make you feel self-conscious. It also sells clothes – cut for the larger bust – and whilst much of it isn’t my cup of tea, you can find the odd good thing there –  a great print wrap dress, or a super-fitting top, say.

If you can’t get to one of the stores, then you can ring up and speak to a really knowledgeable person on the phone but it’s really worth going into a store to be fitted if you can, at least once a year. And, it’s just introduced its first L-cup bra.

Post-script: one of my on-line friends has pointed out that Bravissimo is very good if you are small backed but big-boobed (and you might not think you are, again what I said about so many women wearing the wrong size bra). I know loads of women who thought they were a 32B (that fabled B-again) to be told they are actually a 30E or something. Honestly this  may be the quickest, cheapest way of getting a boob job – just get properly measured.

The best chocolate ice cream in the world.

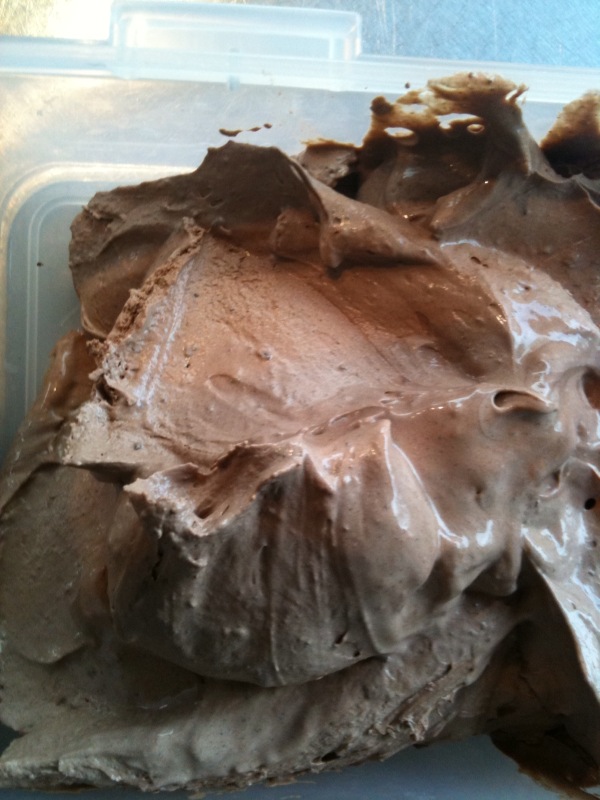
There is no easy way – unless you’re a professional food photographer in which case you’d be using anything other than actual ice cream – to photograph chocolate ice cream without  making it look like…something else…
See? Here is the same ice cream but photographed at night, by artificial light after we’d had some. See how glorious moussey it looks? That’s how it tastes if you eat it not long after making it. Even a few days’ later it’s still delicious.

I hesitate not in saying this is the best chocolate ice cream you can get. I mean, very probably my dad’s chocolate ice cream was better. And his chocolate chestnut ice cream was damn brilliant. But aside from that, you can search high, you can search deep but you won’t find a better, simpler, chocolate ice cream recipe.

I know because believe me – credemi – I’ve tried.

And, how sweet that this recipe didn’t come from some vast volume of ice cream recipes. I didn’t steal it from a gelateria, or my dad’s shop. It was in the fold out pamphlet of recipes that came from my Panasonic ice cream maker.

I’ve doubled the quantities, because the original made about two portions’ worth (how is it that doubling it seems to make more than double if you see what I mean?). If you can, make this in the morning for eating in the evening. That way it will have had a chance to set a bit, but not go rock solid. It will never be that good again although of course, like all ice cream, it will keep in the freezer for weeks/months.

This last batch I made was using eggs from our own chickens. Coincidence or not it was the best I’ve ever made. So tasty I wanted to eat the whole lot.

You will need:

4 egg yolks – freeze the whites to make madeleines or macaroons or friands another time
100g granulated sugar
160ml of milk – I use semi skimmed and it’s always been fine
2tbsp cocoa powder – I always use Green and Black’s
100g good plain chocolate – I always use Waitrose Continental  (70%), the packet looks unassuming (black with a vanilla coloured banner across the middle) but don’t be fooled, it’s superb chocolate
240ml of double cream, although I have just chucked the entire 300ml tub in there as this is what Waitrose’s comes in and 60ml of cream left in a tub is of no use to anyone.

Beat the egg yolks and sugar together until pale. Do this in a heat proof bowl or a bain marie. You can do this by hand using a little whisk. Don’t be a cissy. You don’t need an electric whisk.

Mix the milk and cocoa powder together to make what looks like a birruva mess. Add this mixture to the egg mix. Place the heat proof bowl over a pan of simmering water (or put the bain marie on the stove if you’re posh and have one, a bain marie that is). Stir until it thickens.

When it’s done, take off the heat and chuck the chocolate in and stir gently but firmly. You will have at the very least broken this into pieces, or if you can be bothered, cut it into smaller pieces. I never can be bothered and it goes in in big, chunky, pieces and it’s fine. You get the occasional shard that doesn’t melt but I quite like that as it’s a bit choc chippy in the final ice cream.

Put it aside to allow to cool – whilst it’s doing this cover the actual surface with a layer of baking parchment. Because I’m posh, I have ready cut circles for just this purpose. Whisk the cream until it’s thick and stir into the chocolate mixture. Refrigerate for a couple of hours before placing in your ice cream maker.

This is no time to be wailing that you don’t have an ice cream maker. YOu’re not taking this seriously enough. You need one. When it’s done decant into a suitable freezer container and freeze.

Eat with abandon and try to forget about the fact that you don’t have a pension. If you eat enough of this ice cream, anyway, you probably won’t live that long.

Milk bottle holder for when milk comes in bottles.

I stole this pic from http://www.recycleboxes.co.uk where I got mine from. I hope he will forgive me but I couldn’t be arsed to go outside and take a picture of my own.

When I lived in the West End of London, I lived in a mansion block. Like many mansion blocks our home had some really funny little details. For instance, our two bedroomed flat had bells to ring for the maid, and in the kitchen there was one of those boxes that showed you whether the bell had been rung in the bedroom or the living room. For yes, there were two bells that could have been pushed in urgent maid-need. I found this fairly startling given that the flat was not that big and you could just have easily have shouted for the maid.

If you had one, which we didn’t.

It also had, outside the front door, a little cabinet recessed into the wall which you accessed via a flap-door. This was for storing the milk. We had a milk man who delivered milk in bottles, until such time as we started buying our milk in the supermarket and milk no longer came in bottles but cartons, and the funny little cabinet was no longer used, although I used to play with it sometimes and put my dolls in there.

I’ve always been a birruva sucker for milk in milk bottles. When I moved from the mansion flat to a flat around the corner, I could have had my  milk delivered I suppose, but I was in my 20s and too busy going out and smoking Lucky Strike to worry about milk being delivered. Then I moved to Old Street and lived up 102 flights of stairs in a loft appartment and there was no way I was going up and down those stairs any more than necessary. Plus it would have been very unlikely the milk would still have been there in the morning as it was an edgy place. At least for the first five years we lived there until our presence gentrified the area of course.

So when I moved to a house, having milk in bottles delivered was pretty high on my list of priorities. Above, possibly, even looking at schools in the area and checking train time-tables.

Once I’d had the entire garden fenced and the electric gates installed and the watch towers erected, the milk man found it hard to get in to deliver his clinky bottles of milk. And because we’re on a sloping drive leaving the milk bottles out, in our litigious society, was risky.

I felt a purchase coming on.

The world of milk bottle holders is a bizarre place. Before you know it, you’re transported onto sites that want you to believe you’re living in Provence and you need hand painted house-number tiles and little signs saying things like “I’m in the garden”. Once I’d pushed past the sachets of dried lavender and ceramic egg boxes (which no sane person should use since eggs should always be kept in the fridge), I realised that I was not going to find what I wanted on these whimsical sites whose merchandise was 95% twisted wire.

And then I found this wall mounted version (above, except mine is a different colour) from Milk Safe. Completely practical. Fairly minimalist. If you stain it yourself (which I recommend you do) you can make it look fairly decent. And if you live in a high crime area you can even opt for the lockable version. There are various different versions – you can get it for four or eight bottles, wall mounted or not, lockable or free for all, closed at the bottom or open.

Look here for all the variations, from £27.99.

A nice cake for tea

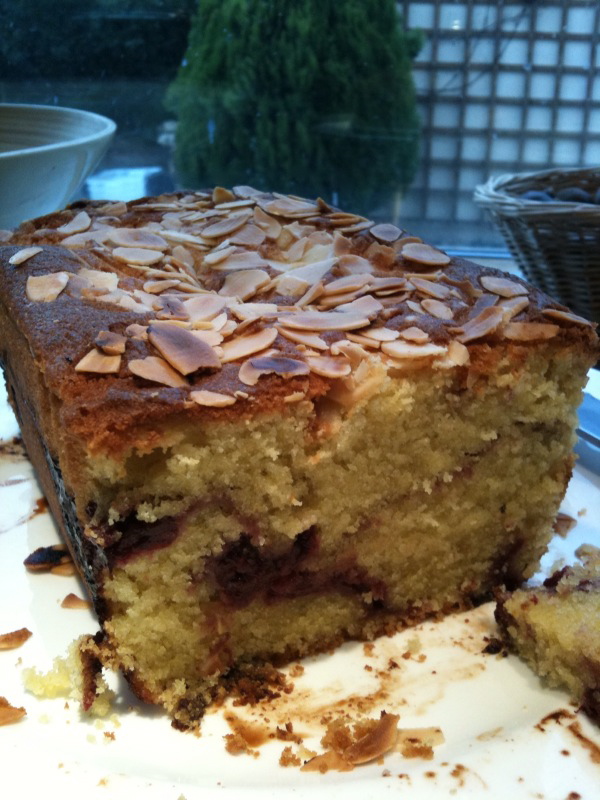
Lovely cake for tea with a river of compote running through it. I’m sorry for the conifer in the background. Legacy of previous tenants. I hate conifers. It’s got to go.

I really was going to write about something non-food related.  But if I’m going to write about, say, a washing machine, I really feel I have to do my research. And frankly, at the moment, I just can’t be bothered. Whereas with food, well you don’t really need to do much work, do you?  You just say yum yum yum, I like this, you try it too.

Plus it’s cold and blowy and I want to write about cake and plus x2 we are in the fortunate position of having lots of eggs at the moment as each of our chickens is laying one a day. So I wanted to use some up. So this morning I made ice cream (four eggs yolks, the whites into the fridge for friands or madeleines another day), and then I thought “I really fancy a nice cake for tea”. The criteria being that it couldn’t be chocolate and it had to be made from things I already had in.

And I do have a lot in since I am a pig and an ingredient hoarder and I don’t like to run out of things.

I couldn’t be bothered to go through the 75 recipe books we have, or the vast amount of ripped out magazine recipes. So I did what I always do when in a tizz. I turned to Waitrose.

I actually typed in “cake” to see what it would bring up, and this Almond and Cherry cake came up and I checked and I had everything – save for the jam it asks for, I substituted compote instead. It’s so easy to make – chuck everything into a mixing bowl and get the food mixer to even whisk it up for you (sorry if you’re reading this Helena, I know you haven’t got your mixer situ. sorted yet…).

You take

150g self raising flour
100g ground almonds
175g softened butter – you’ll be lucky if at this time of year yours is soft enough at room temp, so stuff it in the microwave on low for 1-2 mins
150g caster sugar
2 medium eggs, preferably from your own chickens of course, failing that from the fridge
Few drops of almond essence, I use Amaretto di Saronno Lazzaroni from Bakery Bits, I find it vastly superior to anything else you can buy. When I say a few drops, I probably put in about 8-10 but it’s difficult to tell since they come out in a rush.
4tbsps of milk, any milk you have in the fridge that’s from a cow preferably.
150g fruity jammy stuff (the original recipe uses that St Dalfour no sugar one, I used Bonne Maman compote, sort of drained, and it was delicious. I wouldn’t personally use jam jam as it’d be too sweet I think)
handful of flaked almonds

You need a 900g loaf tin. Which brings me onto a slight rant which is, why do loaf tins never ever have their capacity on them? Anyway, I use a small, stout loaf tin and line it with parchment loaf liner; just cut some out of baking parchment sheets if you don’t have them pre-formed.

Preheat oven to 160C. I warn you, this cake is so quick, do this the moment you feel like making this cake. You put all the ingredients EXCEPT FOR THE FRUITY JAMMY STUFF AND THE FLAKED ALMONDS, in a mixing bowl and beat with an electric whisk for 1-2 mins. Pour half the mixture into the loaf tin. Stop. Now put the fruity, jammy stuff or compote in, like a layer. Now pour in the rest of the cakey mixture. Now get a skewer and gently swirl around. Scatter the flaked almonds on top and put in oven for 1hr – ish. Mine was done after one hour, go a bit longer if you need to. Cake should be firm and when you put in a cake tester/raw piece of spaghetti it shouldn’t come out all gooey.

Let it cool in the tin as this is a moist cake. I wasn’t expecting too much, but this is a really lovely cake. Moisty, almondy, bit Bakewell-ish. Perfect with tea. Shame I’ve already had a slice in the name of research.

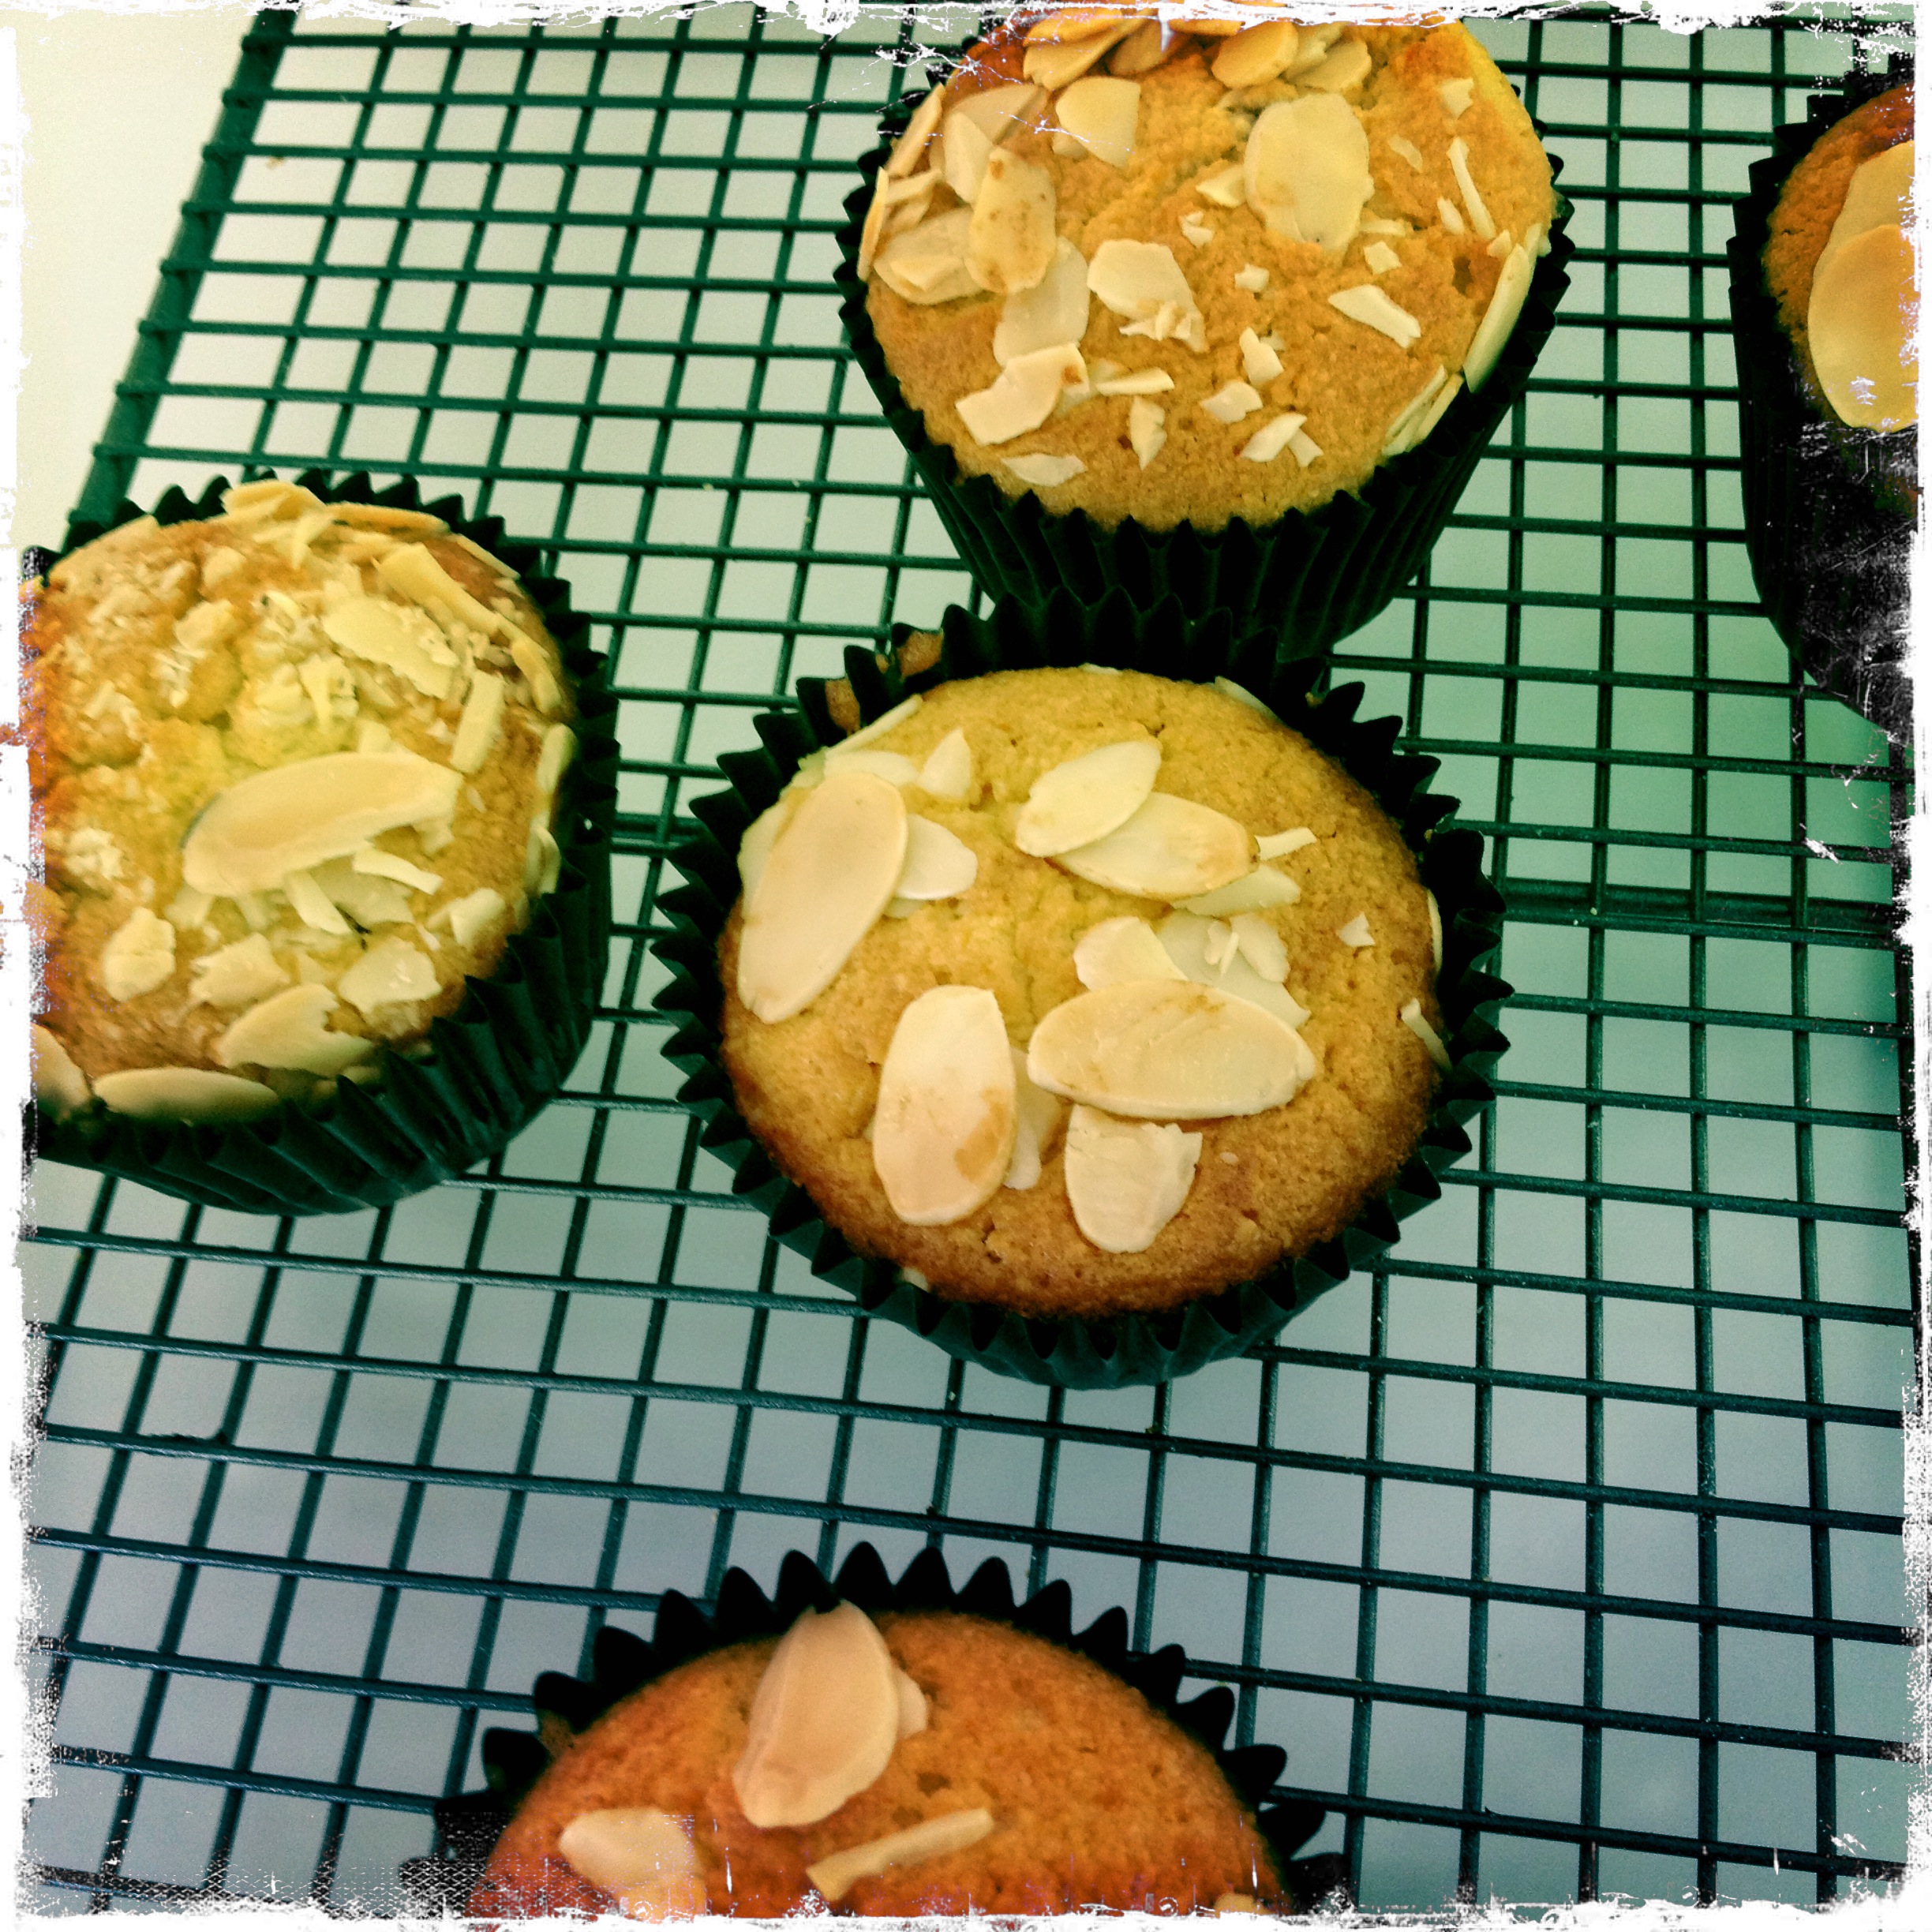
UPDATE: You can also make this into individual cakes by putting the mixture into muffin cases. I got eleven out of the mixture. They took about 20-25 mins cooking time (sorry I got distracted and forgot to make a note of it) at the same temperature. This makes them ideal for picnics.

IMG_2375


Bagels – not sourdough

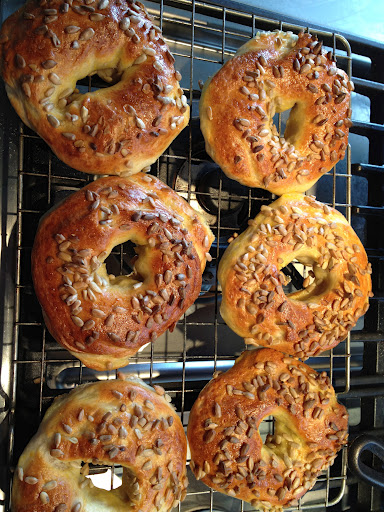
These bagels are not just not sourdough, they’re made in a breadmaker. Nevertheless, here they are, all blousey and almost industrial compared to my artisan sourdough.

But look: they’re delicious. Nothing at all like bought bagels which may look surgically enhanced but are as interesting as dust to eat (although if you remember that fantastic sketch from Little Britain, dust is a valuable diet food…). The only memorable bagel I ever had out was at the Geffrye museum cafe, I had it with smoked salmon and a very fine cappuccino. A memorable little lunch that shows food doesn’t have to be fancy to be remembered.

So, my bagels. I’ve been making them for years and the recipe is from some bread machine book I had but adapted slightly (in what way I can’t remember now but anyway it works which is what matters). They don’t look pretty – ignore that and just enjoy the taste.

These are excellent for children – they just love them. In which case I make them smaller and end up with 12-16.

For eight large bagels you need:

2 teaspoons of dried yeast
450g strong white bread flour
1 1/2 teaspoons of salt – I grind up Maldon sea salt
1 1/2 tablespoons of sugar – I use caster
230ml water, whatever temperature it comes out of the cold tap.

egg or malt wash – see later

baking tray
clean tea towels
saucepan and slotted spoon

I put it into my bread machine, which is a Panasonic bread machine and the only sort I recommend. Your bread machine may ask for the ingredients to go in in a different order but mine asks for the yeast first. You then select the dough cycle. Mine is 2hrs 20mins long. Be careful not to put it on a short dough cycle (mine also has one for pizza which is 45 mins long) as it won’t work.

In the meantime, get a baking tray

When the dough is ready, you divide it up into how many bagels you want. This mixture makes eight regular sized bagels, but I have made more mini ones. I roll each piece of dough between my palms to make a ball. I rest them for a few minutes (in reality you can start on the first one by the time you’ve done the last one if you follow), then roll them into sausage shapes and loop the ends around. This isn’t a regular bagel shape – none of that perfect roundness – but honestly once baked you won’t care. It’s the best way, I’ve found, of keeping the hole intact.

As you shape them, place each one on a lightly oiled baking tray or one with baking parchment on it – make sure they’re not touching or you’ll have a hard job separating them and they might collapse as you manhandle them. When they’re all shaped, leave them to rise, covered with a dry, clean [why do they always say this, does anyone use a dirty one?] tea-towel ** for about 10-30 mins (30mins if your kitchen is cold, 10mins if it’s warm or you put them in a warm place). There’s a lot of yeast in them so don’t overprove.

**Note here: you can – and I regularly do – also put them, at this stage, into a refrigerator overnight for their rise, and then go straight to boiling them. I think this gives them a nicer flavour and chewier texture and it also means you can have freshly baked bagels for breakfast.

Whilst they’re resting and puffing up, put a big saucepan of water onto boil and preheat the oven to 220C/Gas 7. I use a casserole dish pan which is shallow, but wide. You don’t need the water to be deep deep, as the bagels will float, but if you have a wide aperture then you can get more in at once.

When they’re done and the water is on a rolling boil, put the bagels in to the pan. Unless your pan is a huge paella pan, you will have to do them in batches – that’s fine. You boil them for about 30 secs each side (so turn them over with the slotty spoon). Watch them puff up more. Take them out one at a time with the slotted spoon and place on a clean tea towel to drain them and do the next batch til they’re all done.

Either get a clean baking tray and oil it lightly, or wipe off the last one you used and re-oil it. OR if you’re like me and have one of those reusable baking sheets that you used to prove the bagels on, you just now put them back on them. But either way, place the boiled bagels onto the tray. It’s fine if they touch, because once cooked they’re more stable than at the proof stage, so you can tear them apart. But if you can do them so they don’t touch all the better. Mine are always crammed together as that’s the only way you can get them cooked all in one go and at this stage – i.e. proved and boiled – you don’t really want them hanging round waiting to be baked for longer than necessary.

Once the bagels are on the tray, you’re on the home run. Either make an egg wash of beaten egg, or use this fabulous dried malt extract which I mix up with some water and brush on. You can then either cook the bagels plain or scatter on some sesame seeds, pumpkin seeds, sunflower, linseeds etc.

Cook for 12-15 mins (this is in my oven, yours may differ). They’ll be a lovely dark golden brown when they’re done.
These keep for a day or two but are best eaten on the day of being made and toasted thereafter. They freeze really well – just freeze when cooked to have lovely fresh bagels another day!

The shaping is getting better..