Sleepwear for the bigger breasted, a moan and a tip
One of the (many) things I envy about girls with breasts like tiny mandarins, is that they don’t have to worry about nightwear. They can wear whatever they want and if they have to answer the door to the postman or the milkman or the Milk Tray man (where IS he these days?) they don’t have to do it with their arms folded because their breasts are unsupported.
Naturally, big-breasted girls can do this too, but personally, I don’t like wondering round the house in my pyjamas with unfettered breasts.
Also if your breasts are really large and/or you’re breastfeeding, it really isn’t that comfortable sleeping with no support at all. Many women really don’t like wearing a bra at night but you don’t want nuffin, neither. I know this from years of co-running a parenting board (no not that one, this one).
Now, you can get pyjamas/nighties with ‘secret support’ – Bravissimo being the most obvious – but they are all sleeveless, and I like to have my shoulders covered at night. But also it really limits you to the styles available (which you may or may not like) at a time when, as a big-bosomed woman, you already feel you have limited choice in clothes.
M&S now does (and has done for a while) some secret support camisoles that are really rather good and these work really well at providing a modicum of support and you can wear them on their own, atop a PJ style trouser, if – unlike me – you don’t mind having your shoulders bare. Or under any normal PJ you like, thus opening you up to choose from any PJs out there. You could I guess also wear them with nighties, but I don’t really do nighties.
My favourite M&S secret support camisole vesty things are these and these. Both are £12 a piece and come in a variety of colours, the shoulder straps also adjust, a nice touch.
Although Bravissimo does a racer back PJ top in lots of larger sizes, so it fits better than the M&S ones if you’re big-cupped, they are over double the price and always sold out. It also has great strappy tops, but these cost even more: £32. So I think the M&S ones compare really favourably, especially if all you want is something to wear for a bit of support under your current nightwear without going to bed fully upholstered in a bra.
If you’ve found a solution that works for you, do share..
Lollipops…lovely chocolate lollipops…
![]() |
| A mint leaf enrobed in dark chocolate atop a stick. Joy. |
When I was researching how to make my One Giant After Eight mint, I came across this on t’internet which I thought was a fantastic idea.
So I made some and they were great and so easy. There’s something about giving people a little chocolate something on a stick that makes them go crazy. (I got some mint leaves, melted some 70% cocoa chocolate, dripped it over the top and stuck a lollipop stick on, do the lot on some baking parchment, put in fridge for not very long at all, peel off, present with coffee.)
This got me thinking of making other chocolate lollipops. My children like chocolate and I don’t mind them eating it, but prefer them to have good quality dark chocolate which is actually good for you: it’s not easy finding dark chocolate lollies, the choice in milk chocolate whatnot is HUGE, in dark chocolate? Not so much. You can of course also make these chocolollos for adults and serve them after dinner with coffee/instead of a dessert. They are my new BIG NEW THING THAT I’M REALLY EXCITED ABOUT and am pressing chocolate lollies on everyone who comes round.
So I decided to get some lollipop moulds to make the process even simpler and because I’m a sucker for gadgets. This means you can make a tray of choco lollies in under five minutes and they look so neat and perfect. I just melt the chocolate in a jug, in the microwave (about 100g makes seven lollies, roughly), pour them into the moulds, putting in whatever you like – sunflower seeds, pumpkin seeds, chopped nuts, chopped up mint leaves, whole mint leaves, flakes of chilli, bashed up mints or honeycomb. I mean just GO CRAZY. Up to you with whether you put the ‘filling’ in before or after pouring in the chocolate – you get different effects according to which you do. I like it cos it means I can give my children a chocolate hit with omega-3 rich seeds which makes this practically a health food.
I got my moulds from Make a Wish Cake Shop, the 7 in one plain one is this one. (Ignore the pic, what you get is a plain tray with seven plain lolly impressions, those funny pics are stick on sugar discs, nothing to do with the mould.) I also got this 4 in one which gives you a much bigger lollipop, only really for special occasions I’d say. Then you need some lolly sticks.
There are lots of other places that do lolly moulds/sticks but that’s where I got mine and the service was fast.
I am aware this is the third chocolate post in a row.
An update in November 2011. I make these all the time and have experimented with crushed coffee beans (espresso ones if it makes a difference): excellent. But the BIG find was popping candy (I get mine from Waitrose, it’s in the baking aisle, near stuff like sprinkles and cooking chocolate. It’s fantastic, you sprinkle some popping candy (it comes in little rocks almost like crystals) into each mould and pour the chocolate on top. Then, when you eat the candy it ‘explodes’ in your mouth.
![]() |
|
| Lollies in chocolate. With bits. |
![]() |
| And yet more.. |
Home made Nutella
![]() |
|
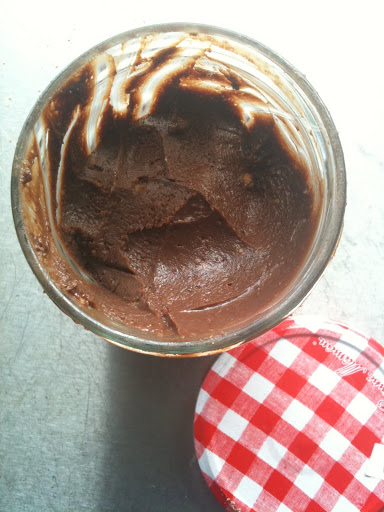
| Not the most amazing pic but it’s real life home made Nutella-type spread in a jar, look! |
I know this doesn’t look good; two consecutive posts concerning chocolate. There is tons of other stuff I could be writing about, I’m just not very fired up about them though. And as this is a blog, and I’m not being paid, it has to be a bit enjoyable for me.
In Italy Nutella comes in glass jars you can use, when you’ve scoffed the lot, as glasses to drink out of. They come in pretty patterns. I think you could get them here at one point too, but I don’t see them anymore.
I used to eat Nutella out of the jar, on a spoon. I can’t believe this now as I find it quite disgustingly sweet. The ads sell it to you as having slow release energy thanks to the 1.5 hazelnut you get in every serving…we have Nutella in our house but I loathe it now. It’s laden with sugar.
So when I saw Annie Rigg’s book about Edible Presents and saw there was a recipe for Chocolate and Hazelnut spread in it, I jumped.
You probably can do this without a food processor, but I don’t.
Makes 1x 450g jar
75g blanched hazelnuts
100g 70% cocoa chocolate
100ml condensed milk
1-2 tablespoons of hazelnut oil
a pinch of salt
3-4 tablespoons of hot water (if you even need this much)
The recipe asks for you to use sterilised jars. I use them straight out of the dishwasher, if it’s good enough for Nigella, it’s good enough for me.
Toast the hazelnuts; you can do this in an oven or in a dry frying pan. Until they’re golden. Cool slightly and then grind to as smooth a paste as you can get in your food processor.
Melt the chocolate, condensed milk and hazelnut oil, very gently, in a saucepan. When the chocolate has melted and it’s all mixed up nicely, pour this into the food processor, add the pinch of salt (I always use ground up rock salt in sweet things) and blend. Add as much hot water as you need to give it a thick, spreadable consistency. Don’t panic if, like me, you see it has gone really runny. It firms up in the fridge. That said, you shouldn’t overdo it, I’m just saying don’t go into a tizz if you have (you can always use it as super luxurious ice cream topping if it does go wrong).
Spoon into a jar and keep in the fridge. Rigg says it keeps for up to two weeks. I doubt it will last that long.
Now, I didn’t want to interrupt the recipe further up, with my tales of hazelnut essence, but I bought some from Bakery Bits. I was wary because, unlike the excellent other ‘essences’ I have from there (Aroma Panettone and Aroma Veneziana are exceptional) which have natural oils in them, the ingredients listed seemed decidedly un-natural. Stupidly I thought it was like extract of hazelnut or something (this is probably impossible to do). Anyway, the jury’s out on whether it’s nice or not but my verdict is: disappointing. Its aroma is rather synthetic and artificial. I liked it at first, but you need to go really easy on it as it can become very overpowering; and I’m not sure I’d use it again. My partner’s nose is far more sensitive and he found it overwhelming.
This recipe doesn’t call for essence of any kind, but because I had it I added a few drops – about four. My seven year old loves this spread but says it’s too ‘hazelnutty’ which is probably accurate. I think this essence is good for when you really need to convey ‘this is made of hazelnuts’ without actually adding that many real nuts and that isn’t the case for this spread, or anything I’m likely to make.
This spread is, anyway, delicious and whilst still not a health food, is a damn sight healthier than shop-bought.
![]() |
| Mmmmm. Eat on toast, or on a croissant or straight out of the jar with your fingers. |
One giant after dinner mint
I got this recipe from last month’s Delicious magazine.
![]() |
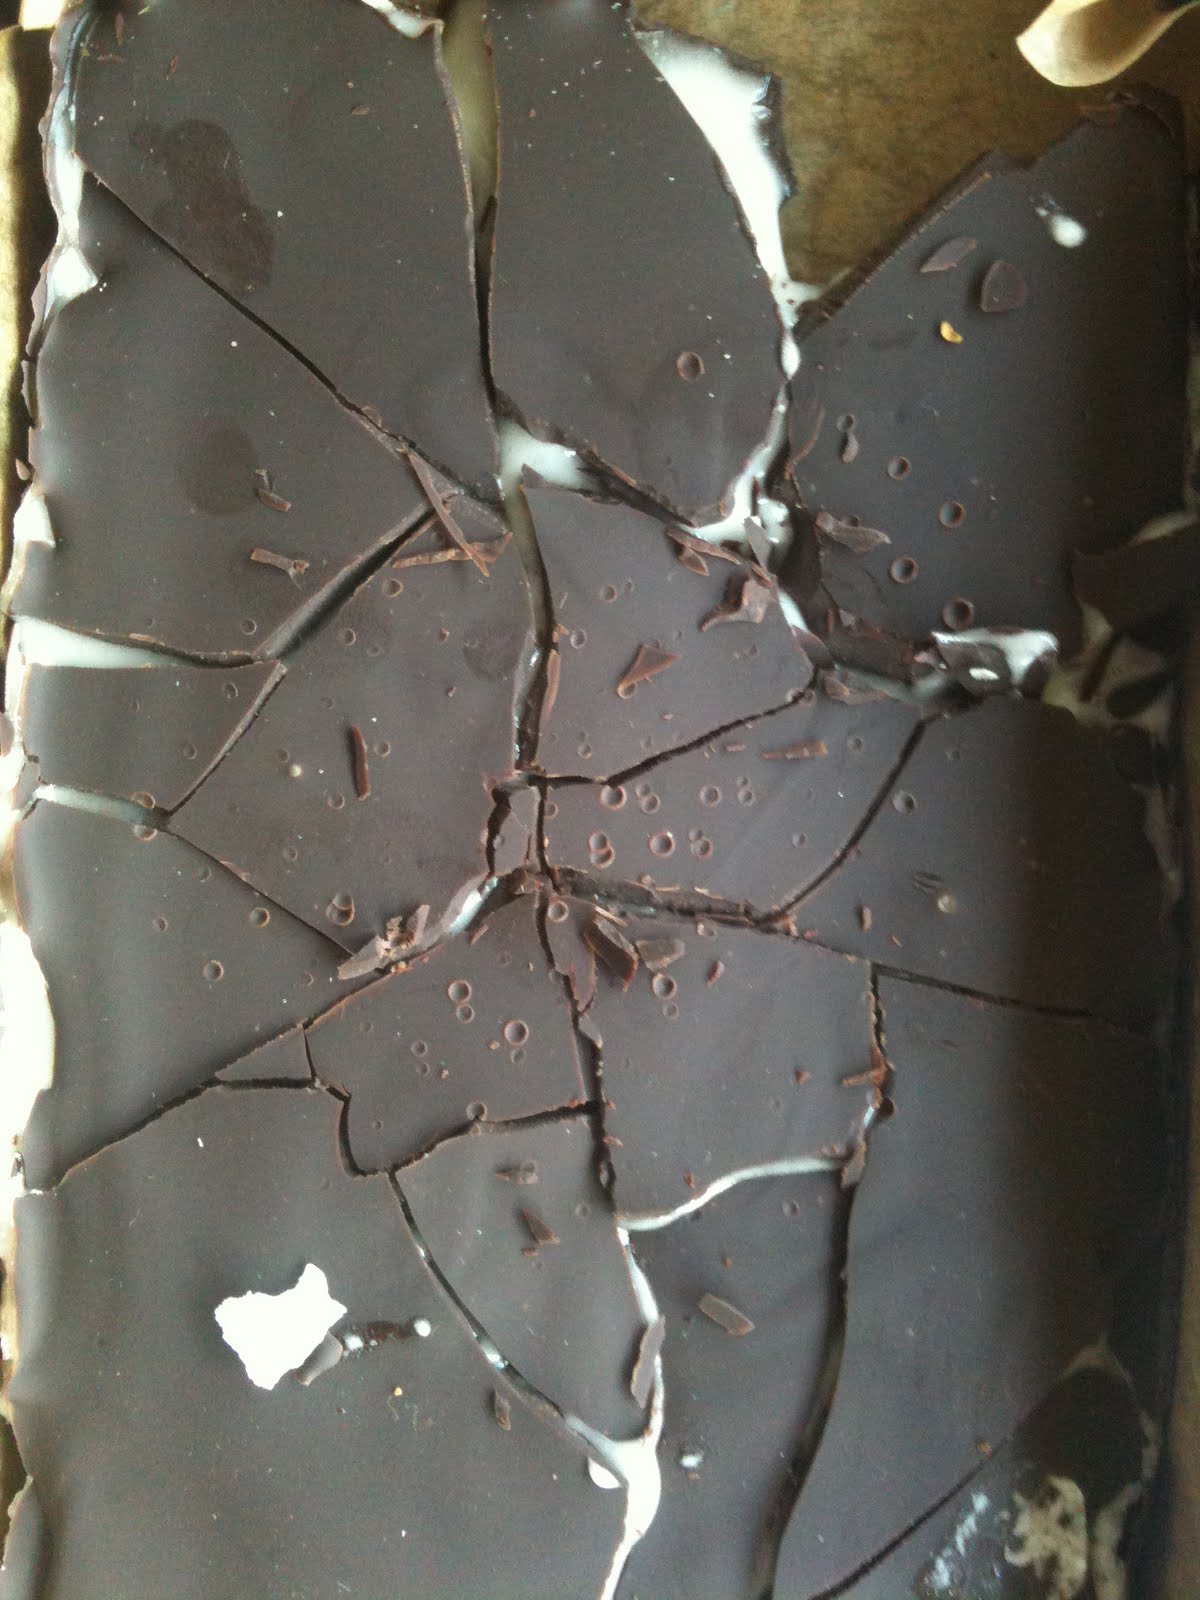
| After dinner mint chocolate: make it, smash it, eat it |
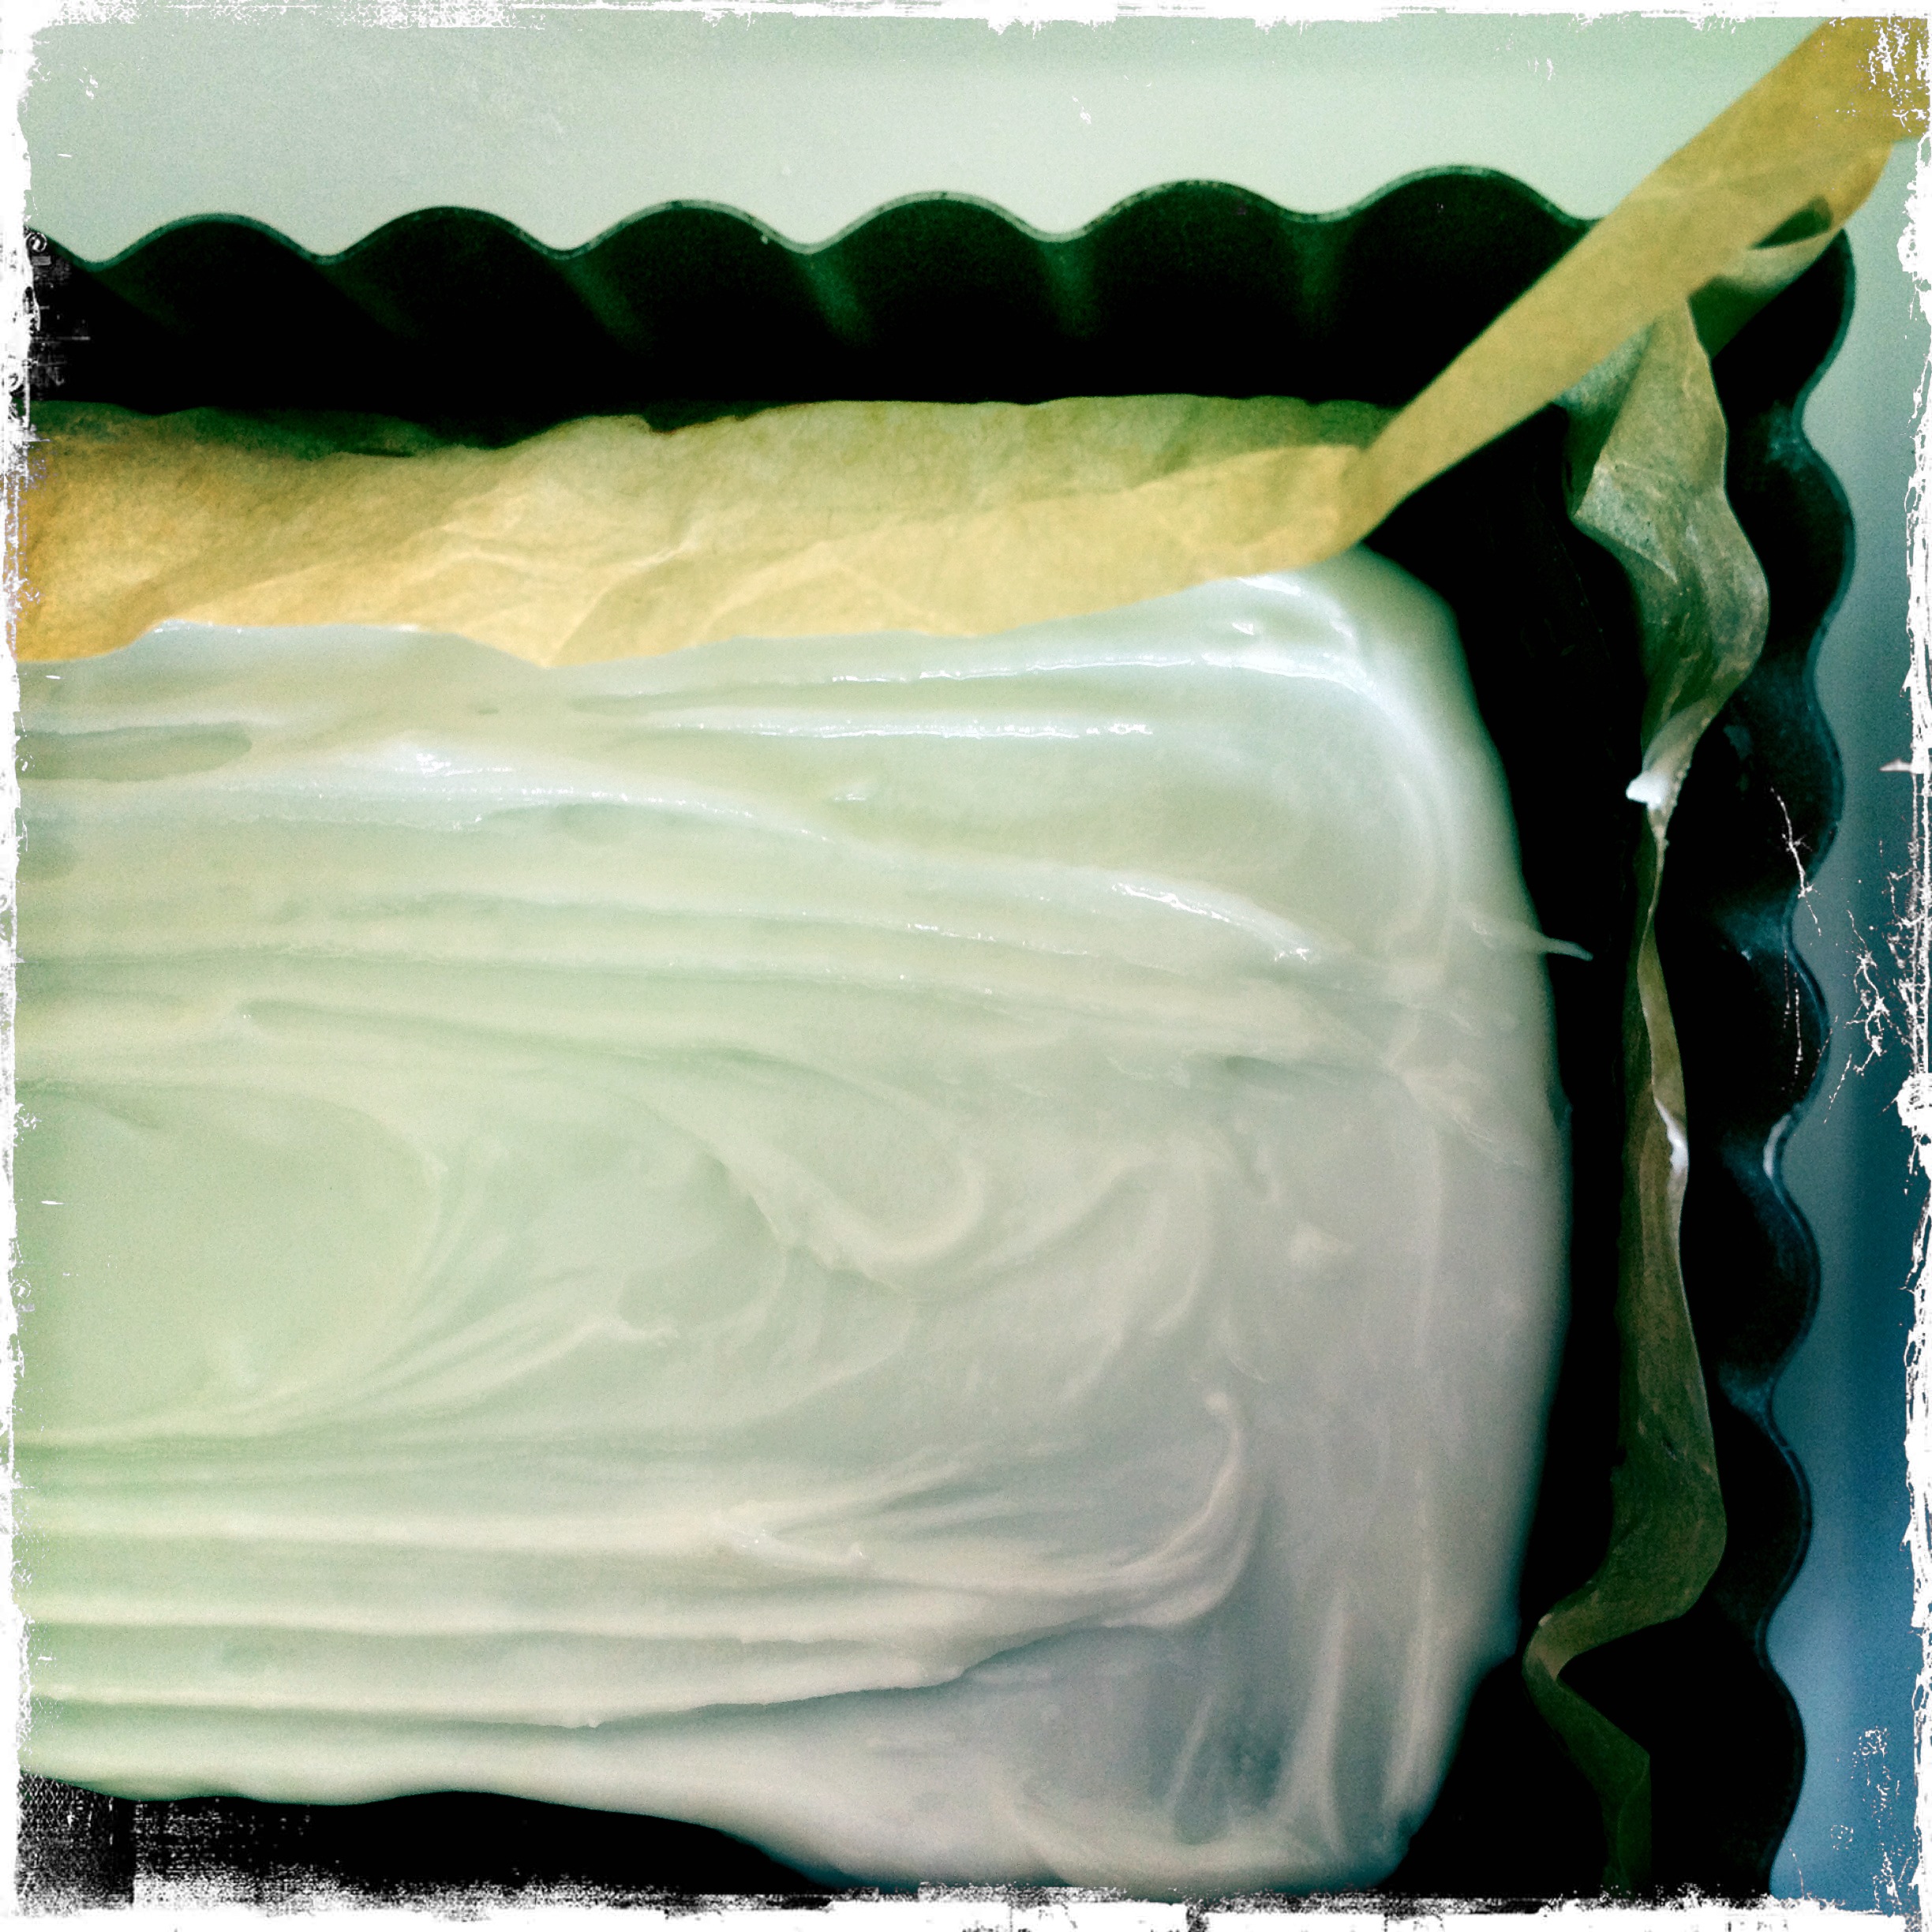
I used a long tin of about 8cm by 30cm, cos I wanted that sort of shape. I lined it in baking parchment (tip: scrunch up the paper first, then flatten it out so it lays flat more easily, this also gives the After Eight an authentic looking side to it, all crinkly).
I melted some dark chocolate. I used about 100g for the bottom and 100g for the top (I’ll put the whole recipe, as I used it, below) I used 70% but actually you could easily go higher – and definitely no lower. It’s important to get the chocolate spread thinly. Thick sounds good but in reality this means you end up with chocolate that’s hard to crack and you want it thin. Don’t sweat it though because unless you’re an idiot you still end up with a great end product.
Pour/spread the chocolate for the bottom (so, 100g) on the bottom of the tin – refrigerate. Chocolate takes almost no time at all to set. Mine took what seemed like 10 mins. It should be hard and crisp.
Make the fondant bit. I used one egg white and 220g icing sugar plus of course the all important peppermint essence. Just in case your fondant is really stiff add a tiny bit of water. Go easy as you don’t want to add too much.
This is a suitable juncture to point out that this product contains raw egg whites so you know, don’t eat if you’re old/young/pregnant/prone to hysteria.
Mix the egg white and icing sugar together (sieve the icing sugar in) until you have a consistency that you like. Add a teaspoon of peppermint extract. Note that refrigerating it doesn’t really thicken it up much so aim for what you want the finished filling to be like, not what you hope it will turn into. To this end you may wish to add the egg white bit by bit. (I never have to as my eggs are laid by my chickens, so not giant).
I end up with really thick fondant that’s a great consistency for what it needs to do.
When ready, spread over the base layer of chocolate and refrigerate for an hour or two.
Now melt more chocolate and spread it gently over the top – don’t drag it or you’ll end up with a mess.
Refrigerate and when ready to eat bring it out and smash it up with a hammer (but so you get big pieces, not lots of little ones) and let people help themselves. The circles on mine (if you look closely) are from the meat tenderizer I used. I’m sure finer folk have a toffee hammer or some such. DON’T bash it with a large thing like a rolling pin, you want to shatter it into shards, not smash it into a mess of tiny pieces.
You can cut this into squares, but they won’t be really neat. Or at least, mine weren’t. And I do think it’s fun to break it up yourself and eat shards of it.
Scoff after your meal with a strong espresso.
In summary you need:
about 200g very dark chocolate
220g icing sugar
1 egg white
one teaspoon of peppermint extract (I used the Star Kay White one from Waitrose)
A greedy disposition.
Make up for legs
I’m not presenting this one by Sally Hansen as the best out of a month’s long testing exercise. It’s simply that someone left a couple of cans of it in my boyfriend’s studio and he brought them home and passed them over to me with a little shoulder-shrug: “I thought you might find a use for these.”
A couple of years ago a friend of mine came round to my house and her legs looked very good – smooth, nice colour, absolutely nothing false about the look of them. She told me she had on some leg make up by Revlon or Rimmel. I never got any but the first day this year that I got my legs out and realised that, despite having 100% Italian DNA, my legs were very white, I remembered that I had some ‘make up for legs’ reached for a can of this and really liked it.
I’m not a fan of fake tan anymore. I don’t really sunbathe, but I really liked this. You don’t have to have any of the precision of fake tan, you squirt it on and rub it in and you can tell there and then if you’ve made a mistake. It won’t make pale legs look like they’ve spent a week on a sunny beach, but it does even out the flaws and take the deathly pale off and enable you to get your legs out and feel that bit more confident about them – it’s what it says: make up for legs.
iPhone, grouping your apps into folders
I’m sure lots of you know this already but I didn’t so I thought it was worth sharing in case anyone else still has to discover this, too.
Like many people, my iPhone is heavy with apps – I have several pages of them. Because my two year old is the boss of my iPhone, the apps also get routinely moved around. I’ve been meaning to do ‘pages’ of relevant apps, you know the sort of thing – page 2 is full of ‘news apps’, page 3 has ‘travel apps’, page 4 is ‘games’, etc, but I never have.
What I didn’t realise, until last night, was that you can make folders. What you do is hold your finger on an app (any app) until all the apps start moving around in the way that they do, then slide one relevant app into another similar one (eg, the Indy app into the Guardian app). This automatically generates a folder and you then have a chance to name it (iPhone will automatically generate a name, but you can change it). You can fit around 12 apps into each folder (sorry, not counted and my phone is not with me at the moment), but you can have more than one folder with the same name if you want to.
Here’s a bit more about it from Macworld.
Colomba – one of the most delicious things I’ve ever made
![]() |
| Colomba, soft, orangey, classy. |
Colomba means dove in Italian and it’s a traditional Easter cake. It’s much like panettone – traditional Italian Christmas cake – except it doesn’t have sultanas.
Both colomba and panettone use a biga – or sponge starter. I’ve never attempted panettone because it’s not meant to be easy. Not difficult per se, but the recipe is long and there are various stages during which you really need to concentrate. Plus you need to hang panettone upside down when it’s done (until it ‘sets’). I was almost tempted last year when I found out that Patrick at Bakery Bits had started selling the waxed paper cases you need for panettone but then my mamma’s friend bought an exceptional one back from Italy so I never bothered to make my own.
Then Patrick posted a recipe for colomba and started selling Aroma Veneziana which is rich with citrus and almond oils with a hint of vanilla. He also sells the colomba cases (I found the 750g ample big enough for the recipe below. You can make the cake in a traditional cake tin but the dove shape is traditional). So I decided to try it.
God it was delicious. One of the best things I’ve ever made. So good that I couldn’t believe I’d actually made it myself. (I’m aware Easter has passed now, but this shouldn’t put you off trying it.)
I made a few changes to Patrick’s recipe which I’ve detailed below. I actually made two colomba cakes – retardeding the proof time on my first attempt because I ran out of time (I put it in the fridge at the stage marked * below, because from start to finish this cake takes quite a long time, you really need to start it in the morning) and cooked it for 40 mins. Refrigerating it didn’t seem to affect it at all, if anything I think it was tastier. It was supremely moist – a tiny bit underdone and doughy at the very centre, but unnoticeable to all but me. I cooked the second one for longer – probably 50 mins and it was more authentic ‘colomba’ but slightly dryer. My oven is ferocious so I cooked at more like 180/190C. Patrick’s tip of putting silver foil on top is one to be followed, as the egg white/sugar coating burns easily. In fact I covered the whole of the colomba for the middle portion of the cooking time.
Anyway, this is what you need to do.
First stage: the sponge
15g caster sugar
100g warm water
3 egg yolks (reserve two egg whites, freeze the others if you don’t know what to do with them immediately)
11g instant dried yeast
70g strong white bread flour
Mix together the sugar and water with the egg yolks; separately, mix together the yeast and flour and add this to the egg/sugar/water mixture. You get a thick batter. cover with cling film and leave for a good 30-40mins until it’s really bubbly and frothy (note: my kitchen is about 20 degrees, if yours is warmer/cooler you’ll nee to adjust the time accordingly).
Second stage: first dough
The frothing, elastic sponge, as above.
75g warm water
45g very soft unsalted butter
6g dried yeast
210g strong white bread flour
Whisk the water into the sponge, then mix in the butter. Separately mix the flour and yeast together and add these to the sponge. You should have a thick, stick, moist batter. Cover with cling film and leave for about two hours, until doubled in volume.
Third stage: second dough
The first dough, as above.
145g caster sugar
15g honey
3 egg yolks
grated zest of two oranges
2 teaspoons of Aroma Veneziana (this is my favourite big, I adore the smell and it gives you a hint of the good things to come).
115g very soft unsalted butter
250g strong white bread flour
5g sea salt, finely ground
150g chopped mixed peel
Take your first dough and now mix in the sugar, honey and egg yolks. It’ll look a bit unpromising and ‘separate’ – don’t panic. Add the Aroma Veneziana, the orange zest and butter, then the flour and salt. Now, Patrick didn’t add the mixed peel til later (see his original recipe, link above), but I added mine here too. Mix all together.
Now here, Patrick says to knead until you have a soft, smooth, elastic dough. My dough was sticky and a bit unmanageable so I rested it for ten minutes, then gave it a light knead, rested it for ten minutes, then gave it a light knead, rested it for ten minutes, then gave it a light knead. I did this on a lightly oiled chopping board.
Then I picked up the original recipe which says to put it in a oiled bowl and cover with cling film * and leave to rise ‘dramatically’, Patrick says until it’s about three times the original volume which takes about 3-4 hours.
(For the first colomba this * is where I refrigerated it and the next morning, took it out and let it sit all morning until it got to room temperature and then started to rise ‘dramatically’.)
When that’s done, Patrick cuts his dough in half and puts it in the case (after rolling it), one half making the ‘wings’ and one half the head to tail bit (so they overlap). I didn’t do this, I cut three pieces to fit head to tail, and two for the wings, rolled it out to flatten it put it in the case and pinched the dough together.
I found the case was quite floppy once the dough was in it, so I sat it on a baking tray and when the time came put the whole lot in the oven.
At this stage you let it sit and rise again for about 2-3 hours, until doubled in volume, covered with a damp tea towel. Mine easily took more like three hours.
Fourth stage: the delicious topping
2 egg whites
25g caster sugar
25g ground almonds
crushed sugar cubes
flaked almonds
Just before baking you make a paste of the topping ingredients: 2 egg whites, 25g caster sugar, 25g ground almonds and put the whole lot on top of the colomba, spread out with a pastry brush/back of spoon to make sure every bit is covered. Please don’t miss this bit – it’s the topping which really makes it. Scatter broken up sugar cubes and flaked almonds on top – I used three sugar cubes and that was plenty.
Cook for 40 mins at 200C and check if it’s done by putting a skewer in. If it’s burning put silver foil on top. Even if it looks really done – do check with the skewer, if it comes out really gunky it’s not done yet.
I can’t even begin to tell you how great this is. Patrick says it keeps for four days in a tin, but I made my two a week ago and although one is gone, the other is still superb. But if you do have any left you can always toast it/butter it. We eat it in the morning dipped in caffe latte.
This recipe seems long – it is. But take your time and try it. It’s pretty fool proof considering the result!
Let me know how you get on…and don’t save it just for Easter!
"There are buns for tea"
![]() |
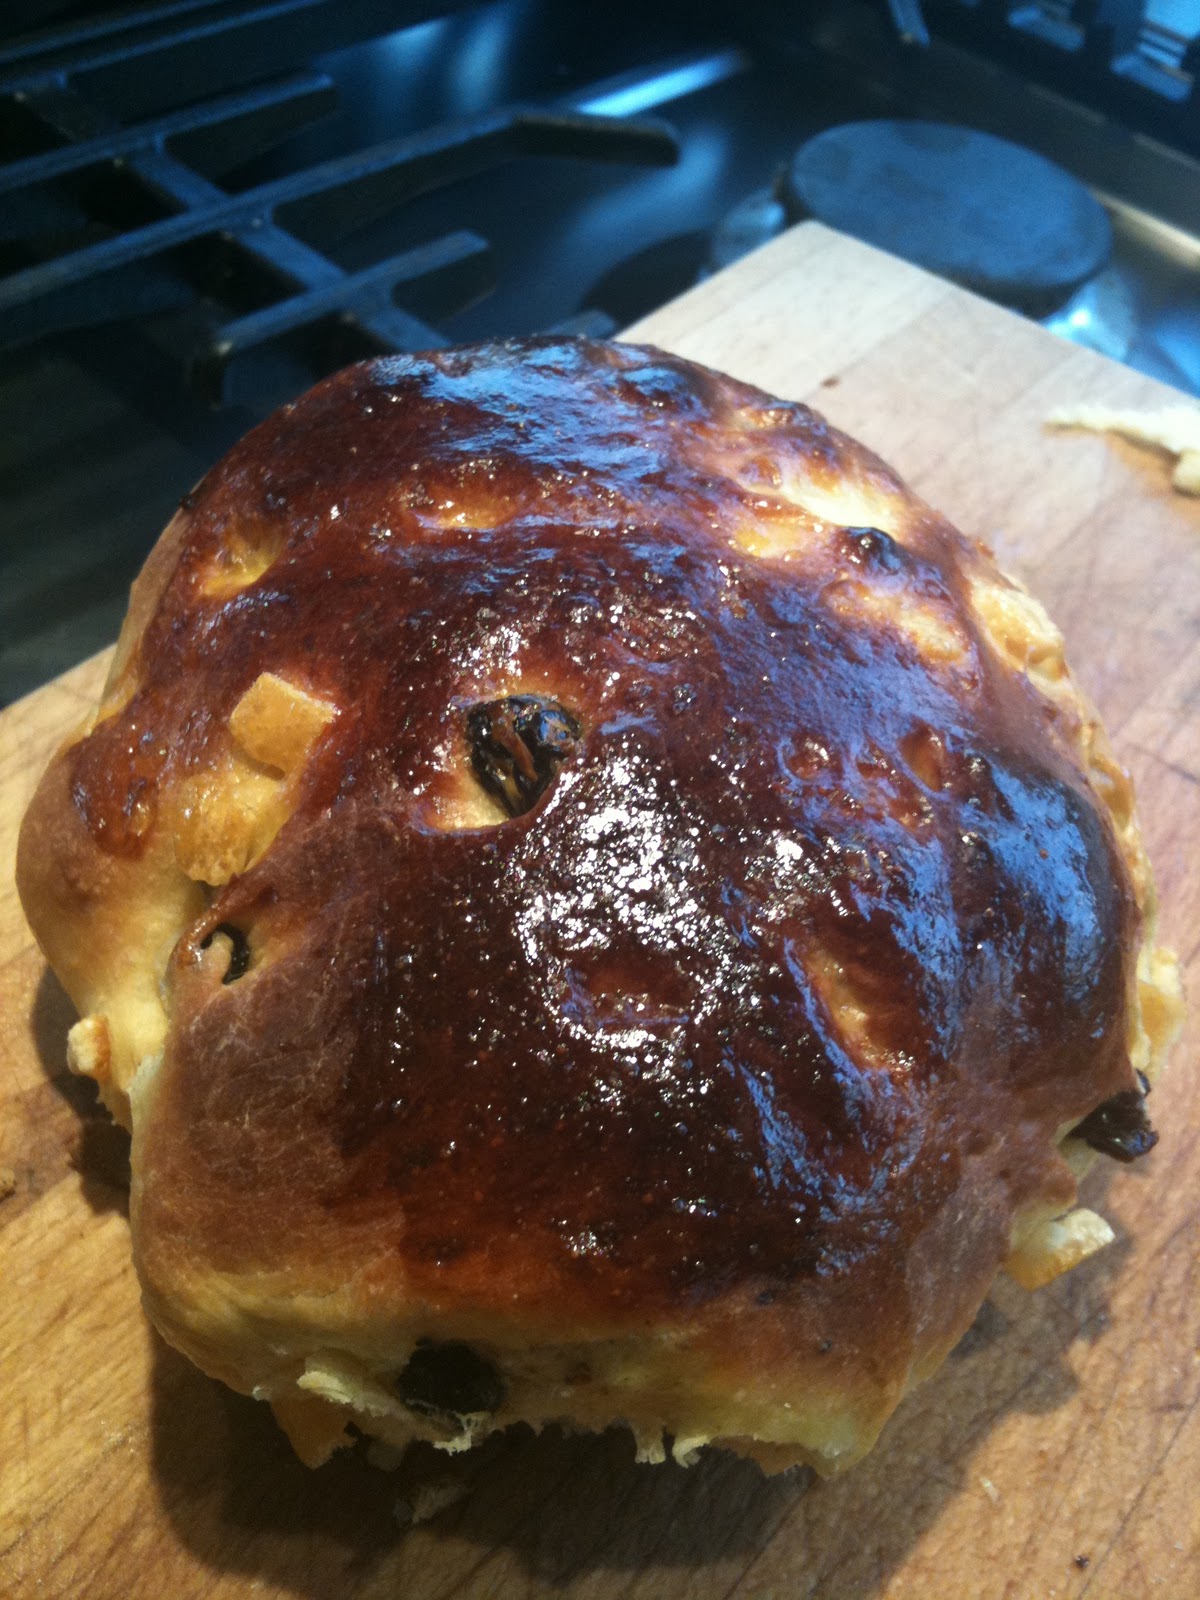
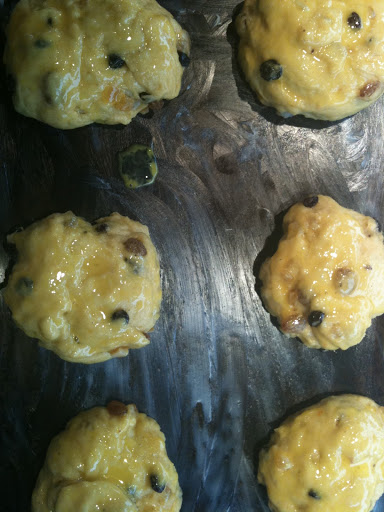
| A bun. This one from the first batch, thus without its top hat of crushed sugar cubes and amaretti biscuits, which I now regard as obligatory. |
As regular readers will know, I don’t really like cooking with yeast. I trust it to the breadmachine – see bagels – but making dough from scratch, I don’t really like using yeast.
Which is why I’m so comfortable, and confident, with sourdough.
But recently a recipe for Panettone teacakes on the Bakery Bits blog caught my eye, or rather, the Tweet advertising them did. So I tried them. The first time, I didn’t read the recipe properly and only realised you needed white chocolate when it was too late. I had dark chocolate (I always have dark chocolate) which I thought I could substitute because I thought the recipe might use the chocolate as ‘chips’. But it doesn’t – it’s used as as lard substitute. See Dan Lepard’s original recipe here from 2007, which explains it all rather beautifully (one of the many reasons that I love Dan’s recipes is that he tells you a bit about the whole chemistry of it too, so I always learn something, beyond how to make a new bun or bread).
Anyway I left the white chocolate out in my first batch, and also didn’t have enough candied peel. And used mostly sultanas rather than raisins. And didn’t have the recommended topping. But they were still great if a little less sweet than I think they should be. The second time I made them I had all the relevant ingredients and they were strangely, slightly less soft but completely delicious. These are the new house teacakes.
But the dough makes quite a lot (about 14) and that’s too much for us. If you want, this dough freezes beautifully. A few days after first making these, when teacakes were called for (freshly baked, and buttered, they make an excellent after swimming treat I’ve discovered), I got the dough out, defrosted it, shaped it, left them to rise and they were perfetti. In fact I’ve done this a few times now, frozen the dough and then taken them out the night before they were needed to defrost, got up in the morning, shaped them and given them an hour or so’s rising and then cooked them and they’ve been delicious.
These are life-affirmingly delicious about 20 minutes out of the oven.
The Aroma Panettone is an absolute must here.
These teacakes have promoted me to constantly say “there’s buns for tea” now. If there is a word in the English language more cheering than ‘buns’, I can’t think what it is. It’s so comforting, so Enid. Ironically the Railway Children was on today and they said, at least twice “we can have buns for tea”.
Anyway here’s what you need to do to have buns for tea:
14g instant yeast
125g warm water
600g strong white bread flour
50g milk – any type
50g honey
25g caster sugar
75g white chocolate, melted
150g sultanas (original calls for currants, I prefer sultanas)
150g mixed candied peel
Zest of one orange
1 teaspoon of salt
3 large eggs, 3 egg yolks (yikes I know, a lot of eggs!) plus one extra egg for the egg wash although I find milk works almost as well and is less wasteful, especially if you freeze the mixture and make in batches.
2 teaspoons of Aroma Panettone
Amaretti biscuits
La Perruche sugar lumps
Measure out the flour. From the 600g, take 3 tablespoons and put that in a bowl with the yeast and water. Mix it up til it’s all dissolved. Leave it for about 15/20mins, until there is obvious bubbling. Because I whisk my mixture up, be sure the bubbles you see are the yeast working (these look more like geyser bubbles) rather than just ‘whisk’ bubbles. On a hot day you’ll see this fairly quickly. My kitchen is quite cool and it can take 20 mins plus.
Heat the milk up, then add the chocolate, sugar and honey. There isn’t much milk so you do think “how will the chocolate melt” but it does. If you get stuck you can always just very gently heat it up again, but I’ve never found the need. To this add the sultanas, peel, zest, salt and Aroma Panettone.
Separately, whisk the eggs together – the 3 whole eggs and the 3 yolks (freeze the whites, I’ve got a killer Madeleine recipe coming soon). You’re just combining them, you don’t have to whip them into a frenzy. To these add the yeast mixture and then the milk/peel mixture. Then the flour. Use a dough hook and a food mixer if you like, or do it by hand.
Just until it’s all incorporated.
Leave the dough to rest for ten minutes. Then you give it a light knead, on an oiled surface, with a 30 minute rest each time. Do this three times (so to recap, after the first mixing, leave the dough for 10 mins, then light knead, rest for thirty mins, light knead, rest for 30 mins, light knead, rest for 30 mins.
![]() |
| Egg-wash on, about to go into the oven |
Now divide the dough up into a bun size. Patrick said 100g a piece, I find my buns are slightly smaller. Roll into a ball with your hand and place on a buttered baking tray (you’ll be cooking on this same tray so make sure it fits into your oven). Flatten to about 2cm thickness, or leave thicker if you prefer (they do rise up). Ideally don’t have them touching but if they do it really doesn’t matter – you just tear them apart when they’re cooked.
Now leave them to double in size. This takes about 30 mins in my warming drawer.
Beat the last egg and brush over the top of the teacake just as you’re ready to bake them and sprinkle over the crushed amaretti biscuits and sugar lumps. You can live without them of course but they really do add something.
Patrick recommended cooking his buns for 15 mins at 220, mine can be done in half that time (our oven is practically industrial in its heat), so set a timer and check for yourself.
These are lovely on their own or, you know, split and buttered…
![]() |
| Fresh out of the oven |
E-cloth-mop
If you are not the sort of person to do their own cleaning, then perhaps skip this post. For it is about mops.
I do have a cleaner. Her name is Rute and she is Portuguese. And even though Portuguese (or Porkinese as my child calls it) is very different from Italian, we converse splendidly. Partly through the international language of Rant.
Anyway, despite me having a cleaner, I still do my own cleaning at times, largely because I think it’s really important to be able to deal with your own dirt.
If you didn’t know this, Italians have a thing about cleaning. Spesh southern Italians. My family in the south are all certifiably insane and wash the kitchen from top to bottom after lunch.
Every day.
I’m not like this. But I do like a bit of Scanda-style which means wooden floors, and wooden floors show up dirt far more than carpets. Dust-bunnies kinda get sucked into carpets. Anyway, this is a fucking mop for Christ’s sake so I won’t go on too much. But it – the E-cloth mop – is fab.
Why it’s good:
- It’s so simple and it looks good in that pared down way (look: design is important, even in mops)
- You get interchangeable ‘heads’ which are rectangles of fabric. There are three, a white fluffy one for simply ‘sweeping’, a blue one for washing and a blue striped one for tough stains.
- They attach via a Velcro-type strip, super easy.
- They zzzzzp off for washing – bung them in the machine at 60C.
- Also zzzp it off for dunking in the washing water and wring it really dry before putting it back on for cleaning another bit of floor – because the cloth is so wrung out you can use it on engineered floors (well, I do).
- It’s a step up from the ‘straccio’ over a broom head that we use in Italy.
That’s it. If you need a mop, this is the one to get.