Author Archives: Annalisa Barbieri

The perfect drinking glass?

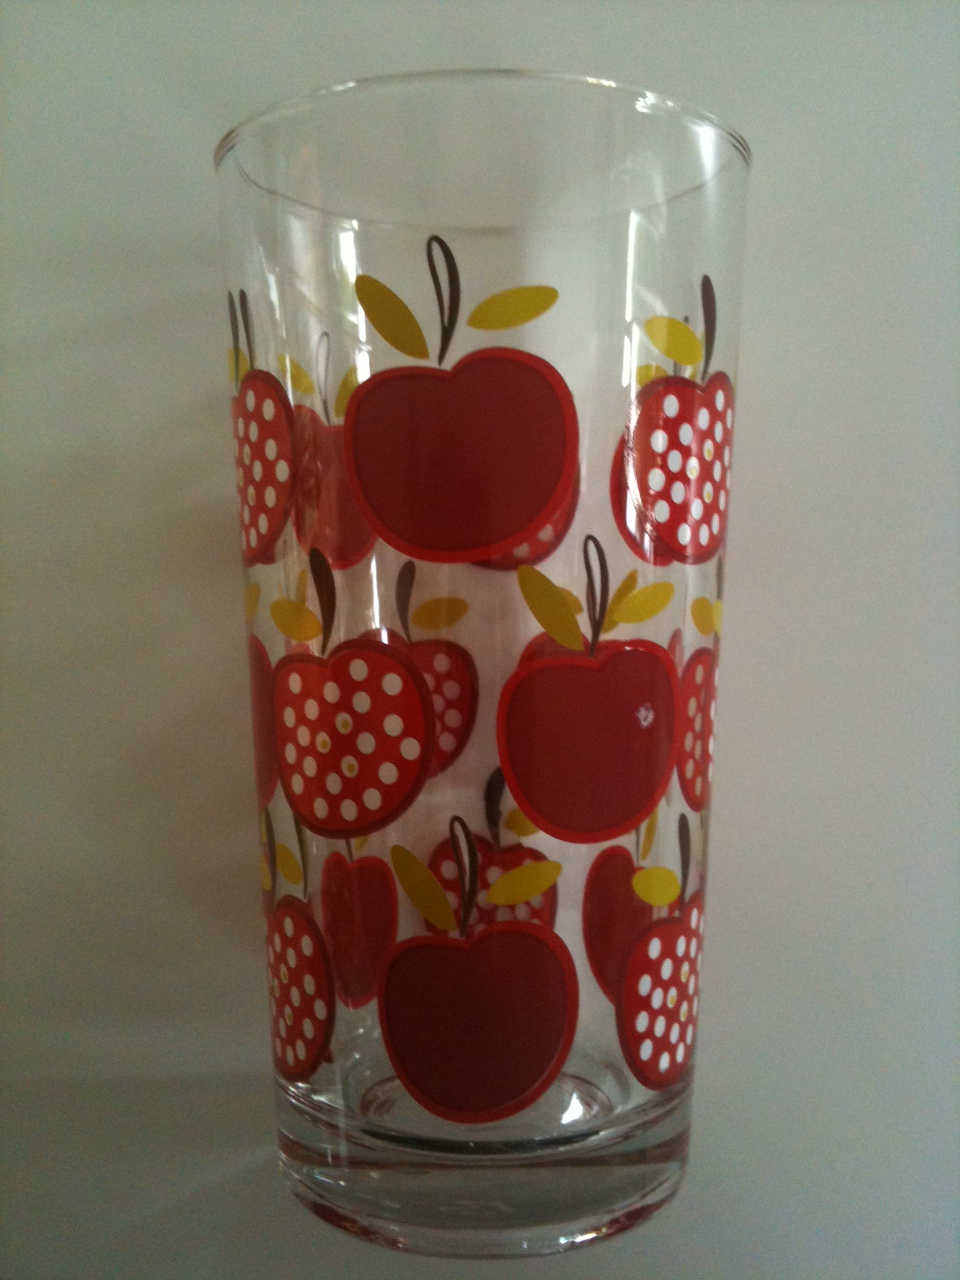
La Gigogne. Very difficult to take a picture of a glass..

You may have gleaned, from one of my other posts, that I’ve got a thing about glasses. This may be because my beverage of choice is plain old water, and thus I need to get my kick from the vessel in which it’s served.

I am crazy for these Duralex glasses. Duralex almost went bust a few years ago, which must take some doing considering that its glasses are so beautiful, simple, iconic and various other words that you wouldn’t marry with a company that almost went bust. Perhaps its most famous glass is the Picardie. (That link not only takes you to a picture of the Picardie, but a rather good article on Duralex in general, in the Independent.)

But I’m not so keen on the Picardie. My particular favourite is the slightly lesser known, far simpler Gigogne glass. It looks a bit like a bowling ball with two lines etched around it (not easy to see in the pics, but you can just make them out). It sits so nicely in the palm of your hand and the 160ml size makes a lovely glass for children, too. Not so crazy when you realise (see below) how resilient Duralex is.

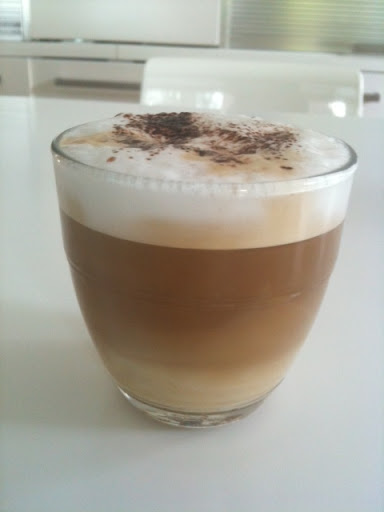
It comes in three sizes: 220ml, 160ml, 90ml. It’s the middle size you can see here and it is perfect for serving water, red wine (I really do not like traditional wine glasses, they make me hyperventilate, especially the ones we have which are on stems about a foot high and I always fear knocking them over because I am quite clumsy. My partner is rabid about serving wine in the correct way, at the correct temperature, in the correct glass and then you holding it in the correct way. Me? I drink the Italian peasant way, in a glass rough worker’s hands can pick up easily) or even, as you can see below, cappuccino. It holds, to my mind, the perfect proportions of a good cappuccino – not too much milk, one espresso shot.

You can also serve desserts in it – individual style trifles, mousses, you get the picture. Even though there isn’t one of it holding such a dessert. Another time.

Duralex glasses are virtually unbreakable: tempered, can stand hot or cold, chip proof, can go in the dishwasher or the microwave. No wonder they were used in school canteens and put to various other commercial uses in the 60s and 70s.

I cannot imagine a more hard working, plucky glass. And all for a coupla quid each. I got mine from Rinkit via Amazon. They are surely due for a major come back.

Update. Johnny Loulous has now started stocking them. I now have them in both the medium and large size. I prefer the large for water (I drink a lot of water).

The Museum of Brands, Packaging and Marketing

This little museum is just a short walk away from where I grew up. I’ve been meaning to go there ever since I discovered its existence, a couple of years ago. It’s a lovely way to spend an hour or so and unless you’re unlucky, it should be nice and calm and not too busy.

There are cabinets full of packets of washing up liquid, sweets, chocolate, biscuits, bleach, stock cubes…you get the picture. It shows how packaging has changed over the years (or, not so much in some cases) and it’s a great trip down memory lane. I found it comfortingly nostalgic. There are good toilets, a very simple cafe (simple as in the staff have a kettle and make the tea) but a few tables to sit at – very peaceful (or was when we went) with a TV showing ads from the past on a loop – which provided excellent entertainment.

The shop has some great postcards (55p showing vintage ads).

I loved this place. Go.

Ottolenghi is round the corner if you want to spend lots of money on great pastries.

Museum of Brands:

Opening hours
Tues-Sat 10.00:18.00, Sun 11.00:17.00
Closed Mondays except Bank Holidays
Last entry is 45 minutes before closing
Closed Christmas Day, Boxing Day, New Year’s Day, Notting Hill Carnival
Admission
Adults £6.50 (including Gift Aid),
Children (7-16) £2.25, Family £15.00, Concessions £4.00. Group discount 10% (groups of 10 or more are asked to pre-book).

Revolutionary new treatment for verrucas!

Bet you’re glad you discovered this blog. It’s so full of useful, glamorous things. Don’t worry. I’m sure I’ll sneak a designer bag in next week.

Maybe.

In the meantime, something more useful. How to treat a verruca without spending very much money at all.

Despite growing up next to a swimming pool (and using it regularly) I have never had a verruca. But my eldest caught/grew/developed one a few months ago. Now for those that don’t know, a verruca is simply a wart that grows inwards (because the weight of walking on your foot means it can’t grow outwards), and those black bits you see are the blood vessels.

So we did the usual and bought Bazooka that Verruca and nothing really happened. Then another verruca grew and I started to worry that my child would become like one of those freaks that has a verruca farm on her feet (this happened to my cousin, she had about eighteen of them). So after a few months of painting on Bazooka and nothing happening I texted my friend Mary, who is a GP, and asked her if I should take my daughter to the docs to have the verruca frozen off with liquid nitrogen. “Yes, you can,” she texted back, “or you can try something else that seems to be having lots of success.” I bit my fingers whilst I waited to hear what that something else was. Perhaps something illegal. That would be exciting.

“Electrical tape” she texted.  She said it would take a few months, but the Bazooka had done nothing in a few months so thought it was worth a try. So I bought some, from the market stall. It was 35p (yellow, if it matters) and I swear in less than a fortnight, all the verrucas had gone.

This is, of course, ground breaking news because it could bring down the fortunes of various over the counter remedies. I don’t know, perhaps it was fluke, but try it. I’m guessing electrical tape works the best as it’s very sticky and watertight, but all you do is cut a little piece, stick it over the verruca and replace every day/few days.

Let me know how you get on.

A 2014 update: we only use this now for verruca treatment and it’s amazing, especially if you can catch them early. For us it’s effective in less than a week.

Madeleines

Spot the eager small child trying to reach up for a madeleine

It started with the purchase of a madeleine tray. Because, ya know, I don’t have enough baking tins. Then came the hunt for the perfect madeleine recipe.

Big disappointment. Many were nothing more than a sponge recipe that you then baked into a shell-shape.

Then I came across a recipe by Heston Blumenthal in, I think, The Times. If I recall the tale correctly he made these for his wife when he was courting her. They are exquisite.

Here’s what you need:

125g unsalted butter, plus a bit extra for greasing the mould
100g icing sugar
40g ground almonds
40g plain flour, plus again a bit extra *
3 large egg whites
2 teaspoons of honey
Finely grated zest of a lemon
Salt

*I have made these, really successfully (like can’t tell the difference successful) with rice flour for those that can’t have wheat. I made these for the super talented opera singer Sarah Connolly with rice flour and she LOVED ME FOR IT. I think she may have even shed a tear, although that may have  been at my singing.

This is what you do.

Don’t preheat any ovens just yet.

Put the butter into a small sauce pan over a medium heat and melt it, keep it on the heat until it starts to sizzle and, Heston says, have a nice nutty scent to it. I have an atrocious sense of smell so this never happens for me and I do it by eye, it goes darker is the only way I can describe it and takes about five minutes. You’re making beurre noisette.

Don’t panic. It’s not like making caramel. Set it aside and take a deep breath. You’re about to make something delicious.

Take your madeleine tray and grease it with some of that extra butter. Unlike when you make friands (more on them another time), don’t be tempted to melt the butter and brush it on. It makes the mads too greasy. Once you’ve buttered the moulds, sprinkle some flour over and tap off the excess.

This is where a flour duster must really come in handy. A flour duster is a kitchen gadget I do not (yet) possess.

Now, sieve the icing sugar, ground almonds and flour into a bowl. You’ll no doubt have some bits of round almond left over in the sieve, just chuck that in too when you’re done. Using a fork, whisk the egg whites into the sugar/almonds/flour. Just lightly and with no panic. You’re not making meringues.

Now add the honey, whisk it up a bit more. Now add the butter which should be warm, but not hot. Now the lemon zest and mix until everything is homogenous. To use Heston’s very particular word. Now add a bit of salt. I grind up some rock salt for this.

Now press some cling film or baking parchment onto the surface of the mixture and rest it in the fridge for at least an hour. I’ve left it overnight and longer. The gluten relaxes to produce a madeleine that is, to quote Ross in Friends (The “Manny” episode) “Lighter than air”.

I have, at this stage, transported the mixture on holiday, or to friends’ houses so that I can cook up fresh madeleines on a whim. But what you’re meant to do next is fill the moulds (which you could of course grease whilst the mixture is resting) with the mixture. Heston says they make 10 but I’m sure I’ve made 12. Anyway you fill with madeleine mixture and put it in the fridge again for half an hour (or longer if need be).

No-one said this was going to be quick.

Preheat oven to 170C.

Cook for 10-15 minutes. They should be dark brown around the edges but golden otherwise. Turn out (you may need to prise the edges with a knife) and leave for five minutes before eating. You REALLY need to eat these warm from the oven, they will never be that good again.

Nearly all gone..

Update, 24 June 2012

After several requests from my children to make chocolate madeleines, I decided to try to adapt this recipe. What I did was melt 50g of plain chocolate and divide the mixture made above into two.

Into one of the halves half I drizzled the melted chocolate and stirred it well. I then dolloped a spoon of the chocolate mixture into my madeleine tray, a spoonful of the plain mixutre and cooked as above. Result: fantastic. The chocolately bit was really chocolately. I had worried it might alter the mixture in some way, but only for the better!

The only thing I’d change is that, next time, I’d swirl the chocolate mixture into the plain mixture using  a skewer or something, to make it more marbled. Dunno why, just think it’d be nice.

But generally, I feel really very clever.

You can also add a handful of chocolate chips to the plain mixture.

IMG_1407

I love these tea towels

It’s a joke in our house that whenever I’m on a particularly scary deadline, I iron tea towels. My partner can always tell when I’m procrastinating wildly because he comes home/downstairs/in from the shed and everything is ironed to within an inch of its life.

I only like industrial looking tea towels. The ones with the red or blue stripe and something (I’ve never worked out what) written down its length. I loathe cutsey, jokey ones. They are completely wrong. But I love these mid-century modern styley ones from M&S with their bright, graphic designs: £9.50 for three. I’ve seen similar for about £15 each so buy before they all go.

Mid Century-ish glasses with apples on

I’m a total sucker for anything from the 1950s and 60s (and bits of the 1970s). It reminds me of my childhood, because invariably the stuff the grown ups had around them heralded from that time. I think my all time favourite year for design (and the year I think the perfect man’s suit was made, it never got any better) was 1963, coincidentally also the year my parents got married.

Anyway. I wanted some every day drinking glasses that had a pattern on that was jolly, a bit retro, reminded me of my childhood in Italy (sniff) but weren’t so expensive I’d never use them. I looked everywhere and then I found these from of all places – Tesco. £1.25 a glass or £6 for six. I love the design, which is a bit Scanda.

Worth straying away from Waitrose for, but then hurry straight back.

Baked ricotta and sweet potato salad

 
This is so delicious that I started eating it and then remembered I hadn’t photographed it which is why it’s half eaten. But it looks very good when first assembled and will appeal to those who like prettiness on a plate.
 
 
If I had tons of money, one of the things I’d do is hire a chef. Someone to make wonderful little delicate salads for me. I love salads. I’m not talking limp lettuce with enough vinegar to make your hair shine, I’m talking big, blousey salads with lotsa things in them.
 
The problem is I don’t always feel like making them. Since my first pregnancy, sometimes preparing a salad can make me feel a bit sick. I have to do it before hunger makes me stupid, so a bit of pre-planning is required.
 
I’m hugely fortunate, but utterly deserving, because my partner is a fantastic cook, and I can sometimes boss him into making me a delicious salad, giving him the above reason/excuse and it seems to work. Despite me telling you all this, I’ve got quite a salad repertoire and this is one of them. It’s from Peter Gordon’s Salads. I think Gordon (The Sugar Club, The Providores) is hugely underrated by the at-home cook. I love Salads – published in 2005 – because Gordon proves that a proper salad can be a meal in its own right, not just an add-on to lessen the guilt.
 
The recipe below can withstand a lot of tweaking, so if as you make it you think “I can’t possibly eat this much spinach” then don’t put so much in. I found 400g waaaaay too much and only used about 150g. Don’t know if it’s a typo but see how you get on. I’ve reproduced the recipe here the way he printed it however.
 
Here’s what you need for four worthy people:
 
400g ricotta
half a teaspoon smoked sweet paprika
quarter of a spoon of cumin seeds – leave them as they are no need to crush
quarter of a teaspoon of ground cinnamon
2 tablespoons extra virgin olive oil
sea salt and freshly ground black pepper
 
600g sweet potatoes, Gordon says to scrub their skins, I peeled mine cos I didn’t read that bit
4 tablespoons of hot water
300g grapes off the stems. He doesn’t specify which, I used red seedless. You’d be insane to use seeded ones unless you want your guests to be spitting all over lunch.
2 tablespoons pomegranate molasses (I got mine from a food market)
3 table spoons of grapeseed oil (I used a mixture of olive and rapeseed)
1 teaspoon soy sauce
2 handfuls of olives, stoned and roughly chopped
2 tablespoons of baby capers, rinsed
12 mint leaves, shredded
2 tablespoons thinly sliced chives
400g baby spinach (see above)
 
First you preheat the oven to 180. Line a baking tray with baking parchment and then slice the ricotta into 2cm pieces. Don’t worry if it crumbles a bit. I sliced mine whilst still  in its little round container, and then lifted it out, and it worked fine. Mix the paprika, cumin and cinnamon together with a teaspoon of the olive oil and brush this on the cheese. Sprinkle with sea salt and cook for 15 mins. Take out and leave to one side to cool.
 
Turn the oven up to 200C.
You’re now going to cook the sweet potatoes and grapes together, so pick two containers that will fit side by side. If you don’t have, don’t fret. This salad is served at room temperature so you can just cook one at a time. I’d probably do the grapes first.
 
So, cut the sweet pots into thin wedges and place in a small roasting tin. Pour in the hot water, season with salt and pepper and drizzle over the remaining olive oil. I know it sounds mad but just do it. Bake until just cooked – about 20 mins.
 
Place the grapes in a non-reactive dish and pour on the pomegranate molasses, grapeseed/other oil you’re using and soy sauce. Bake for 20 mins. Remove when done and leave to cool.
 
Once everything is at room temperature, pour the juice from the cooked grapes into a bowl and mix in the olives, capers, mint and chives to form the dressing.
 
To serve, toss the spinach with half the dressing and place on four plates. Scatter the sweet potato wedges on top, then flake the ricotta on top of that. Scatter over the grapes then pour the rest of the dressing over the top.
 
Eat. You will enjoy it.   

Sleepwear for the bigger breasted, a moan and a tip

One of the (many) things I envy about girls with breasts like tiny mandarins, is that they don’t have to worry about nightwear. They can wear whatever they want and if they have to answer the door to the postman or the milkman or the Milk Tray man (where IS he these days?) they don’t have to do it with their arms folded because their breasts are unsupported.

Naturally, big-breasted girls can do this too, but personally, I don’t like wondering round the house in my pyjamas with unfettered breasts.

Also if your breasts are really large and/or you’re breastfeeding, it really isn’t that comfortable sleeping with no support at all. Many women really don’t like wearing a bra at night but you don’t want nuffin, neither. I know this from years of co-running a parenting board (no not that one, this one).

Now, you can get pyjamas/nighties with ‘secret support’ – Bravissimo being the most obvious – but they are all sleeveless, and I like to have my shoulders covered at night. But also it really limits you to the styles available (which you may or may not like) at a time when, as a big-bosomed woman, you already feel you have limited choice in clothes.

M&S now does (and has done for a while) some secret support camisoles that are really rather good and these work really well at providing a modicum of support and you can wear them on their own, atop a PJ style trouser, if – unlike me – you don’t mind having your shoulders bare. Or under any normal PJ you like, thus opening you up to choose from any PJs out there. You could I guess also wear them with nighties, but I don’t really do nighties.

My favourite M&S secret support camisole vesty things are these and these. Both are £12 a piece and come in a variety of colours, the shoulder straps also adjust, a nice touch.

Although Bravissimo does a racer back PJ top in lots of larger sizes, so it fits better than the M&S ones if you’re big-cupped, they are over double the price and always sold out. It also has great strappy tops, but these cost even more: £32. So I think the M&S ones compare really favourably, especially if all you want is something to wear for a bit of support under your current nightwear without going to bed fully upholstered in a bra.

If you’ve found a solution that works for you, do share..

Lollipops…lovely chocolate lollipops…

A mint leaf enrobed in dark chocolate atop a stick. Joy.

When I was researching how to make my One Giant After Eight mint, I came across this on t’internet which I thought was a fantastic idea.

So I made some and they were great and so easy. There’s something about giving people a little chocolate something on a stick that makes them go crazy. (I got some mint leaves, melted some 70% cocoa chocolate, dripped it over the top and stuck a lollipop stick on, do the lot on some baking parchment, put in fridge for not very long at all, peel off, present with coffee.)

This got me thinking of making other chocolate lollipops. My children like chocolate and I don’t mind them eating it, but prefer them to have good quality dark chocolate which is actually good for you: it’s not easy finding dark chocolate lollies, the choice in milk chocolate whatnot is HUGE, in dark chocolate? Not so much. You can of course also make these chocolollos for adults and serve them after dinner with coffee/instead of a dessert. They are my new BIG NEW THING THAT I’M REALLY EXCITED ABOUT and am pressing chocolate lollies on everyone who comes round.

So I decided to get some lollipop moulds to make the process even simpler and because I’m a sucker for gadgets. This means you can make a tray of choco lollies in under five minutes and they look so neat and perfect. I just melt the chocolate in a jug, in the microwave (about 100g makes seven lollies, roughly), pour them into the moulds, putting in whatever you like – sunflower seeds, pumpkin seeds, chopped nuts, chopped up mint leaves, whole mint leaves, flakes of chilli, bashed up mints or honeycomb. I mean just GO CRAZY. Up to you with whether you put the ‘filling’ in before or after pouring in the chocolate – you get different effects according to which you do.  I like it cos it means I can give my children a chocolate hit with omega-3 rich seeds which makes this practically a health food.

I got my moulds from Make a Wish Cake Shop, the 7 in one plain one is this one. (Ignore the pic, what you get is a plain tray with seven plain lolly impressions, those funny pics are stick on sugar discs, nothing to do with the mould.) I also got this 4 in one which gives you a much bigger lollipop, only really for special occasions I’d say. Then you need some lolly sticks.

There are lots of other places that do lolly moulds/sticks but that’s where I got mine and the service was fast.

I am aware this is the third chocolate post in a row.

An update in November 2011. I make these all the time and have experimented with crushed coffee beans (espresso ones if it makes a difference): excellent. But the BIG find was popping candy (I get mine from Waitrose, it’s in the baking aisle, near stuff like sprinkles and cooking chocolate. It’s fantastic, you sprinkle some popping candy (it comes in little rocks almost like crystals) into each mould and pour the chocolate on top. Then, when you eat the candy it ‘explodes’ in  your mouth.

Lollies in chocolate. With bits.

And yet more..

Home made Nutella

Not the most amazing pic but it’s real life home made Nutella-type spread in a jar, look!

I know this doesn’t look good; two consecutive posts concerning chocolate.  There is tons of other stuff I could be writing about, I’m just not very fired up about them though. And as this is a blog, and I’m not being paid, it has to be a bit enjoyable for me.

In Italy Nutella comes in glass jars you can use, when you’ve scoffed the lot, as glasses to drink out of. They come in pretty patterns. I think you could get them here at one point too, but I don’t see them anymore.

I used to eat Nutella out of the jar, on a spoon. I can’t believe this now as I find it quite disgustingly sweet. The ads sell it to you as having slow release energy thanks to the 1.5 hazelnut you get in every serving…we have Nutella in our house but I loathe it now. It’s laden with sugar.

So when I saw Annie Rigg’s book about Edible Presents and saw there was a recipe for Chocolate and Hazelnut spread in it, I jumped.

You probably can do this without a food processor, but I don’t.

Makes 1x 450g jar

75g blanched hazelnuts
100g 70% cocoa chocolate
100ml condensed milk
1-2 tablespoons of hazelnut oil
a pinch of salt
3-4 tablespoons of hot water (if you even need this much)

The recipe asks for you to use sterilised jars. I use them straight out of the dishwasher, if it’s good enough for Nigella, it’s good enough for me.

Toast the hazelnuts; you can do this in an oven or in a dry frying pan. Until they’re golden. Cool slightly and then  grind to as smooth a paste as you can get in your food processor.

Melt the chocolate, condensed milk and hazelnut oil, very gently, in a saucepan. When the chocolate has melted and it’s all mixed up nicely, pour this into the food processor, add the pinch of salt (I always use ground up rock salt in sweet things) and blend. Add as much hot water as you need to give it a thick, spreadable consistency. Don’t panic if, like me, you see it has gone really runny. It firms up in the fridge. That said, you shouldn’t overdo it, I’m just saying don’t go into a tizz if you have (you can always use it as super luxurious ice cream topping if it does go wrong).

Spoon into a jar and keep in the fridge. Rigg says it keeps for up to two weeks. I doubt it will last that long.

Now, I didn’t want to interrupt the recipe further up, with my tales of hazelnut essence, but I bought some from Bakery Bits.  I was wary because, unlike the excellent other ‘essences’ I have from there (Aroma Panettone and Aroma Veneziana are exceptional) which have natural oils in them, the ingredients listed seemed decidedly un-natural. Stupidly I thought it was like extract of hazelnut or something (this is probably impossible to do). Anyway, the jury’s out on whether it’s nice or not but my verdict is: disappointing. Its aroma is rather synthetic and artificial. I liked it at first, but you need to go really easy on it as it can become very overpowering; and I’m not sure I’d use it again. My partner’s nose is far more sensitive and he found it overwhelming.

This recipe doesn’t call for essence of any kind, but because I had it I added a few drops – about four. My seven year old loves this spread but says it’s too ‘hazelnutty’ which is probably accurate. I think this essence is good for when you really need to convey ‘this is made of hazelnuts’ without actually adding that many real nuts and that isn’t the case for this spread, or anything I’m likely to make.

This spread is, anyway, delicious and whilst still not a health food, is a damn sight healthier than shop-bought.

Mmmmm. Eat on toast, or on a croissant or straight out of the jar with your fingers.