Author Archives: Annalisa Barbieri

One giant after dinner mint

I got this recipe from last month’s Delicious magazine.

After dinner mint chocolate: make it, smash it, eat it

I used a long tin of about 8cm by 30cm, cos I wanted that sort of shape. I lined it in baking parchment (tip: scrunch up the paper first, then flatten it out so it lays flat more easily, this also gives the After Eight an authentic looking side to it, all crinkly).

I melted some dark chocolate. I used about 100g for the bottom and 100g for the top (I’ll put the whole recipe, as I used it, below) I used 70% but actually you could easily go higher – and definitely no lower. It’s important to get the chocolate spread thinly. Thick sounds good but in reality this means you end up with chocolate that’s hard to crack and you want it thin. Don’t sweat it though because unless you’re an idiot you still end up with a great end product.

Pour/spread the chocolate for the bottom (so, 100g) on the bottom of the tin – refrigerate. Chocolate takes almost no time at all to set. Mine took what seemed like 10 mins. It should be hard and crisp.

Make the fondant bit. I used one egg white and 220g icing sugar plus of course the all important peppermint essence. Just in case your fondant is really stiff add a tiny bit of water. Go easy as you don’t want to add too much.

This is a suitable juncture to point out that this product contains raw egg whites so you know, don’t eat if you’re old/young/pregnant/prone to hysteria.

Mix the egg white and icing sugar together (sieve the icing sugar in) until you have a consistency that you like. Add a teaspoon of peppermint extract. Note that refrigerating it doesn’t really thicken it up much so aim for what you want the finished filling to be like, not what you hope it will turn into. To this end you may wish to add the egg white bit by bit. (I never have to as my eggs are laid by my chickens, so not giant).

I end up with really thick fondant that’s a great consistency for what it needs to do.

IMG_1130

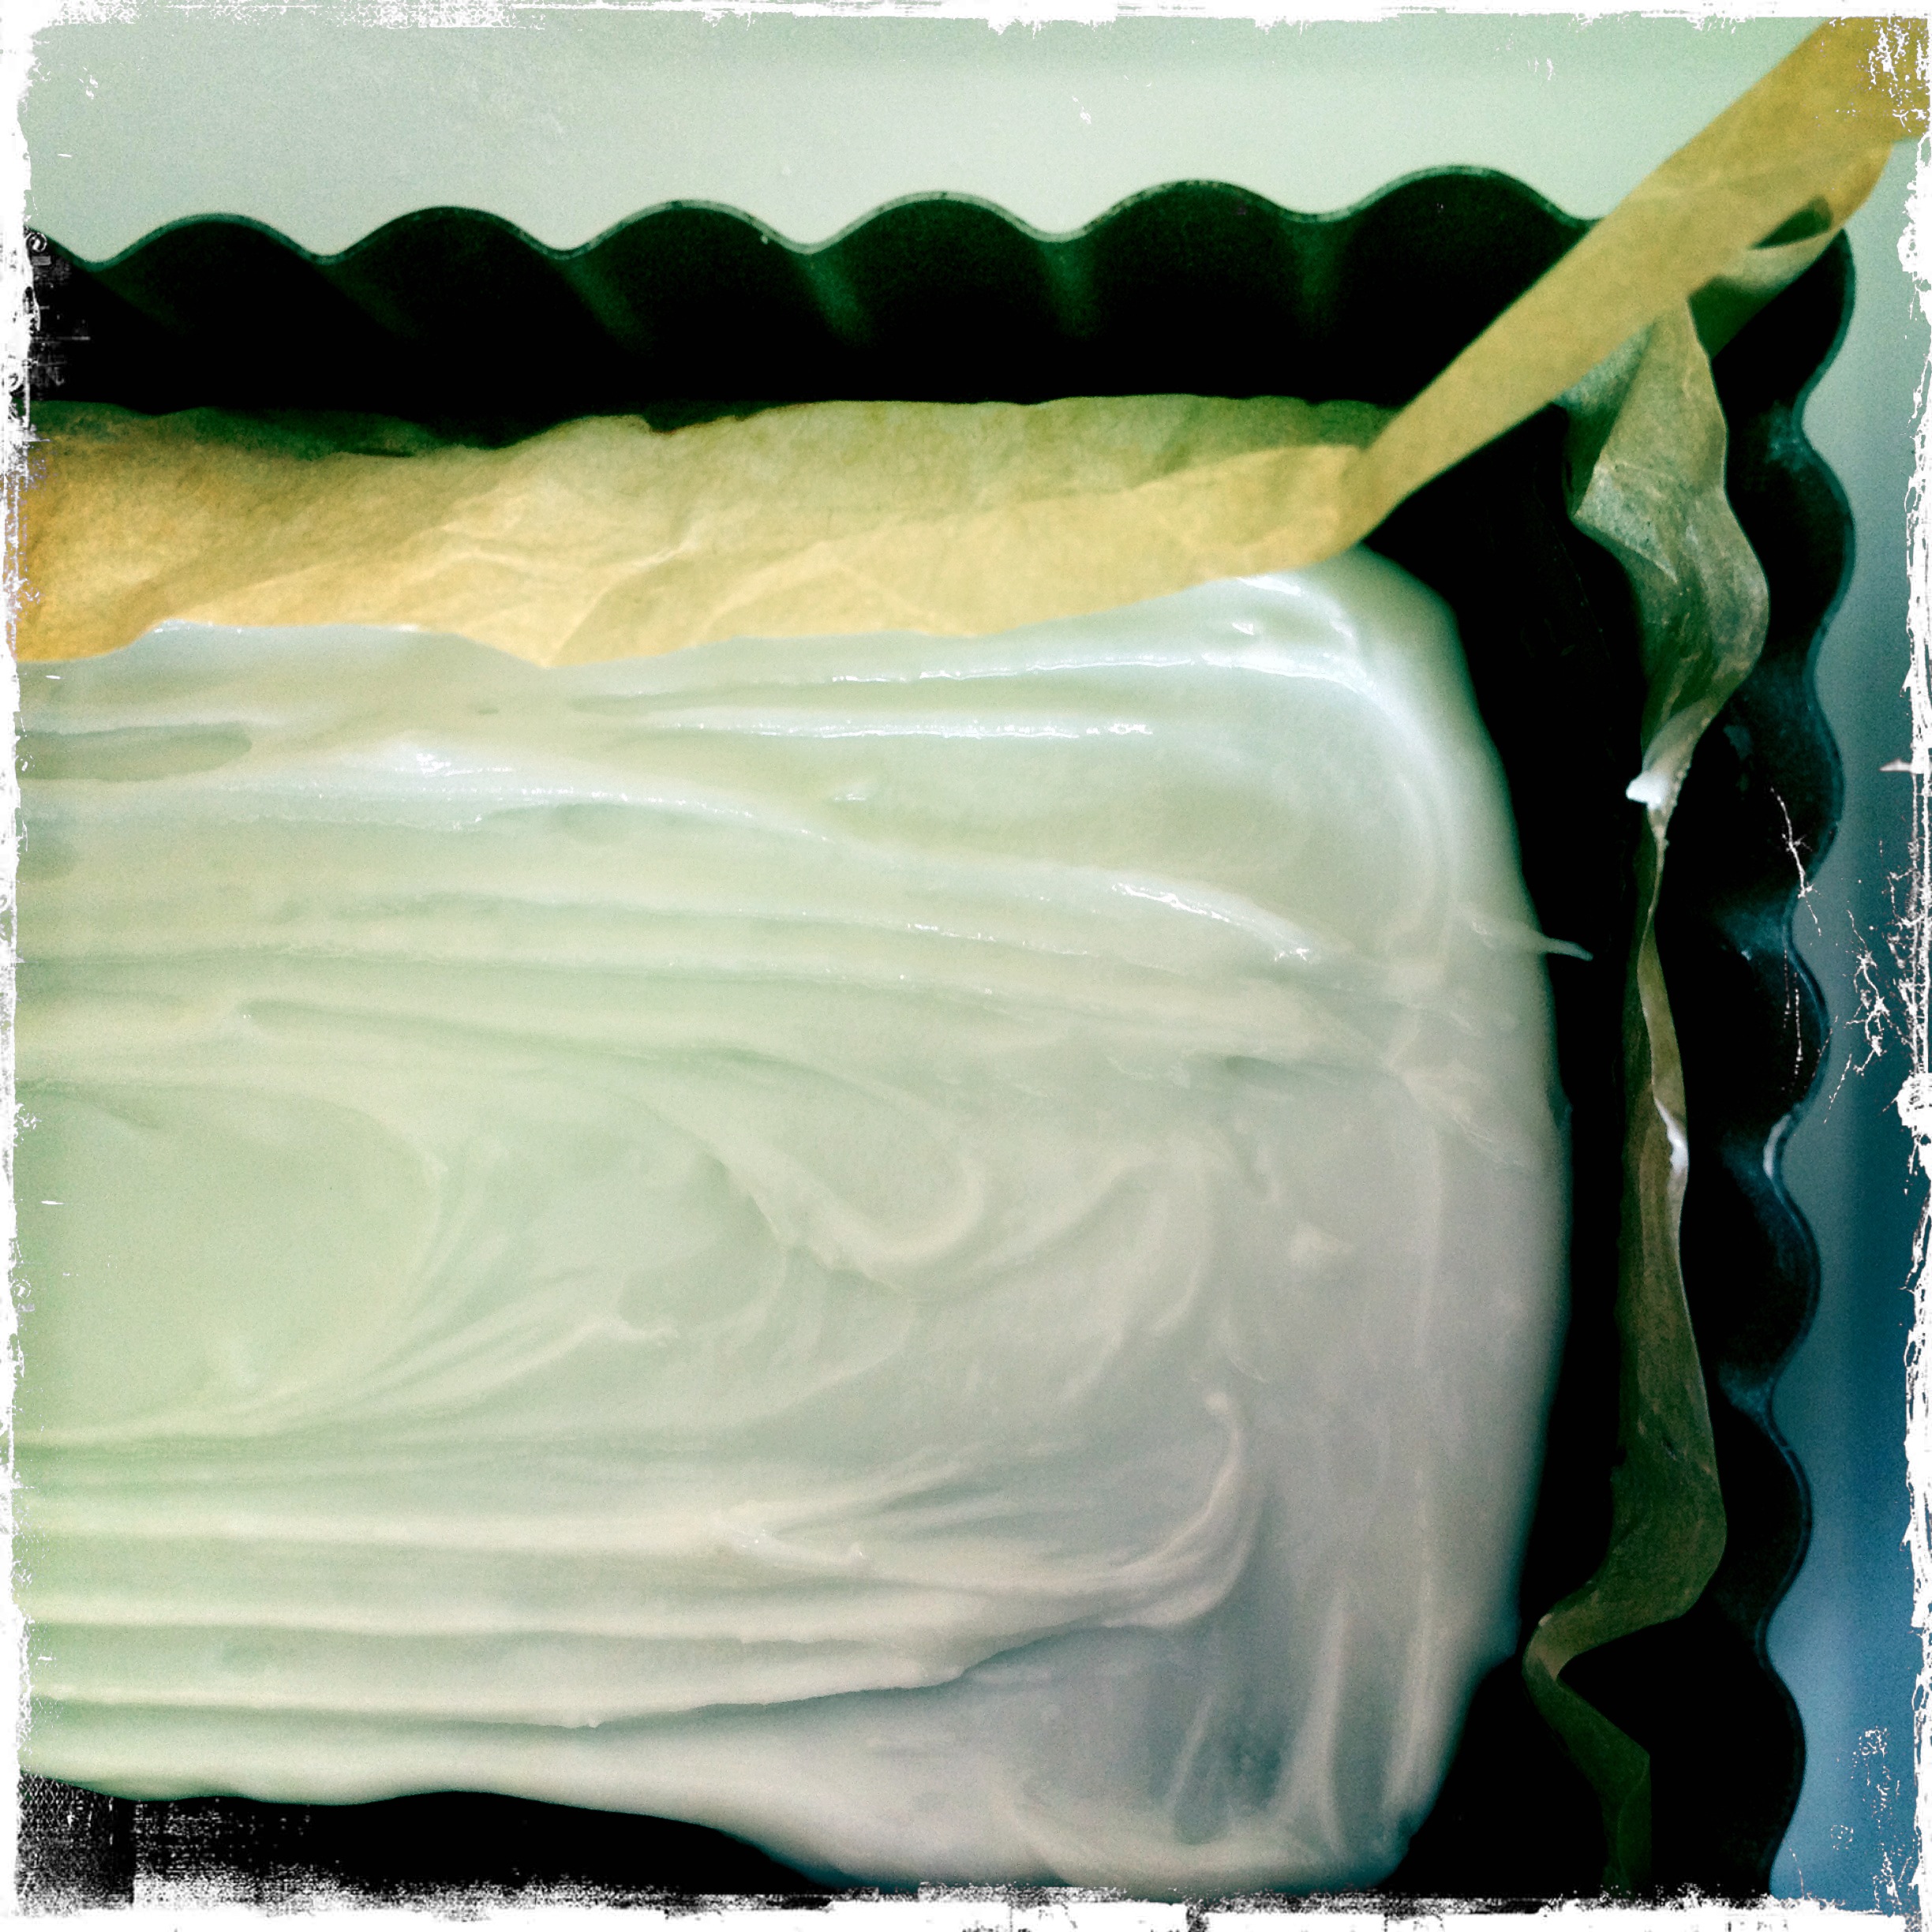
When ready, spread over the base layer of chocolate and refrigerate for an hour or two.

Now melt more chocolate and spread it gently over the top – don’t drag it or you’ll end up with a mess.

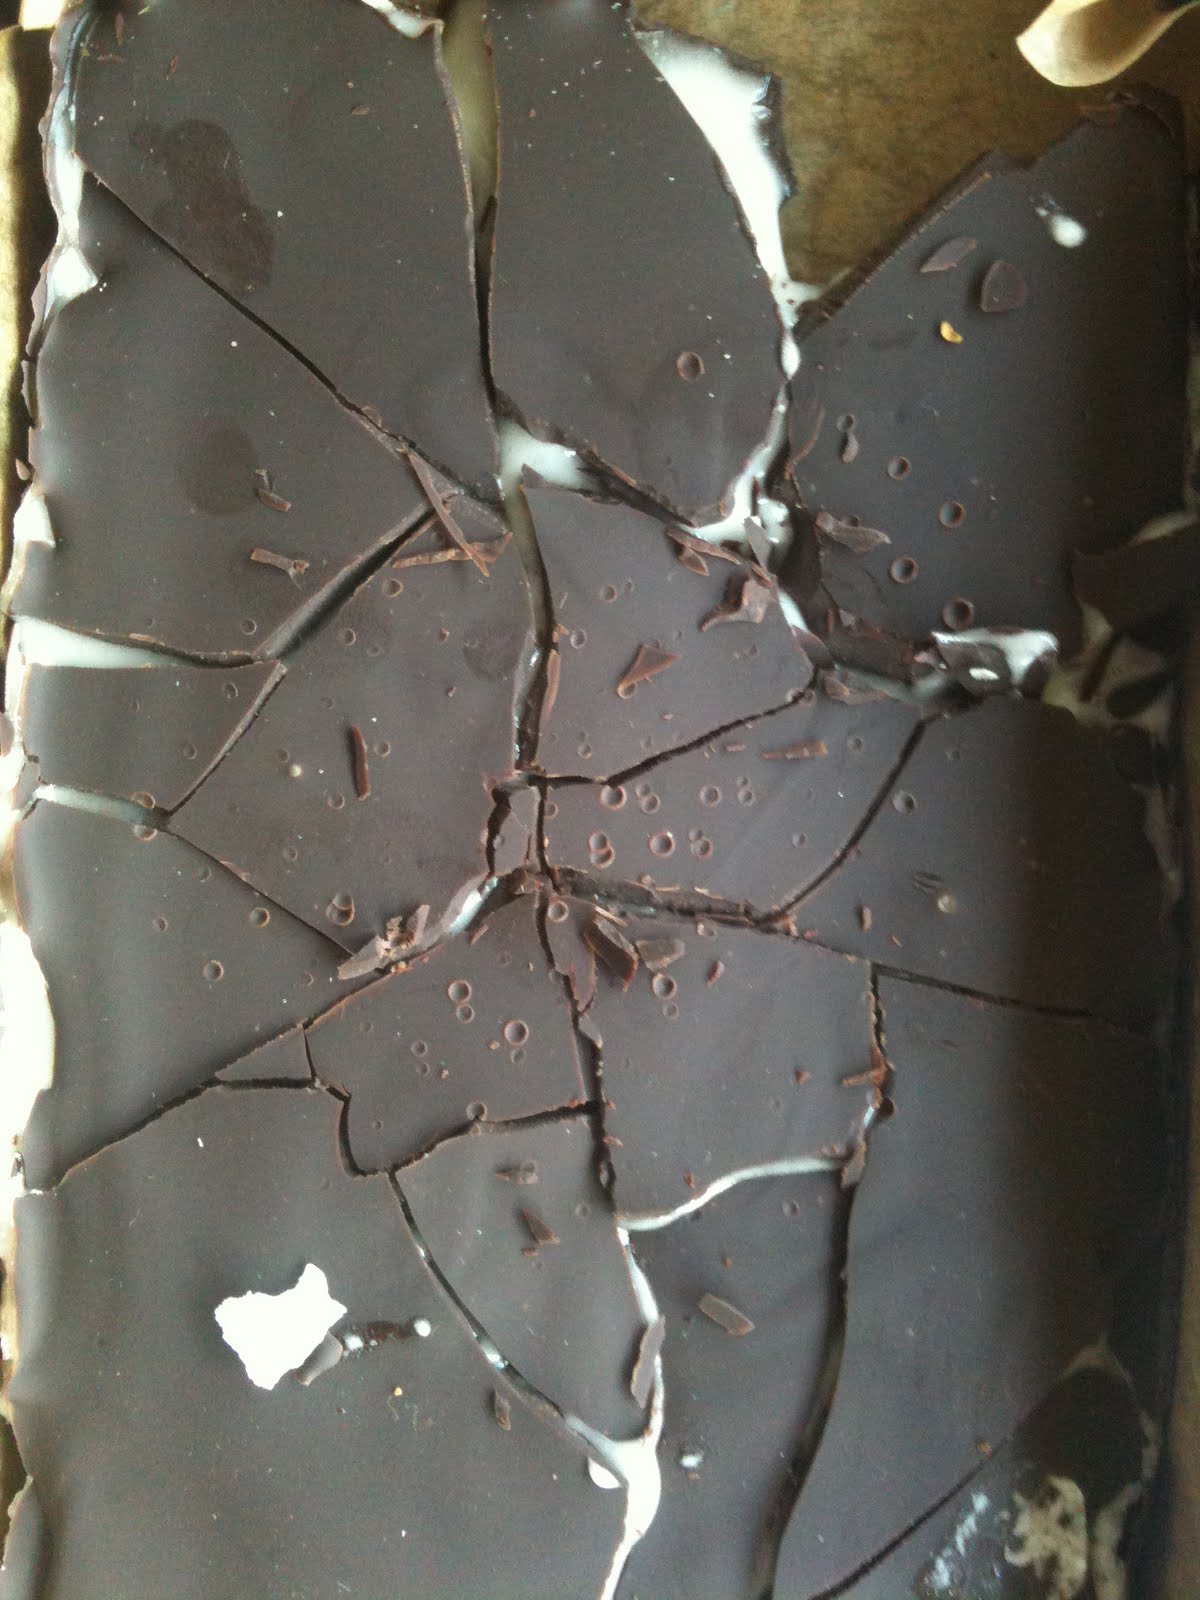
Refrigerate and when ready to eat bring it out and smash it up with a hammer (but so you get big pieces, not lots of little ones) and let people help themselves. The circles on mine (if you look closely) are from the meat tenderizer I used. I’m sure finer folk have a toffee hammer or some such. DON’T bash it with a large thing like a rolling pin, you want to shatter it into shards, not smash it into a mess of tiny pieces.

You can cut this into squares, but they won’t be really neat. Or at least, mine weren’t. And I do think it’s fun to break it up yourself and eat shards of it.

Scoff after your meal with a strong espresso.

IMG_1136

In summary you need:

about 200g very dark chocolate
220g icing sugar
1 egg white
one teaspoon of peppermint extract (I used the Star Kay White one from Waitrose)

A greedy disposition.

Save

Make up for legs

I’m not presenting this one by Sally Hansen as the best out of a month’s long testing exercise. It’s simply that someone left a couple of cans of it in my boyfriend’s studio and he brought them home and passed them over to me with a little shoulder-shrug: “I thought you might find a use for these.”

A couple of years ago a friend of mine came round to my house and her legs looked very good – smooth, nice colour, absolutely nothing false about the look of them. She told me she had on some leg make up by Revlon or Rimmel. I never got any but the first day this year that I got my legs out and realised that, despite having 100% Italian DNA, my legs were very white, I remembered that I had some ‘make up for legs’ reached for a can of this and really liked it.

I’m not a fan of fake tan anymore. I don’t really sunbathe, but I really liked this. You don’t have to have any of the precision of fake tan, you squirt it on and rub it in and you can tell there and then if you’ve made a mistake. It won’t make pale legs look like they’ve spent a week on a sunny beach, but it does even out the flaws and take the deathly pale off and enable you to get your legs out and feel that bit more confident about them – it’s what it says: make up for legs.

iPhone, grouping your apps into folders

I’m sure lots of you know this already but I didn’t so I thought it was worth sharing in case anyone else still has to discover this, too.

Like many people, my iPhone is heavy with apps – I have several pages of them. Because my two year old is the boss of my iPhone, the apps also get routinely moved around. I’ve been meaning to do ‘pages’ of relevant apps, you know the sort of thing – page 2 is full of ‘news apps’, page 3 has ‘travel apps’, page 4 is ‘games’, etc, but I never have.

What I didn’t realise, until last night, was that you can make folders. What you do is hold your finger on an app (any app) until all the apps start moving around in the way that they do, then slide one relevant app into another similar one (eg, the Indy app into the Guardian app). This automatically generates a folder and you then have a chance to name it (iPhone will automatically generate a name, but you can change it). You can fit around 12 apps into each folder (sorry, not counted and my phone is not with me at the moment), but you can have more than one folder with the same name if you want to.

Here’s a bit more about it from Macworld.

Colomba – one of the most delicious things I’ve ever made

Colomba, soft, orangey, classy.

Colomba means dove in Italian and it’s a traditional Easter cake. It’s much like panettone – traditional Italian Christmas cake – except it doesn’t have sultanas.

Both colomba and panettone use a biga – or sponge starter. I’ve never attempted panettone because it’s not meant to be easy. Not difficult per se, but the recipe is long and there are various stages during which you really need to concentrate. Plus you need to hang panettone upside down when it’s done (until it ‘sets’). I was almost tempted last year when I found out that Patrick at Bakery Bits had started selling the waxed paper cases you need for panettone but then my mamma’s friend bought an exceptional one back from Italy so I never bothered to make my own.

Then Patrick posted a recipe for colomba and started selling Aroma Veneziana which is rich with citrus and almond oils with a hint of vanilla. He also sells the colomba cases (I found the 750g ample big enough for the recipe below. You can make the cake in a traditional cake tin but the dove shape is traditional). So I decided to try it.

God it was delicious. One of the best things I’ve ever made. So good that I couldn’t believe I’d actually made it myself. (I’m aware Easter has passed now, but this shouldn’t put you off trying it.)

I made a few changes to Patrick’s recipe which I’ve detailed below. I actually made two colomba cakes – retardeding the proof time on my first attempt because I ran out of time (I put it in the fridge at the stage marked * below, because from start to finish this cake takes quite a long time, you really need to start it in the morning) and cooked it for 40 mins. Refrigerating it didn’t seem to affect it at all, if anything I think it was tastier. It was supremely moist – a tiny bit underdone and doughy at the very centre, but unnoticeable to all but me.  I cooked the second one for longer – probably 50 mins and it was more authentic ‘colomba’ but slightly dryer. My oven is ferocious so I cooked at more like 180/190C. Patrick’s tip of putting silver foil on top is one to be followed, as the egg white/sugar coating burns easily. In fact I covered the whole of the colomba for the middle portion of the cooking time.

Anyway, this is what you need to do.

First stage: the sponge

15g caster sugar
100g warm water
3 egg yolks (reserve two egg whites, freeze the others if you don’t know what to do with them immediately)
11g instant dried yeast
70g strong white bread flour

Mix together the sugar and water with the egg yolks; separately, mix together the yeast and flour and add this to the egg/sugar/water mixture. You get a thick batter. cover with cling film and leave for a good 30-40mins until it’s really bubbly and frothy (note: my kitchen is about 20 degrees, if yours is warmer/cooler you’ll nee to adjust the time accordingly).

Second stage: first  dough


The frothing, elastic sponge, as above.
75g warm water
45g very soft unsalted butter
6g dried yeast
210g strong white bread flour

Whisk the water into the sponge, then mix in the butter. Separately mix the flour and yeast together and add these to the sponge. You should have a thick, stick, moist batter. Cover with cling film and leave for about two hours, until doubled in volume.

Third stage: second dough


The first dough,  as above.
145g caster sugar
15g honey
3 egg yolks
grated zest of two oranges
2 teaspoons of Aroma Veneziana (this is my favourite big, I adore the smell and it gives you a hint of the good things to come).
115g very soft unsalted butter
250g strong white bread flour
5g sea salt, finely ground
150g chopped mixed peel

Take your first dough and now mix in the sugar, honey and egg yolks. It’ll look a bit unpromising and ‘separate’ – don’t panic. Add the Aroma Veneziana, the orange zest and butter, then the flour and salt. Now, Patrick didn’t add the mixed peel til later (see his original recipe, link above), but I added mine here too. Mix all together.

Now here, Patrick says to knead until you have a soft, smooth, elastic dough. My dough was sticky and a bit unmanageable so I rested it for ten minutes, then gave it a light knead, rested it for ten minutes, then gave it a light knead, rested it for ten minutes, then gave it a light knead. I did this on a lightly oiled chopping board.

Then I picked up the original recipe which says to put it in a oiled bowl and cover with cling film * and leave to rise ‘dramatically’, Patrick says until it’s about three times the original volume which takes about 3-4 hours.

(For the first colomba this * is where I refrigerated it and the next morning, took it out and let it sit all morning until it got to room temperature and then started to rise ‘dramatically’.)

When that’s done, Patrick cuts his dough in half and puts it in the case (after rolling it), one half making the ‘wings’ and one half the head to tail bit (so they overlap). I didn’t do this, I cut three pieces to fit head to tail, and two for the wings, rolled it out to flatten it put it in the case and pinched the dough together.  


I found the case was quite floppy once the dough was in it, so I sat it on a baking tray and when the time came put the whole lot in the oven.


At this stage you let it sit and rise again for about 2-3 hours, until doubled in volume, covered with a damp tea towel. Mine easily took more like three hours. 

Fourth stage: the delicious topping


2 egg whites
25g caster sugar
25g ground almonds


crushed sugar cubes
flaked almonds

Just before baking you make a paste of the topping ingredients: 2 egg whites, 25g caster sugar, 25g ground almonds and put the whole lot on top of the colomba, spread out with a pastry brush/back of spoon to make sure every bit is covered. Please don’t miss this bit – it’s the topping which really makes it. Scatter broken up sugar cubes and flaked almonds on top – I used three sugar cubes and that was plenty.


Cook for 40 mins at 200C and check if it’s done by putting a skewer in. If it’s burning put silver foil on top. Even if it looks really done – do check with the skewer, if it comes out really gunky it’s not done yet. 


I can’t even begin to tell you how great this is. Patrick says it keeps for four days in a tin, but I made my two a week ago and although one is gone, the other is still superb. But if you do have any left you can always toast it/butter it. We eat it in the morning dipped in caffe latte.


This recipe seems long – it is. But take your time and try it. It’s pretty fool proof considering the result!


Let me know how you get on…and don’t save it just for Easter!


"There are buns for tea"

A bun. This one from the first batch, thus without its top hat of crushed sugar cubes and amaretti biscuits, which I now regard as obligatory.

As regular readers will know, I don’t really like cooking with yeast. I trust it to the breadmachine – see bagels – but making dough from scratch, I don’t really like using yeast.

Which is why I’m so comfortable, and confident, with sourdough.

But recently a recipe for Panettone teacakes on the Bakery Bits blog caught my eye, or rather, the Tweet advertising them did. So I tried them. The first time, I didn’t read the recipe properly and only realised you needed white chocolate when it was too late. I had dark chocolate (I always have dark chocolate) which I thought I could substitute because I thought the recipe might use the chocolate as ‘chips’. But it doesn’t – it’s used as as lard substitute. See Dan Lepard’s original recipe here from 2007, which explains it all rather beautifully (one of the many reasons that I love Dan’s recipes is that he tells you a bit about the whole chemistry of it too, so I always learn something, beyond how to make a new bun or bread).

Anyway I left the white chocolate out in my first batch, and also didn’t have enough candied peel. And used mostly sultanas rather than raisins. And didn’t have the recommended topping. But they were still great if a little less sweet than I think they should be. The second time I made them I had all the relevant ingredients and they were strangely, slightly less soft but completely delicious. These are the new house teacakes.

But the dough makes quite a lot (about 14) and that’s too much for us. If you want, this dough freezes beautifully. A few days after first making these, when teacakes were called for (freshly baked, and buttered, they make an excellent after swimming treat I’ve discovered), I got the dough out, defrosted it, shaped it, left them to rise and they were perfetti. In fact I’ve done this a few times now, frozen the dough and then taken them out the night before they were needed to defrost, got up in the morning, shaped them and given them an hour or so’s rising and then cooked them and they’ve been delicious.

These are life-affirmingly delicious about 20 minutes out of the oven.

The Aroma Panettone is an absolute must here.

These teacakes have promoted me to constantly say “there’s buns for tea” now. If there is a word in the English language more cheering than ‘buns’, I can’t think what it is. It’s so comforting, so Enid. Ironically the  Railway Children was on today and they said, at least twice “we can have buns for tea”.

Anyway here’s what  you need to do to have buns for tea:

14g instant yeast
125g warm water
600g strong white bread flour
50g milk – any type
50g honey
25g caster sugar
75g white chocolate, melted
150g sultanas (original calls for currants, I prefer sultanas)
150g mixed candied peel
Zest of one orange
1 teaspoon of salt
3 large eggs, 3 egg yolks (yikes I know, a lot of eggs!) plus one extra egg for the egg wash although I find milk works almost as well and is less wasteful, especially if you freeze the mixture and make in batches.
2 teaspoons of Aroma Panettone

Amaretti biscuits
La Perruche sugar lumps

Measure out the flour. From the 600g, take 3 tablespoons and put that in a bowl with the yeast and water. Mix it up til it’s all dissolved. Leave it for about 15/20mins, until there is obvious bubbling. Because I whisk my mixture up, be sure the bubbles you see are the yeast working (these look more like geyser bubbles) rather than just ‘whisk’ bubbles. On a hot day you’ll see this fairly quickly. My kitchen is quite cool and it can take 20 mins plus.

Heat the milk up, then add the chocolate, sugar and honey. There isn’t much milk so you do think “how will the chocolate melt” but it does. If you get stuck you can always just very gently heat it up again, but I’ve never found the need. To this add the sultanas, peel, zest, salt and Aroma Panettone.

Separately, whisk the eggs together – the 3 whole eggs and the 3 yolks (freeze the whites, I’ve got a killer Madeleine recipe coming soon). You’re just combining them, you don’t have to whip them into a frenzy. To these add the yeast mixture and then the milk/peel mixture. Then the flour. Use a dough hook and a food mixer if you like, or do it by hand.

Just until it’s all incorporated.

Leave the dough to rest for ten minutes. Then you give it a light knead, on an oiled surface, with a 30 minute rest each time. Do this three times (so to recap, after the first mixing, leave the dough for 10 mins, then light knead, rest for thirty mins, light knead, rest for 30 mins, light knead, rest for 30 mins.

Egg-wash on, about to go into the oven

Now divide the dough up into a bun size. Patrick said 100g a piece, I find my buns are slightly smaller. Roll into a ball with your hand and place on a buttered baking tray (you’ll be cooking on this same tray so make sure it fits into your oven). Flatten to about 2cm thickness, or leave thicker if you prefer (they do rise up). Ideally don’t have them touching but if they do it really doesn’t matter – you just tear them apart when they’re cooked.

Now leave them to double in size. This takes about 30 mins in my warming drawer.

Beat the last egg and brush over the top of the teacake just as you’re ready to bake them and sprinkle over the crushed amaretti biscuits and sugar lumps. You can live without them of course but they really do add something.

Patrick recommended cooking his buns for 15 mins at 220, mine can be done in half that time (our oven is practically industrial in its heat), so set a timer and check for yourself.

These are lovely on their own or, you know, split and buttered…

Fresh out of the oven

E-cloth-mop

If you are not the sort of person to do their own cleaning, then perhaps skip this post. For it is about mops.

I do have a cleaner. Her name is Rute and she is Portuguese. And even though Portuguese (or Porkinese as my child calls it) is very different from Italian, we converse splendidly. Partly through the international language of Rant.

Anyway, despite me having a cleaner, I still do my own cleaning at times, largely because I think it’s really important to be able to deal with your own dirt.

If you didn’t know this, Italians have a thing about cleaning. Spesh southern Italians. My family in the south are all certifiably insane and wash the kitchen from top to bottom after lunch.

Every day.

I’m not like this. But I do like a bit of Scanda-style which means wooden floors, and wooden floors show up dirt far more than carpets. Dust-bunnies kinda get sucked into carpets. Anyway, this is a fucking mop for Christ’s sake so I won’t go on too much. But it – the E-cloth mop – is fab.

Why it’s good:

  • It’s so simple and it looks good in that pared down way (look: design is important, even in mops)
  • You get interchangeable ‘heads’ which are rectangles of fabric. There are three, a white fluffy one for simply ‘sweeping’, a blue one for washing and a blue striped one for tough stains.
  • They attach via a Velcro-type strip, super easy.
  • They zzzzzp off for washing – bung them in the machine at 60C.
  • Also zzzp it off for dunking in the washing water and wring it really dry before putting it back on for cleaning another bit of floor – because the cloth is so wrung out you can use it on engineered floors (well, I do).
  • It’s a step up from the ‘straccio’ over a broom head that we use in Italy.

That’s it. If you need a mop, this is the one to get.

Pete’s pizza dough

This isn’t sourdough, and it’s a bread machine recipe. But it’s a lovely pizza dough, and one which Pete, my partner, has perfected over the years.

I don’t understand people who ooh-ahh over the fact that we make our own pizzas. It’s simplicity itself and you can make them in advance.

I make these in two Mermaid trays – but I like them thin. If you like your pizzas thick well, I’m not sure I have much to say to you really. Pizzas shouldn’t be thick.

From start to finish you can have pizzas on the table in about fifty-five minutes. The pizza-dough cycle on my bread machine takes 40 mins, then you just roll out, put toppings on and they’re cooked in 8-10 mins. And for those of you who have children, this is a lovely thing to get them involved in.

Here’s what you need (Pete works in ounces, I work in grams, I’ve kept true to his recipe here):

8floz hand hot water
2tablespoons olive oil
12oz of plain white, soft flour (note: not bread flour)
1teaspoon caster sugar
1teaspoon salt
2teaspoons yeast

You put all the ingredients in your bread machine in the order the manufacturer recommends, above is the order I put mine in as that’s what Panasonic recommends. The pizza dough cycle is, as I said, 40 mins long on my machine. (The regular dough cycle is 2.20mins so that should give you an idea, you don’t want a long cycle.)

The pizza dough before rolling

When it’s done, oil a suitable surface (I use a very large chopping board so that I can move it about if need be) and your hands, and take the dough out. Sometimes this dough is really sticky, other times more manageable. It makes for a better dough when it’s stickier (higher hydration) so there is a compensation.

Because I use the dough across two baking trays, I cut mine in half; but if you’re making – say – four round pizzas, cut into four..etc. I’m sure you can work it out..

Roll out the dough, as thin as you can, to fit your tray/tin. If you can do that thing of throwing the dough up in the air to make it thin, great: do teach me how to do it too!

When it’s rolled out to an approximate size, I lay it on the tray (note: I oil the tray and coat it with polenta/cornmeal), rest if for five mins and then stretch it into the corners/sides.

Now you can, at this stage, go straight into doing the toppings and either cook it or put it in the fridge (naked or with all the toppings on, I put mine in naked). You can also freeze it (in which case cook straight from frozen, just give it a few more mins). I cover mine with cling film place one tray on top of another (if no toppings on) to save space in the fridge.

When you’re ready to cook, if you haven’t already, put on whatever toppings you want. For the tomato bit on the top, I use Waitrose Sundried Tomato paste – a tiny amount spread on the pizza base (it’s quite salty so go carefully). Then I put on artichoke hearts, salami slices, olives, ham, mushrooms, mozzarella, asparagus if in season etc. Or just the tomato paste and some mozzarella for those who like it really simple (boring..) Just before it goes into the oven, splash some olive oil on it and cook it for 7-10 mins. My oven is very hot and has a pizza setting, yours might too. You can tell when it’s done as it will have bubbled up and be golden.

Take out and slide onto a chopping board, slice up, eat and feel very virtuous. Pizza doesn’t have to be unhealthy..or at least whilst not pretending this is a health food, it’s as healthy as pizza can be.

La pizza, I put the rocket on after it came out of the oven

Le Couronne, or the loaf with the hole

I got really excited when Patrick from Bakery Bits, tweeted to say he had a new banneton in stock in a couronne, or ring shape. It was in cane, which I’ve never used before (all my bannetons are wicker and lined in linen).

I’ve a healthy collection of bannetons that I’ve built up over the last year, but in baton and round shapes. I really fancied a couronne shaped one. (I’ve been obsessed with round bread with a hole in it since my purchase of a Tortana from Flour City.)

So I bought one, and also took the opportunity to replenish my Aroma Panettone, which immediately transports me back to my childhood (you seen that scene in Ratatouille where whathisface the restaurant critic, goes back in time to his mother’s kitchen? That’s what this does to me).

Anyway, I was EXCITED about it. Made a batch of my every day bread, put it into the fridge for a retarded proof and got up in the morning.

First thing: the dough stuck to the banneton (the middle bit is wood). Not a good start. I slashed and cooked it and the hole completely closed up so that I ended up with a round loaf with a tiny dimple.

Not good.

I emailed Patrick. He recommended rice flour to aid non-stick (I had used rye). That remedied the sticking situation, but I just couldn’t get the hole to keep. (Sadly no pictures of bread proved in this banneton as I just never had a camera handy.)

When you cook bread, you want it to rise, but you can’t choose where it rises, so any hole you make (like in bagels) has to be bigger than you want it to end up with. But I just couldn’t get the hole to stay.

I knew the fabulous (and far more experienced baker than I) Joanna from Zeb Bakes had also bought one, so I asked her what she thought. She was also struggling with it. We both thought the middle bit should be thicker.

Patrick was v.helpful and kept going back to the manufacturers who said it should work. But it didn’t. Patrick got another banneton in, this time in linen lined wicker. He sent it to me free of charge. This banneton just looked much better, the middle bit was thicker and the whole shape was more promising.

It worked much better, too. Here is the loaf I made that first time. I did however, enlarge the hole once it was on the baking tray, which isn’t for the nervous. I haven’t fully got the hang of slashing the dough however (any thoughts anyone?) as I find it quite hard to make slashes on such a small ring of dough, such as it is before it puffs up.

First loaf using linen-lined wicker couronne banneton. V.nice.
Second loaf in the couronne, this was a white dough

Second time I made a white loaf but was more gung-ho didn’t enlarge the hole on the tray. This is what happened:

Hmm.

The third time I tried sticking a muffin ring in the middle. This did indeed hold the middle open, but a) the middle didn’t crust up properly and b) the ring sort of got swallowed into the bread. It was fine, and a really great loaf. I’m going to carry on experimenting with a tin in the middle and maybe even – gasp – put ice cubes in there. Just till the bread has developed a crust and then remove the tin.

In the meantime, if you’re careful you can get a really nice ring shape, but you need to play around with the dough on the tray. I do love the couronne bread shape however as you get maximum crust, not great for children who are fussy about these things, but good for me, who does.

Any more experienced bakers out there with any tips, I’d welcome them. Grazie!

The Kindle

When the Kindle launched in the UK last September, I had one on pre-order. I quietly fretting for days about its purchase, feeling distracted with the guilt of it, and then cancelled it. But the urge never went away.

Here is the Kindle, in its cover, open. This is it in its sleep mode, it throws up random literary pictures which are rather nice.

I did lots of research into the Kindle. Canvassed my friends that had one. I was curious about just how much they seemed to love it, which seemed odd. I love books, especially picture books or ones you can dip in and out of. But I don’t read (didn’t read..) fiction, not since the heady days of going to Callosa D’Ensarria with my girly friends and devouring Jackie Collins in between tormenting the local boys.

I read loads, but just not fiction.

My best friend, Emma, regularly devours novels. She loses herself in them. I see people on the train lost in paperbacks, chunky as bricks. The odd time I have picked up a novel and managed to finish it, I’ve loved having this whole other world to escape to.

But I’m not what you might call, a natural novel-reader.

So what the fuck would be the point of me having a Kindle?

This was why I cancelled my order. But then, but then..

So I ordered one again and before I could cancel it, it arrived. And God, I love it.

It’s not an iPad. I mean, that’s obvious, but if you’re wondering “should I get an iPad or a Kindle”, you really haven’t understood the difference at all. The Kindle is rudimentary compared to the iPad, it’s nothing like it. Whereas the iPad is what it is – like the screen of your computer that you hold in your hand, and able to do more or less what your computer can do, the Kindle is an electronic reading device in black and, er, grey. You can read newspapers on it, but really, this doesn’t work (yet, I’m sure it will). You’re much better off reading newspapers n’ stuff on line, on a regular computer/laptop/iPad/iPhone type thingy.

Here’s a Kindle page. It’s not back-lit (like the iPad or a computer screen is, so easier on the eye).

So the Kindle is, really, for books. Word books. I can’t imagine anyone buying a cookery book for the Kindle, that would be really wrong I think. So the Kindle is not going to replace you having to buy any books, but if you read novels: great.

Here are some observations on it, some of them are obvious but heck, I’m gonna make them anyway:

  • You can store loads of books on it.
  • You can change the size of the font or spacing of lines – brilliant if you’re short-sighted.
  • No wastage. No ‘what do I do with this book now that it’s read’, although no lending to friends, either.
  • Not every book you will want is available as a Kindle version, yet.
  • Books that are out of copyright are free.
  • It’s not good for pictures, but great for older children – in fact I think its use for older children has been underplayed.
  • It has an inbuilt dictionary – which I find super useful, children will too.
  • You can make notes and see notes others have made.
  • It automatically notes what page you last read, no matter how many books you have on the go at once.
  • Although the ‘turnpage’ buttons are on the left and right, the up and down controls are bottom right, left handed people might find this frustrating (I don’t know, I’m right-handed). I’m thinking there should also be a LH version.
  • You can download various Kindle apps for your computer/phone and it all syncs so you can access your books anywhere, if you’re desperate. 
  • The battery lasts for weeks.

If you’re fairly wealthy, I think it’d make a great present to load up a Kindle with the sort of books you think your friend would like. The novelist and journalist India Knight did this for a friend (although to be completely accurate I think she loaded up her own Kindle) who was poorly, which I think is a great idea.

I wouldn’t, personally, get the 3GS version. Honestly how desperate do you have to be to get a book? Most places have Wi-Fi, so save your pennies. What I would spend money on is the official Kindle cover that Amazon does which is an EXTORTIONATE £50. But it’s fabulous. Leather and has an inbuilt light which is just great if you read at night (you can’t read the Kindle in the dark, it’s not back-lit like the Ipad is, which is also why it doesn’t give you eye-ache after a while).

Here’s the Kindle, in its cover (chocolate brown since you asked) with the inbuilt light. The actual light shining on the Kindle is actually from an overhead light so don’t be confused. The Kindle light is plenty sufficient to read by.

I’ve started reading voraciously (so anyone who wants to buy me a present: Amazon vouchers are a good idea) and I love having my Kindle to escape into on the train. Plus with the cover it looks more like a book so you don’t feel as much of a wanker on the Tube. It’s invaluable, for me, when I’m breastfeeding in the middle of the night/trying to get the baby to sleep, as I just don’t mind if she wants to feed for an hour, as I can just read read read.

The Kindle, all snug and safe in its cover, it has a rather nice elastic band fastening with tab, which you see above.

I love it…in a way that’s curious..

ps: I forgot to add, you can get sample pages from the Kindle store for free, so a try before you buy kinda thing.

Lovely little cakes for a celebration

The perfect, je pense, small celebration cake.

I first came up against the possibility of making a ‘celebration cake’ when my eldest was baptised at eleven months. I’d seen (and heard) of heroic cake making efforts by other mothers. It usually involved icing. And I’m no good at icing. Not that fancy pants icing that is all super smooth and then you  make little characters to stick on the top.

This isn’t me being coy. I’m pretty fucking fantastic at cooking (look, I’ve long said: there is no immodesty in the truth), and baking in particular. But I know my limits, and mine don’t reach to the royal icing aisle (I don’t really even know what royal icing is, please don’t try to tell me either, I’m not listening).

I knew that I could make some pretty good cakes but they weren’t really up to ‘celebration standard’. So I decided to make lots of little cakes instead, figuring that if a few got spoiled, it wouldn’t really matter. I guess the same thought goes behind laying carpet tiles, the wretched things. So, for the baptism, I made some fairy cakes with fondant icing and iced my daughter’s initial atop each one. And, for extra flourish, put a silver ball – those tiny things that break your teeth- on top. I say this, contained in a cuppla sentences, but the reality of it involved several packets of icing sugar, a neighbour’s flat (thanks Sarah) and lots of beads of sweat on the forehead. Fairy cakes tend to cook to a peak – no good for a smooth finish. So each fairy cake had to be beheaded. This involved lots of eating of the remnants. Anyway, the important thing – of course! – is that they looked spectacular all piled up. People could eat one or two or FOUR (that was my brother in law).

They were an enormous, runaway, apron-lifting-in-triumph success.

Ever since then, for big gatherings, I’ve made lots of little cakes. As my eldest got older, and I acquired cake stands, I started buying things to go atop the cakes, like little roses. By the time my second was born, and baptised, I was on a roll. For that, I made the same cakes you see  here, but with a brown paper cases, which worked really well – not least you can’t see the drips of icing, not that you get many with this glorious icing.

This is a Nigella recipe, hidden in the depths of one of her books, there is no picture to accompany it so you may have missed it. Now is its moment.

Chocolate cupcakes

Nigella says this makes 12. I say it makes 14 and it’s better to make 14 as you don’t want them too high up in their cases (see later). However, because most bun trays come in 12s, this means you have to make the last two separately. You decide if you can be bothered…


The little cakes

110g unsalted butter
155g dark muscovado sugar (the original asks for 225g)
1 large egg, preferably from your own chicken (arf arf)
half a teaspoon of vanilla extract
50g dark chocolate (70% cocoa), melted and cooled
100g plain flour
half a teaspoon of bicarbonate of soda
125ml boiling water

The ganache

175g dark chocolate
75g milk chocolate
200ml double cream
half a teaspoon of vanilla extract

Note: in my experience of making these cakes, which is extensive…this makes far too much ganache.

But that’s okay because you can chill the extra and use it to make Chocolate Ganache Hot Chocolate.

Preheat the oven to 180C. Line your (deep) bun case with 12 muffin cases.

Cream the butter and sugar together. Add the egg and vanilla, Fold in the melted/cooled chocolate, alternate flour and bicarb with water. By that I mean, put the bicarb in the flour, then put a spoon of that into the cake mixture, stir, then add water, then more flour etc. Do not over beat them. I don’t know why, I’ve never dared trying to overbeat them.

This is the ideal height for the cooled cake, so that you can slap on a good layer of chocolate ganache.

This is a fluid mixture, like a batter. Carefully spoon mixture into the cases. I’ve found that it’s best to fill to about 2/3 full which is why you might find you could easily make 14. It’s up to you. If you make 14, you fill them up less, and this leaves more room for the icing. However it’s a faff to leave some mixture and then have to put in 2 extra. So up to you. The icing still works beautifully with a fuller cupcake.

Cook for 30 mins, leave to cool.

You make the icing by shoving all the ingredients into a bowl atop a saucepan of simmering water, melt then whisk til thick (it’s pretty thick anyway, so the whisking is almost unncessary). When the cupcakes are quite, quite cold, take one in a quivering hand and take a spoon, dip it into the icing and spread over the top as thick as you can get away with. Leave to cool, but don’t put in the fridge.

Eat as soon as possible, and that’s an order..

Here they are all lined up, ready to perform.