Category Archives: Parties

One giant Twix (tart). Gluten, dairy, sugar and fat full

I like this tart for bringing to people as a present. I’ve yet to meet a grown up, or child, no matter how posh or spoiled and used to presents, who doesn’t love this (unless of course you hate Twixes). But it also makes a good dessert when you really can’t decide what to make to please everyone. And just a small slice is really enough.

I can’t overstate this. It is pancreas-bustingly sweet. A bit too sweet for me if truth be told, it sets my teeth on edge. I want to play around with the recipe next time to try to resolve this. That said, a small slice (or even cube) is a treat. But, like the Wagon Wheels I made last year which set off a sort of crazy reaction, proceed with caution

The caramel making is a faff, I won’t lie. A thermometer is a must (I can hear you sighing). I have very similar to  these, which is brilliant. You can use it to probe meat with, take the temperature of a child, use it to make confectionery – it’s great because you just have a probe sticking into the hot caramel, with the actual body of the thermometer somewhere out of the way. I stick mine above where I’m working, to the extractor fan hood (it has a magnetic back). Obviously you do need to remember to clean the probe between child and caramel.

Anyway, this recipe was from Delicious magazine some time ago. I made a fundamental change to the timing of the caramel/temperature, because the first time I made it, taking it up to 115C meant the bottom of the caramel burned, so you had burnt/darker bits. It didn’t affect the taste, but it was annoying. I now stop the last bit of the caramel making at 111C – precision is all in caramel making – and it’s fine: chewy, golden and just before it starts to burn. I also changed the way you make the chocolate ganache.

This is what you need:

For the base

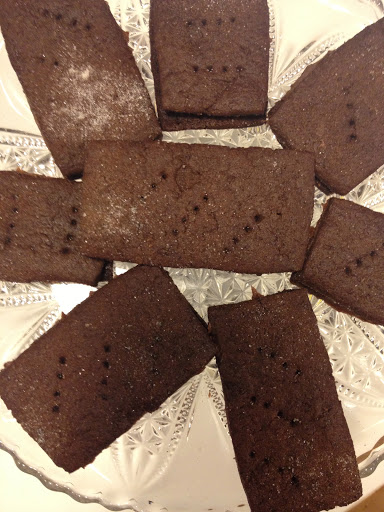
225g shortcake biscuits

75g unsalted butter, melted

For the caramel

125ml double cream

90ml condensed milk

125ml golden syrup

110g caster sugar

30g unsalted butter, cut into small pieces

For the chocolate topping

200g good quality milk chocolate (I use Green and Black’s Cooking chocolate at 37% cocoa solids)

75ml double cream

Small knob of butter


What you do:

Heat the oven to 170C. Put the biscuits and melted butter in a food processor, then pulse until all amalgamated. Line a loose bottomed tart tin, mine was 35cm x 12cm the biscuit crumbs. You can lightly oil the tin first, if you are of a nervous disposition.

Press the crumbs down and up the sides,  chill for ten minutes then cook it for 15 mins. Let it cool, then put back in the fridge. You’re done with the oven now, so switch it off.

To make the caramel, put the 125ml of double cream in a sauce pan with the condensed milk and heat up very slowly. I do this at the same time I’m making the caramel, cos I’m ‘ard and can multi task. If you do it separately it’s important it’s kept warm-ish as otherwise, if you introduce it to the caramel – such as you will later – cold, it might split.

Now put the golden syrup and caster sugar in a separate pan with 30ml of cold water, trying hard not to think of the glycaemic index of these two ingredients combined. Heat it gently until the sugar melts, stick the thermometer in, bring to the boil and then bring down to a simmer until the thermometer reads 120C. This may take a while (5-10mins). When making caramel, the temperature rises, then seems to stall, then rises again, then leaps. Be careful here, a caramel solution at 120C is very, very hot. Don’t have small children wondering round. Don’t leave it unattended.

When it reaches 120C, take it off the heat and stir in the chopped butter, then add the still warm cream/condensed milk mixture. Stir stir stir, (take out the tart base from the fridge in its tin), and put the caramel mixture back on the heat and bring back to the boil – this will take a while – until the mixture is at 111C. When it reaches this temperature, pour the caramel into the biscuit crumb lined tray and leave to cool completely. When it’s cool, put in the fridge.

Then, make the chocolate ganache: put a bowl atop a saucepan of simmering water. In this bowl put the milk chocolate, the 75ml of double cream and the knob of butter. Stir until everything has melted. This is the chocolate ganache. You now pour this over the caramel filled tart and as it cools, make wavy patterns, just, you know because.

Leave to set. Keep in fridge. Eat slowly and in small portions. No-one wants diabetes for Christmas.

Simple sushi for the beginner

My eldest and I used to make sushi from her children’s cookery books and whilst it was okay, it wasn’t great. This however, from the Maisie Makes series in the BBC Good Food magazine makes for really delicious sushi, thanks to the addition of a few key ingredients that other, simpler, recipes leave out; such as the Japanese mayonnaise – which is absolutely essential I think. I do understand about simplifying some recipes for children, but if they leave you with a lesser product, I don’t really think they give an accurate picture of what children can achieve.

Anyway, nothing here is hard. But it does take a bit of practise and do get all the ingredients because it really makes a difference, and if you like sushi I think this will become a regular thing and the cost of each make will go down… The sushi shown here was made entirely by my ten year old and she took it in her school lunch box. Her father and I had the rest for our lunch, with lots of wasabi (I am slightly addicted to the stuff) and soy sauce.

We don’t have access to sushi grade fish here, and my daughter doesn’t like pressed sushi, so we make only the rolls.

Here is the recipe, although if you can get hold of the January 2014 BBC Good Food magazine, I’d recommend you do as there are pictures which makes this much easier!

Do give this a go. It makes for a terrific packed lunch, we make the rolls the night before and it makes that whole packed lunch thing much easier the next morning. And when you are quaffing eight of these rolls for your own lunch, you can marvel at how much you would pay for them if you bought them out.


A last minute Christmas present idea: Kumquat chocolate slab


This is a really easy, delicious thing to make. Yes you do need a) chocolate and b) kumquats in the house to make this exact one, but the idea is that with a bit of imagination, you have a really easy, original gift to make for someone at the last minute. Perhaps you’ve been invited round to someone’s house and want to take a little gift.

I used kumquats, because that’s what I saw in Martha Stewart Living. This decision also resulted in perhaps my most middle class quest of the year: going in search of them (Sainsbury’s had them). It was worth it because kumquats lend themselves really beautifully to this idea and weren’t madly expensive. A packet that would have made this twice over cost £1.50. Plus they look festive, colourful and this was absolutely delicious: like a grown up, not too sickly, Terry’s Chocolate Orange.

But if you don’t have kumquats, or don’t like them you can put anything on top of the chocolate: slices of stem ginger, roasted hazelnuts, sliced pistachios, what ever takes your fancy, you get the idea.

For this I used a mixture of Green and Black’s milk chocolate and Waitrose Continental 70% cocoa chocolate, because I wanted it to be quite creamy. You want the slab to ‘snap’ when you serve it so don’t go too milky chocolatey, even if you want to serve it to children. To make it really grown up and ‘snappy’, make it out of all 70% cocoa chocolate. I used about 250g of chocolate in total to make this slab, which fed sixteen at after lunch coffee.

Melt in a bowl, over boiling water, then pour onto baking parchment on a baking tray. Scatter over your topping of choice. Put in fridge to set. If giving as a present – and not serving at your own dinner party – then break it up and put it in cellophane bag or if you have food-grade cellophane wrap (naturally, ahem, I do) then you can wrap the whole thing in one piece.

That’s it. So easy and looks so impressive.

Chocolate ganache – a great filling for doughnuts or eclairs

Continuing with my slight eclair obsession…I’ve been wanting to try a darker chocolate cream, as opposed to my white chocolate cream, for some time now in an eclair. Except I trialled it in a doughnut, first. But you could use this in anything that needs a gooey chocolate filling. It tastes like chocolate ice cream. Except not cold..

The recipe for the doughnuts is here, and of course you’ll notice immediately that these are not deep fried doughnuts. This honestly doesn’t matter. The doughnut here is simply a receptacle for the chocolate. Just like it really doesn’t matter what a drug mule looks like, they’re there to just, you know..

The topping you see above is just melted dark (70%) chocolate – about 50g – with a teaspoon of vegetable oil.  And sugar sprinkles of course. I’m not a man fan of them to eat. The conflicting textures confuse me: soft doughnut, soft cream, crunchy, sugary, balls. But the children love them.

For the chocolate ganache filling, all you do is (for 12 small doughnuts) put about 100ml of double cream and 50g of dark, 70% cocoa chocolate, in a bowl over some boiling water. Stir until the chocolate is melted. It should be thick. Chill. Then add about another 100ml of double cream and whisk until really thick. I then added two teaspoons of icing sugar, because I was after a very particular taste – just sweet but not sickly and without the sugar it was simple too ‘dark’. But do taste as you go. Put in an icing bag with an appropriate nozzle – depending on what you’re doing, eclairs, doughnuts etc. Chill the icing bag and the cream for half an hour. Then use.

Alternative Christmas ‘pudding’ ideas

Jamie’s Winter Pudding Bombe
My actual bombe

I don’t mean as a direct alternative to that dried fruit pudding English people have after Christmas dinner (which I now love, I actually made my own two years ago for the first time and make them a year in advance now). But I mean, something to eat for pudding on or around Christmas Day.

Chocolate Chestnut Rum Roulade

Every Christmas I make this amazing Chocolate Chestnut Rum Roulade. It’s an Icelandic recipe that I got from the Waitrose magazine twelve years ago. It is so good. I make it every Christmas and my eldest asked for it for her birthday this year. It’s really not that difficult, can be made ahead and put in the fridge.

Another thing I make is Jamie’s Winter Pudding Bombe. This is superb made in advance and stuck in the freezer. I do make some changes to this as the clementine he asks for just freezes solid (obviously) and I don’t find it very nice to eat. So I do his recipe but instead of the bits he asks for  I add some dark glace cherries, some candied fruits, some sour cherries soaked in marsala (I use marsala instead of vin santo throughout) and then some toasted pistachios and hazelnuts. I think you could easily customize this bit.

I also use home made vanilla ice cream because it’s tastier and cheaper.  The quantity in that recipe I’ve linked to make the perfect, perfect amount for this recipe.

Need I point out that you don’t use expensive panettone for this.

You can make it in advance, as I said, and then just turn it out when you want to serve it, and pour the chocolate over the top.

Annie Bell’s Blackout cake, as near to chocolate cake perfection as possible.

Lastly, for something that doesn’t look as festive but is really, really delicious. Annie Bell’s Brooklyn Blackout cake which is as close to chocolate cake perfection as I can take you. I guess you could make it more festive with gold leaf or something. I don’t know, up to you. It’s sensational however and once people start eating it they won’t care if it looks festive or not.

Do feel free to share your Christmas pudding alternatives.

update: mid January 2013. We just at the last of the bombe, which had been nestling in the freezer since I made it on 21st December. I thought you might like to see inside. It was still really really good.

Home made bourbon biscuits

Although I make almost all the biscuits and cakes we eat, I do think there are some things that are just better shop bought. Shop bought custard creams are just what they are and impossible to replicate at home. (This doesn’t mean I won’t try but I won’t expect to get them to compete with shop bought and compete is the right word here.)

But a few weeks ago, I was out for brunch and gossip a very important business meeting with my friend Fiona Hughes and we went to the Orchard Cafe in London’s Holborn.  On the way out, after we’d devoured extremely good scrambled eggs with home made bread and smoked tomato ketchup, I spotted a giant bourbon biscuit, filled with salted caramel goo.

Now. I don’t eat biscuits and cakes ‘n’ stuff like that, during the week, only at the weekend. And as this was a Tuesday, I couldn’t justify it.

However, because I am a greedy thing at heart, the memory of these biscuits scratched away at me, like a sticky out label on a T-shirt, and eventually I decided to try to make my own.

I finally found a mention of an edition of Jamie Magazine that had a recipe for home made bourbon biscuits and so determined was I, I tracked a back issue down, paid for it and waited for it to arrive.

These biscuits are great. Really, really good. I do of course want to get a specialist rectangular cutter and maybe a Barbieri stamp. [Update: believe it or not, I now have both of these.]  But until then, I just cut a line of these, and then cut the rectangles by hand. It made for a very artisan finish but no less impressive.

You need:

For the biscuits:

50g soft butter, unsalted
50g soft brown sugar (I used dark)
1 tablespoon of golden syrup
110g plain flour
20g good cocoa powder (don’t go using any of that ‘bad’ stuff)
half a teaspoon of bicarbonate of soda
a bit of caster sugar for sprinkling

For the filling:

75g icing sugar
50g soft butter
1 tablespoon of cocoa powder
1 teaspoon of cold, strong coffee (use milk if you don’t like coffee, but the coffee really, really adds something)

Put the oven on to gas 150C. You need a baking tray lined with baking parchment.

Either cream the butter and sugar for the biscuits by hand, or use an electric whisk (the recipe calls for latter, I did former). Do this until pale and fluffy. I love the word fluffy.

Then beat in the golden syrup using a wooden spoon (even if you’ve used an electric whisker you’re now instructed to STOP and use a wooden spoon and put your arms to work). Then sift in the flour, cocoa powder and bicarbonate and beat into an even dough. You may need a few drops of milk. Try not to use it but if you do, literally put the milk in half a teaspoon at a time, you want a fairly dry, low hydration dough not something really sticky.

Turn it out onto a piece of baking parchment and top it with more baking parchment so you roll it out between two sheets of baking parchment. Roll until about 3mm thick. Because you want the biscuit to be crisp, don’t make it too thick, although you can’t make it too thin either. Get the ruler out, this is biscuits for goodness sake. It’s important to get it right.

Cut the dough, however works for you, into about 24 fingers of about 5cm x 3cm. I cut long rectangles and then cut into smaller rectangles. Place on parchment lined baking tray, with about 1cm gap in between (they do rise a bit but not much). I prick with a fork for a birruva pretty pattern.

Sprinkle with caster sugar and cook for 8-10 minutes. Make sure they are cooked, not soft as they won’t harden up much and you really do want these to be crispy not cakey. But of course, don’t overcook (am I being too bossy? I want you to get these right you see).

When done, wipe the sweat from your brown, transfer to a wire rack etc. Cool.

For the filling mix the sugar and butter together, add the cocoa powder. At this point it will look pale and unpromising and you may start to panic. Have faith! When you add the milk (a scant teaspoon, just to bring everything together), it will go dark and glossy and glorious and you will be SO pleased with yourself.

Spread on one biscuit, sandwich with another. Daintily arrange. Eat and be amazed.

Ice cream cake

Very yummy ice cream cake

When I used to go to Italy, up to Salsomaggiore Terme, provincia di Parma, where my father is from, we used to go to Pasticceria Tosi on Sunday to buy little cakes and pastries (a very common tradition in Italy). In the fridge/freezer display there would always be ice cream cakes.

They seemed impossibly luxurious and I can still see myself looking in at them.

When I saw this recipe by Bill Granger in the August edition of Waitrose magazine, I knew I had to try it (unfortunately I can’t find a link to it on the Waitrose site). He calls it tiramisu ice cream cake. Of course, being Italian, I cannot call it this.

I adapted it quite a bit, halving the proportions, adding more sponge fingers, less chocolate and taking out the Kahlua that Granger asks for (I haven’t got any in my cupboard and I’m not going to spend £17 on a bottle of it to keep in said cupboard, but if you have some, do use it, maybe half and half marsala or all Kahlua, up to you). I know this recipe may seem imprecise, but the beauty of it is that you can add more or less of something you like/don’t like.

This is what I did:

65ml espresso/strong black coffee
30ml marsala (or use sherry)
Nearly a whole packet of sponge fingers (about 170g)
Some vanilla ice cream, I used about half of one batch of this home made stuff
About 50g of grated dark chocolate

I lined a small loaf tin (about 6″ x 4″) with some parchment paper. Then I started layering up the dessert.

Mix the coffee and marsala together in a small dish. Individually dip the sponge fingers into it. Don’t linger or they will fall apart. Lay the fingers down on the base of the dish, break some up if they don’t fit but end up with a base of soaked sponge fingers.

Now layer with vanilla ice cream, then grated chocolate. Grating chocolate is possibly one of my least favourite jobs EVER, as the chocolate ends up going everywhere and sticking to the grater. So I didn’t use loads, you can use more if you like. I probably should have used my grater attachment on my food processor, but I don’t like to use it for what I consider small jobs..

Then  just keep going. Dip the sponge fingers in the mixture, ice cream, grated chocolate. Until you run out of space. I ended up with a layer of sponge fingers as I like them, Granger says to end up with a sprinkling of chocolate.

Cover with cling film and put in the freezer. Take out for about 30 mins before you need it and keep it in the fridge. It slices beautifully and my eldest loved it (although I need to point out that it DOES HAVE ALCOHOL IN IT and it is ILLEGAL TO GIVE ALCOHOL TO A CHILD UNDER THE AGE OF FIVE). I gave my youngest a separate bit with no booze in it.

Afterwards it struck me that if you preferred you could layer these up individually in little ramekins or some lovely little glasses and freeze them individually.

If making for a large party, double the recipe above and use a big old square tin. Granger recommends 26″ square but use your common sense. No reason you couldn’t make this in a loaf tin like I did just a bigger one.

Light ‘n’ fluffy vanilla ice cream

Never underestimate how hard it is to be a food photographer.

There are two people I discuss ice cream making with. My father and my friend Lucy. Recently Lucy told me about an unassuming little recipe she had come across for vanilla ice cream that was different to the way we usually made ice cream: instead of the custard method (which uses just the yolks of the egg), it used the whole egg. This was of particular interest to me as I make lots of ice cream and my freezer is overflowing with egg whites. There are only so many madeleines I can make.

This vanilla ice cream recipe is also great because it’s quick, easy and makes a lovely light vanilla ice cream that scoops straight from the freezer and children, in particular, seem to love. I would probably go with my more luxe version if the ice cream were being served at a really posh dinner party, atop, say, some exquisite piece of patisserie.

I’ve adapted the recipe slightly (lowered the sugar from 100g to 80g and slightly changed how you make it).

4 eggs, separated
80g icing sugar
teaspoon of vanilla essence
300ml double cream

Get three large bowls. Separate the egg yolks and egg whites into a bowl each. Put the cream into the third bowl.

Add the vanilla essence to egg yolks. Do it NOW or you will forget and without it, you have Fior di Latte ice cream, not vanilla. Add the sugar to the egg yolks too.

Take an electric hand held whisk. Whisk the egg whites until stiff. Then the cream until it holds itself properly, like a well trained ballerina. Finally the egg yolks, sugar, vanilla essence.

Now gently fold the cream into the egg yolk mixture and finally the egg whites. Put in ice cream maker. If yours is very small, you may have to do this in two batches. I have a Magimix and I put it all in, it comes right up to the top but it reduces as it’s being made.

You can of course have this on its own. Make tiramisu with it, it goes great with a fruit salad. Or fold in some chocolate coated popping candy for something a bit Heston.

Chewy scoop biscuits

 These have just come out of the oven. They are crispy, salty, sugary, chocolately. But not sickly, because that would be wrong.

As I’ve mentioned in the past, I keep all my torn out recipes in Muji PP Portfolio books. I have about 12 of them covering different subjects like ‘Everyday’, ‘Pasta’, ‘Fish’ and of course one just for biscuits…

I had cut this recipe out of the Waitrose magazine some time ago and recently refound it. It was the word ‘chewy’ that got me, even though these biscuits aren’t, actually chewy (or I have not found them to be so).

Not that that matters, because they’re delicious, easy to make and – best of all, for me – you can make the dough, shape them and then freeze them so when you fancy home made biscuits you’re only a quarter of an hour away from them. It also means you can cook just a few at a time (important for greedy types such as me).

Anyway, here is the recipe. I didn’t have hazelnuts so I used walnuts. The three types of chocolate is really important, as is the salt (obviously all the ingredients are important. But what I mean is something that seems unimportant, like the salt, is actually crucial in my view).

I didn’t use an ice cream scoop, just shaped them with  my hands into walnut sized balls. My biscuits, as you can see, aren’t flat like those in the magazine.

I found 12 mins was plenty, but my oven is fierce.

If you want to freeze them – and I recommend you do as this dough makes loads, you just shape them and them freeze them spaced out on a tray or plate or something. When frozen, then you can bung them all into a freezer bag (if you bung them all in to begin with they will all freeze stuck together, and you don’t really want that), to pull out and cook – from frozen – whensoever you wish. If cooking from frozen, give them 15 mins.

A white chocolate lolly ‘cake’

I don’t even like white chocolate, but let me tell you, these were so good I almost ate them all in ‘quality control’ before the actual day.

Yesterday was my eldest daughter’s first holy communion. I made her a cake made entirely of white chocolate lollies. Since first experimenting with chocolate lollies last year, I’ve really moved on with them and by investing in a few things: proper moulds, sticks and a stand, you can really make something quite simple and easy to make (but ssssh, don’t tell anyone) into something that looks spectacular.

I made these the day before, and just assembled them on the day (i.e. slotted them into the holes in the stand). Once I’ve had an alcoholic drink, my guests have to pretty much fend for themselves so anything that can be pre-made plays to my great organisational skills and my weakness for being a dreadful, drunk, host.

I usually make chocolate lollies in 70% cocoa chocolate. But a few months ago, my friend Lucy (who is the only person in the whole of East Anglia who possibly has more baking gadgets/biscuit cutters than I) mentioned that she had made some lollies in white chocolate using crystallized violets. I stored this bit of information away in my brain, thinking white lollies would be lovely for a holy communion, instead of a cake, say. We had some crystallized violets that my partner and the girls had made for mother’s day (every aspect of that sentence sounds smug, but I don’t mean it to), I used Green and  Black’s white chocolate (which is, I have to say, absolutely superb). And this is what I did.

Melted the white chocolate.
Poured it into the moulds.
Put in lolly sticks.
Scattered on some crystallized violets or freeze dried strawberries (from Waitrose, they come in a tube, in the baking aisle).
Put in fridge to set.
Removed from moulds after a couple of hours.
Tasted one for quality control purposes.
Decided they were so amazingly good I had to have more.
Cycle to Waitrose to buy more white chocolate.
Repeat process.
And then, when time comes, slot the lollies into the holes in the stand and da-dar.

A note about the stand. I bought mine from Amazon. It doesn’t appear to be sold anymore, but I’m looking out for other stockists as it’s really lovely and minimalist and classy.