I’ll have to add a picture anon and also I can never really decide how you spell houmous so I hope that will do.
Here’s the thing with me and houmous. I’ve never really liked home made, or at least I have never made any at home which pleases me.
But all this has changed. I went to my friend Tamsin’s house; Tamsin is an inaugural member of my Suffolk Chocolate Club and it was her turn to host, and she made this amazing houmous which now I make and it’s, amazingly, still amazing when I make it.
The key is a really whizzy blender. I make mine in my Sage Super Blender, which is not its real name. I find if I make it in my Magimix it needs far longer to make it smooth.
You need (I’m so sorry about the formatting, not sure what’s going on with WordPress atm)
A 400g tin of chickpeas drain the liquid and keep it separate 50ml of the chickpea liquid (but you might need a bit more, I never do though, you can keep it though for aqua faba if that’s your thing – it is mine) 60ml lemon juice, this seems to be about 2/3 of my little organic lemons. Don’t forget you can grate the peel and keep it in the freezer, for something else. 60ml extra virgin olive oil 1 garlic clove, peeled 1 teaspoon of ground cumin Half a teaspoons of paprika 1 tablespoon of tahini 1 teaspoon of sea salt
Blend it all up til smooth, serve with a drizzle of very good olive oil. It’s really good. The recipe says you can add 100g roasted red peppers to make it into red pepper houmous.
What I also do now is halve the houmous (how many ways are there to spell houmous?) when it’s done and then, to one half I add a small cooked beetroot and briefly whizz it up again and it makes for something even yummier.
We had guests coming, and I had planned to make normal eclairs, stuffed full of white chocolate cream. But as I went to get the mixture out of my Kenwood mixer, I noticed the whisk attachment, which I’d had for about twenty years, had splintered and broken. There were really sharp filaments of metal sticking out, and I couldn’t risk the possibility that some had got into the mixture (and you can’t really sieve eclair mixture). So I had to start all over again.
However, my Magimix food processor whisk wasn’t strong enough to give me that really ribbony eclair texture, so I knew the dough would be too soft to pipe. But I wasn’t about to waste a whole other mixture so I thought sod it, I’m going to pour it into my Yorkshire Pudding tins – which are like shallow four circle shapes per tin – that’ll contain the mixture. And it worked beautifully. You could treat these like a normal eclair, by splitting them and coating the top with chocolate and injecting the insides with cream. But I didn’t want the faff after such a relatively stressful baking morning. So I just placed the cream on top, put some berries on and as an homage to the usual chocolate topping I poured on some Bare Bones Chocolate Syrup (seasonal produce) but you don’t need this latter.
Just to bring everything up to date here are the recipes for the eclairs and the white chocolate cream.
Eclairs (makes eight in my Yorkshire tins)
125ml water 50g butter 75g plain flour 3 medium eggs (at room temperature, this is important) pinch of salt
Preheat oven to 180C.
Put the water in a sauce pan with the butter and salt and heat until the butter has melted. With the heat still on, beat in with a wooden spoon, the flour. Mix around vigorously until it forms a dough and doesn’t stick to the sides of the pan.
You can let the mixture cool here, you’re meant to, I never do.
Put the dough in a stand alone mixer with the whisk attachment on, then add the first egg. When fully incorporated add the other egg and then the third. Strictly speaking you only add enough egg til it comes together to form a thick, ribbon-y dough, that is to say that when you lift the whisk out of the mixture it leaves trails of visible ribbons behind for a few seconds. But I just add three eggs in and if you’re making Yorkshire eclairs the consistency of the dough should be thick, but it doesn’t matter if it’s not super thick because you’re not piping it.
When the dough has some substance to it, pour it into your Yorkshire tins (you do not need to grease them in anyway). Bake for about 25-35 mins. Longer will give you a dryer, crisper eclair if that’s what you want. For this recipe, ie in this shape, I like them a bit fluffier and softer so I check after 25 mins.
When cool, dollop on the white chocolate cream and top with berries and you are good to go. Once assembled eat immediately.
The eclairs can be kept in a tin for a day or two but they will soften. I rather like them like this but you may not.
White chocolate cream
Ideally make this just before you do the eclairs (even the day before) so it can set in the fridge.
You need 300ml of double cream and about 100-125g of white chocolate.
Heat half the cream in a saucepan, break up the chocolate, as small as you can, and then pour the heated cream over the top of the chocolate and stir until melted. (You can of course just put both together in a bowl and melt over hot water but I find that’s more of a faff.) When it’s all melted, put this chocolate/cream mixture in the fridge until it’s cool. When it is, mix in the other half of the double cream and whisk until stiff. It’s now ready to serve when you are.
Lavosh are a bit like Italian Linguette – flat breads that you use with dips. They are so easy to make, the dough can be kept, balled up into individual portions for extra convenience, in the fridge for a day or two, ready to be rolled out and baked and you can have fresh lavosh on the table in under 20 mins.
You need, for eight lavosh
1 teaspoon of dried yeast 125ml of lukewarm water 1 teaspoon of caster sugar
300g of 00 flour (or just plain if you don’t have 00)
60ml of extra virgin olive oil
1 teaspoon of sea salt plus extra for sprinkling
1 egg white
Some herbs for atop, I’ve used basil here but you can use anything you like, fresh rosemary would be nice, as would dried oregano.
Mix together the 1 teaspoon of yeast, 125ml of lukewarm water and the teaspoon of caster sugar in a small bowl and give it 10-15 minutes until the top is frothy.
Whilst you are waiting for this mix together the 300g of flour and one teaspoon of salt in a bowl, make a little well and pour in the 60ml of extra virgin olive oil.. When the yeast/water/sugar mixture is frothy, pout this into the flour mixture too, and mix together until you have a rough dough. Knead this gently for a few minutes (if you need to you can do this on a lightly oiled chopping board or surface) leave for five minutes, go back and knead it again for a a minute or so (nothing strenuous is needed) leave it for another five minutes and by this time it should be smooth. Now leave it covered with a tea towel in a bowl in a warm place until it’s risen slightly. You could also put it in the fridge at this stage and carry on the next day with the cutting up into portions and rolling it out.
When it’s risen slightly cut into eight portions. I then roll them up into balls and with a rolling pin roll them out until they are long and thin. You can then cook, as below.
But if you haven’t previously kept the whole dough overnight you can cook some now and some – balled up in portions or as one big lump of dough – tomorrow as long as you leave the dough in the fridge at about 4C.
Basically when you are ready to bake them, preheat oven to 200C.
You can then either place baking parchment on a baking sheet and put the rolled out lavosh onto it, brush with the egg white, press in the basil leaves or whatever herbs you are using and sprinkle some salt. Then cook for about 12 mins until golden brown.
Or what I do is I preheat the baking sheet with the oven and when the oven is up to temperature the baking sheet is hot. I have separately prepared the lavosh onto the baking parchment (I have a re-usable silicon one). I take out the hot baking sheet and gently slide the lavosh on the baking parchment onto the tray. This way the lavosh puff up more but it’s really not necessary. Then bake as before
They are ready to eat pretty much straight away and are absolutely delicious with dips.
The food writer Nicola Miller introduced me to what I think is the best bacon roll, from 5 Angel Hill in Bury St Edmunds. Their soft pretzel rolls, filled with salty bacon slices can see me going pretty much all day. Few breakfasts do this.
So when I saw this recipe for soft pretzel rolls in BBC Good Food magazine a while ago, by Edd Kimber (who I think is a genius and the only person I pay for on Substack) I had to make them.
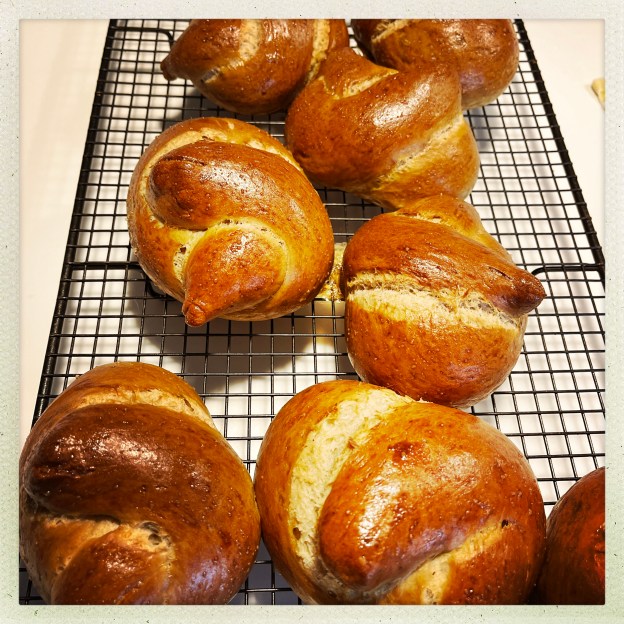
I gave up hope of making them so they looked like pretzels, mine just look like in the picture. They make great rolls for sandwiches, sweet – but not too sweet – and soft. And of course with bacon for breakfast, and maybe an egg. I also really like them on their own.
The baked bicarb bit is a pain but you only need to do it once to yield a jar of baked bicarb which lasts for a good few batches, and it is worth it (I’ve done it without and they are fine but the baked bicarb does add something). I’ve reproduced the recipe here, eversoslightly tweaked, largely to help me as the way it’s laid on in BBC Good Food I always found confusing.
For the pretzel rolls (makes eight)
500g strong white bread flour
7g dried yeast (I use Dove’s Farm)
25g dark brown muscovado sugar
300ml of luke warm water
50g unsalted butter (I sometimes put 50g of fridge-cold butter into a jug of 300ml of just boiled water and wait til the butter melts, thus cooling the water, and then wait until the water is at the sort of temperature that when you dip your finger in it feels neither hot or cold)
1 teaspoon of salt
For when ready to bake
2tbsp baked bicarb (see later)
An egg for egg wash
Sea salt for sprinkling if you want.
I put all the ingredients for the pretzel rolls (not the ‘for when ready to bake’ bits) into a food mixer with dough attachment and mix for ten minutes. Then I take out the dough hook and leave at room temperature for an hour (less if it’s really hot).
When ready, take the dough out and divide into eight. You roll each piece out into a long sausage and then shape into a U then cross the ends up and over. If you get stuck just YouTube How to shape a pretzel but don’t get fixated on making large holes or gaps. You can also just shape these into little normal buns. Place on parchment covered tray.
Then you can either set these aside for – as the original says – 20 mins (covered with a cloth) or do as I do which is put them in a fridge which is at 4C (on a parchment covered tray, covered with a tea towel). I bake them the next day. Note these won’t keep for ever in the fridge so if you want them the next day, make them late afternoon/evening.
When you are ready to cook, preheat the oven to 200C and bring a large pan of water to the boil put in the two tablespoons of baked bicarb (I will tell you how to do this at the end). Take your tray of pretzel rolls out of the fridge. Depending on how big your saucepan is you put in, say, two pretzel rolls and a time and boil for 20 seconds each side (flip over using the slotted spoon). Take out the pretzel rolls with a slotted spoon and place back on the parchment covered baking tray.
When all are done like this you brush the rolls with beaten egg, sprinkle with sea salt if you so desire and bake them at the 200C for 20 mins. They will be a rich golden brown. As soon as you are able to place them on a cooling rack, off the parchment (otherwise they can go soggy). Wait as long as you can to start enjoying them.
Once cooled these also freeze beautifully, I defrost them in the microwave on the defrost function for about 2 minutes.
Baked bicarbonate
Preheat oven to 120C. Foil line a baking tray and pour a whole tub of bicarbonate of soda (the sort of size you get in the supermarket) . Spread out so it’s all even and bake for one hour. When cool put in a specially marked container so you have it for next time.
I first started making bagels over 13 years ago. I still make them very regularly. Home made bagels are not difficult, completely different to shop bought versions and whilst I won’t say they are ‘healthy’ they are very much better if you make them yourself.
The original recipe still stands but I’ve tweaked it ever so slightly and this is what I do now, making it in a stand mixer.
Ingredients:
450g strong white bread flour
1.5 tablespoons of caster sugar
1.5 teaspoons of salt
230-240 ml of water, at body temperature preferably (but just not ice cold).
1.5 teaspoons of dried yeast
egg wash for later and seeds if you want them.
Method
If you want to eat these the next day, start making them about 5pm. They overprove easily, even at 4C in the fridge, so you don’t want them hanging round too long. If you want to eat them that day, start making these about 3 hours before you want to eat them.
Put everything in a stand mixer with a dough hook. Mix steadily for ten minutes. Take out the dough hook (on very lazy days I don’t even do that, I drape a tea towel over the mixer) and cover.
Leave for one hour at a room temperature. After an hour the mixture should have risen. Obviously if you live somewhere very hot or very cold adjust accordingly. The dough should be puffed up and a bit yielding to the touch.
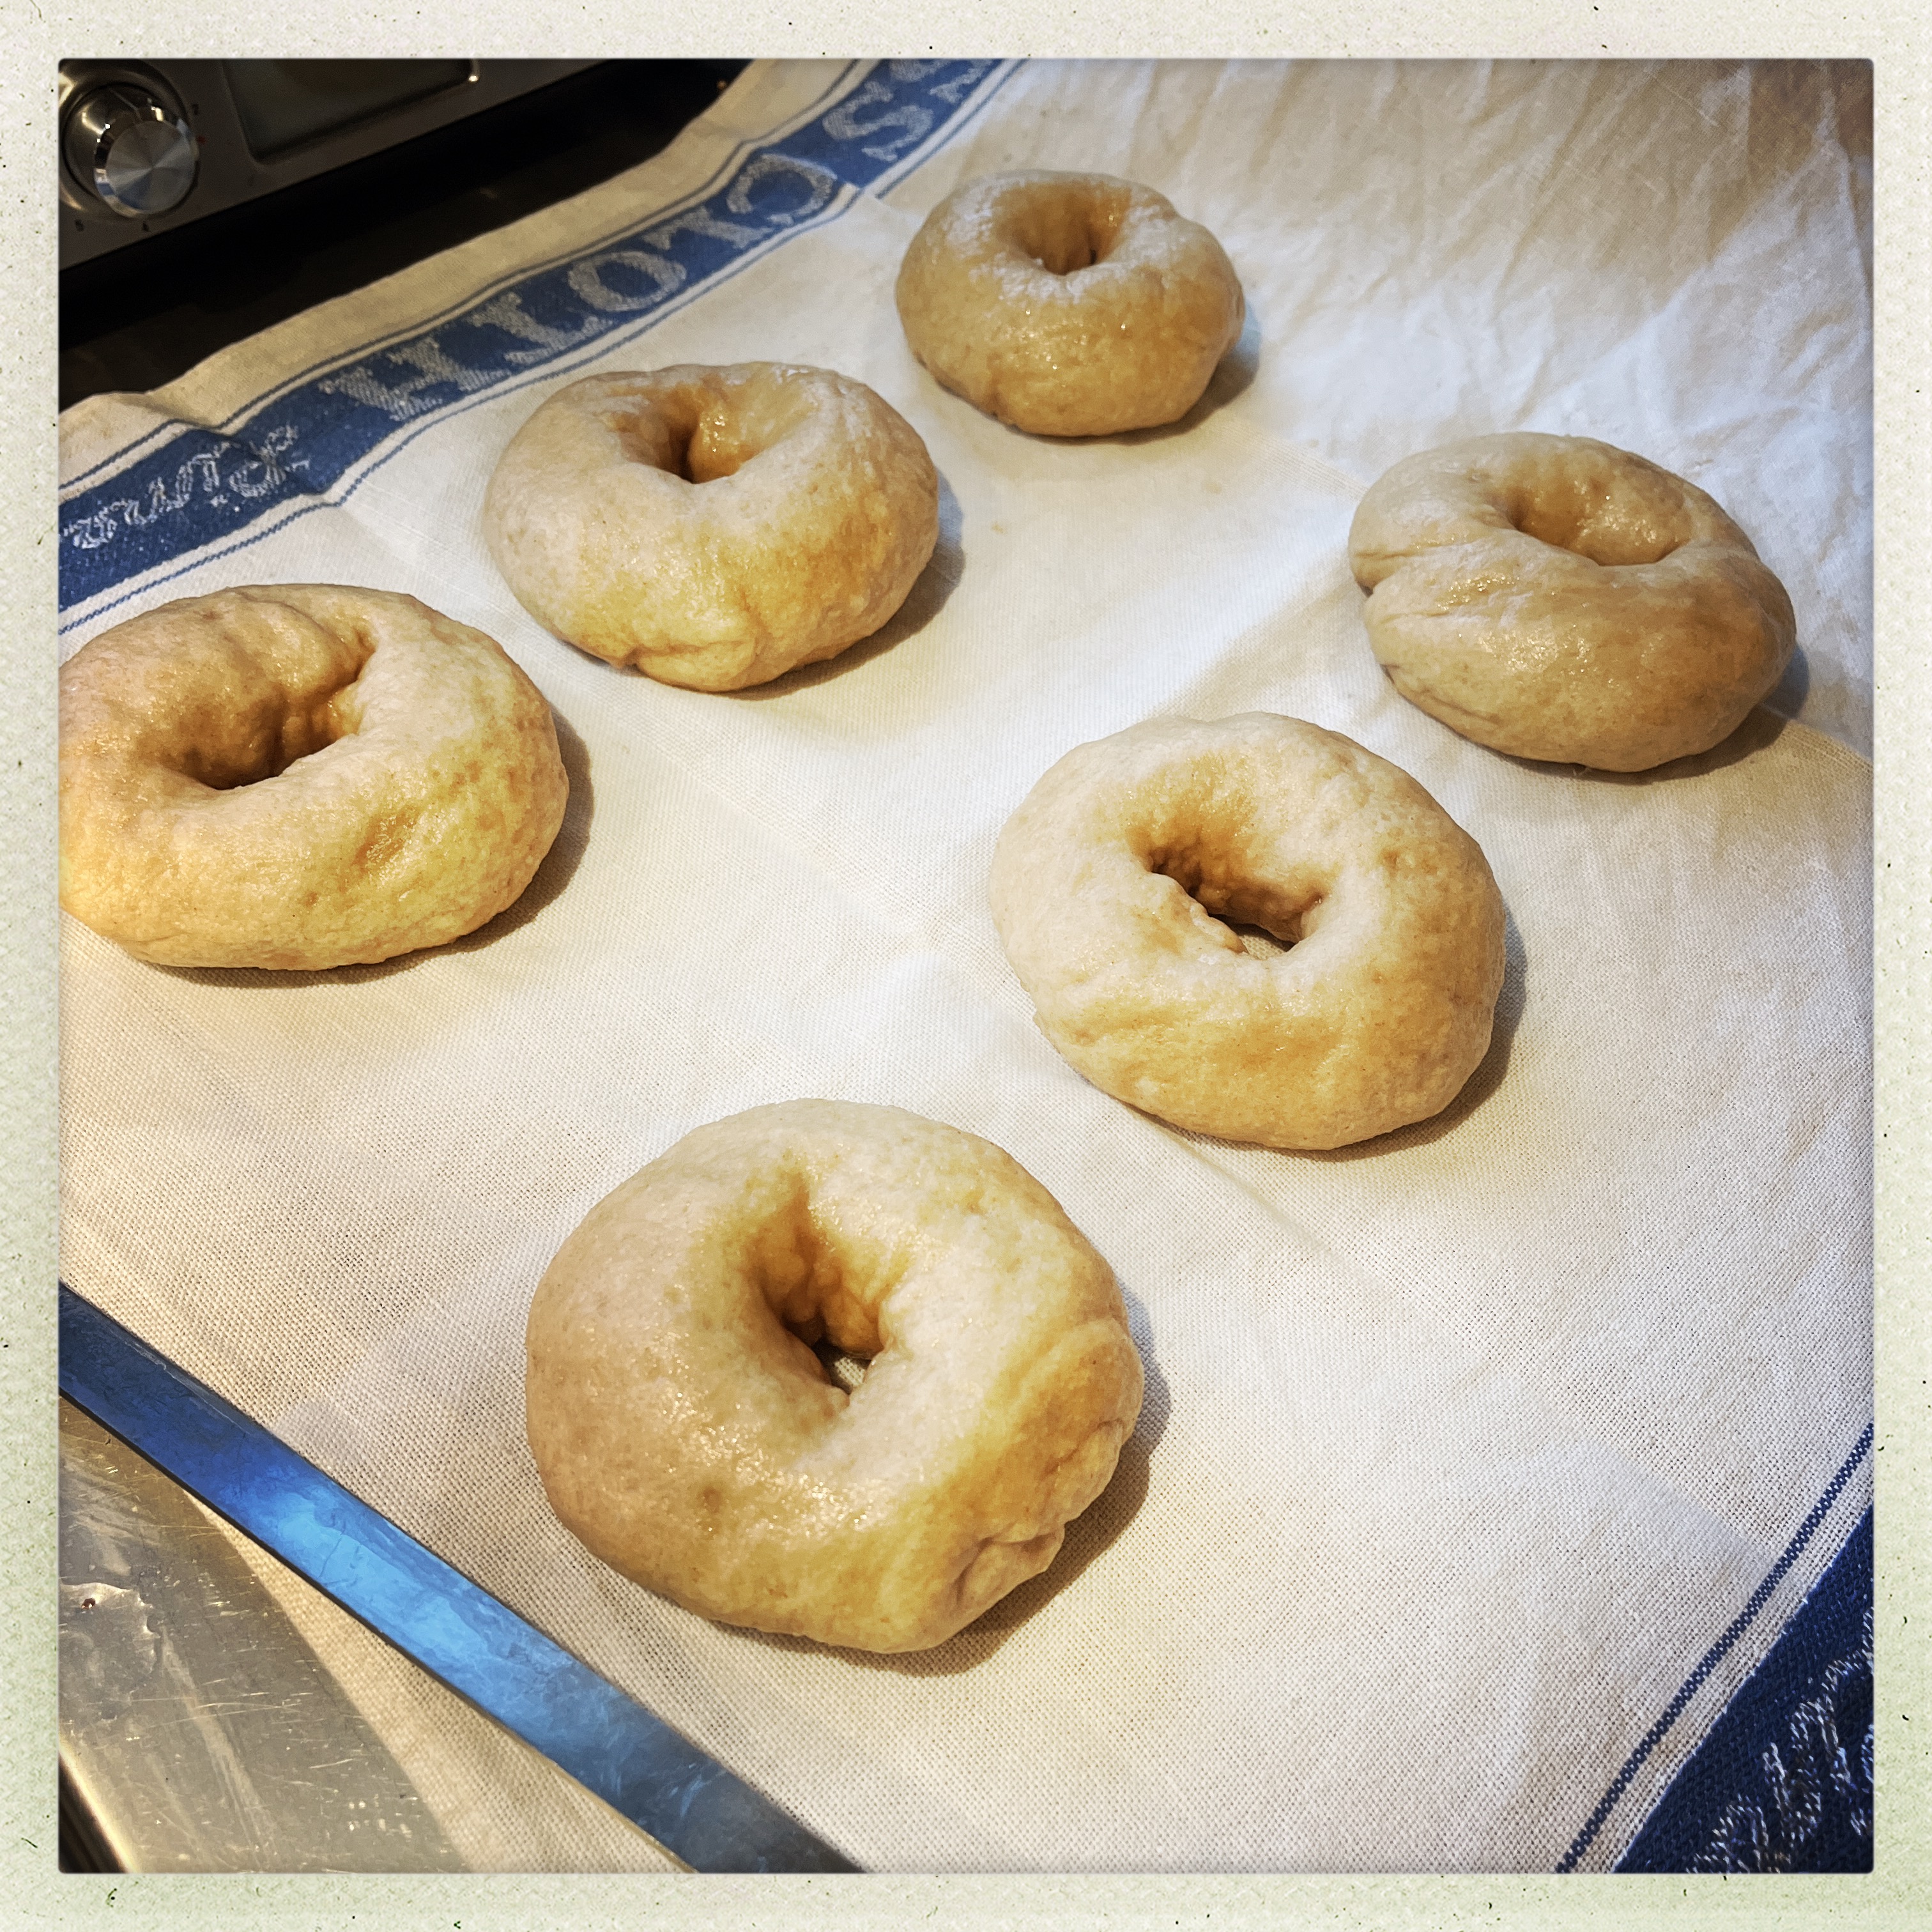
Now cut the dough up, using a bread knife, into eight pieces (more if you want to make smaller bagels). You can now either roll each piece into a long sausage and then join the ends (overlap slightly, as per pic below, although in that they are already baked) or gently knead into a ball (put dough in palm of your hand, cup your other hand over and gently make circles, it’ll ball-up), then make a hole with your finger, or a wooden spoon and make the hole a bit bigger. Place on a baking parchment lined tray. Cover with a clean tea towel.
Now either put in the fridge at 4C if you want to bake these the next day – in which case you can go straight to the boiling of them once you’ve taken them out of the fridge. Or rest for about an hour til they’ve puffed up.
Whenever you are ready to cook:
Preheat oven to 220C.
Bring a wide-mouthed pan of water to the boil. I boil two at a time. Slide in two bagels, upside down to begin with (it doesn’t really matter but this is the way I do them), boil for 45s, tip over with a slotted spoon, boil for another 45s. Take out with the slotted spoon and place them to drain for a few minutes on the tea towel, whilst you do the others.
Once ready to bake put them back on the parchment lined tray you had them on, brush with beaten egg (can be a whole egg or just a yolk if that’s what you have), sprinkle with seeds if you want.
Bake for about 12 minutes (depending on your oven of course).
Voila. They also freeze (once baked) beautifully – better than letting them go stale and then toasted them – and you can defrost them gently in a microwave and they seem like freshly baked.
My friend Lucy told me about this original recipe, from the Waitrose site.
I’ve adapted it, to include ground almonds, olive oil, and also tweaked with the icing. If you want to see the original recipe it’s here, otherwise here’s how I make it now.
Because I also like my treats to be contained, I make these in muffin cases and the recipe makes 16.
For those who have done the Zoe Trial, these score 59 per cake (“enjoy regularly” and I do!). They make very moist cakes that keep really well for about a week in the fridge and I think get even better as they age! These have become a real favourite int he house. Just make sure you eat them when they are really cool, or leave them for a day before eating.
200ml extra virgin olive oil
200g caster sugar
4 eggs
2 tablespoons of yuzu juice
125g self raising flour (I have also used white spelt and then a teaspoon of baking powder)
125g ground almonds
1 teaspoon of bicarbonate
250g courgettes – grated and put in a sieve for a bit then squeezed to get moisture out (there won’t be a lot)
pinch of salt
Icing
One and a half tablespoons of icing sugar
250g cream cheese
1 tablespoon of yuzu juice
Method
Oven to 180C. Put muffin cases in a muffin tray (I have a 12 hole one and then a 6 hole one, or you could make these in stages).
Beat together the 200ml of extra virgin oil and the 200g of caster sugar for about two minutes with an electric mixer (whisk attachment). You want it to have thickened. Then add the four eggs, one at a time, the two tablespoons of yuzu juice, the 125g self raising flour (or spelt and baking powder), 125g ground almonds, 1 tsp of bicarb and a pinch of salt, then finally the courgettes.
Spoon carefully into the muffin cases and cook for about 25 minutes. It’s quite hard to see if they are cooked as these are a moist cake, but press down and there should be som resistance. If not cook for a few minutes more.
When completely cool, mix together the cream cheese and icing sugar (just with a fork or spoon it should take seconds) and yuzu juice and top each cup cake with icing.
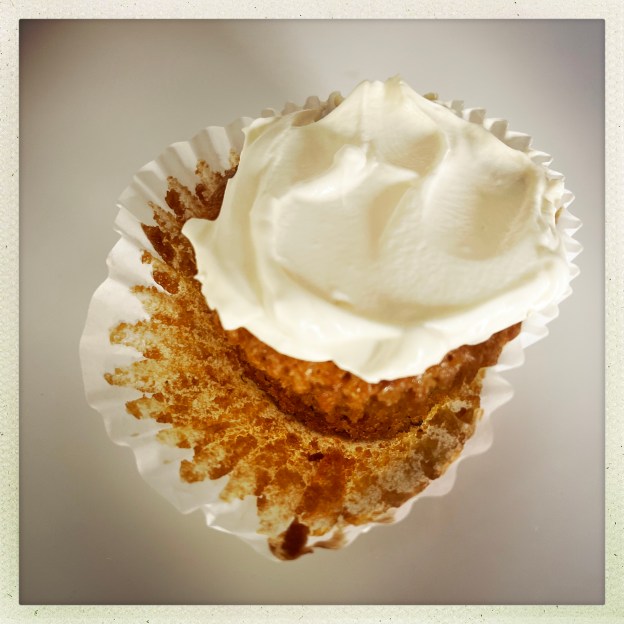
Store in the fridge and enjoy one a day! I don’t have any pics yet as I am both greedy and lazy but will remedy this soon.
This is surely a nursery stalwart, and I cut this out of a BBC Good Food magazine earlier this year and hid it as it’s pasta and it’s too easy to eat pasta. But, as I seem to be on a carb fest I scheduled this for dinner last night and it was absolutely delicious. Warming, comforting, cosy, just as our government crashes and burns the economy. We ate it in front of the fire trying to keep sane (and warm). I have changed this slightly as don’t agree what they did with the peas (they say cook them in the last few minutes of the pasta cooking but this is impractical if you want to then puree the peas, see later).
This serves two but as a small dinner, augmenting the pasta to 250g, it served three of us fine.
200g conchiglie pasta (don’t fight it like I tried to, this is a great shape for this dish, we used the smaller-size shells, not tiny tiny but just normal, recipe calls for conchiglione which are the big mofos but we didn’t use them)
160g cooked peas 1 red onion, finely chopped
A slosh of olive oil
100g cooked ham
150ml double cream
Juice of half a lemon
40g parmesan, plus extra to serve
Cook the pasta according to the packet instructions, which we know always lie.
At the same time, because cooking is all about multi tasking, heat the oil in the frying pan and fry the onion until soft. Add the ham, cream, lemon juice and parmesan, then season and mix together well. Remove from heat, try not to pick at the bits.
The recipe says to puree some of the peas which you can do if you want (we did). Drain the pasta loosely (ie keep a tiny bit of the water on it) then tip everything into a big pan/frying pan and mix together, serve from the pan if you want and add extra parmesan.
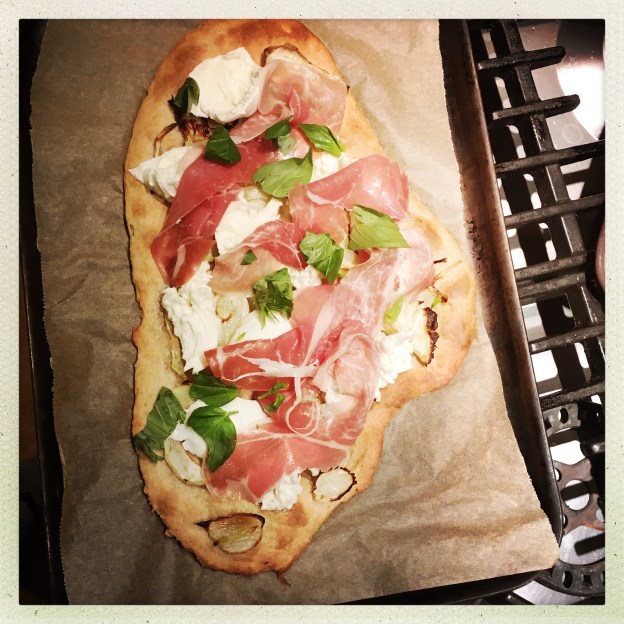
This is a Donna Hay recipe which makes a really quick, light, and slightly flakey pizza. It’s not pizza as you may know it and I find it best if you fold over the finished product and eat it like that. But it is delicious. And fast. I’ve reproduced the recipe more or less as she originally gave it but you can customise it with any topping you like. This makes two pizzas which we divided up to have half each and I found that was plenty for dinner with a green salad.
The base
1-2 fennel bulbs thinly sliced
Four tablespoons of olive oil
260g white spelt flour plus a little extra
Half a teaspoon of sea salt
250g Greek yoghurt
The Topping
300g soft mozzarella (ie not the block kind, Hay calls for burata but i didn’t use it)
6-8 slices of Parma ham or equivalent
Some fresh basil to scatter atop
Method
Oven to 200C, I put mine a smidge lower and on fan so that I can do both at the same time. Put two large baking trays in the oven to heat up.
Toss the fennel slices in two tablespoons of the olive oil and set aside. To make the pizza dough put the flour and salt in a bowl, stir, make a well in the middle and into that put the yoghurt and the remaining two tablespoons of olive oil and use a fork to mix it all together. Tip onto a lightly oiled board or work surface and gently knead until a smooth dough forms – this doesn’t take long. Now divide into two.
Roll out each piece between two pieces of baking parchment. This always seems wasteful to me but it’s needed and you’ll use two of them for final baking. (I use three piece in total, as I move the top sheet from one piece of dough to the other.) Roll out until, Hay says, they are about 35 x 25 x 0.5 cm. I just did mine until they seemed right (and they were!).
Keeping the dough on the bottom sheet of the baking parchment (you’ll transfer the whole thing onto the baking tray), remove the top piece and arrange the fennel slices on the top. If you’re using something else that needs to be baked – pepper slices, tomato sauce, you’d add that here too. Don’t over do it though, think of this pizza as something you do partly in the oven, partly you top outside of it. But the beauty is that you can also experiment.
When you’ve done that, take the baking trays out of the oven, slide the topped pizza on top, repeat with the other one and then bake for 15-18 minutes until the base is crisp and golden.
Remove from the oven and top with the slices of mozzarella and Parma ham or other toppings you’ve chosen that don’t need cooking. And scatter over Basil leaves if you have them.
Sometimes you keep a recipe hanging round for years, meaning to make it. And then you do, and you’re glad you did – keep the recipe and, eventually, make it. This is one such. Like a lot of people, I was late to like rice pudding. In my Italian family we tended to have more of a rice cake – served sliced. I mean I liked it but I didn’t love it. And then of course, the more sloppy rice pudding was served at school and was, like everything about school dinners aside from the fluted shortbread rounds we were occasionally served (which were nectar) – awful.
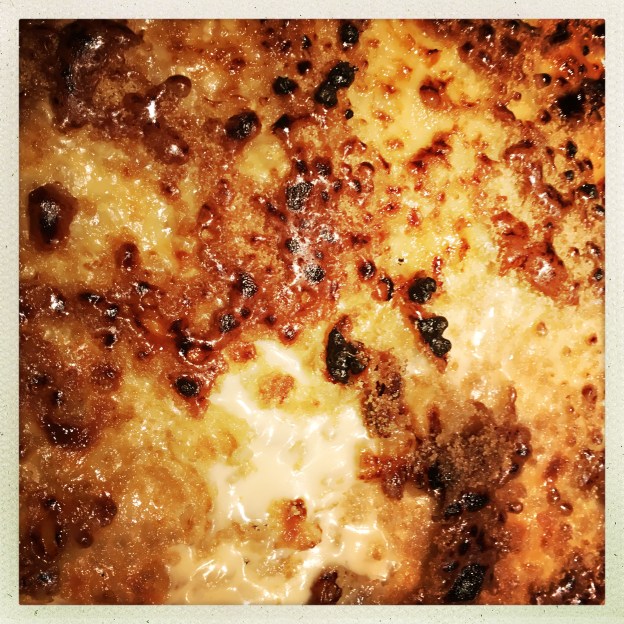
Anyway when I finally made this it was supremely good. The original recipe calls for light brown sugar for the topping for brûlée-ing but I don’t think it worked great. We have three blow torches, of various degrees of industry and I couldn’t really get any of them to do what I wanted, so in the end I shoved it under the grill. This recipe is originally from BBC Good Food, some time ago now..
75g butter
175g short-grain pudding rice
140g light muscovado sugar
500ml double cream
1 teaspoon of vanilla extract
500-600ml full fat milk
Demerara for sprinkling on top to make the brûlée topping (optional but really good)
Get a large-ish sauce pan that can eventually take all the ingredients. Melt the 75g of butter until it starts sizzling and then add the rice. Stir the175g of rice around for 4-5 minutes until the butter starts to turn golden, then stir in the 140g muscovado sugar and cook for a few minutes more until the sugar starts to dissolve.
Now pour in the 500ml of cream, stir and boil gently unil all the sugar has dissolved and you have a thick butterscotch sauce, now gradually stir in 500ml of the milk and the vanilla.
Simmer all of this for 45 minutes, I stirred every three minutes to stop it catching at the bottom as it has a tendency to at the beginning. Towards the end the rice should feel cooked – not mushy – and if you need to add the extra 100ml of milk (I never need to). You should have what looks like a creamy risotto.
When it’s done pour into a shallow heat proof dish – I use a square Le Creuset. Sprinkle the sugar over the top and either blow torch or put it under a grill for about 5 minutes until the top is golden and set. This might not happen uniformly: don’t worry. It’s still delicious. TBH it’s still amazing without its brûlée hat.
I like this about 30 mins after it’s done, but it’s also good later, if kept at room temperature. It can of course be stored in the fridge – and should be if you are leaving it for more than a few hours – but give it a quick blast in the microwave before eating to loosen it, if you don’t have time to bring it back to room temperature. That said my eldest loves it cold. I don’t.
It’s delicious and comforting and that’s what I need right now.
I first made these in the summer of lockdown 2020, when we would ‘go’ for a picnic each Wednesday, which involved us getting into the car, basically driving into the turning circle on our drive and then getting out and having a picnic.
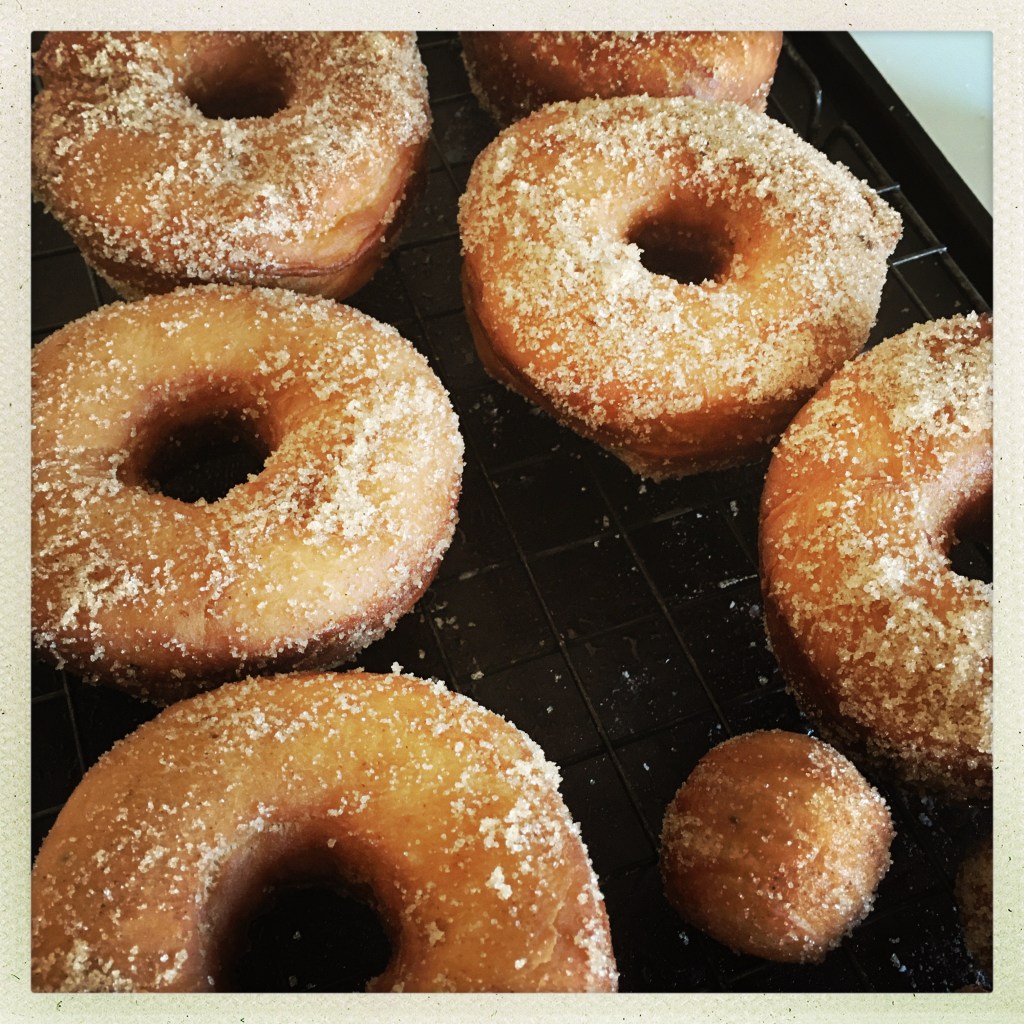
Listen: you make your fun where you can. My friend T gave me this recipe which I have tweaked a bit. It makes a lot – about eight. And they don’t really keep, they’re not the same even two hours after making them. You can use only half the dough at a time and make the rest the next day. (Note: I have pushed these to a 144 hour prove at 4C and they are delicious, so you can absolutely make the dough, cut into doughnuts and keep in the fridge and make in batches, the 144 prove doughnuts were amazing – they puffed up to life-saving-rubber-ring size and tasted amazing.)
Warning: you need to start these the day before you need them.
This doughnut had a 144 hour prove.
These are the ingredients:
240 ml whole milk warmed to 50C (I use a thermapen for all my kitchen thermometer needs)
1 large egg at room temperature
Four tablespoons of melted butter, cooled slightly
225g sourdough starter, also at room temperature. This should have been recently refreshed – about 5-6 hours ago at room temperature, the day before if kept in the fridge
500g plain flour
110g granulated sugar
1 teaspoon of salt
1 teaspoon of cinnamon
You’ll also need quite a lot of oil for frying (try not to think about it, I am not a fan of deep frying but you need to for this) and some caster sugar mixed with cinnamon for coating later.
Once the milk has reached 50C mix it together with the butter, starter and egg. You can do this by hand or in a mixer with the whisk attachment. Then add the sugar and the flour.
Now with this bit you can either mix it all up and knead on an oiled board, leave for ten minutes, knead for ten seconds, leave for ten minutes, knead for ten seconds, leave for ten seconds until you have a smooth elastic dough (so repeat one more time if needed). Or you can do it all with a dough hook attachment in a mixer for about 15 mins until it all clumps together.
Once this bit has been reached you get a big bowl, oil it and put the dough in, cover it and refrigerate it overnight/until the next day when it’s needed.
About 2-3 hours before you want to eat your doughnuts, take the mixture out, roll it out on an oiled surface until it’s about 3cm thick. I use a round cookie cutter to cut the doughnuts out, using a small one to make the ‘hole’. See what sort of size you want them to be, mine are about 10cm with the hole in the middle about 2.5cm. You can also do them as round doughnuts but I like ring ones best. The first time I made these I tore the edges slightly and was really upset that they wouldn’t be all perfect but actually, those little tears made (see main picture) something gloriously layered and even tastier! I’ve tried to recreate it ever since and can’t..
Put them on an oiled tray, or one lined with baking parchment and cover with cling film which you can also lightly oil if you are nervous (tbh I cover mine with a tea towel). Leave to rise for about 1-2 hours – depends on how warm your kitchen is. You know the dough is ready when your finger gently pressed makes an indentation but also don’t sweat it.
Fry a pan of oil up (use something light and not highly flavoured: I use a blend of olive oil and sunflower oil). Now here it depends a) how brave you are b) how wasteful you want to be with the oil c) how many you have made and intend to cook d) how many you want to cook at once. I tend to use about a litre of oil in a medium sized sauce pan and cook two at a time. DO NOT OVERFILL and of course be sensible, this is oil you are heating up. When it reaches 175C (use your thermometer) you’re ready to go, using a slotted spoon lower down however many doughnuts you intend to cook. Like I said I do two at a time. They take about 2-3 mins per side, flip with the slotted spoon; the colour is the guide here: you’re looking for a true golden brown. Take out using your slotted spoon and immediately flop the doughnut into caster sugar and cinnamon in a bowl.
Then place on a drying rack. When all are done you’re about to experience something wonderful so take a moment to enjoy it.









 Pane Amore e Cha Cha Cha