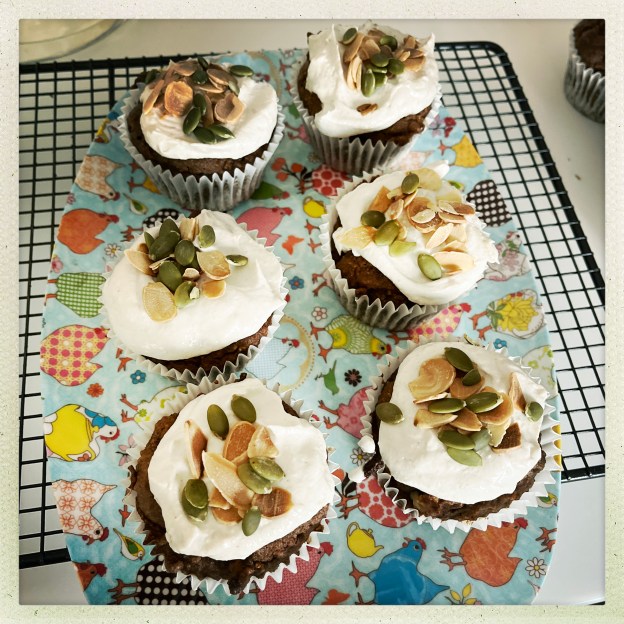
Category Archives: Gluten-free

Nigella’s chocolate olive oil cake

This is simple and beautiful. It can be flourless but somehow seems so much better than so many of the flourless chocolate cakes that turn up at gatherings. It’s so easy to throw together. The original recipe is here, but I’ve cut down the sugar and may cut it down further but be careful as sugar plays a role in cake making beyond mere sweetening.

Use a mild olive oil, I have at times used a too fruity one and whilst adding a depth of flavour, it’s distracting.

Once you’ve made this once you’ll realise it’s so easy you can make it in a commercial break, no chocolate to melt or chop. Largely store cupboard ingredients. My children love it.

You need

150ml mild olive oil

50g cocoa powder

125ml boiling water

Two teaspoons of vanilla extract

150g ground almonds (you could also substitute half almond half hazelnut, you can also use flour but unless you are allergic to nuts I implore you not to do this)

Half a teaspoon of bicarbonate of soda

A pinch of salt

175g caster sugar

3 eggs

What you do

Oven to 170C

A 23cm spring form tin, base lined with baking parchment.

Pour the boiling water slowly into the cocoa and stir until no lumps remain, add the vanilla extract.

In a separate bowl, mix together the almonds, bicarb and salt. And then you’re going to beat/whisk together the eggs, olive oil and caster sugar, either by hand (go you) with a whisk/wooden spoon or with an electric contraption (hand held or free standing).

Nigella says to use the paddle attachment, I always use the whisk because I can never find the paddle attachment. Beat electronically for three minutes until it’s syrupy and fluffy and pale yellowy. By hand: until your hand falls off.

To the eggs/oil/sugar mixture slowly add the cocoa mixture (turn down the speed if you are doing this with a gadget). When all incorporated add the ground almonds/bicarb/salt. Scrap down, make sure all mixed then pour into the tin.

Bake for 25-45 mins. Nigella says 40-45, mine is done in 25. You want it to be a bit quivering on top in the middle (Nigella describes it as looking a bit damp) but defo set at the edges. A skewer should come out pretty clean.

Ratatouille and halloumi tray bake

This recipe came from an excellent and surprising source. My friend Lynda recommended it and it’s The Fast 800 Recipe book. But don’t let it put you off, honestly it’s become one of my most used and loved books for its simple, healthy, quick recipes which you can augment or add to if you’re not fasting. Which I so rarely can…This serves four which you can eat with lovely crusty bread if you’re not carb-avoidant. And who is these days? It’s surprisingly delicious. TBH I’m not a huge fan of ratatouille, or beans and yet this is…yum.

Ingredients

2  peppers – not green sorry, de-seeded and cut into chunks

1 medium aubergine or two courgettes

1 onion cut into chunks

3 tablespoons of olive oil

2 garlic cloves, peeled and crushed

Basil leaves, a small handful sliced into shreds (don’t cry if you don’t have)

1 x 400g can of chopped tomatoes

1 teaspoon of oregano (or use a tin of tomatoes with herbs)

225g block halloumi cheese – slice into eight

A tin of 400g of drained and rinsed cannellini beans

Method

Oven to 220C. Place the peppers and aubergine/courgette and onions onto a tray, drizzle on the olive oil, season with salt and pepper (but not too much salt as the halloumi is quite salty). Mix everything around and roast for 30-35 minutes, turning half way through if you can be bothered.

After this time, take out, stir in the garlic and basil, tomatoes + oregano and beans. Arrange the slices of halloumi on top and back in the oven for about 15 mins. I tend to give it a ‘top oven’ blast for a few minutes at the end. The halloumi should be lightly browned.

Scatter over more fresh basil if you remember and serve with a crisp green salad.

Nigella’s rather good banana and chocolate bread (which can be gluten free).

I always associate banana bread with Nigella. I think it’s because, it was in one of the first recipes of hers that I read, I’m sure, that she said baking a banana bread filled the house with a fug of domesticity.

Or some such. Since then I’ve made dozens of banana breads and it usually
disappoints, probably because I keep changing recipes. Faced, however, with a huge batch of frozen, overripe bananas in the freezer (I always freeze overripe bananas) and more chocolate than any sane person needs (this is what happens when you get made Chocolate Correspondent of a national newspaper) I decided to have another go at making banana bread.

Also, for complicated reasons that I don’t fully understand myself, I hadn’t cooked or baked anything in weeks when I first made this last year. Which is really not like me, but this glorious little cake gave me my baking mojo back.

For a writer, I am remarkably picture led where recipes are concerned and thus it was that I found this recipe for Nigella’s Gluten-Free Banana Bread and it was, I confess the picture of the large slabs of chocolate which lured me in.  I planned to make it gluten free (why not) but in the end found no rice flour in my flour cupboard so made it with normal plain flour. I also lowered the sugar and used pecans instead. I think this would also be great made in muffin size. I’ve put the recipe below as I made it – do refer to the original if you wish and if you want to make it gluten-free which this ain’t.

175g plain flour (I use spelt these days, a mixture of white and wholegrain)

100g ground almonds

two teaspoons of baking power

half a teaspoon of bicarbonate of soda

a quarter teaspoon of sea salt

500g of very ripe bananas (weighed with skin on)

two teaspoons of vanilla extract

100g Greek yoghurt – full fat

Two eggs

125g light olive oil

100g light brown sugar

100g roughly chopped pecans (or any other nut you like)

150g chopped chocolate – I used a mixture of milk and plain in chocolate chip size and quite large chunks

You need a 2lb loaf tin for this (Nigella gives the sizes as 24cm x 12cm and mine was roughly that, why don’t cake tin manufacturers put the volume/measurements on the bottom of their tins?). Line this tin. Preheat the oven to 170C.

Mix together the dry ingredients, thus the flour, ground almonds, baking powder, bicarbonate of soda and salt.

In a larger bowl (for this will be the one everything else ends up in) place the bananas and mash them up, then mix in the vanilla extract, Greek yoghurt and the eggs one at a time. Then the oil and sugar. When all is better unified than a post-Brexit UK, add the dry ingredients bit by bit until combined. Then finally gently fold in the nuts and chocolate.

Dollop all this in the cake tin and bake for about forty minutes. Nigella says 45-55, my oven seems quite fierce so I started checking it after 35 mins. Also it does depend on how much moisture your bananas hold.

You know it’s done when the top is dry, it springs back, it’s shrunk away a little from the sides and a skewer comes out relatively clean (obviously not if you hit a shard of chocolate).

This is a beautiful cake. Unfortunately I can’t find a picture I took of it so this post will be picture-less until I make it again.

Vegetable lasagna: chargrilled courgettes with a multitude of greens.

I’m actually on deadline for two pieces as I start on this. But what the hell. I see it as a warm up.

Every day I look for healthy things to make my family. And if the quest for healthy things is satisfied, my children will invariably not be impressed. The reaction to this was “but where is the pasta” followed by “it isn’t actually half bad”. My youngest – the harshest critic and who would, like her nonno, live off bread and Parma ham if she were able to – ate some. I can’t say she was a fan.

But I thought this was delicious and satisfies that urge for something healthy but tasty. And it has almost a kilo of green leafy stuff in it.

It’s adapted slightly from a Donna Hay recipe. I just love Donna.

Ingredients

About six courgettes, sliced lengthways. Not too thick, not too thin. You’re going to chargrill them.

Lots of extra virgin olive oil but not that super expensive stuff

An onion, chopped up so tears stream down your face

2 x clove of garlic, chopped small (I can’t bear to crush them)

A small bunch of oregano chopped up

Salt and pepper

About 300-400g kale, trimmed of the big thick stems in the middle – rinsed

About 300g spinach – rinsed

500g or thereabouts of ricotta

15g fresh parsley finely chopped (either sort)

Rind of an unwaxed lemon

About 100g of grated mozzarella

About 100g of grated parmesan – like with the mozzarella I do it by eye and depending on size of container.

(quantities of cheese don’t have to be super exact but don’t veer off too much. Don’t sweat it if you only have 80g of each, say).

HipstamaticPhoto-578332785.064248

Before the oven


What you do

I do love a recipe you can make in stages and this is one such. First you oil each side of the courgette slices and chargrill them.

[I use a griddle pan which I bought years ago. It’s a Le Creuset one and it’s big and rectangular shaped and you lay it across two rings. I use it for so many things: not just veg but also making toasted sarnies. I also have a griddle ‘press’ that I used to press things down on. I just looked and my Le Creuset griddle costs £160 now! But I bought it nearly 20 years ago and it’s still going strong so it is worth it on a per use basis. The press I have is something like this.]

So griddle the slices until they are marked and a bit cooked through. Put to one side. If you plan to make this later you can just put it in a lidded Pyrex and put in the fridge, otherwise just keep on a plate until you are ready to assemble.

Then you chop the one onion with the two cloves of garlic and gently saute with the handful of oregano and a little olive oil. I add the seasoning at this point:  a good pinch of sea salt and some black pepper which I always angrily grind over food, as if in a fury. When the onion is translucent set the mixture to one side. Or put it in the fridge until needed.

Now you blanch the spinach and kale and you will think “how can we eat all this green veg?” but you can because it will reduce down. What I do is blanch it, drain as best I can, then I whizz the lot up (in batches unless your food processor is ginormous) in a food processor, and then I sit it over a fine sieve atop a bowl and press down with a potato masher. Because I make this in stages, and not in a great rush, I sit it over a fine sieve over a bowl for an an hour or so. You don’t have to whizz it up, it’s perfectly fine as it is, but you will need to carefully drain it in some way. You could sandwich it between two tea towels you don’t much care about. You then mix the drained veg with the onion and garlic and herbs. What I do is add it to the pan this is in, and for a few minutes just gently steam any remaining water out of the veg.

At some point you introduce to each other, via a fork: the ricotta and the lemon rind and the parsley.

So you now have essentially three things: courgettes, ricotta mix and veg/onion mix which you can assemble now or store for later.

It’s hard to say what size dish to use. Within reason you can use a normal family-supper sized dish. But I favour a square one that is about 25/26cm. Lightly oil the bottom, then when you are ready to cook you preheat oven to 220C.

Start with a third of the courgettes. On top of this put a half the ricotta, then half the greens, then sprinkle on a third of the cheeses.  Repeat and end with a layer of  courgettes and the last of the cheese. Mine was crammed to the top so I put it on a baking sheet in case it erupted (it didn’t). Cook for about 12-15 mins until golden and bubbling and crisp on the top. I didn’t taste it during making it and honestly expected something pretty healthy but bland. Well, no. It was really delicious. I served it with a crisp green salad made with a sharp dressing. Half of it fed four of us, but I suspect for people with larger appetites it won’t go so far.

HipstamaticPhoto-578336868.528218

A cross section

Spiced carrot and lentil soup

This is one of those soups that is so much more than a sum of its parts.  (A bit like this chorizo and red lentil soup one is, too.) It’s also perfect for this time of year when you’ve been in elasticated waistbands for the last two weeks and dread structured clothing. And yet you can’t stop eating, as if hiding evidence.

It’s so easy to make. I chuck it all into the slow cooker at about 2pm, not that it needs slow cooking, but it just makes it even easier. Put it on low and then we eat it at about six  o’clock after a quick whizz up with the stick blender. No need to grate the carrot, I just chop mine into pieces.

The recipe is here on the BBC Good Food site.

Peanut butter and date protein bars (with a bit of chocolate on top)

These came about after a desire to find something in the supermarket that was, basically, just dates and a nut butter. Because that is something I crave post-workout. I also wanted something which was as delicious as the protein bars that my ex-trainer used to get me which used to be so tasty I daren’t look at the ingredients, but they were also so filling that, with a glass of water (you should always drink a glass of water with protein bars) they’d often see me onto the next meal.

Then one day, I saw that Donna Hay published a recipe for something called peanut butter choco-coconut protein bars and I adapted them. I now make these regularly and eat them post work out, or if I haven’t got time for a meal (which is rare but does sometimes happen) or if I just fancy a little treat during the week when I try to really watch what I eat (one has to be realistic and these hit the I need a treat button without making me feel like I’ve fallen into the abyss of unhealthy eating). They also don’t make me crash, blood sugar wise and I would now, honestly, have these over pretty much any chocolate bar.

You can experiment with the amount of protein powder you put in – I did and I put more in than Hay originally suggested. But if you do that, I recommend you do so in 10g increments.

This is what you need:

260g fresh Medjool dates. You can use others but these really do make the best bars. If you use dried dates, rehydrate them in boiling water for half an hour before use, then drain them.

25g raw cacao powder

100g salted peanuts and 40g of unsalted, raw, cashews (or use half and half, depends on how big you want the salted peanut hit to be). You can of course use 140g of any nut you want, roasted or raw. A few extra nuts if you want to chop and sprinkle on top

Two tablespoons of peanut butter (or any nut butter)

50g desiccated coconut

35g unflavoured protein powder (I use an organic whey protein powder)

1 teaspoon of vanilla extract

45g cacao nibs

150g dark chocolate, melted

What you need

You can make this in a round cake tin – about 8/9″ would be ideal. I make it in my square cake tin which is 20cm. You might prefer the bars thicker but I like them like this. 20cm square is about as big as you want to go, any bigger and you’ll struggle to have enough chocolate to coat all the top – it just covers it as it is, but is still plenty, if you see what I mean.

Whatever tin you use, line with baking parchment.

Place everything except the cacao nibs and the dark chocolate (which you need to melt, for the topping) in a food processor and blitz til it’s all amalgamated – about one or two minutes. Right at the end, add the cacao nibs and blitz a couple more times.

Press this mixture into your prepared cake tin. Put it in the fridge for at least 30 mins.

Then you melt the chocolate either in the microwave or in a bain marie arrangement, and spread over the top. Add some chopped peanuts (or whatever nuts you are using) on the top if you like. Sometimes I do, sometimes I don’t. As I said, in my 20cm square tin it’s just enough to cover. You don’t really want to up the chocolate, as then it becomes all about the chocolate and turns this from an interesting, not totally nutritionally devoid treat into something else…

Refrigerate until you need them, which will be soon. Cut into whatever shape you like. I do long thin bars, little squares or if I want to pack it in my bag for a meal replacement (which I would only do in emergencies) or a good snack later, I cut it into a bar shape and take it in my bag wrapped in foil and then eat it feeling really smug and happy.

They keep for at least a week in my house and have never been around longer than that.


Cacao, banana and walnut bars: good for breakfast or post work out.

To my mind, no-one does ‘healthy but delicious snacks’ better than Donna Hay. I’m really not interested in mixing together linseeds and dates and other such stuff if the result is something you might have found in a health food shop circa 1974.

What I love about Hay and her recipes, is that there are no really contrived ingredients, no-one is pretending they are a substitute for broccoli, but if you want something a bit better than a sugar-laden cereal bar, she comes up with the goods.

I adapted these because I just didn’t agree with the number of dates she originally put in (200g) and although I think I have a sweet tooth, it’s evidently not that sweet.

Anyway. I cut these into squares. They freeze brilliantly. They are tasty and nutritious and the sugar hit from the dates and bananas is balanced by the cashews.  I eat them when I want something a bit chocolatey and quick and they have also served as an emergency lunch – with a green smoothie – when I’ve had no time and had to go straight to an interview. I know this makes me sound really virtuous and you know what? I am during the week. At the weekend I can eat whatever I damn well please.

You need

225g cashews, raw (although might try them anon roasted)

120g dessicated coconut

300g ripe bananas (about three)

150g fresh dates, pitted

2 teaspoons of vanilla extract

35g raw cacao powder

half a teaspoon of bicarbonate of soda

2 tablespoons of cacao nibs

50g chopped walnuts

Method

Oven to 180C. Line a square 20cm tin with baking parchment.

Place everything, save for the walnuts and the cacao nibs, into a food processor and blitz the buggery out of it – Hay recommends 5 minutes I can’t remember how long I did it for. At the end, add half the cacao nibs and pulse a few times.

Shove the mixture into the tin, pressing down with your hands or the back of a spoon and sprinkle on top the remaining cacao nibs and chopped walnuts.

Cook for 25 minutes or thereabouts. Cool, the refrigerate and cut into required shape. Keeps for about a week in the fridge but as I said, I keep half, freeze half and they froze beautifully.

Prune and dark chocolate brownies

I saw this recipe in my Donna Hay Fresh and Light magazine, which costs me a staggering £9.50 from Selfridges but is, to my mind, worth every penny as each edition yields more recipes than many recipe books which cost double that.

But I saw it and shunned it as I’m not overly a fan of brownies – too sweet for me usually. But due to a rather terrifying health scare a few weeks ago (I had tests and everything is not only fine but I am actually in really good health yay!) I’ve overhauled the way I eat which was long overdue because although I have always eaten with health in mind, I’ve I’m also greedy and at times lazy. So I’ve gone back to planning what I eat (this has always worked really well for me) and maximise nutrients. And it not only shows in the way I feel, but I’ve lost weight and body fat, whilst augmenting my muscle mass (I do big weights twice a week).

Anyway I shunned them but then was fancying a weekend chocolatey treat and decided to try them and I was not disappointed. Now I know that this isn’t a recipe which magically transforms broccoli into brownies, and I know that prunes are very high in sugar. I know all this but prunes have more nutrients than mere sugar and here’s the thing. These are delicious in their own right. My eldest doesn’t like them but my youngest adores them and my partner – who hates brownies – had one and declared it “the best chocolate thing I’ve tasted in a long time”.

So these are still an occasional treat (I only eat stuff like this at the weekend now) but they’re delicious and gluten free.

The brownies

255g prunes, take the stones out

50g of dark chocolate, melted (Hay asks for 70% but I use these chocolate chips for nearly all my cooking now and they are delicious)

60 ml of light olive oil

80ml maple syrup

1 teaspoon of vanilla extract

80g ground almonds

25g cocoa powder (I use raw organic, no idea if it’s better but it makes me feel better looking at the packet)

2 eggs

The chocolate ganache

80g dark chocolate

60ml of cream (Hay says to use coconut milk but I used cream as that’s what I had, you could use milk)


Pre heat the oven to 180C. You need a 20cm square baking tin, preferably with a removal bottom, if not make sure the baking paper you line it with comes up the sides so you can carefully lift it out later. If you scrunch up the baking paper first it sits in the tin more easily.

Take 170g of the prunes and put them in a jug, cover with boiling water for about ten minutes. I scissor cut the remaining prunes into small pieces and put in a small bowl for later (don’t forget them!) or you could of course chop them with a knife on a board.

Drain the prunes (discard the water) and place in a bowl with the rest of the ingredients for the brownies and whizz up with a hand held blender (or you could put in a food processor, I did as I was told). When done, scatter in and mix in the prune pieces. Put the mixture in the tin and cook for 25-30 minutes. The middle should be firm when pressed but you do want them a bit squidgy.

They will be very soft, so keep in the tin and when cold gently take out. Make the ganache by very gently heating the chocolate and cream in a small pan (I would never usually melt chocolate like this, I’d use a bain marie set up, but I was hungry and it was fine). Spread over the top. If you can, wait a while before slicing up and eating. Store in the fridge where they do harden up.

IMG_7999

I have no idea how long these last as they were practically all gone in 24 hours.

Note: the main image is the brownies a day later, after being taken out of the fridge, the image in the text is of them first iced and sliced – with some missing for, ahem, testing purposes.

Note to self: Put walnuts in next time.


Chestnut marmalade muffins (gluten, wheat, dairy free but don’t let any of that put you off)

These are adapted from a Hugh Fearnley-Whittingstall recipe (from his book Light & Easy). The original calls for 75g coconut oil, which I just find too much, and 75g runny honey, which I’ve eased back on just ever so slightly. His recipe also says cook for 25 mins, but mine are done at 17.

It calls for chestnut flour – which isn’t cheap, nor madly readily available. But is delicious and so filling. Don’t be tempted to buy it in bulk, it doesn’t keep for very long.

And you really need an electric whisker unless your arms are super strong. If they are, all respect to you.

These are just so delicious though, and gluten-free if that’s important to you. I love anything to do with chestnuts as it reminds me of my Pa.

Note these make ten. I’ve been making these for a few years now and every time, with my 12-bun tray, it catches me out.

125g chestnut flour

A pinch of salt

2 teaspoons of baking powder

125g marmalade

2 large eggs

70g runny honey

half a teaspoon of vanilla extract

50g coconut oil, melted and cooled.

Pumpkin seeds to sprinkle.


Preheat the oven to 170. Line a muffin tin with…muffin cases

Combine the flour, salt and baking powder and set aside.

In a food mixer with whisk attachment, put the eggs, honey and vanilla and whisk for, frankly, ages. But about eight minutes. Until the mixture is like a thick mousse and the beaters leave trails when you lift them out.

Now gently and slowly, with the mixer running, spoon in the flour mixture and when all is incorporated whisk again for a few minutes. The mixture will go down to a batter-type one. When done, trickle in the melted coconut oil with a tablespoon of water and whisk for half a minute more. Take off from the mixer and just with a spoon fold in the marmalade.

Spoon the batter into the TEN muffin cases. They won’t come up all the way, that’s how it should be, about 2/3 full. Sprinkle on the pumpkin seeds and bake for  about 20 mins – check after 15. They should be golden and bounce back when you touch them. Depends on your oven of course.

Barbecued baked beans (in the pressure or slow cooker).

I’m not not a fan of baked beans, but I’d never think “ooh I must have some baked beans”. They feature very little in my life other than when my partner decides to have some on toast, from a tin, for lunch, when there is very little else to eat. Then, they are a Godsend.

So the idea of making them only really came to me because I was seduced by a photo of them in the recipe book that came with my Sage Fast Slo Pro (and this is the recipe below, with some adaptions). I am quite shallow.

Sourcing “dried small white beans’ which the recipe called for (I went for cannellini but you can also choose haricot) was really not easy, they were nowhere to be found locally to me (I live in the countryside) so in the end I had to resort to the evils of Amazon. But you will be able to find them in the supermarket, it’s just that mine didn’t sell them…

These are really easy, but bear in mind you will need to reduce the sauce at the end. If you have a pressure/slow cooker that allows you to do this, all you really need to do is stir occasionally – it took about 20 mins on medium heat.

Making things that are easily bought is often a double edged sword and the shop bought can easily out trump the home made. Hummus, for me, comes into this category. I have only once tasted home made that was better than shop bought (that was my friend Sarah who made it whilst we were staying at Sackville House together).

I made these because, seduced by the aforementioned picture, I had bought some dried cannellini beans some weeks before and forgotten about them. Then, when we found ourselves without “a hot meal” as my partner put it one Saturday lunchtime, I looked in the store cupboard and found we had all the ingredients (the original recipe calls for bacon, I have omitted it). It’s super easy to make, I don’t know how you end up with a smokey barbecue flavour, but you do. They are delicious, nutritious and it makes LOADS. We had enough for beans on toast for about ten people. They properly fill you up – which is rare for me. Six hours after eating, I still wasn’t hungry.

My children don’t like baked beans, so I can’t tell you that children will love it as I don’t know – mine certainly ate more than shop bought beans, but only marginally so. My partner who is a life-long baked bean fan, said they were fantastic and gave me a round of applause.

This is what you need

1 onion, sliced

1 tablespoon of olive oil

2 cloves of garlic, finely chopped or crushed

500g small white beans, rinsed and picked over (I’m not sure what for, mine were all fine).

1 litre of water

125ml strong black coffee (I used a big tablespoon of instant espresso powder which I keep for making coffee cakes, dissolved in 125ml of hot water)

250ml passata

110g dark brown sugar (I’m sure you could alter this to use less but this is what the original calls for, I’m sure it still works out at having a lower sugar content than shop bought)

1 tablespoon of English mustard

1 tablespoon of black treacle

half a teaspoon of Tabasco sauce

1 and a half teaspoons of salt

2 tablespoons of white or cider vinegar (for the very end)

What you do

If you have a pressure/slow cooker which allows you to saute, put this function on, heat up the oil then add the onion and cook until soft – about five mins. If yours doesn’t have this function do this bit on the stove top in a frying pan/saucepan.

When soft, add the garlic and cook for a minute.

Now, either add the rest of the ingredients, minus the vinegar to the pot of your pressure/slow cooker, or now tip the onions/garlic into your pressure/slow cooker and then add the rest of the ingredients (minus the vinegar).

Select pressure cook 80kPa, natural steam release and cook for 35-40 mins or select slow cooker mode for 10-12 hours on low.

When time is up, add the vinegar and you need to reduce the sauce right down until it’s syrupy – either in the pressure/slow cooker if you have a reduce function or decant into a large sauce pan and do it the traditional way. Mine took 20 mins.

Update January 2021. I have since made these with a squirt of Liquid Smoke from Sous Chef which was amazing. I’ve upped the time to 35-40 mins as I really don’t think 30-35 was enough time!