A nice healthy lunch, that’s largely an assembly job


I eat insanely well during the week. My lunches are not calorie controlled, but because I tend not to eat dinner, I really pack my nutrients into the first half of the day.

This is a lovely lunch. It’s healthy but delicious; easy and you can of course customise it however you want. I tend to bake bread in the morning, so this is a good time to put some veg in the oven to roast it for lunch later on. I use red onion, peppers, squash, a good tablespoon of olive oil, some herbs. Whatever veg I have.

Come lunch time I either use some sourdough or, more frequently, some of these delicious flat breads: I buy the organic wholemeal version. They’ve got very few, natural, ingredients and also, unopened, keep for a few weeks so good to have in. Although I make my own flatbreads occasionally, I often just want a quick lunch and this enables me.

When I’m ready to eat I heat up my flat bread in a flat frying pan, then top it with some Tracklements Chilli Jam or Stokes Red Onion Marmalade – just spread a bit around. Then scatter some lettuce/spinach/rocket leaves atop, plus some avocado. Scoop up your roasted veg, top with some suitable protein if you so wish – goat’s cheese, crumbled feta, dry-fried halloumi, sardines etc. Scatter over some toasted nuts/seeds if you like, drizzle with olive oil. Eat. It’s delicious and you feel really good afterwards.


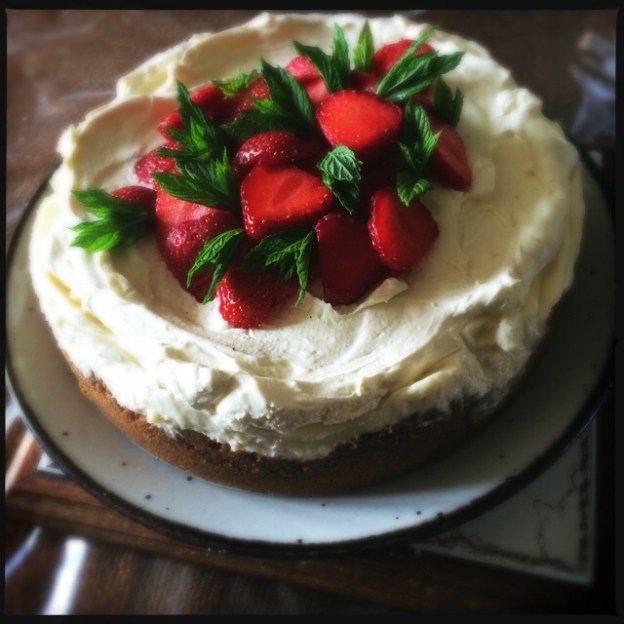
White chocolate and strawberry cheesecake (no cook)

This is a Waitrose recipe that I adapted. The original, to my mind, uses far too much butter to biscuit ratio and you end up with a greasy mass. It’s also imperative you line the base and sides. I don’t think you need the extra cream on top, either. But add it if it’s more of an occasion.

200g whatever biscuits you like at the bottom of a cheesecake

50g melted butter

400g strawberries, stalks removed and cut in half/slices for the top

200g white chocolate

400g cream cheese

25g caster sugar

170ml double cream and mint leaves to go on top (although note: you need 4 tablespoons of double cream for the actual cheesecake filling). So if you decide not to add the cream at the top, you’ll still need some double cream.

You need a 20cm/8″ loose-based cake tin which you need to line the base and sides of. I know it’s a faff but so is trying to dislodge a cheesecake that’s welded itself to the tin.

Crush up the biscuits in whatever way you see fit: food processor, plastic bag with a rolling pin. Tip crushes up biscuits into a bowl and add the 50g melted butter. Stir together and then line the cake tin with it – the base and as far up the sides as you can go. Cut the strawberries in half and place, face side down, until you’ve covered the base.

Chill it whilst you make the filling.

Melt the chocolate in a bowl over boiling water/or gently, in a microwave. When all molten, cool slightly whilst you mix together the cream cheese and sugar with two tablespoons of boiling water. To this, now, beat in the melted chocolate a bit at a time at first, then add the rest in, with four tablespoons from the 170ml of double cream if using for the topping, if not just 4tbsps of double cream. Mix all together.

Put on top of biscuit base. If you want to do a cream topping, whip the rest of the cream until just firm, put on top of the cream cheese filling, top with sliced or halved strawberries and chill, overnight if possible.

Top with mint leaves just before eating. It’s best 20mins out of the fridge.


Chocolate yoghurt

This is a really nice thing to have with some fruit. I’m all for eating yoghurt on its own but if you want to butch it up a little, or make it into an extra treaty thing then you can easily make chocolate yoghurt. This serves two.

Melt 50g of chocolate of your choice in the microwave or in a bowl over a pan of simmering water. White chocolate gives a lovely vanilla-y flavour but experiment with milk or plain. Obviously milk or plain will colour the yoghurt.

Now, for the yoghurt, use anything from 150g – 250g. We always have live Greek-style yoghurt (is any yoghurt dead yoghurt?) but use any plain yoghurt that takes your fancy. 150g gives you a very tasty dessert indeed. Chocolate-y tasting with a nice, clean tang of yoghurt. The more yoghurt you add, the more you’ll have to eat but the less sweet it tastes. Experiment..

Once the chocolate is melted you add the yoghurt, add a tablespoon in first so you get a smooth mixture then add the rest; stir it so it’s all amalgamated and serve with some nice fruit. Awesome, fairly healthy, dessert. If you want to up your good fats, sprinkle some chopped nuts on top.


Biscuits made with nut butters

My friend Emily, who originally gave me some starter that started (ha ha) my sourdough journey, told me about some spelt and peanut butter cookies that she had made and couldn’t stop eating. Her email made it sound as if she’d eaten four that day or something.

I have Emily down as a) super healthy and b) incredibly controlled where biscuit eating is concerned so the fact that she had eaten so many, and was trying to resist eating more, meant I had to bookmark the recipe. The original one is here, but Emily said she’d adapted them with some rye so this is what I’ve done too in the recipe below.

But when I looked at the recipe, I saw it was all in cups, which are the Devil’s measurements as far as I’m concerned. I have a set of US cups which I bought from Crate and Barrell when I went to San Francisco with my Ma but I’ve never used them because recipes using cups ‘n’ sticks ‘n’ stuff like that drive me to the very edge of insanity.

Then in this month’s Martha Stewart Living there was a recipe for whole-wheat almond butter sandwich cookies which looked amazing. The recipe, like all Martha’s goddam recipes, was in cups ‘n’ sticks. I emailed her team saying “look, why can’t you also provide metric measurements as you sell your magazine in the UK”. And to their credit they did reply.

Telling me that conversion charts were available on Google. Which I guess told me how much they think of their UK readers.

Donna Hay magazine (note: Australian cups are different to US cups, DH magazine is Australian) always provides metric in its recipes. So it can be done. And you’d think that Martha, with all her Harvard interns that she gets over to organise her photo library at home, would be able to provide this.

But no.

Anyway, there were now two recipes – for essential biscuits – asking for cup measurements, so I had to man up. And with the help of about 45 people on Facebook, lots of crying and shouting and, yes, looking things up on Google, I was able to translate these recipes into metric and here I have them laid before you. I’ve also tweaked where necessary because Martha, for example, was asking for a shed-load of cream cheese and, following her recipe meant the cream cheese was far too runny. When I looked at all my other cream cheese frosting recipes (which is what this is, but sandwiched between two bics) they all had butter in, so I put butter in mine and hey-presto, it worked.

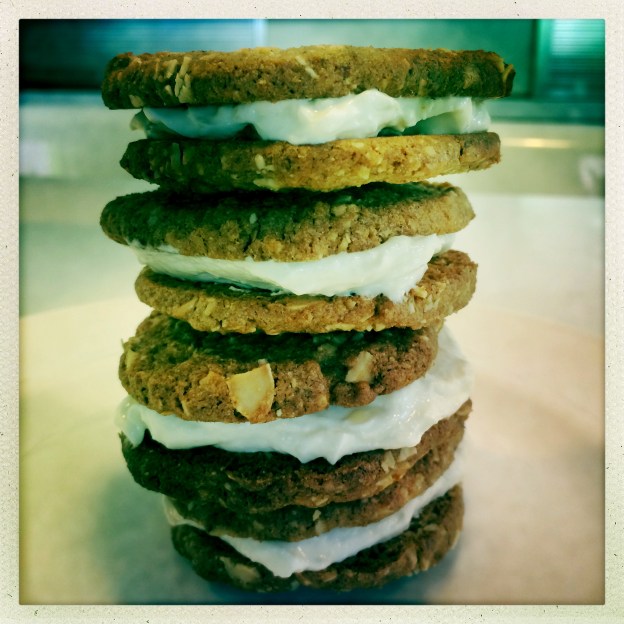
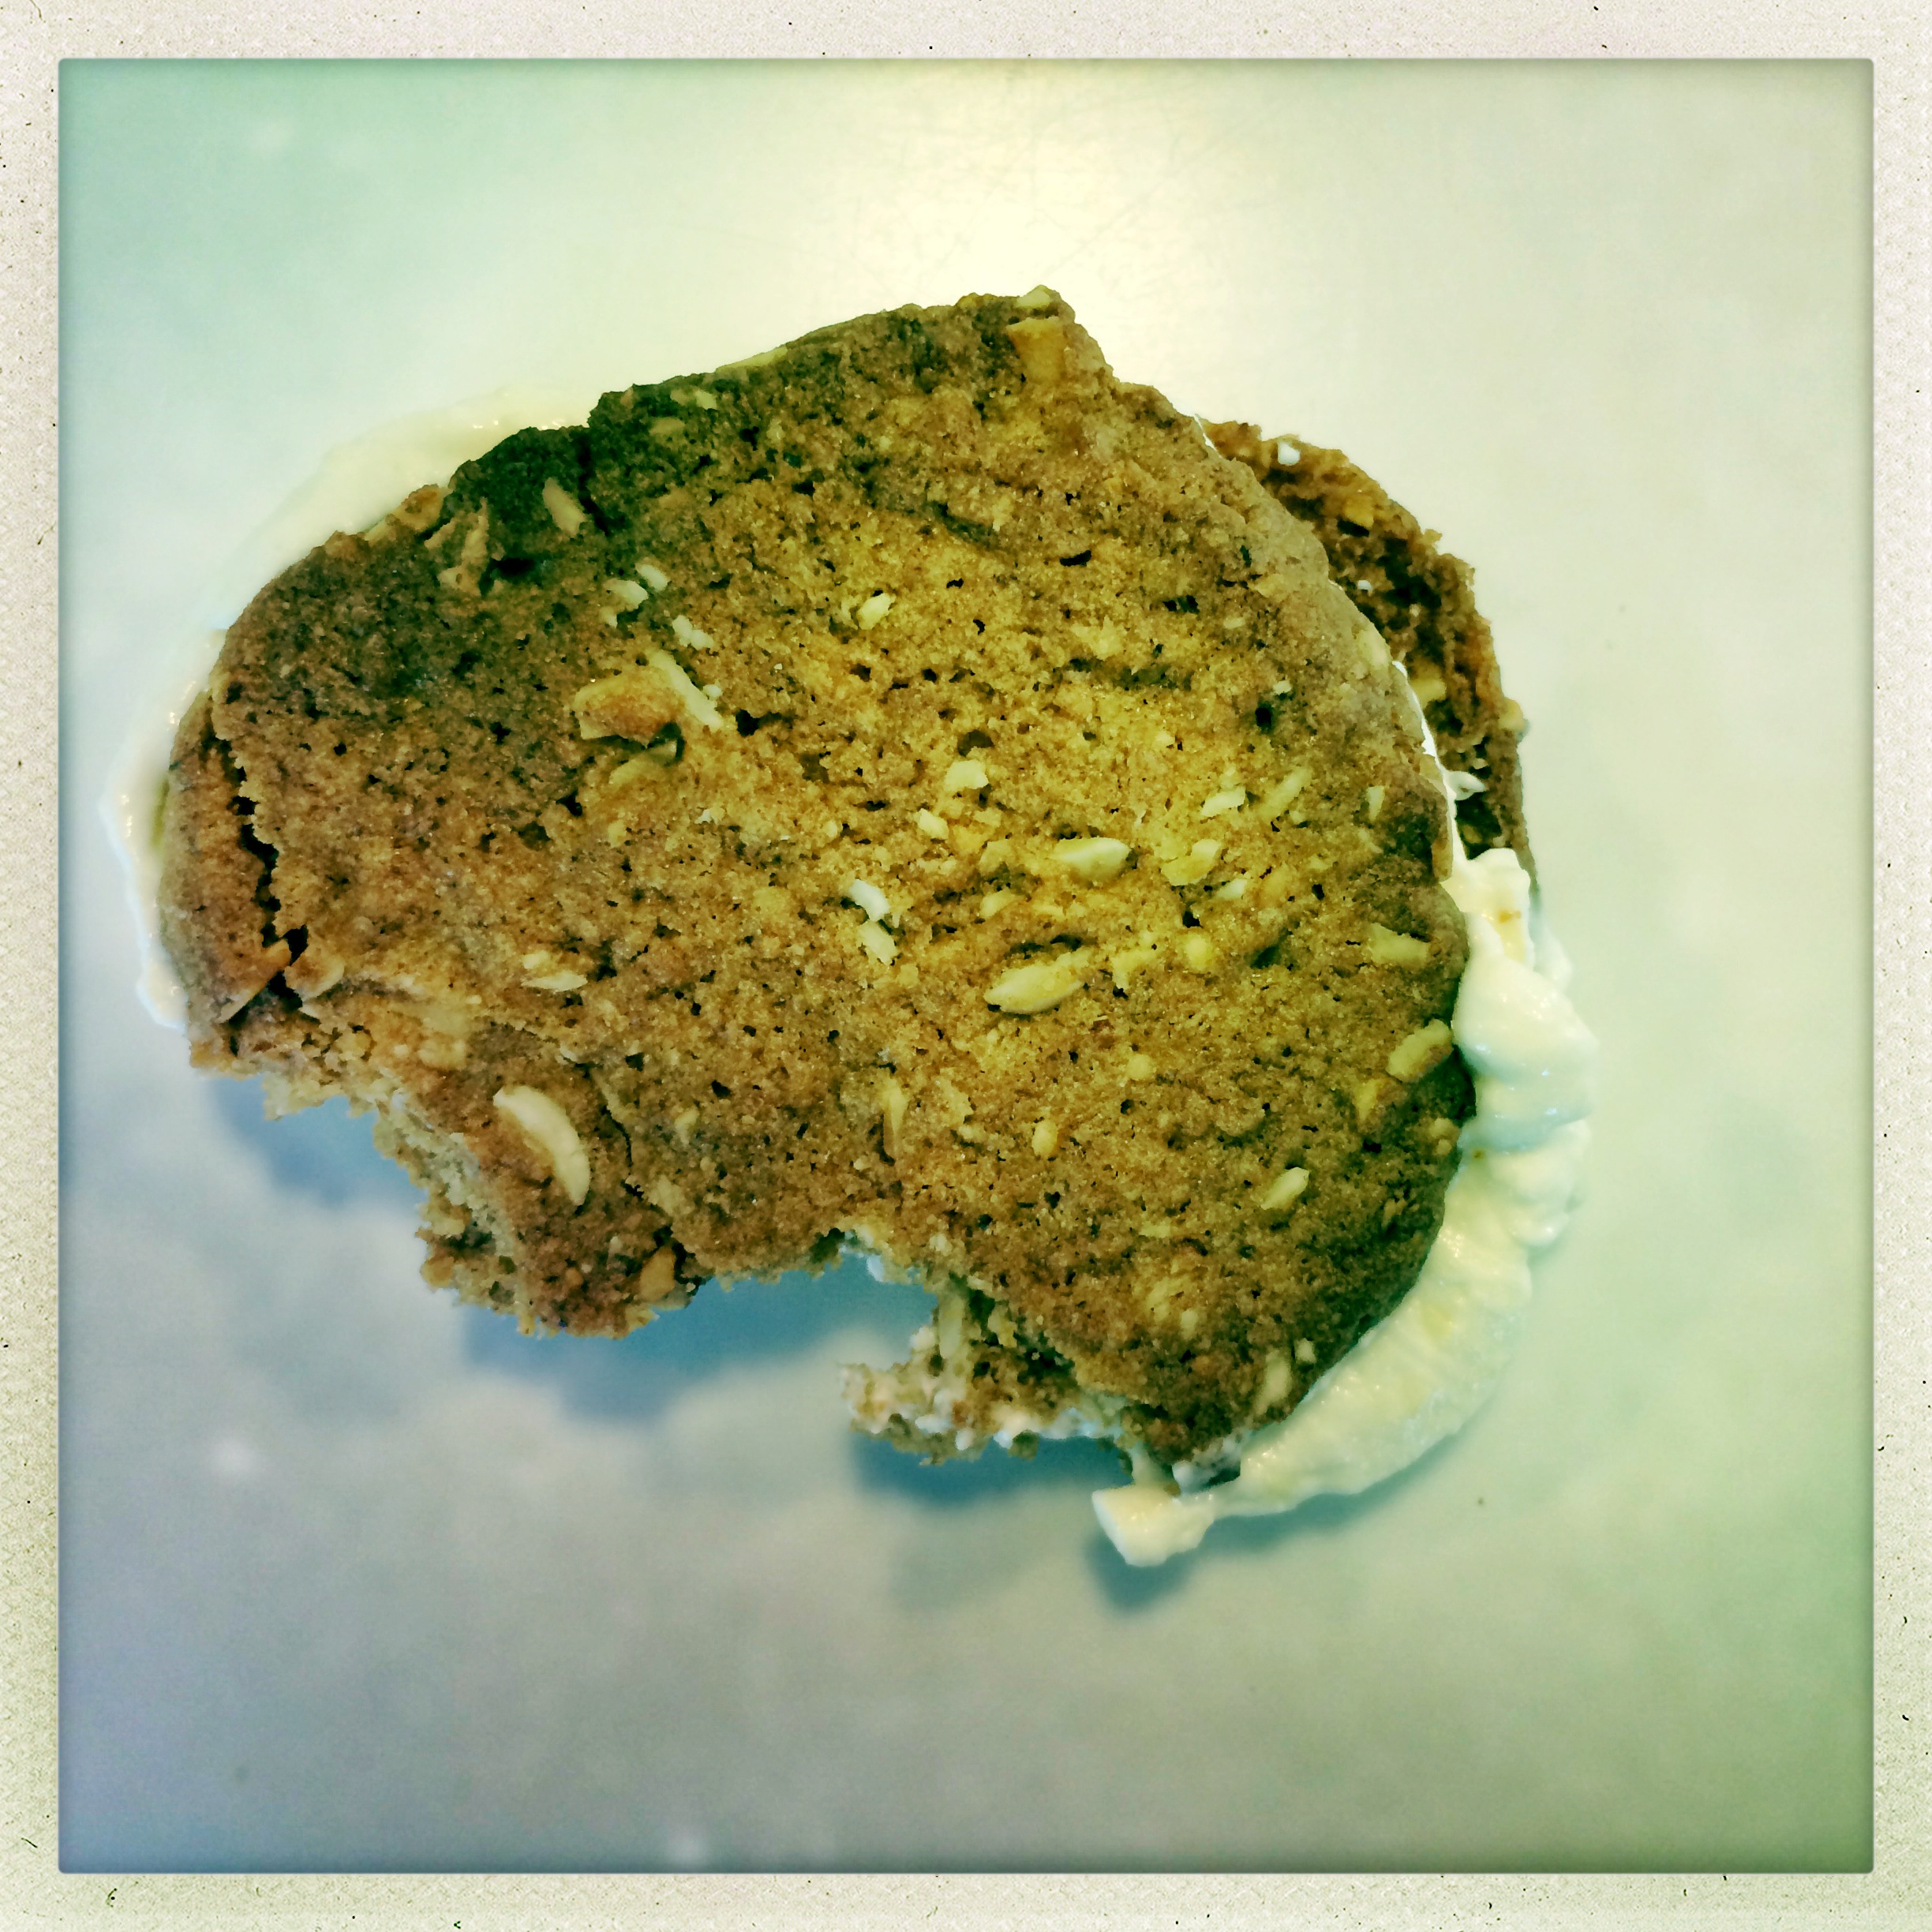
The almond sandwich biscuits are tremendously good. And full of nuts which are great for you. You could use other nuts too. I bet hazelnuts would be fabulous. These biscuits can also be eaten on their own, but where’s the fun in that when you can eat two, joined together with a spoonful of cream cheese. You need to make these as you eat them, otherwise they go soft. They’re still delicious mind. But to keep that crunch you need to keep the biscuits in an air tight container, the cream cheese mixture in the fridge, and assemble them before eating.

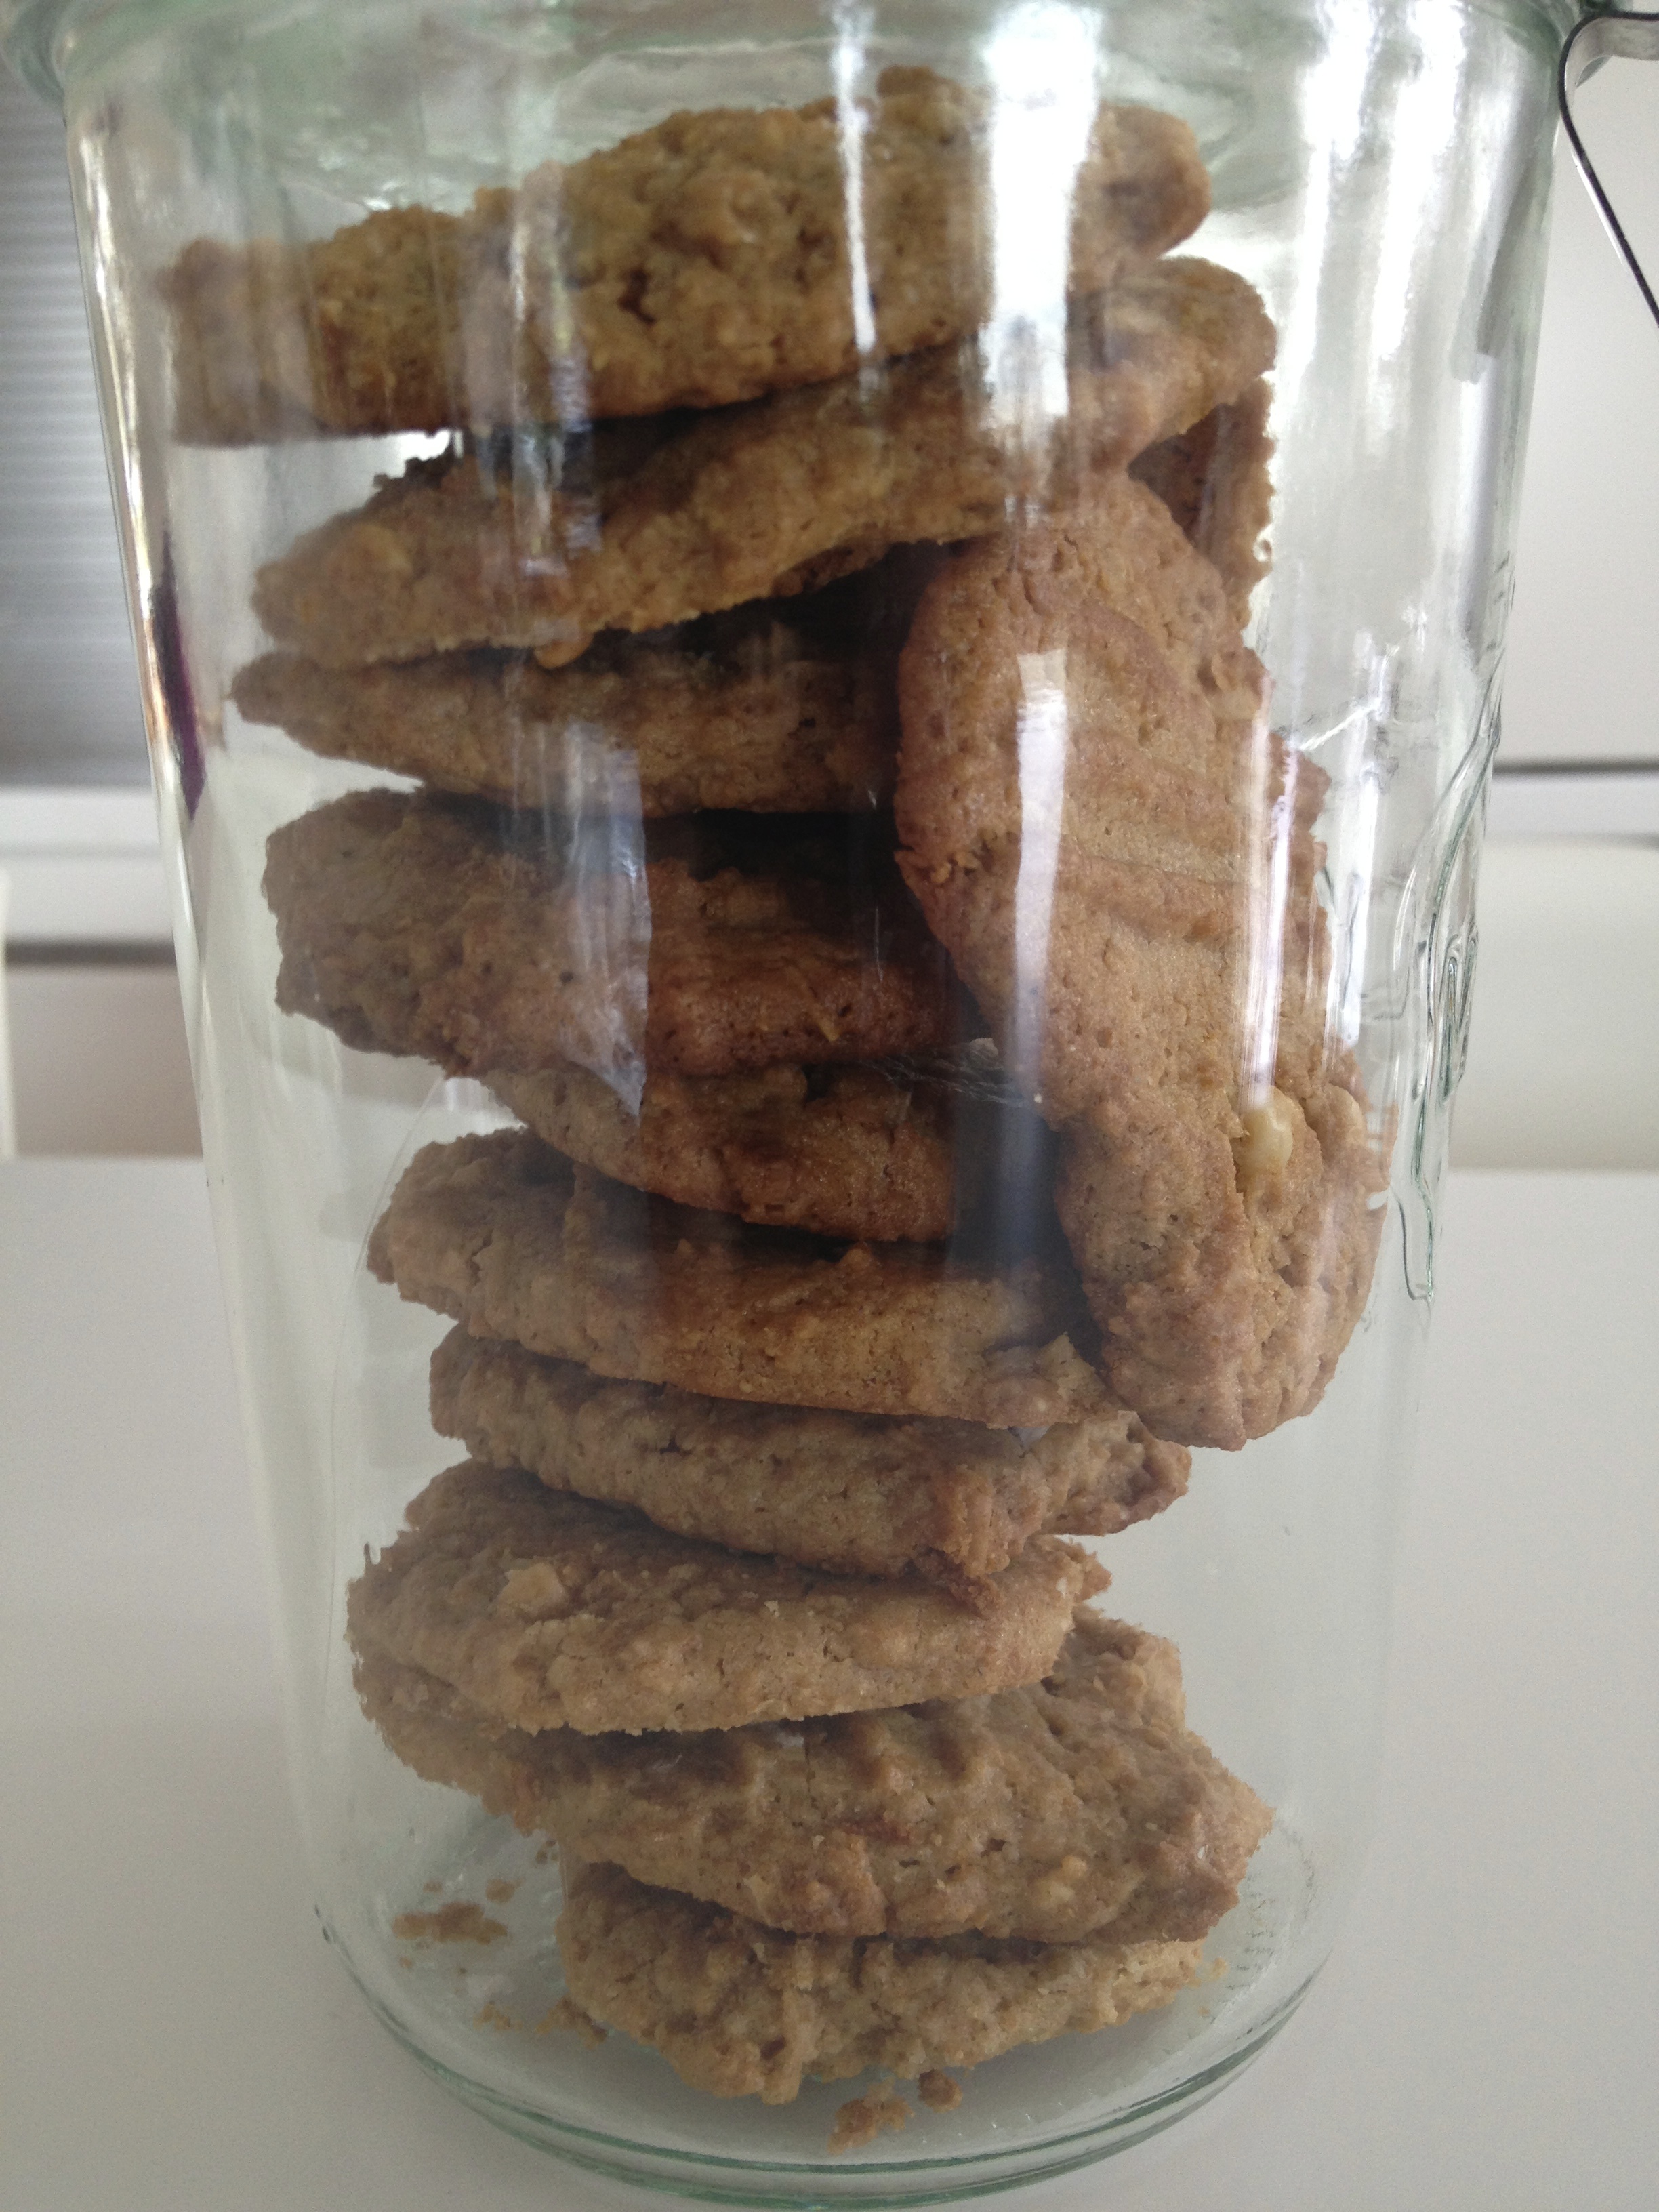
The spelt/rye/peanut cookies are wonderful too. But different. Easy to make and filling. You don’t get sugar crashes after eating them. And you feel kinda virtuous. I’m actually really craving one as I write and I crave these little salty, savoury sweet biscuits quite often.

Neither are cheap to make though. But they’re not the sort of biscuits you’d ever find in a shop so if you want them, you have to make them

IMG_6691

Wholemeal almond-butter sandwich cookies

I found these made about 30

160g wholemeal plain flour

1 teaspoon of baking powder

a big pinch of sea salt

113g of unsalted butter

130g almond (or other nut) butter

220g light brown sugar

1 large egg

85g flaked almonds, toasted and chopped

for the filling:

300g tub of cream cheese (at room temperature)

50g runny honey

40g very soft butter

half a teaspoon of vanilla extract

Method

Mix together the flour, baking powder and salt and put aside. Beat butter with an electric mixer for about a minute on medium. Obviously you can do this by hand too, or get a Harvard graduate to do it for you. Add the nut butter and beat until smooth as Martha’s face. Now beat in the sugar and egg until as well mixed as one of Martha’s parties. Now reduce the speed to low and add the flour mixture. Now, by hand, and gentle, mix in the almonds.

The dough is fairly soft at this stage, but you can form it into a long salami shape using baking parchment and a bit of swearing. Aim for about 12″ long. Freeze for about an hour or you can at this stage freeze until needed.

When you’re ready to cook, preheat oven to 180C take out the biscuit dough (if long-frozen let it be at room temperature for about half an hour, if you’ve only frozen it for an hour it’s ready to use straight away). Slice into thin rounds, just under a centimetre.

Bake on parchment lined trays for 8-10 minutes. You want them to be just gently golden. Imagine the sort of tan Martha lets herself get: nothing too extreme. If you were sure you’d want these to be eaten on their own, I’d probably cook them on the lesser side of done to give them a bit of chewiness.

Let them cool completely, then whisk together the filling ingredients, fill and go.

IMG_0040

Spelt/rye nut butter cookies

280g of spelt/rye flour. I used about 200g of spelt to 80g of rye, but use all spelt if you want

1 teaspoon of baking powder

1 teaspoon of salt

240g of nut butter of your choice

85g of tahini

165g maple syrup

50g of coconut oil/olive oil

1.5 teaspoons of vanilla extract

Oven to 180C. Mix together the salt, flours and baking powder. In another bowl mix together the rest of the ingredients. Introduce the two and mix gently until you get a dough. Drop spoonfuls onto a lined baking tray, or take bits of the dough off and roll, roughly into a ball and do the same (depends how easy the dough is to work with). Flatten with a fork. Bake for 8-10 mins.

IMG_0042


Orford Ness

We discovered Orford Ness quite by chance last year. It’s about an hour from where we live and we went there on my birthday last year, with steak pasties in our ruck sack and no expectations.

IMG_2065

We were blown away. Not literally of course, although that’s always a possibility on Orford Ness. It’s an old military bomb testing site – once one of the most secret places in Europe until just a few years ago – and there are still unexploded bombs there so you have to stick to the paths (the Coast Ranger told me that the light house keeper blew himself up by stepping on an UXB many years ago, but I don’t know if he was making that up..). It’s a desolate, fascinating, fragile place.

IMG_7534

Visitor numbers are strictly limited and you can’t book in advance, so you can only turn up and be booked on the next boat of that day – they run from 10am until 2pm to get you out there (the journey takes about a minute). The last boat back is at 5pm and they have a system in place to make sure you don’t get left behind.

So what is it? Well it’s a peninsula, a spit of land, off the very pretty village of Orford (well worth a visit). Although it is, strictly speaking, accessible by land from Aldeburgh, it isn’t for the general public and so it feels like an island which you can only get on to by boat.

IMG_7559

And it’s weird. If you like abandoned places you’ll love this place. There’s left behind ordnance, old buildings – some now too fragile to go into unfortunately. The National Trust – which owns it – treads a fine line between letting nature reclaim it and looking after it. There are three paths and they are only open seasonally, and not all are open at the same time and, as the numbers are limited, there is a real ‘cut off’ feeling when you get there.

IMG_7574

There is only one toilet and no picnic places. When we’ve been we tend to perch on old rocks ‘n’ things. There are no trees so there is no cover, so sensible shoes/clothes/sunhat/sunglasses are a must depending on the weather (which is always that bit more extreme than on the mainland). No dogs or bikes allowed.

But it’s magical. Unfortunately you can’t walk down to the lighthouse anymore and then along the amazing shingle beach which houses a significant portion of all the shingle in Europe. The lighthouse was sold last year (you can still go visit) and the beach suffered terribly in last year’s storms. Ten metres were lost in five months, four metres in just one night.

IMG_7550

This is such a shame because it was one of the best beach walks I’ve ever done, there’s something so raw and…epic…about this bit of coastline.

August 2015 note: this has now changed, and although the Police Tower (which is still shown on the maps) was washed away, you can walk down to and along the beach on approved paths and it is still magical. But it’s always good to check first as things do change on Orford ness!

I am completely obsessed with the Cobra Mist building, which stands, hulking and secret in the distance (you can’t get to it and you certainly can’t go in it).

I had to make do with standing ankle deep in suspect water in one of the AWRE (Atomic Weapons Research Establishment), where work ceased 43 years ago and nature has taken over. It was one of the eeriest, creepiest places I’ve ever been in. I was actually too scared to go in some of the rooms, which were dark and dripping with water.

IMG_7580

IMG_7601

The rest of Orford Ness is fragile, beautiful and unlike anywhere I’ve been in the UK. So close to ‘civilisation’ and yet the moment you step onto the peninsula it feels like nowhere you’ve ever been. It feels slightly dangerous, like you’re just on the edge of something happening…

IMG_7561

To reconnect with the world, when we got back onto Orford, we went to the Castle Green to the lovely Lisa’s Ice cream cart and had a truly excellent ice cream..

IMG_7623


How I make porridge

People are quite often scared to cook pasta for me, on account of me being Italian. I think they think I spend my whole time at home making pasta from scratch and that my kitchen is covered with spaghetti drying from the ceiling.

I never really understood this intimidation, until I started getting into porridge. For such a simple food, there seem to be an awful lot of rules about how you should make it. Porridge features not at all in the Italian diet, so I didn’t have any claim to it.

All I knew is that whenever you read about how to make porridge it would say forceful things such as “all you need is water and salt, anything else isn’t porridge”.

But I don’t like porridge made with water and salt and it’s taken me years to admit this. Furthermore, feeling that that’s the only way to eat porridge isn’t really helpful because porridge is really good for you, so it’s worth working out how YOU like to eat it. After all, I know some people who eat pasta with ketchup and do I judge?

You guess.

Anyway, this is how I make, and eat, porridge.

For one portion. I put the saucepan directly on my digital scales and weigh everything.

30g porridge oats

100g of milk

150g water

a pinch of salt

half a teaspoon of cinnamon (I didn’t think I liked cinnamon but it really works)

Some berries

Maple syrup

Nut butter of your choice

Weigh the porridge, water and milk straight into a saucepan, then add the cinnamon and salt and put on the stove. It seems quite a lot of liquid but this is the key (I’ve found) to making a lovely creamy porridge.

Simmer and stir for quite a long time, 5-10 mins. You can leave it periodically and come back to it and I find it meditative and I like to think about the day ahead whilst doing it. Also whilst doing it I can’t POSSIBLY do anything else so I say to my partner “the children need breakfast, I can’t POSSIBLY do it because I’m stirring my porridge”.

Once the milk and water has been largely, but not totally, absorbed – you will still have a fairly wet porridge – take it off the heat and leave it for a minute whilst you plate up your berries and nut butter. I nearly always have blueberries. In the winter I buy frozen ones and stick them in the porridge for that last minute standing time.

I also add to the plate a large – very large – tablespoon of nut butter, usually cashew or almond and always Meridian as it’s the best by far AND I LOVE IT. This is because, contrary to popular opinion, porridge on its own does not, and never has, filled me up til lunch time. If I eat porridge with no protein in it (i.e. the nut butter) I am as hungry as a pregnant woman in the first trimester by 10am. Sometimes 9am. But adding a huge dollop of nut butter not only adds useful nutrients and good fats, but helps fill me up.

On top of the porridge, berries and nut butter I add a teaspoon of maple syrup. A teaspoon of maple syrup has 30 calories which is nothing really, but it really adds to the yummyness of the porridge.

This is how I make porridge.

Iced coffee

This was inspired by an ice cream recipe which didn’t so much go wrong, but which I didn’t like.

I have a book called The Perfect Scoop by David Lebovitz. A great book absolutely crammed full of great and inspiring recipes for ice cream, sorbets and the like. I bought it after I tried Lebovitz’s Torrone Ice cream which is one of the best ice creams ever.

In the book, Lebovitz has a recipe for Vietnamese Coffee Ice cream. I made it and it wasn’t really my thing. Too ‘icy’, and not creamy enough for the sort of ice cream I like. What could I do with it I wondered? Then I remembered how my father used to make iced coffee in my parents’ cafe and I thought “a-ha” I’ll use it as a base for iced coffee. And so this is what I did. (I’ve slightly adapted the recipe here by altering the proportions.)

When you’ve made the ice cream, store it in the freezer and then when the mood for iced coffee takes you, just add a scoop of the ice cream to some milk and whizz it up in a blender. I use my Dualit milk frother on the ‘cold milk’ setting and it works perfectly (put the milk and ice cream in the machine at the same time, sometimes I do have to run it twice to make sure the mixture is smooth).

IMG_6319

You need about a scoop of ice cream per small glass of milk, although experiment and see what suits you and if you prefer a more creamy or stronger coffee taste. My children go mad for this drink; obviously I have to ration it out as all that caffeine…

It’s a great drink for this lovely hot weather and, once you’ve made the ice cream, the whole thing is ready in minutes. Serve with ice cubes if you wish, but I don’t find there’s any need.

Iced coffee ice cream:

397g Waitrose Condensed Milk (for those, like me, who boycott Nestle, it’s great to know that Waitrose now makes its own condensed milk and it’s cheaper than Nestle’s)

250 – 300 ml of espresso or very strong coffee

80ml single cream

A pinch of ground coffee

You basically mix everything together, chill it and then put it in your ice cream maker.

Or, if you plan to make lots of iced coffee over the next few days, just store it at this stage, in the fridge and use half a cup every time you want to make an iced coffee, topping it up with milk (and an ice cube or two if you want it really ice cold) to suit your taste (so more iced coffee mix to less milk if you like it very strong/sweet, more milk if less so).

I love to top this up with almond milk. This doesn’t, of course, give you a dairy free iced coffee as the cream and condensed milk are dairy, but it does lower the dairy hit and gives a lovely nutty taste.

Iced buns for a Wednesday

There are many other things that I should be doing. I am in the middle of a piece about Death, I interview somebody in an hour, I have a study that looks like a store cupboard nobody cares about, and everybody chucks their stuff into. I should be researching, planning and tidying to enable a more structured work routine.

But all I want to do is write about buns. Iced buns. I don’t even, particularly, like iced buns. I never wake up and think “I really fancy an iced bun”. But they are a perfect, unassuming little cake. Very English (to my Italian mind). And humble. My partner, who is English going back to the beginning of time, said that “iced buns were what you bought your children when they really wanted a doughnut”. I have no idea if this is true

This is how you make them. It’s a recipe from a Jamie Oliver magazine from a few years back, the method of which I’ve adapted slightly. The recipe says it makes 12, but you could easily make 24 small ones (and even then, not that small). These were, actually, iced ‘fingers’ but I prefer the word bun. I made 12 and they were as oversized as the eyes on a Bratz doll. Next time I’d make them smaller.

14g dried yeast

150ml milk, tepid

500g strong white bread flour

50g caster sugar

2 teaspoons of salt

40g very soft butter, unsalted

2 eggs

140ml of water straight out of the tap

For the icing: 300g icing sugar, 2-3 tablespoons of water

Stir the yeast into the milk and set aside. You don’t need to wait for it to froth up or anything.

Mix together the flour, sugar and salt together. Now stir in the yeast/milk mixture and the rest of the ingredients, mixing it all together.

You’ll have a very wet dough that looks almost unmanageable. Leave it in a bowl for 10 minutes.

Oil a work surface or board (wooden boards don’t work so well for bread kneading, I use a Top Gourmet one which is made of recycled cardboard and it’s brilliant for all my bread making) and tip the dough out. You may need to scrape it up with a scraper to begin with but don’t be tempted to add flour and don’t panic. You can do this. It’s buns you’re making, just think of that.

Knead it very lightly for about 10 seconds, then cover and leave for ten minutes.

Do this twice more. By the end you should have a smooth dough that is slightly more manageable. Now leave it, covered in an oiled bowl, for about an hour and a half. It should have doubled/risen quite a bit.

At the end of this time, knead it lightly one more time and cut bits off it and roll into either circles (I used flour for this last bit) or sausage shapes. If you want to be really precise, weigh the whole dough, work out how many buns you want, then divide one by the other so you end up with buns the exact same size.

Place whatever size/shape bun you’ve made onto a parchment lined tray. The buns shouldn’t be touching yet – they reach out to each other as they rise.

Cover and leave in a warm place for 30 minutes. I left them at room temperature – 20c – for 90 minutes (not on purpose, I got held up) and when I came back they’d blown up to enormous proportions. All was fine, I had very big, very light, very fluffy buns. But it was touch and go until I got them in the oven. I’d say give them an hour at an average room temperature.

Into a preheated oven of 200C, place the buns for 10 minutes or so. You want them to be lightly golden. When done, take them out and cool completely. They’ll be all squashed up against each other and you’ll have to tear them apart to reveal their inner fluffy softness.

Now  mix up the sugar and water to make the icing and spread it on top. The icing won’t be pouring consistency – it’s much thicker than that. So you need to spread it on with a knife but as it dries it smooths out so don’t worry about it not looking lovely and slick when it first goes on.

Don’t store these in an airtight container. The buns need to breathe or the icing will slide off. So you may want to freeze half (un-iced in which case make half the quantity of icing) as these make rather a lot. But they are fun to give away. Everyone seems to like an iced bun.

These are great for school fetes for that reason – children and adults like them – and they are not overly expensive to make. I think, and my eldest agrees, that these taste even better the next day. They didn’t last into a third though.


Chollah bread

Where I grew up, in Bayswater London W2, there used to be a bakery called Grodzinski and we would buy our bread there. I’d be fascinated – what child wouldn’t be – by the slicer, that they fed your whole loaves into if you asked for it to be sliced.

Sometimes, we would buy chollah bread. I loved its eggy sweetness and my favourite filling for it would be mortadella. Some years later, when I was telling my partner, he pointed out that perhaps using pork in a traditional Jewish bread wasn’t the BEST thing I could have done. (Sorry.)

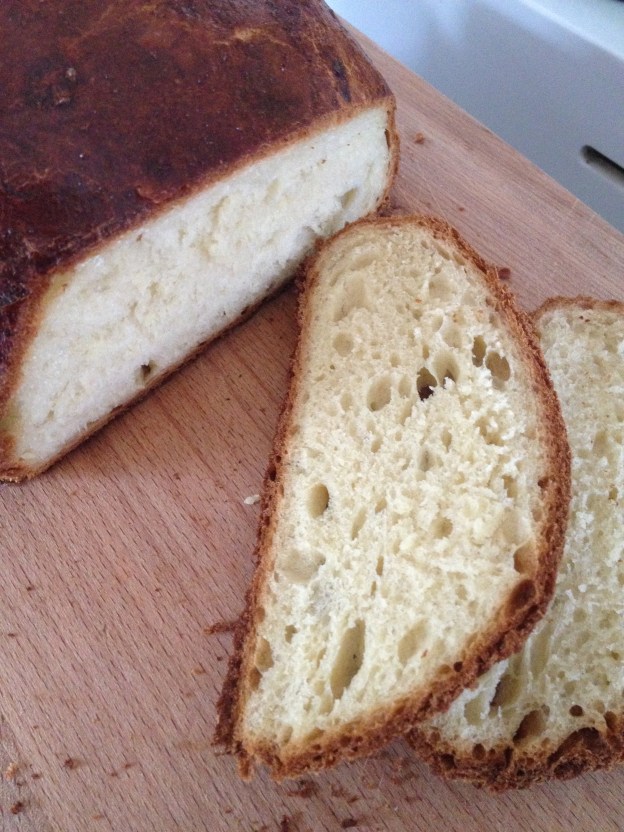
Anyway. A few years ago, I attempted to recreate this wonder bread at home and I was amazed at how well it worked. This is an amalgamation of recipes that I found and it works for me, I’m not sure how authentic it is (be interested to know). It makes one good loaf. I don’t attempt to knot it or shape it into anything fancy. A Jewish friend of mine who regularly bakes says that, in her opinion, the dough is either dry enough to shape, but that results in a dry bread, or too wet to shape, but this results in a tastier bread. This was also my experience. So I always go for a higher hydration loaf in a simple boule shape. Be warned: it’s the sort of bread you can’t stop eating. Any that you miraculously have left over and goes stale (you won’t have any) you can make into French toast.

420g white flour – plain gives a better texture but you can also use strong white

7g of dried yeast

60g caster sugar

240ml of water, warm

a teaspoon of salt

1 egg

60ml of olive oil or oil of choice (you could also use melted butter)

You need an extra egg to glaze with, or milk. And poppy/sesame seeds if you like to sprinkle atop.

Mix a heaped teaspoon of the measured out sugar, with the yeast, into the warm water. Mix it up well and leave it to froth up. This takes about 15 or so minutes in my kitchen.

Mix the remaining sugar with the flour and salt into a large bowl and mix with a fork. When the yeast/water/sugar mixture has become nice and bubbled up, add this to the flour mixture and mix together using a fork until you get a sticky dough. Now add the egg and oil and mix it all together. Leave it for ten minutes.

Now tip it out onto an oiled surface and knead it very gently. Cover with a bowl and leave it for ten minutes. Repeat this twice more. The dough should be fairly smooth by now. When you have kneaded it gently for the third and final time, put it into an oiled bowl and cover with a cloth in for two or so hours.

Heat the oven to 200C, take your dough out knead gently and shape into the form you want it to be (as I said, a boule is really the only thing I can do with it) and place it on the baking tray you’ll want to bake it on. Leave for a final 20-30 minutes to rest.

Before it goes into the oven, brush it gently with beaten egg/milk and sprinkle with seeds if you so wish. Bake it for 20-30 minutes and leave to rest until completely cold before cutting it. (Yeah right.)

Pear and Hazelnut cake

I am a fiend for cutting recipes out of magazines and filing them in big Muji PP document files, which I then mark things like ‘Puddings’ or ‘Everyday’ or ‘Christmas’. People who come to visit look at my bookshelves and I know they think I’m bonkers. I AM bonkers. But, it does mean I have custom made books.

And it was in such a book, called ‘Cakes’ that I found a recipe I’d cut out years ago. Most unassuming it was and by the lovely Nigel Slater. It involved pears. I’m usually a bit suspicious of people who say, when I ask them what sort of cake they’d like me to make them, “something with fruit in it”. I think a cake is a cake and if you want fruit, eat fruit. But there are exceptions, of course, and this is one of them.

And it is an exceptional cake. I must have eaten half of it all by myself which is really rare for me. I customised it by using:

a) ready toasted and chopped hazelnuts which seemed like such a luxury it made me feel quite heady. Because my packet came in 100g, I then scattered 20g of the chopped hazels onto the crumble topping and…

b) the cake calls for 165g of flour and I substituted half of that wholemeal, adding a quarter teaspoon of baking powder as the wholemeal flour I have is plain.

c) I also used about 40g of wholemeal in the crumble topping. The cake didn’t suffer for it at all. By that I mean it didn’t become overwhelmingly worthy. But I do like to avoid 100% white flour cakes if possible. The thought of adding wholemeal flour may scare, but as long as you don’t overdo it and do it in appropriate cakes – i.e. NOT ones like Victoria sponge – then it just adds a lovely dimension to your baking and a good flavour.

This is lovely warm, with cream. It reheats easily with a ten second blast per slice in the microwave. I don’t know why it’s so addictive exactly but it is. A superior cake. Eat it and cry gently.