One giant Twix (tart). Gluten, dairy, sugar and fat full

I like this tart for bringing to people as a present. I’ve yet to meet a grown up, or child, no matter how posh or spoiled and used to presents, who doesn’t love this (unless of course you hate Twixes). But it also makes a good dessert when you really can’t decide what to make to please everyone. And just a small slice is really enough.

I can’t overstate this. It is pancreas-bustingly sweet. A bit too sweet for me if truth be told, it sets my teeth on edge. I want to play around with the recipe next time to try to resolve this. That said, a small slice (or even cube) is a treat. But, like the Wagon Wheels I made last year which set off a sort of crazy reaction, proceed with caution

The caramel making is a faff, I won’t lie. A thermometer is a must (I can hear you sighing). I have very similar to  these, which is brilliant. You can use it to probe meat with, take the temperature of a child, use it to make confectionery – it’s great because you just have a probe sticking into the hot caramel, with the actual body of the thermometer somewhere out of the way. I stick mine above where I’m working, to the extractor fan hood (it has a magnetic back). Obviously you do need to remember to clean the probe between child and caramel.

Anyway, this recipe was from Delicious magazine some time ago. I made a fundamental change to the timing of the caramel/temperature, because the first time I made it, taking it up to 115C meant the bottom of the caramel burned, so you had burnt/darker bits. It didn’t affect the taste, but it was annoying. I now stop the last bit of the caramel making at 111C – precision is all in caramel making – and it’s fine: chewy, golden and just before it starts to burn. I also changed the way you make the chocolate ganache.

This is what you need:

For the base

225g shortcake biscuits

75g unsalted butter, melted

For the caramel

125ml double cream

90ml condensed milk

125ml golden syrup

110g caster sugar

30g unsalted butter, cut into small pieces

For the chocolate topping

200g good quality milk chocolate (I use Green and Black’s Cooking chocolate at 37% cocoa solids)

75ml double cream

Small knob of butter


What you do:

Heat the oven to 170C. Put the biscuits and melted butter in a food processor, then pulse until all amalgamated. Line a loose bottomed tart tin, mine was 35cm x 12cm the biscuit crumbs. You can lightly oil the tin first, if you are of a nervous disposition.

Press the crumbs down and up the sides,  chill for ten minutes then cook it for 15 mins. Let it cool, then put back in the fridge. You’re done with the oven now, so switch it off.

To make the caramel, put the 125ml of double cream in a sauce pan with the condensed milk and heat up very slowly. I do this at the same time I’m making the caramel, cos I’m ‘ard and can multi task. If you do it separately it’s important it’s kept warm-ish as otherwise, if you introduce it to the caramel – such as you will later – cold, it might split.

Now put the golden syrup and caster sugar in a separate pan with 30ml of cold water, trying hard not to think of the glycaemic index of these two ingredients combined. Heat it gently until the sugar melts, stick the thermometer in, bring to the boil and then bring down to a simmer until the thermometer reads 120C. This may take a while (5-10mins). When making caramel, the temperature rises, then seems to stall, then rises again, then leaps. Be careful here, a caramel solution at 120C is very, very hot. Don’t have small children wondering round. Don’t leave it unattended.

When it reaches 120C, take it off the heat and stir in the chopped butter, then add the still warm cream/condensed milk mixture. Stir stir stir, (take out the tart base from the fridge in its tin), and put the caramel mixture back on the heat and bring back to the boil – this will take a while – until the mixture is at 111C. When it reaches this temperature, pour the caramel into the biscuit crumb lined tray and leave to cool completely. When it’s cool, put in the fridge.

Then, make the chocolate ganache: put a bowl atop a saucepan of simmering water. In this bowl put the milk chocolate, the 75ml of double cream and the knob of butter. Stir until everything has melted. This is the chocolate ganache. You now pour this over the caramel filled tart and as it cools, make wavy patterns, just, you know because.

Leave to set. Keep in fridge. Eat slowly and in small portions. No-one wants diabetes for Christmas.

Pumpkin and ginger loaf

I got this recipe from the BBC Good Food magazine. I have adapted it ever so slightly. I would also experiment with dropping the sugar content, but never the first time I make something. It’s great for using up Hallowe’en pumpkin carving scrapings, but I admit I used butternut squash as bit too early, for us, to be carving pumps.

Ingredients

250g pumpkin or butternut squash chunks (note: peeled weight)

50g black treacle

140g golden syrup

140g light brown sugar

100ml milk

100g cold butter, diced

125g self raising flour

100g plain wholemeal flour

1 teaspoon of bicarbonate of soda

half a teaspoon of baking powder

1 tablespoon of ground ginger

2 teaspoons of mixed spice

2 eggs

8-10 pieces of crystallized ginger, thinly sliced

What you do

Oven to 180C. You need a 2lb loaf tin (23cm x 13cm x 7cm) which you have lined in baking parchment.

Put the pumpkin or squash chunks in a bowl with a bit of water, cover with pierced cling film or a suitable microwave cover, and cook on full power in the microwave for about 9-10 minutes. When done, drain any excess water and mash it up.

Whilst that is doing, put the treacle, golden syrup, milk and sugar in a saucepan and bring to a very gentle boil, stirring until the sugar is all dissolved. Take off the heat.

Sift together the dry ingredients: the flours, ginger, mixed spice, bicarb and baking powder, add the diced butter and rub together with finger tips until like fine breadcrumbs. I admit it, I did this in a food processor because I am a lazy bastard. Set aside.

Whisk the egg gently into the pumpkin/squash, just until you have a gooey, orange mass. Now pour this into the treacle/syrup/sugar/milk mixture, or vice versa. Now add to the dry ingredients, mixing carefully and slowly. If the syrupy mixture is too hot and/or you add it too fast, then you will get small clumps of flour that will never disperse.

Or you could be like me and chuck the whole lot into the bowl of a food mixture and whisk it together, because you can never have too much washing up.

Pour the batter into the loaf tin and onto the top, scatter 80% of the sliced up crystallized ginger. Bake in the centre of the oven for  45 minutes. A skewer should come out with some moist crumbs, you don’t want it too dry. Five minutes before, scatter the rest of the sliced ginger on top.

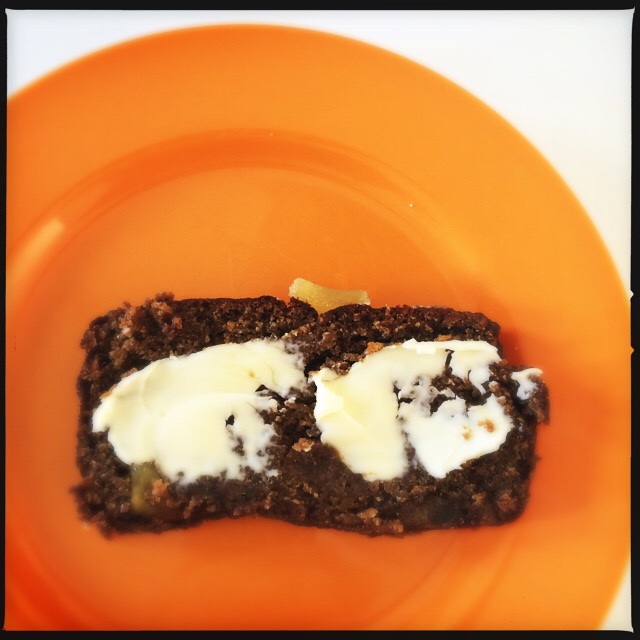
Take out and cool completely. Like all gingerbread, it tastes better after a few days of being wrapped in baking parchment/foil and is delicious sliced and spread with butter and served, in front of a fire, with a cup of tea.  It is full of lovely autumn flavours.

IMG_9616


Raw chocolate and orange tart (gluten free, dairy free)

For a while I’ve been meaning to make a raw chocolate tart. I keep seeing recipes for them and I love a birruva treat every day after my lunch. But. I don’t always want that sugar high/low I get after eating pastry (much as I adore pastry). Anyway. I saw this in Delicious magazine and I’ve adapted it every so slightly. Next time, I think I’d make some changes to the base, too – I would use toasted (sssh, I know that won’t make it raw but it will make it delish) nuts instead of the dessicated coconut.

If you don’t like coconut you won’t like this, but otherwise, this is a really intense chocolate treat. It still feels ‘spoily’ and not too worthy. It lasts a good long while so you can have a slither every day and it tastes even better after a few days. I warn you, the chocolate hit is powerful.

For the base:

110g coconut oil

140g ground almonds

175g dessicated coconut

2 tablespoons of honey

1 tablespoon of raw cocoa (I buy it in 1K bags and it works out at quite good value compared to the Green and Blacks one I used to buy)

For the filling:

75g dates

Zest and juice of one orange

50g coconut oil

175g honey (I used mostly honey and some maple as I ran out)

140g raw cocoa powder

Method

Soak the dates in some boiling water for about half an hour then drain them, and discard the water.

Put the ingredients for the base (not the dates, they aren’t part of it yet) in a food processor until it starts to clump together, then tip into a 23cm loose based tart tin. Don’t wash the food processor up yet!

You don’t need to grease the tin or anything (although be warned, the first slice is hard to cut). Flatten it down and up the sides with your fingers, cover with cling film and put in the fridge.

So much easier than pastry isn’t it?

Now put the drained dates, plus all the other ingredients for the filling, into the food processor and whizz up. I found it made quite a sticky mess that was hard to liberate, fully, from the bowl and blade but do your best. Spoon the filling into the case and put it in the fridge. But, once it’s been in the fridge, I find it tastes nice for being out of the fridge for ten minutes.

You only need a tiny slice.


Cauliflower-crust pizza (gluten free)

I am not a fan of food, which, under the umbrella of ‘being healthy’, pretends to be something else and in so doing, delivers only disappointment. Courgette strips instead of pasta, yoghurt when you really need cream, vegetables in cake (which I admit can sometimes work)..cauliflower instead of pizza…

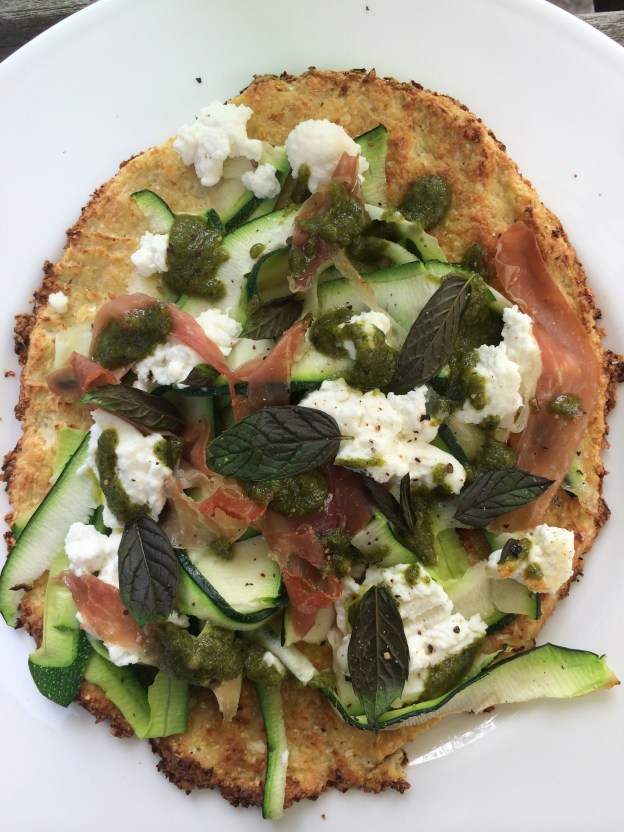
This isn’t anything like a pizza. I warn you now. But if, as I do, you like to have a lunch with a ‘base’ and lots of veg then this is a really good, gluten-free, wheat-free and tasty (yes really) offering. To me, it didn’t taste like cauliflower at all, more like a lovely parmesan crust. My partner was a veggie for 20 years; he views such things with deep suspicion, having been offered beans, made into the shape of a lacklustre burger for many years. But he was impressed and delighted.

I got the recipe from Delicious Magazine (no link because it doesn’t appear to be online), and I’ve halved the ingredients to make it ideal for two, for lunch. I followed the recipe topping but obviously you can add whatever you want. We happened to have some pesto made by my eldest (she makes it better than I do, taking it off me and saying “here Mummy, let me show you”. I love how she is confident like this). You could, feasibly, leave the pesto out and add a drizzle of olive oil or chilli oil, or just, you know, BUY SOME.

225g cauliflower florets
1 medium egg
75g ground almonds
25g grated parmesan
salt and pepper
1 courgette
2 slices of Parma ham
120g ricotta
Pesto and mint to serve

Heat the oven to 200C and put in a large baking sheet. Now, put the florets in a food processor and blitz so it looks like cous cous. Put in a bowl and add the egg (which you have lightly beaten), ground almonds, parmesan and a bit of salt and pepper (not too much salt as the parmesan is also salty). Stir together.

On a piece of baking parchment, spoon out two portions. I sort of shaped it by hand, into two round shapes. It was easy, no rolling and although the mixture is wet and you think it won’t work, it does.

When you’ve done this, take out the baking sheet (which will be hot!) and gently slide the baking parchment onto the baking sheet. Cook for about 20 minutes or until golden and firm to the touch. Check after 15 minutes.

Whilst that’s cooking, slice the courgette into ribbons.

When the bases are cooked, take out and keeping them on the baking sheet, scatter over the ricotta, courgette and ham. Cook for another five minutes and then, spoon a bit of pesto and scatter some mint leaves atop.

2016 update: I just love this dish. What I tend to do is spread a thin layer of chilli jam/caramelised onion/chorizo jam over the base, then layer on the courgette and ricotta but also add (ssssh) some slices of chorizo, which I love. This really is tasty! When it’s cooked I drizzle on some olive oil (extra virgin).


My meatloaf

My mother’s meatloaf is the stuff of legend. In the past, whenever we had meatloaf at my house my children would look up, all eyelashes and downy cheeks and say “is this Nonna’s meatloaf?” and I would have to say that no, no it wasn’t, it was mummy’s. And they would look down and  eat it, making approving, encouraging noises but they would know, and I would know, that it wasn’t comparable. Every meatloaf I’ve tried, until this one, was just not right.

The thing about my mother’s meatloaf is that she minces her own meat, so it’s silky smooth and sublime. I like my meatloaf like I like my sausages: not coarse. I want it to be an easy transaction. And all the meatloaves I’d made before were too coarse, too dry, trying too hard.

Last year I bought Donna Hay’s Simple dinners, from whence this recipe comes.  It’s a great book. Her recipes are genuinely tasty, pretty healthy, made from a clever combination of not too many ingredients and easy to follow. She is, to my mind, just about the best cookery writer of the day (for meals ‘n’ stuff. Dan Lepard is still my man for bread). I’ve adapted it here because I’ve been making this meatloaf for over a year now and I’ve made it my own: I’ve adapted it slightly to suit our needs.

As such, this is now my meatloaf recipe, in that it’s the one I use as my go-to meatloaf recipe. I can’t imagine it will ever be made better by anyone else’s meatloaf recipe. Except, naturally, my mum’s.

(What I also love about it is, if you make this for a Sunday lunch, and it’s very good at Sunday lunch, you can make it in advance or the day before, keep it in the fridge and put it straight in the oven. Just give it 5-10 mins more in the oven at the lower temperature i.e. the first round of cooking.)

This is great served with the usual stuff, but I particularly like it with mash for a real comfort, fork-only meal.

You need:

a packet of thinly sliced pancetta, about 20 slices

110g breadcrumbs

60ml milk

400g rose-veal mince (all veal sold in Europe is non-crated, but I only buy higher welfare British veal, if you are not sure, substitute beef mince)

500g free range pork mince (I never, ever buy any other sort of pork)

1 tablespoon of Dijon mustard

1 large egg

a tablespoon of thyme leaves, stripped from the stem

salt and black pepper

2 tablespoons of maple syrup

What you do:

Oven on to 160C if you intend to cook it straight away. Get a loaf tin which is about 22cm by 8cm and line the bottom with the pancetta (line across the width, not length if you follow). If you imagine that the meatloaf will be turned upside down on serving, this will be the top of it. Don’t sweat it if you don’t have enough pancetta to cover the whole bottom/sides, and ditto if you have a bit too much, I also line the side/sides not just the bottom. If you have very long slices then don’t worry, you can just overlap them when the tin is full of the mince. It doesn’t have to be perfect.

Because I rarely have properly stale bread, and even if I did I hate grating bread (my mum always, always has properly stale bread which she grates), I put some day or so old bread into a food processor and whizz it up. Take it out then pour the milk over it and give it a little stir.

Now, what I do to make it all super smooth is this. I put the milky breadcrumbss back into the food processor with all the mince, the mustard,the thyme leaves and the egg. Add a bit of salt and black pepper. And then I whizz it all in the food processor. It comes out looking like awful meat slurry.

Don’t worry. You know it’s not.

Now, pack this into the loaf tin. It will seem like too much but keep the faith, pack it in, press it down, tuck over any overhanging pancetta slices if you have them. Then, either put in the oven or cover with cling film and put in the fridge for a day or so (obviously not over what the sell-by date of the meat is).

When you are ready to cook it put it in the preheated 160C oven and bake for 30-35 minutes until the meat is just cooked through. (If you’ve had it in the fridge then increase this time to 35-40 minutes maybe a tad longer, use your common sense.)

Now, take it out and onto a baking tray, invert the meatloaf. Obviously the tin will be hot so take care with oven gloves, etc. Onto the inverted meatloaf brush with the maple syrup. Turn oven up to 180C and now bake for 15-20 minutes.

Serve. It’s delicious.


Sweetcorn fritters

I’ve been a bit obsessed with vegetable fritters, ever since I had sweetcorn and courgette ones at Caravan in King’s Cross, which is across the road from my office, off the breakfast menu. These are some I’ve adapted from a Waitrose recipe. They don’t contain courgette, although there’s no reason why you couldn’t replace half the sweetcorn with courgette if you wanted to. I just haven’t, yet.

These are a regular lunch for me. I make a batch and have it across two days as it makes about six fritters.

What you need

1 x 326g can of sweetcorn (or 250g of actual corn off the cob/frozen)

75g self raising flour

1 egg

65ml semi skimmed milk

3 salad onions, sliced

some coriander (about a tablespoon’s worth)

A bit of oil to fry them.

I serve these with a rocket, avocado, tomato salad dressed with extra virgin olive oil and lime juice and a smear of Tracklements chilli jam.

What you do

Put the corn, flour, egg and milk with the salad onions and the coriander in a bowl with a pinch of salt. Mix together well.

Heat the oil in a frying pan and drop about two tablespoons of the mixture per fritter (see what size you want them to be). Cook for about 3 mins each side and presto pronto. Ready to eat.


Sourdough after a 156hr prove

Ever wondered how long you can push sourdough for? I baked these rolls  after a 156hr prove at 2C. They were very dry when they came out of the fridge and I slashed them with a bread knife, not expecting much. Cooked them for 8mins at 250C (fan) then 8mins at 220C (normal).

So you can go away on holiday for a few days and leave some sourdough rolls proving for a good few days. I think if anything, they rose up more than normal…

Berry ripple ice cream (no ice cream maker necessary)

This is a super easy ice cream, but with the luxury of a ripple running through it that makes the most of all the free blackberries available at this time of year. The blackberries used in this were picked by my dad in Wimbledon, SW London. But you can use any berries. I’ve made this with raspberries or brambles.

Anyway, here’s how to do it:

For the ice cream:

A 397g can of condensed milk

450-500ml of double cream. I use an organic cream that comes in 227ml, and I use two pots, but it doesn’t matter if you add a bit more or a bit less.

2 teaspoons of vanilla extract

For the ripple

A big bowl of blackberries, or raspberries or brambles, about 300g. Don’t sweat it though if you have less as you can still make a great ripple ice cream just with less ripple.

Some caster sugar – to taste. I use a couple of heaped tablespoons as the ice cream in this is already very sweet. Don’t make it too sweet and best to add too little, taste and then add a bit more if necessary than t’other way around.

First, make the ripple. Put the berries in a sauce pan and put in the sugar.  Stir so the sugar dissolves and then simmer for about 10 minutes until it’s all mushy. Pass through a sieve to get rid of the seedy bits. Taste and see if you need more sugar but don’t over do it. Put to one side to cool. You can make this part the day before.

Now mix together the cream and the condensed milk, add the vanilla extract and whisk until thick and stiff.

I pour the vanilla ice cream into a large, shallow Pyrex dish (rectangular) so you have a large surface area. Then I spoon the ripple on top and very gently run a knife through it to disperse it.

That’s it. Freeze and eat on demand. It’s delicious. Enjoy the super psychedelic picture. I served a scoop of this with my mamma’s apple pie. My dad’s harvest, my mum’s apple pie and my ice cream. A delicious family team effort.

Speedo Swedish swimming goggles

I swim a lot. This sentence seems an incredible thing to be able to write given that, I didn’t learn to swim until I was 26 and I am scared of water. But, I control it. I swim only in pools that I know, that I’ve checked out for giant plugs into the underworld. I also swim, these days, almost exclusively outside. I don’t mean in the sea or in rivers, that would be too scary. But in outdoor pools.

And swimming outside necessitates mirrored goggles. At least, it does for someone like me who is never out of prescription sunglasses the rest of the time.

My last pair of goggles lasted about 20 years. Perhaps because there was a fifteen year gap of not swimming very much in the middle. But as they were starting to fray, I looked around for a replacement. Goggles are so individual and  you see most people, in the pool, between lengths, adjusting theirs and shaking out the water. I just thought this is what you had to do.

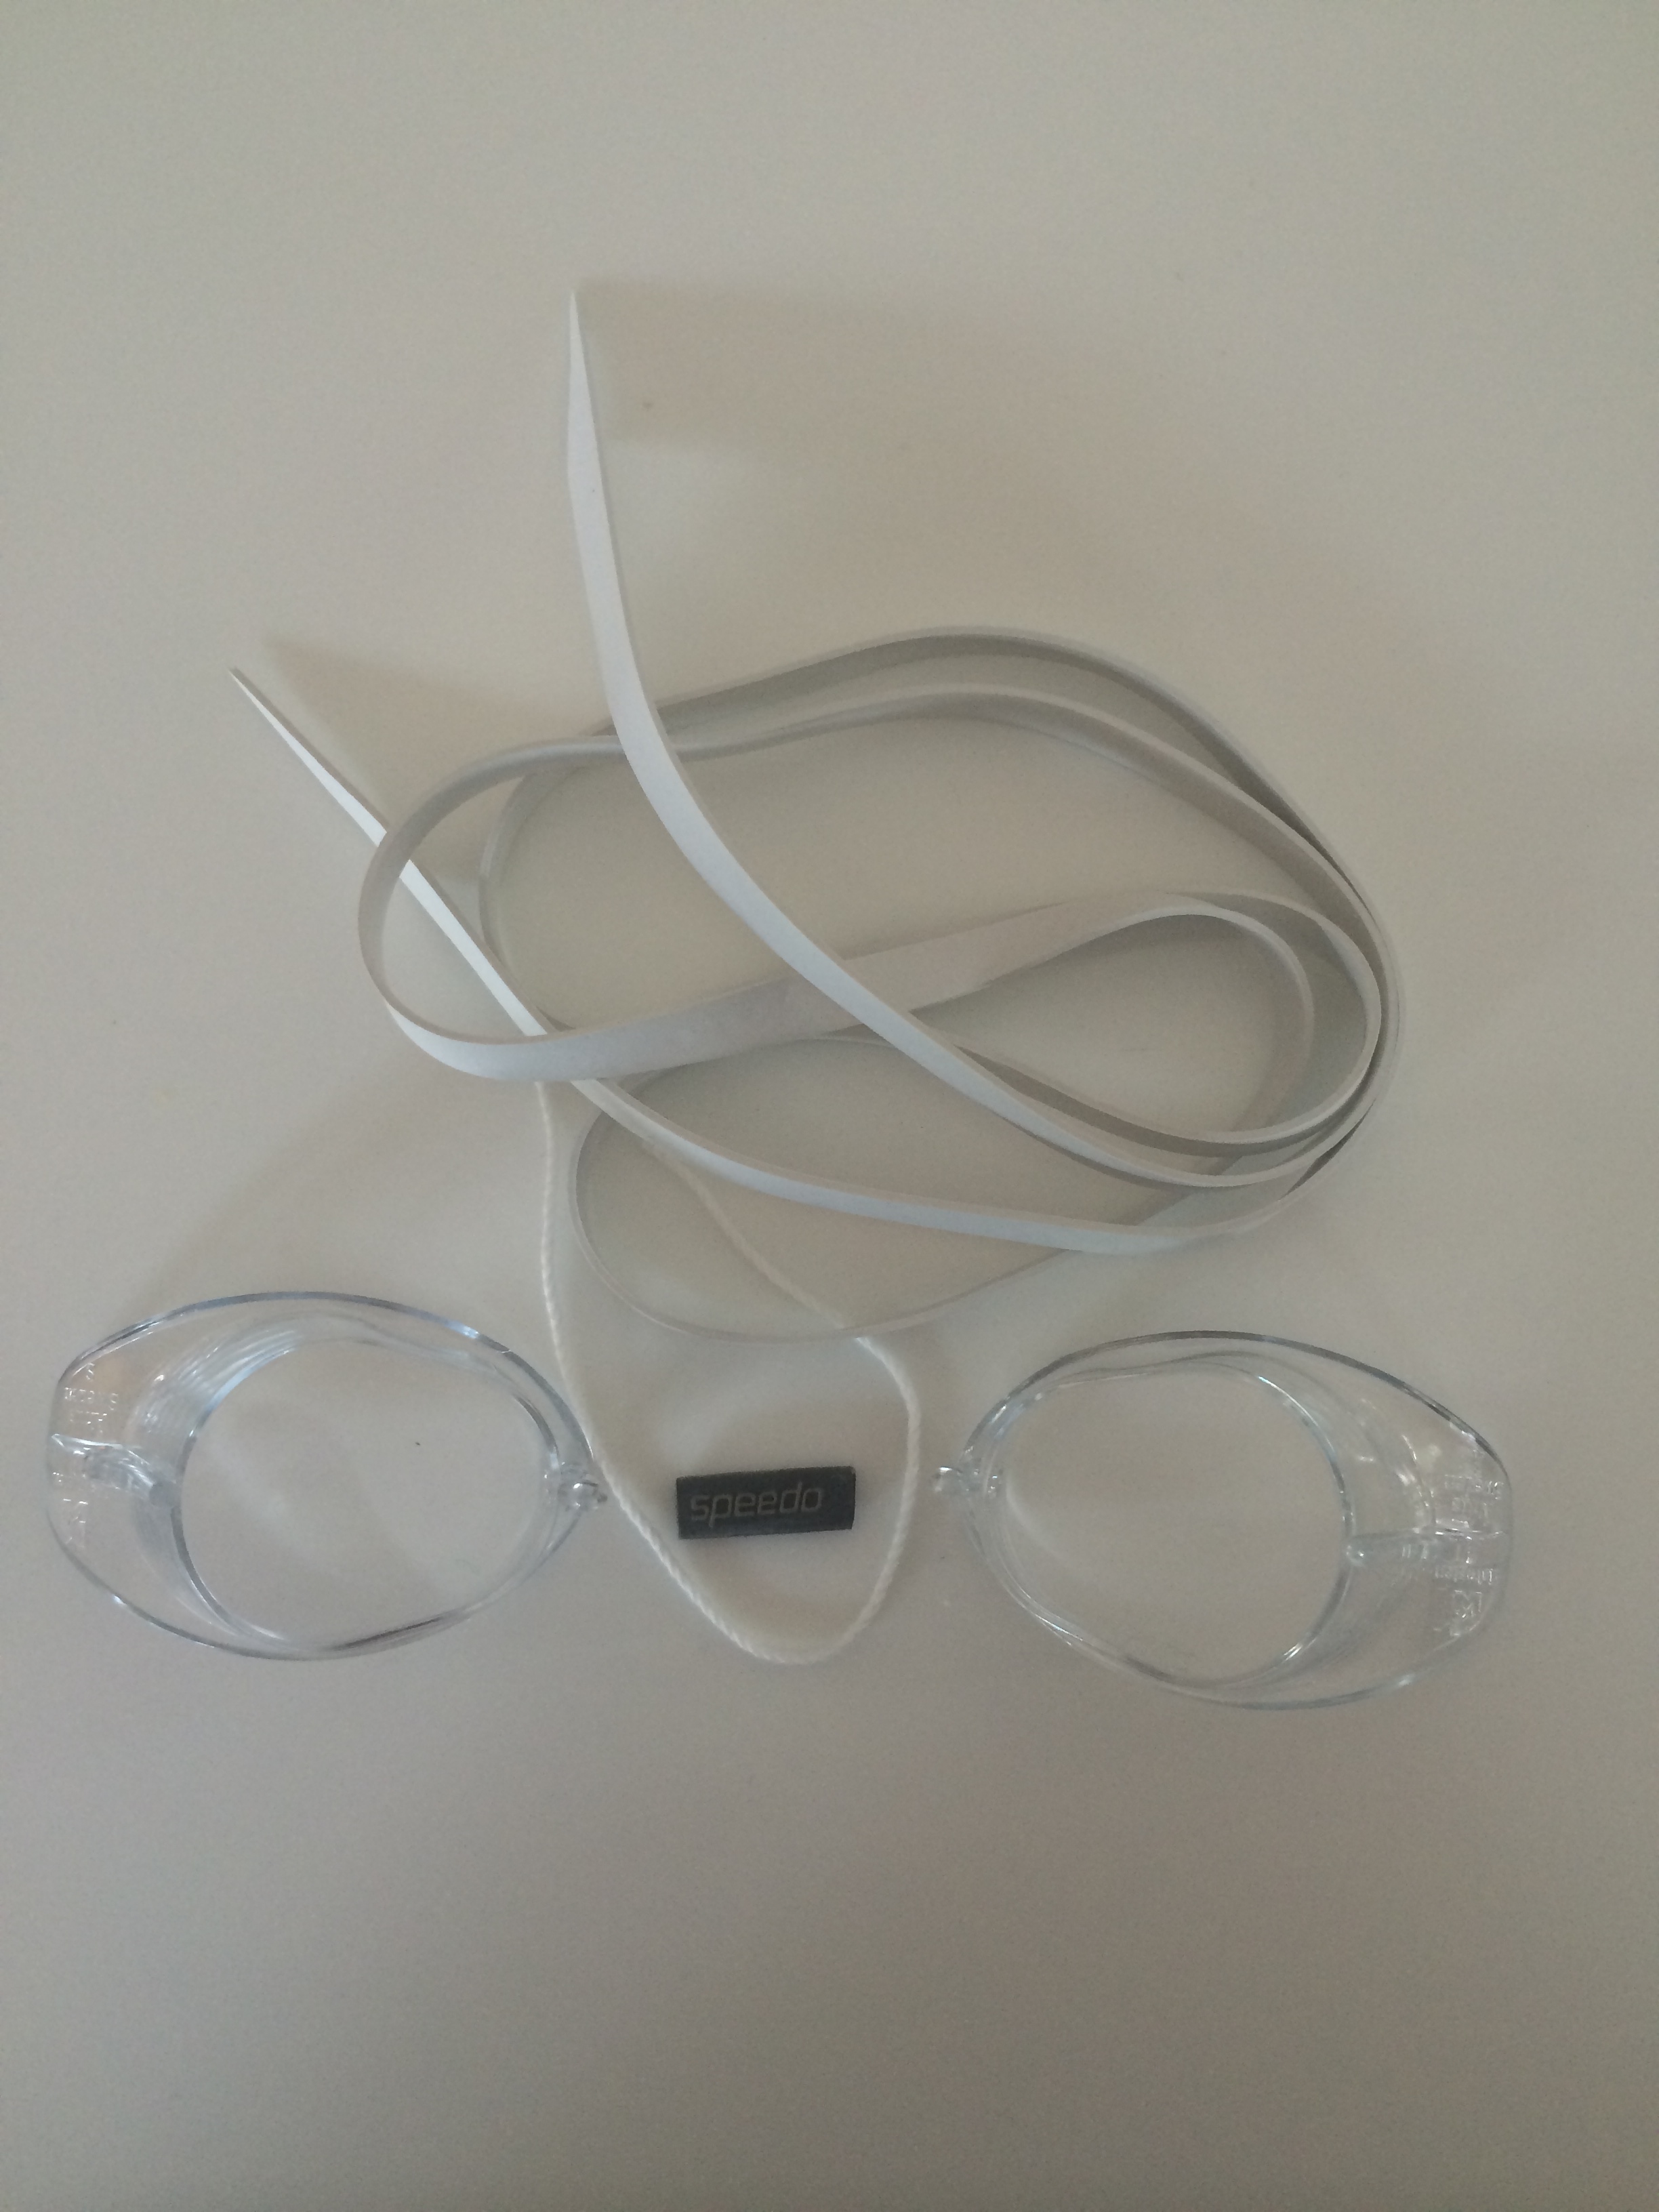
Then I saw Swedish goggles. These come in a kit. They are so cheap compared to normal goggles: I paid £10 for two pairs, one mirrored one plain, which is just what I need (mirrored is no good at night time/dusk, you need clear then). The reviews were glowing.

IMG_8486

I never think that same experience will apply to me. I read about people finding things amazing and ‘the best ever’ and I think “I bet that won’t be my experience”.

I hesitated before building the goggles because, for some reason, I thought it would be tricky. You get the goggles in pieces: a latex head band, two eye pieces, a nose bridge and a piece of string, per set of goggles. But it was easy. Sure, I got my partner to help me hold the lenses in place whilst I tied the string. And sure, I didn’t bother to tidy up the string over my nose so it looked slightly bonkers, until my friend Jess (an ex jeweller) offered to sort it out for me and made them look really cool. But it was easy.

The big thing about Swedish goggles, other than you make them yourself and fit them exactly to you, is that there is no padding. What can I tell you, they’re somehow really comfortable and… best goggles ever. They fit brilliantly, I never have to adjust them once I’m swimming and no fogging up so far. You also get great all round vision (you don’t realise how restricted your vision is with conventional goggles until you try these) and I love how minimal they are.

You will need to do an internet search for them. Mine cost £10 for two pairs, you can get them even cheaper. And if you need any help in putting them together you can look on You Tube. Just put Swedish Goggles Fitting into search.

Little towelling dress, a great buy

This is an absolutely brilliant toweling dress that comes in blue or white (I have it in blue). It zips all up the front and has a draw-string and a hood and short sleeves.

It’s perfect for putting on after a swim/on the beach. (I’d always envied children their toweling cover ups.) Because I am not tall, the style fits me really well (I didn’t want anything too short) and comes to a few inches above my knees. I’m a size 14 and the L fitted me with room to spare. I swim every day and put this on after my shower and when I can’t be bothered to get dressed back into proper clothes, but don’t want to lounge around in a dressing gown, either. I love it, and am resisting the urge to buy two in case anything happens to the first one. But be warned: doing this (buying two of the same thing) will immediately render the first less special.

£35 from John Lewis.