Enriched bread dough with nuts and dried fruit (bread machine)

After I made enriched dough chocolate chip rolls, I thought I’d try making something similar, but stuffed with nuts and dried fruit instead. My mum especially, likes bread like this. She gets something from M&S that is stuffed with nuts and fruit.

I doubled the recipe used before and added 160g of mixed dried fruits and nuts of your choice. The bread was lovely, really soft, tasty and would be lovely with cheese or just eaten with a thick spread of butter. I made two loaves this morning and one is almost already all gone (the other, on its way to my Mamma).

Without adding any bits, these make a fantastic burger/hot dog bun and are now what I use for burger buns. You can also make, bake and then freeze for future use.

This is what I did:

One teaspoon of dried yeast (I use Dove’s Farm)

500g strong white bread flour (you could make this a teeny bit more healthy by using 400g strong white/100g of strong wholemeal, but I never do)

Two teaspoons of caster sugar

50g butter, chopped and added in

Two tablespoons of milk

One teaspoon of salt

Two eggs

175ml water

for later: 160g of ‘stuff’ if you are adding bits: dried fruit, nuts, chocolate chips or a mixture. My every day is chocolate chips and flaked almonds. I’ve now found a great source of very good quality chocolate chips which I can buy in bulk, as it was costing me a fortune. I like the 55% cocoa ones, as they are a good half way house, but you can go higher or lower.

Put everything, bar the fruit and nuts, into the bread machine and set to a dough cycle (mine lasts 2hrs 20mins). You can also easily make this by hand by mixing everything together, leaving for 15 mins, kneading lightly, leaving for 15 mins etc: repeat about four times until dough is really smooth and soft.

When done, take out and put in a bowl and mix in the fruit and nuts. Leave for ten minutes.

On an oiled surface, tip out and knead lightly to make sure everything is incorporated. Leave for ten minutes. Then cut in half and shape: either into a baton shape, a round or buns. I get eight good sized buns out of this but you can of course make them slightly smaller and get more. Place both on a baking parchment lined tray and prove overnight in the fridge (cover with a clean dishcloth).

In the morning bake for approx 12 mins at 220C.

Delicious!

(Apologies if I’ve made any mistakes, I’m typing this whilst also answering 101 questions about Our Generation dolls, posed by my youngest…)

HipstamaticPhoto-533895246.730634


Chocolate Chip Brioches, dough made in the bread machine (especially for Connie).

So a while ago, I posted a recipe for enriched dough chocolate chip brioches. My youngest actually prefers the enriched dough version but I had long hankered after proper, buttery, brioche dough.

I wanted something I could bung in the bread maker and let machine make the dough. And although my Panasonic bread maker doesn’t have a brioche cycle (it’s nearly 20 years old) I knew the newer ones did so I did a search and found a recipe, online, in a newer Panasonic breadmaker instruction book.

These brioches are fairly fuss free. As with all brioche dough, it is very buttery and if handled too much at the shaping stage you become FULLY aware of how much butter is in there as it starts to slide across the kitchen counter and you end up needing to wipe down your hands a lot. But most of the work is done in the bread machine so don’t worry.

Make these the day before you want them, shape them, cover them, stick them in the fridge and the day you want them (they make wonderful breakfasts) just heat up the oven, glaze the buns and stick them in the oven. Voila. Buttery, brioches with melting chocolate inside.

I cooked some of these this morning (made yesterday) because I was making Christmas cards with my children and my friend Mary, who is super crafty came with her absolutely fabulous children and we all sat sticking, embossing and cutting; chatting, the fire burning, lovely music on. It was like something out of a Jane Austen novel, except with Spotify.  Connie, the eldest has just started making bagels and asked me for the recipe. So here it is.

One and a half teaspoons of instant yeast

400g strong white bread flour

Four tablespoons of caster sugar

15ml of rum (I seriously don’t know what this does so if you don’t have it I’m sure you can just add a bit more milk but if you have it, add it, I mean why not?)

One and a half teaspoons of salt

70g of butter, cut into cubes and straight from the fridge

90ml of milk

50g of butter, cut into cubes and straight from the fridge for later *

100g chocolate chips, I prefer dark – for when the dough is out of the machine

Makes 12

Put everything except for the chocolate chips and ‘later’ butter into the bread maker and set the dough cycle – it should be about 2hrs. Mine is 2hrs 20minutes.

At the first knead stage (about 30-50 mins in) add the ‘later’ butter. Your machine may have a beeper for ‘later butter’ stage. Mine doesn’t.

*You can add all the butter at the beginning and honestly I’ve not noticed much difference, so see how you go. If you’re around and can add it later, do, if you need to get on with something just add it all at once.

Don’t, however, add the chocolate chips now, they will melt slightly and the dough will be slightly coloured. It doesn’t affect the taste but..I just prefer it done later.

When the dough cycle is finished, take the dough out, flatten out, add the chocolate chips and sort of gently knead them in. Rest the dough for ten mins, then cut 12 pieces out of it and shape into sausage shapes (or rounds). If you find the dough resistant you can cut the 12 pieces, then rest, then shape. Or just cut and shape straight away – see how you feel.

When shaped, place on a baking parchment lined tray, cover with a tea towel and put in the fridge overnight or for a few hours until you need them.

When ready to bake, heat oven to 180C, brush the brioches with egg yolk and cook for 20 mins (check after 15).

Eat about 30 mins out of the oven when it’s the perfect mix of warm brioche and melting chocolate. You can also freeze them, when cold, for resuscitation another day.

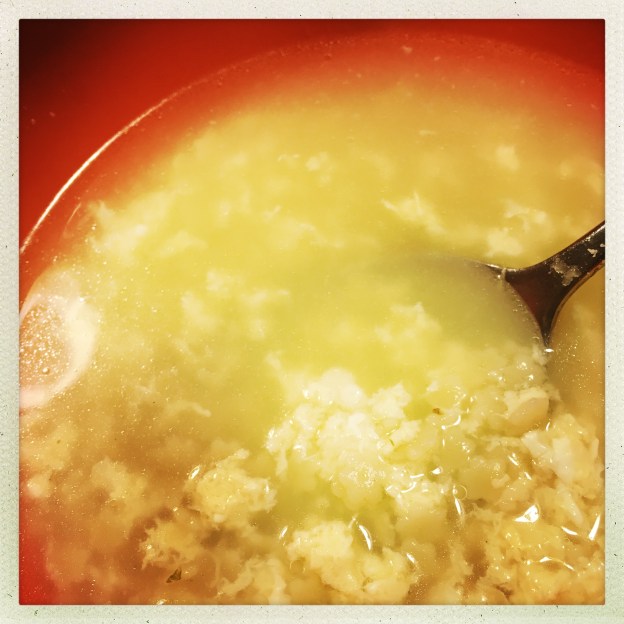
Stracciatella in brodo

Many people may associate stracciatella with ice cream and indeed, you can and do get stracciatella – traditionally flor di latte ice cream with bits of chocolate in.

Straccio in Italian means ‘rag’, bits of cloth.

Stracciatella in brodo is, to my mind, one of the finest foodstuffs. It is oft made, in Italian kitchens, as a bit of a ‘scratch’ meal when there’s not much else. But to think it’s in anyway lacking because of this is to be a fool. It is deeply nourishing and savoury, good for you, ready in minutes if you have some stand by ingredients and I’ve never met a child who doesn’t love it.

I do have home made chicken broth in the freezer on stand by. I make it in batches. But of course you could use a stock cube. Then all you need is some baby pasta (optional), parmesan (which I buy in bulk, grate and keep in the freezer) and an/some eggs.

Don’t be afraid by the lack of precision in the ingredients, just go with it.

This is what you need:

A quantity of chicken broth for the amount of people you have

An egg per person

About 20-30g of small pasta (I use stelline – little stars) per person. It must be small.

Some parmesan, grated

This is what you do:

Cook the pasta separately.

Warm up the broth until simmering.

Break the egg(s) into a separate bowl and beat well – this is important

When ready to go, stir the broth and beat in (with a fork or a whisk) the egg. It will cook immediately. Then add the pasta and a good helping of parmesan and serve.


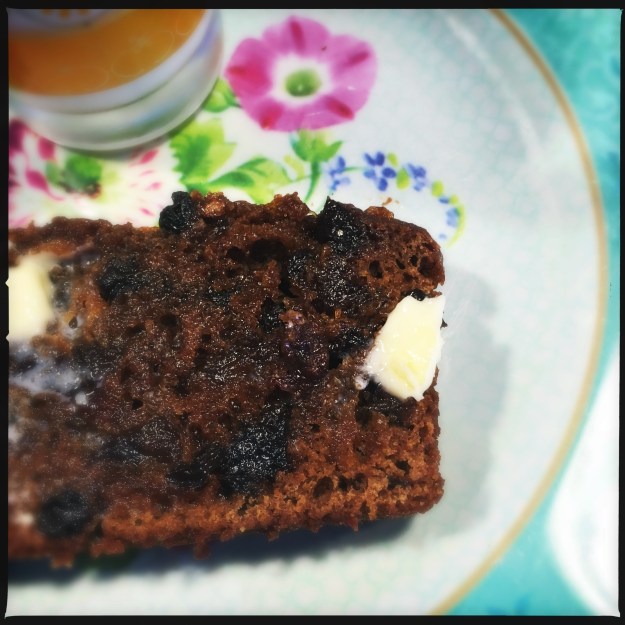
Home made malt loaf

Recently I went to my friend Becky’s house, almost entirely unannounced (I gave her maybe ten minutes notice). And as me and my youngest tumbled into her house, all fizzed up with after-school-ness, she proffered Soreen Malt Loaf, something I’d not seen, and certainly not had, for decades.

Malt loaf is not particularly British (the Swedish have something called wort loaf which is similar), but Soreen Malt Loaf is – it was originally made in Manchester in the 1930’s and still is.

Becky sliced and buttered a few slices and I tried really hard not to eat them all. Then I went home and decided to make it. I had no idea how, or how hard it was and it’s fair to say that, like a lot of things, home made malt loaf isn’t exactly the same as shop bought. But then, what would be the point. But it’s close. I’ve given this to people who know malt loaves and they have decreed it absolutely delicious.

Malt is apparently full of B-vitamins and is meant to be good for you, but it is, at its heart, just sugar so don’t go thinking this is a health loaf. The dried fruit gives you fibre, but again with sugar. So let’s not pretend this is anything other than what it is: cake.

This is adapted from a Good Food recipe, but there are loads on the internet and Nigel Slater has a very fine malt loaf marmalade pudding if you fancy sacrificing one of the malt loaves to this.

Ingredients

150ml hot black tea

180g malt extract plus a bit extra for coating the loaves

85g dark muscovado sugar

200g dried fruit – I use prunes, apricots and then some sultanas/raisins depending on what I have in. Chop them up

2 large eggs

250g plain flour – I sometimes add a small proportion of wholemeal flour, too, but not too much

One teaspoon of baking powder

Half a teaspoon of bicarbonate of soda

You also need two loaf tins and either baking parchment to line the tins, or loaf liners. If you use baking parchment you can get away with greasing the tins (with oil) and placing a long strip of parchment in the tin, so that it covers the bottom and the two short ends (so you also have something to lift out the cake with).

My loaf tins are about 22cm x 7cm (2lb ones). The cakes do rise; they do so uniformly and they about double so bear that in mind when you pour them into any tin you have.

Method

It is so easy that you’d better have your oven preheated to 150C.

Pour the 150ml of tea into a bowl and add the 180g of malt extract; mix around then add  the 85g of sugar, the 200g of dried fruit and the two eggs. Mix gently until incorporated.

Now add the 250g of flour, one teaspoon of baking powder and half a teaspoon of bicarb and mix together.

So easy isn’t it?

Now divide up between the two loaves. It’s fairly fluid so if you are using loaf liners careful that you don’t pour in too quickly as the liners can fold in on each other, I spoon mine in. But you do need to work fairly fast and get them in the oven.

Mine are done after 40 mins exactly but as ever, know your oven. They should be firm to the touch but not over cooked. As soon as they are out, brush more malt extract over the top, then leave to cool.

I wrap mine in foil whilst still warm (Soreen is packed whilst still warm to retain the ‘squidge’) and they are apparently even better after 1-2 days but mine have never lasted that long.

Serve, in time-honoured way, sliced, buttered and with joy.

HipstamaticPhoto-529600364.383963


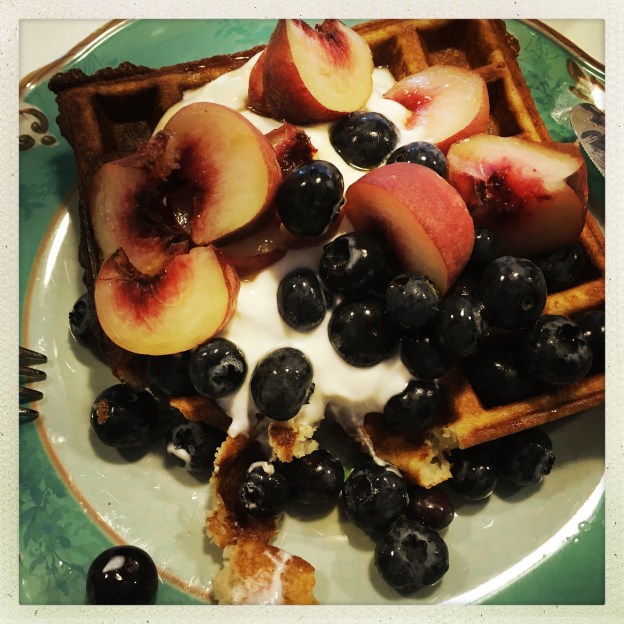
Bee Wilson’s almond waffles

Last year, just after my father died, I made two “grief purchases”. In that sort of ‘fuck it, you only live once’ way one can be after a loved one dies, I didn’t go through my usual checks and balances of ‘do I need this? Is it worth it? Will it earn its keep in the cupboard/on the work surface’. But I didn’t buy an Aston Martin. I bought a waffle maker.

My eldest has always loved waffles. When we used to walk through Whiteley’s department store, on the way to see my mum and dad, on the ground floor there was (still is) a kinda shop/stall which sells, amongst other things, waffles. These waffles are served crowned with squirty cream, chocolate sauce and….Smarties. [We have a Nestle embargo in our house so the Smarties are a very rare treat.]

So imagine my disappointment – which I tried to contain – when I bought a waffle maker, made waffles and my daughter said she wasn’t that keen on them. Not on my waffles anyway (this has happened many times before and I really should be used to it).

But my waffle maker was a top of the range model and I started to panic slightly, I hid it in the cupboard and there I thought it would stay until this January when the fabulous food writer Bee Wilson wrote a recipe for almond waffles in the Guardian.

I made it, they were delicious and this is how we have made waffles ever since. I need to tell you that once I forgot the eggs and although the waffles that were produced were smaller, they tasted like some sort of amazing waffle/doughnut hybrid which I still think about of a morning when I am making these wondering whether I should accidentally forget the eggs again.

Anyway, I love that they have almonds in them, thus lowering the hit on your blood sugar levels. We have these every week now. You can make the mixture the night before (I throw everything into my food mixer), keep it in the fridge and then they are only marginally more work than toast.

I have altered Bee’s original recipe to include a bit of wholemeal flour (20g to 80g of white, plain), as she says on the original recipe, she has also made them using gluten free flour, entirely successfully. I’ve also made them using Sharpham’s Baker’s Blend flour which is a mix of wholegrain and white, entirely successfully.

We serve ours with yoghurt and chopped up fruit and the merest lacing of maple syrup.

80g unsalted butter, melted
20g caster sugar
2 large eggs
100g flour of choice (I’ve made it with gluten-free flour for coeliac friends and it works fine)
80g ground almonds
1 tsp baking powder
170ml whole milk (or almond or coconut milk if you’d rather)
1 tsp vanilla essence

MARCH 2026 UPDATE

Now that I follow a particular diet I’ve modified these for me and am updating it here for, largely, my benefit but also anyone else who doesn’t eat dairy and also likes less sugar.

40g extra virgin olive oil (you can use all olive oil if you want)
40g vegan butter (I use Block. I don’t use it very much or often but occasionally)
10g caster sugar
2 eggs
50g wholemeal flour/Diversity XXX
50g white plain flour (you can use 100g wholemeal)
80g ground almonds
1 tsp baking powder
170ml oat milk (or other plant milk)
1 tsp vanilla essence

Process is same as above. I serve it with organic coconut yoghurt.

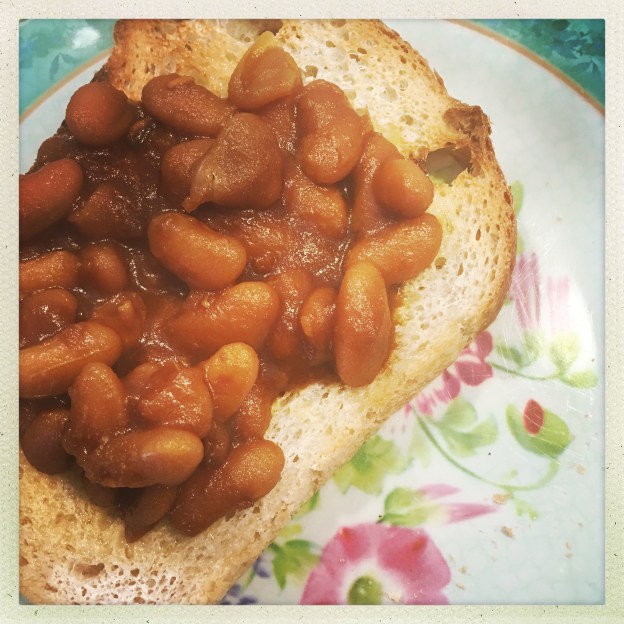
Home made baked beans

I’m not overly a fan of baked beans, but I do love these. Please note the first recipe is for dried beans, which are much cheaper using slow/pressure cooker. Below that is a recipe for ready-cooked beans. You can use haricot or cannellini or small white beans.

This is what you need

1 onion, sliced

1 tablespoon of olive oil

2 cloves of garlic, finely chopped or crushed

500g small white beans, rinsed and picked over (I’m not sure what for, mine were all fine).

1 litre of water

125ml strong black coffee (I used a big tablespoon of instant espresso powder which I keep for making coffee cakes, dissolved in 125ml of hot water)

250ml passata

55g-110g dark brown sugar (100g is what the recipe calls for but we all find it a bit sweet now so do experiment. I’ve made it with half this and will probably reduce further)

1 tablespoon of English mustard

1 tablespoon of black treacle

half a teaspoon of Tabasco sauce

1 and a half teaspoons of salt

2 tablespoons of white or cider vinegar (for the very end, I have left it out and tbh it was fine)

What you do

If you have a pressure/slow cooker which allows you to saute, put this function on, heat up the oil then add the onion and cook until soft – about five mins. If yours doesn’t have this function do this bit on the stove top in a frying pan/saucepan.

When soft, add the garlic and cook for a minute.

Now, either add the rest of the ingredients, minus the vinegar to the pot of your pressure/slow cooker, or now tip the onions/garlic into your pressure/slow cooker and then add the rest of the ingredients (minus the vinegar).

Select pressure cook 80kPa, natural steam release and cook for 35-40 mins or select slow cooker mode for 10-12 hours on low.

When time is up, add the vinegar and you need to reduce the sauce right down until it’s syrupy – either in the pressure/slow cooker if you have a reduce function or decant into a large sauce pan and do it the traditional way. Mine took 20 mins.

Update January 2021. I have since made these with a squirt of Liquid Smoke from Sous Chef which was amazing. I’ve upped the time to 35-40 mins as I really don’t think 30-35 was enough time!

Making using ready cooked beans

It’s not easy to find dried beans where I live so I now make this recipe using these beans. They are not cheap but it’s what I use and it makes a vat of baked beans and the beans are very fine.

Jar of 700g of ready cooked white beans (I use these), use all the liquer in the jar as well. You can of course use beans in tins too!

1 onion, sliced

1 tablespoon of olive oil

2 cloves of garlic, finely chopped or crushed

100ml strong black coffee (I used a big tablespoon of instant espresso powder which I keep for making coffee cakes, dissolved in 125ml of hot water)

250ml passata

80g dark brown sugar (you can alter to taste this is what I use)

1 tablespoon of English mustard

1 tablespoon of black treacle

half a teaspoon of Tabasco sauce

1 and a half teaspoons of salt

1.5 tablespoon of white or cider vinegar (you put this in at the very end, but I often forget it and it’s really fine!)

Use a slow cooker or a regular big pot on the hob. Gently soften the onion in the olive oil, then add the garlic, then tip everything else in – not the vinegar – including all the thick liquid that comes with your beans.  Give everything a good stir and either put in the slow cooker on low for 2 hrs or so or on a low hob. I’m sure they’d be fine after an hour, too. Reduce if you like it really thick but I find this is perfect. 

Here’s a 2024 picture, served with home made seeded sourdough. 


Steak fajitas with avocado salsa and creme fraiche.

This is a favourite in our house, but there has never yet been a good photo taken of it. This is because we tend to descend on it when it’s made and also it just doesn’t photograph well. So I hope Waitrose will forgive me for nicking one from its site.

This recipe originally came from a Waitrose in-store recipe card and I’ve adapted it slightly as I don’t agree with the way it originally said to cook the peppers (with the steak, which is madness as they need vastly different times) and I’ve omitted the  chilli it originally called for and when I made this last night I omitted the chives as ours were covered in small black bugs – blurgh – and it didn’t do the meal any harm at all.

For four people you need:

for the marinade

About 300-340g of steak – the recipe calls for frying steak, I find this tough and I use bavette steak cut into strips. It’s an underused cut, not too expensive, and delicious but don’t cook for long. It’s also amazing made with venison.

2 cloves of finely chopped garlic

1 teaspoon of dried oregano

The juice of one lime (two needed in total, see later)

1 tablespoon of olive oil

the salsa

1 tablespoons of good olive oil

2 ripe avocados

1 small tomato, chopped

2 tablespoons of chopped chives if you have them, don’t stress if you don’t

Juice of one lime

also:

1 tablespoon of olive oil

3 red, yellow or orange peppers but not green. I’ve totally taken against green peppers

Some flour tortillas – we use two small ones each. It’s never enough

Creme fraiche and grated mozzarella to serve

What you do

I prep this in the morning – cut the steak into strips. Mix the olive oil, lime juice and olive oil in a bowl with the oregano. Put steak into marinade, cover and put in fridge until the evening (or at least ten mins).

When ready to eat:

Cut the peppers into strips and cook in the olive oil on medium heat until soft and slightly charred (about ten minutes).

Whilst that is doing:

Skin and stone avocado and put into bowl and mash with lime juice, olive oil, tomato and chives if using. Set aside.

Call someone to lay the table.

Warm the tortillas in a dry frying pan.

Tip the steak in with the peppers and cook on high for about five mins.

When ready to eat, bring to the table and get everyone to make their own: pile creme fraiche, avocado salsa and steak/peppers onto a tortilla and top with grated cheese.

I don’t bother to do any other veg with this…


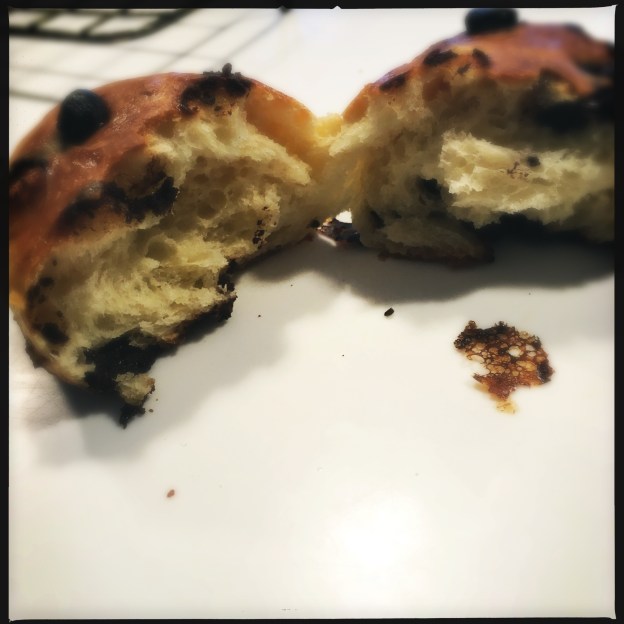
Enriched dough rolls with chocolate chips (bread machine or by hand)

These came about trying to make chocolate chip brioches for my youngest who is obsessed with them. M&S does the best shop bought ones – most leave a really weird taste in your mouth. But we no longer have a local M&S (thanks Stuart Rose)  and anyway, shop bought bread-products are nearly always full of other ingredients I neither recognise nor welcome.

These aren’t strictly speaking brioches – there just isn’t enough butter or eggs to really warrant the name – but they are a lovely little enriched breakfast bread that’s a bit more exciting than bread, but with very little sugar. I promised my youngest I’d make her some brioches, but when the time came, I had very little time and was slightly awed by traditional brioche recipes which involve massaging an entire packet of butter into dough. Plus we were in the middle of jigsaw making and I didn’t want to “splinter off” as my youngest puts it, and start mucking about with dough when she is happy with shop bought. So I looked at my trusty Panasonic bread maker recipe book which is 20 years old; the newer models have actual recipes for brioche bread which I shall attempt anon, and also a special cycle for them which adds half the butter during the cycle. Mine didn’t, but it had a recipe for enriched bread dough. I tweaked it slightly, threw everything save for the chocolate chips into the machine – although I could have put those in too (if you put them in, put them in at the beginning with everything else not in any fancy dispenser drawer as they may melt and get stuck).

It was so easy. Ingredients in bread pan, dough cycle (which is 2hrs 20mins on mine), during which you can do a jigsaw, out, knead in about 80g of chocolate chips, shape into eight rolls – put on baking parchment, cover with cloth, prove in fridge overnight. I also have a little loaf tin that I now make these in. (I double the recipe and it makes ten little loaves.)

Note you can, and I now do, make these by ‘hand’, throw everything bar the chocolate chips (I also regularly add flaked almonds now) into a hand mixer, knead with the dough cycle for ten minutes, turn out and leave for about 30 mins, knead again, leave for another 30 mins or so, knead then shape and fridge overnight or leave to prove for an hour or two at room temperature before cooking. You know the dough is ready to shape when it has ‘give’.

In the morning: oven on to 220C, little buns brushed with a bit of milk or a beaten egg, baked for 10 or so mins. Eaten for breakfast. Delicious. I ate three just for testing purposes. They freeze really well to.

What you need

half a teaspoon of dried yeast (I use Dove’s Farm)

250g strong white bread flour

1 teaspoon of caster sugar

25g butter

1 tablespoon of milk

half a teaspoon of salt

1 egg

85ml water

80g chocolate chips


Un tiramisu che ti tirasu

A few years ago, when we fancied making a tiramisu (it means pick me up, or pull me up), I looked at loads of recipes. I was quite shocked (I’m a bit of a purist when it comes to Italian cooking) at the variations. I mean, Nigella, whom I love, had one, in How To Eat, using no coffee or chocolate and meringues instead of sponge fingers. It caused me to  to slam the pages of the book shut in mock horror.

It is the coffee, and the chocolate that is supposed to act as a ‘tiramisu’. Anything else, to my mind, ti spinge giu (pushes you down).

I have hundreds of cookery books, and a world of recipes at my fingers tips, as do you, on the internet. But nothing was really saying Italian tiramisu to me. Then I thought of looking in my Italian cooking bible: The Silver Spoon.

In these days of celebrity cookbooks, stuffed full of photographs, the recipes in this book are easy to overlook: simple, very few pictures and the list of ingredients for each recipe is short. But don’t overlook them because not only is this a fantastic cookery book, the recipes are accomplished – some of them go back fifty years. As you may expect, some of the recipes are as good as they’re ever going to get.

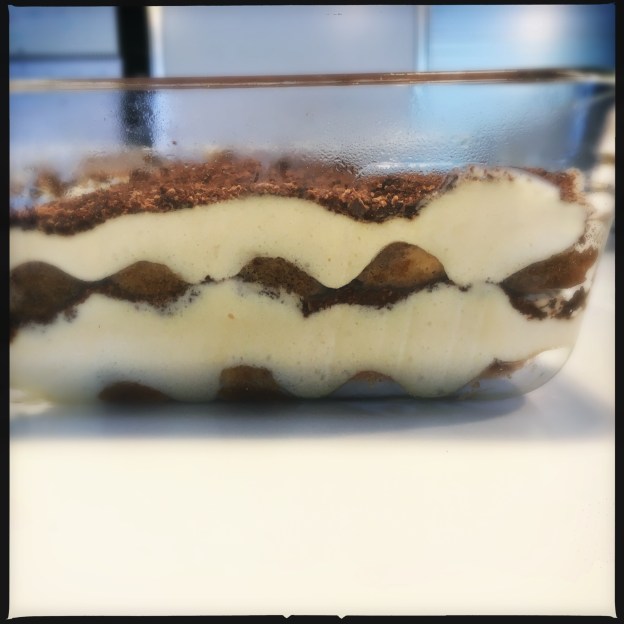
And the tiramisu recipe is no exception. It is one of the few with a photo which I admit helped…I made it and it is the only way we make tiramisu now. It’s simple, anyone can do it (my bambine frequently do) and once made sits in the fridge for a good few days, yielding to your spoon just when you need a…pick me up.

It has no alcohol – so if you feel the need for some after dinner, serve that separately – which means children can easily eat this. Although beware of eating it too late as there’s quite a caffeine punch.

My friend Tamsin doesn’t like coffee, so she doesn’t include it in her tiramisu. Of course I have told her it’s not really a tiramisu, but more of a creamy pudding. Don’t even think of using cocoa powder (other than, maybe, on the very top but I don’t) instead of grated chocolate. The chocolate shavings make this stand out and allow for some bite in what is a wallowy pudding which offers little resistance: you could easily eat aged 98, when all your teeth have fallen out.

And use icing sugar, not caster, which can result in a runny mess.

Here is the original recipe but the adaptions I now make are in italics.

2 egg whites, 4 egg yolks (freeze the 2 extra egg whites)
because I end up with a plethora of egg white I now use all of the four eggs and it just makes for a slightly softer, fluffier tiramisu.

150 icing sugar

400-500g mascarpone (mine comes in 250g tubs so I just use two)

because the mascarpone I buy comes in 250g tubs I now use 500g of mascarpone to no ill effect

200g sponge fingers I use as many as I need to cover the base of my container and the second layer.

175ml espresso coffee

200g plain chocolate, grated I often use less and lately have started using really good hot chocolate mix instead of grated chocolate. Really good hot chocolate is just chocolate flaked..see update note below

NOTE: grating chocolate is one of my least favourite jobs but I do it for this. 200g is what the original recipe asks for, but I’ve made this dozens of times now and I never use this much anymore and in fact I use less than half of it and it’s plenty. My advice is go for 100g of it, because also, grating 200g of chocolate is a total yawn. Jan 2021 update: I’ve discovered that really good hot chocolate comes in flakes and now I use this….

What to do:

I make this in a rectangular Pyrex, which also has a handy lid so I can save it for a few days. Mine is about 17cm x 25cm and it makes two layers. But of course you can make it in a different shape so you get more layers, or even make it circular or in individual portions, just break the sponge fingers up to fill the spaces.

It would, I think, easily serve eight people depending on the size of portion.

First you whisk the egg whites until stiff, set them aside for a moment whilst, in a separate bowl you beat the egg yolks with the icing sugar, then you fold/whisk the mascarpone into the egg yolks and sugar and finally, into this you gently fold in the egg whites. This is your creamy bit.

Lay the sponge fingers onto the base of your dish and brush or pour the coffee on top. Because I know mine makes two layers, I pour half the coffee on now. Then spoon on a layer of the cream and sprinkle with the grated chocolate. Repeat this, ending with a layer of mascarpone/sprinkling of chocolate. I usually end up with more chocolate than I need for this, for some reason, so if so just keep it in a jam jar for next time.

It is better the next day, but can be eaten within a few hours of making it and chilling it to allow the ingredients to meet each other, and mingle.

Pressure cooker risotto.

I never grew up thinking of risotto as risotto but ‘riso’ – this was just always how we had rice. So I’ve never been intimidated by it. This may be why I approached making it in the pressure cooker with the gung-ho attitude I did (it ends well, so don’t worry, no gore or heads blow off).

This is what happened. The children were playing with Lego, it was one of those days where all was right with the world. The sun was shining, the chickens were out pecking the grass, I had mascara on and it was a week day. I had, in the back of my mind, an inkling I had read you could make risotto in the pressure cooker – you can of course.

The pressure cooker was out because I had just made industrial quantities of chicken broth. And that broth tasted really good. I’m always a bit surprised when MY chicken broth comes out tasting anywhere near as good as my mum’s. Anyway. I had loads of broth, it was so tasty. We were going to have warmed up (home made, sourdough, wood-oven cooked – because what do you think I am?) pizza with salad.

But I couldn’t be bothered. I had a bit of a tummy ache and the thought of filling it with pizza, albeit as good as you can get pizza, didn’t really appeal. Plus, have I mentioned, the broth was SO good. So I got some short grain rice (judge me but honestly it’s so similar to risotto rice, which I also had but didn’t use), some onion, some oil, some of my amazing broth and I set to.

This is what I did:

I put the pressure cooker onto saute (mine has that function if not you’ll have to do this bit on the stove), and added some extra virgin really good olive oil. Forget this shit that you need to use crap olive oil to cook, you don’t. You can use really good stuff and it does make a difference to the taste of food (I do use not so good olive oil for some things but not when there are so few ingredients and each needs to step up and hold its own).

I gently softened a chopped onion and some bacon I found in the fridge (three rashers of smokey). Then I added 200g of short grain rice, stirred it around, put in 500ml of stock and put the pressure cooker on 40 wotsit pressure for seven minutes.

Seven minutes.

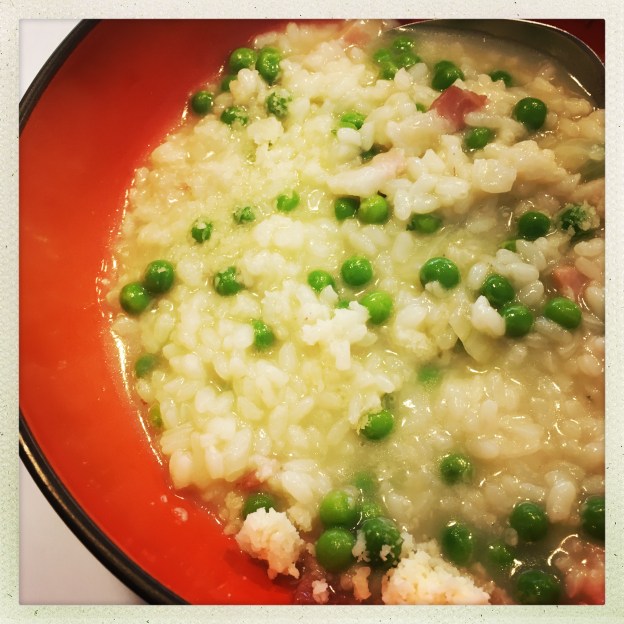
I did of course expect to open the lid and the rice explode like a million fire crackers or it be over cooked or undercooked, but it lay there, glistening, perfect and, despite what the Daily Mail will have you believe, nothing bad happened.

Sure it has to get up to pressure, but it doesn’t take long to get up to 40. After 7 mins you release the steam fast, add 100 ml of stock, some peas what I had had in boiling water for the last 7 mins (as in just chucked frozen peas in a jug and poured boiling water over them) and some parmesan.

It was so good I wanted to open the door and scream. It served three of us but you could easily double this.

More officially:

Some good olive oil, about a tablespoon

An onion, chopped

Bacon, snipped into pieces

200g risotto or short grain rice

600g home made stock – divided up into 500/100ml

An amount of peas to please you all

Parmesan to stir into once cooked.

Of course you could adapt this but this is the basics of what I used. 200g rice to 600g stock.