Category Archives: Gluten-free

Prune and dark chocolate brownies

I saw this recipe in my Donna Hay Fresh and Light magazine, which costs me a staggering £9.50 from Selfridges but is, to my mind, worth every penny as each edition yields more recipes than many recipe books which cost double that.

But I saw it and shunned it as I’m not overly a fan of brownies – too sweet for me usually. But due to a rather terrifying health scare a few weeks ago (I had tests and everything is not only fine but I am actually in really good health yay!) I’ve overhauled the way I eat which was long overdue because although I have always eaten with health in mind, I’ve I’m also greedy and at times lazy. So I’ve gone back to planning what I eat (this has always worked really well for me) and maximise nutrients. And it not only shows in the way I feel, but I’ve lost weight and body fat, whilst augmenting my muscle mass (I do big weights twice a week).

Anyway I shunned them but then was fancying a weekend chocolatey treat and decided to try them and I was not disappointed. Now I know that this isn’t a recipe which magically transforms broccoli into brownies, and I know that prunes are very high in sugar. I know all this but prunes have more nutrients than mere sugar and here’s the thing. These are delicious in their own right. My eldest doesn’t like them but my youngest adores them and my partner – who hates brownies – had one and declared it “the best chocolate thing I’ve tasted in a long time”.

So these are still an occasional treat (I only eat stuff like this at the weekend now) but they’re delicious and gluten free.

The brownies

255g prunes, take the stones out

50g of dark chocolate, melted (Hay asks for 70% but I use these chocolate chips for nearly all my cooking now and they are delicious)

60 ml of light olive oil

80ml maple syrup

1 teaspoon of vanilla extract

80g ground almonds

25g cocoa powder (I use raw organic, no idea if it’s better but it makes me feel better looking at the packet)

2 eggs

The chocolate ganache

80g dark chocolate

60ml of cream (Hay says to use coconut milk but I used cream as that’s what I had, you could use milk)


Pre heat the oven to 180C. You need a 20cm square baking tin, preferably with a removal bottom, if not make sure the baking paper you line it with comes up the sides so you can carefully lift it out later. If you scrunch up the baking paper first it sits in the tin more easily.

Take 170g of the prunes and put them in a jug, cover with boiling water for about ten minutes. I scissor cut the remaining prunes into small pieces and put in a small bowl for later (don’t forget them!) or you could of course chop them with a knife on a board.

Drain the prunes (discard the water) and place in a bowl with the rest of the ingredients for the brownies and whizz up with a hand held blender (or you could put in a food processor, I did as I was told). When done, scatter in and mix in the prune pieces. Put the mixture in the tin and cook for 25-30 minutes. The middle should be firm when pressed but you do want them a bit squidgy.

They will be very soft, so keep in the tin and when cold gently take out. Make the ganache by very gently heating the chocolate and cream in a small pan (I would never usually melt chocolate like this, I’d use a bain marie set up, but I was hungry and it was fine). Spread over the top. If you can, wait a while before slicing up and eating. Store in the fridge where they do harden up.

IMG_7999

I have no idea how long these last as they were practically all gone in 24 hours.

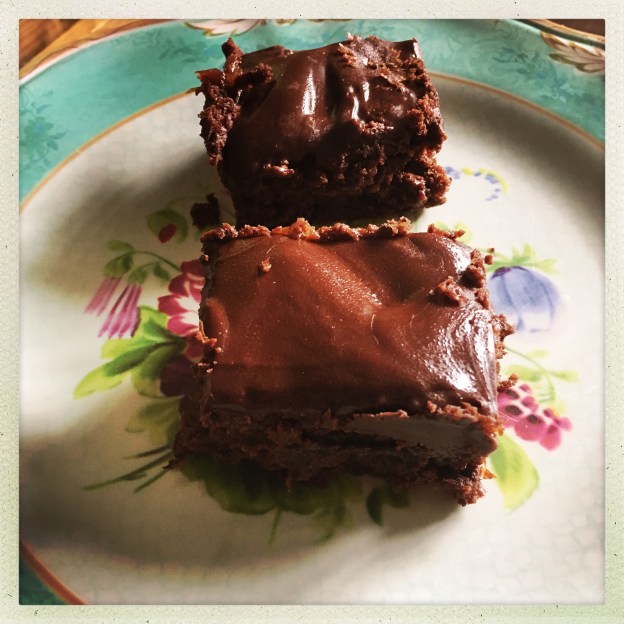
Note: the main image is the brownies a day later, after being taken out of the fridge, the image in the text is of them first iced and sliced – with some missing for, ahem, testing purposes.

Note to self: Put walnuts in next time.


Chestnut marmalade muffins (gluten, wheat, dairy free but don’t let any of that put you off)

These are adapted from a Hugh Fearnley-Whittingstall recipe (from his book Light & Easy). The original calls for 75g coconut oil, which I just find too much, and 75g runny honey, which I’ve eased back on just ever so slightly. His recipe also says cook for 25 mins, but mine are done at 17.

It calls for chestnut flour – which isn’t cheap, nor madly readily available. But is delicious and so filling. Don’t be tempted to buy it in bulk, it doesn’t keep for very long.

And you really need an electric whisker unless your arms are super strong. If they are, all respect to you.

These are just so delicious though, and gluten-free if that’s important to you. I love anything to do with chestnuts as it reminds me of my Pa.

Note these make ten. I’ve been making these for a few years now and every time, with my 12-bun tray, it catches me out.

125g chestnut flour

A pinch of salt

2 teaspoons of baking powder

125g marmalade

2 large eggs

70g runny honey

half a teaspoon of vanilla extract

50g coconut oil, melted and cooled.

Pumpkin seeds to sprinkle.


Preheat the oven to 170. Line a muffin tin with…muffin cases

Combine the flour, salt and baking powder and set aside.

In a food mixer with whisk attachment, put the eggs, honey and vanilla and whisk for, frankly, ages. But about eight minutes. Until the mixture is like a thick mousse and the beaters leave trails when you lift them out.

Now gently and slowly, with the mixer running, spoon in the flour mixture and when all is incorporated whisk again for a few minutes. The mixture will go down to a batter-type one. When done, trickle in the melted coconut oil with a tablespoon of water and whisk for half a minute more. Take off from the mixer and just with a spoon fold in the marmalade.

Spoon the batter into the TEN muffin cases. They won’t come up all the way, that’s how it should be, about 2/3 full. Sprinkle on the pumpkin seeds and bake for  about 20 mins – check after 15. They should be golden and bounce back when you touch them. Depends on your oven of course.

Home made baked beans

I’m not overly a fan of baked beans, but I do love these. Please note the first recipe is for dried beans, which are much cheaper using slow/pressure cooker. Below that is a recipe for ready-cooked beans. You can use haricot or cannellini or small white beans.

This is what you need

1 onion, sliced

1 tablespoon of olive oil

2 cloves of garlic, finely chopped or crushed

500g small white beans, rinsed and picked over (I’m not sure what for, mine were all fine).

1 litre of water

125ml strong black coffee (I used a big tablespoon of instant espresso powder which I keep for making coffee cakes, dissolved in 125ml of hot water)

250ml passata

55g-110g dark brown sugar (100g is what the recipe calls for but we all find it a bit sweet now so do experiment. I’ve made it with half this and will probably reduce further)

1 tablespoon of English mustard

1 tablespoon of black treacle

half a teaspoon of Tabasco sauce

1 and a half teaspoons of salt

2 tablespoons of white or cider vinegar (for the very end, I have left it out and tbh it was fine)

What you do

If you have a pressure/slow cooker which allows you to saute, put this function on, heat up the oil then add the onion and cook until soft – about five mins. If yours doesn’t have this function do this bit on the stove top in a frying pan/saucepan.

When soft, add the garlic and cook for a minute.

Now, either add the rest of the ingredients, minus the vinegar to the pot of your pressure/slow cooker, or now tip the onions/garlic into your pressure/slow cooker and then add the rest of the ingredients (minus the vinegar).

Select pressure cook 80kPa, natural steam release and cook for 35-40 mins or select slow cooker mode for 10-12 hours on low.

When time is up, add the vinegar and you need to reduce the sauce right down until it’s syrupy – either in the pressure/slow cooker if you have a reduce function or decant into a large sauce pan and do it the traditional way. Mine took 20 mins.

Update January 2021. I have since made these with a squirt of Liquid Smoke from Sous Chef which was amazing. I’ve upped the time to 35-40 mins as I really don’t think 30-35 was enough time!

Making using ready cooked beans

It’s not easy to find dried beans where I live so I now make this recipe using these beans. They are not cheap but it’s what I use and it makes a vat of baked beans and the beans are very fine.

Jar of 700g of ready cooked white beans (I use these), use all the liquer in the jar as well. You can of course use beans in tins too!

1 onion, sliced

1 tablespoon of olive oil

2 cloves of garlic, finely chopped or crushed

100ml strong black coffee (I used a big tablespoon of instant espresso powder which I keep for making coffee cakes, dissolved in 125ml of hot water)

250ml passata

80g dark brown sugar (you can alter to taste this is what I use)

1 tablespoon of English mustard

1 tablespoon of black treacle

half a teaspoon of Tabasco sauce

1 and a half teaspoons of salt

1.5 tablespoon of white or cider vinegar (you put this in at the very end, but I often forget it and it’s really fine!)

Use a slow cooker or a regular big pot on the hob. Gently soften the onion in the olive oil, then add the garlic, then tip everything else in – not the vinegar – including all the thick liquid that comes with your beans.  Give everything a good stir and either put in the slow cooker on low for 2 hrs or so or on a low hob. I’m sure they’d be fine after an hour, too. Reduce if you like it really thick but I find this is perfect. 

Here’s a 2024 picture, served with home made seeded sourdough. 


Pressure cooker risotto.

I never grew up thinking of risotto as risotto but ‘riso’ – this was just always how we had rice. So I’ve never been intimidated by it. This may be why I approached making it in the pressure cooker with the gung-ho attitude I did (it ends well, so don’t worry, no gore or heads blow off).

This is what happened. The children were playing with Lego, it was one of those days where all was right with the world. The sun was shining, the chickens were out pecking the grass, I had mascara on and it was a week day. I had, in the back of my mind, an inkling I had read you could make risotto in the pressure cooker – you can of course.

The pressure cooker was out because I had just made industrial quantities of chicken broth. And that broth tasted really good. I’m always a bit surprised when MY chicken broth comes out tasting anywhere near as good as my mum’s. Anyway. I had loads of broth, it was so tasty. We were going to have warmed up (home made, sourdough, wood-oven cooked – because what do you think I am?) pizza with salad.

But I couldn’t be bothered. I had a bit of a tummy ache and the thought of filling it with pizza, albeit as good as you can get pizza, didn’t really appeal. Plus, have I mentioned, the broth was SO good. So I got some short grain rice (judge me but honestly it’s so similar to risotto rice, which I also had but didn’t use), some onion, some oil, some of my amazing broth and I set to.

This is what I did:

I put the pressure cooker onto saute (mine has that function if not you’ll have to do this bit on the stove), and added some extra virgin really good olive oil. Forget this shit that you need to use crap olive oil to cook, you don’t. You can use really good stuff and it does make a difference to the taste of food (I do use not so good olive oil for some things but not when there are so few ingredients and each needs to step up and hold its own).

I gently softened a chopped onion and some bacon I found in the fridge (three rashers of smokey). Then I added 200g of short grain rice, stirred it around, put in 500ml of stock and put the pressure cooker on 40 wotsit pressure for seven minutes.

Seven minutes.

I did of course expect to open the lid and the rice explode like a million fire crackers or it be over cooked or undercooked, but it lay there, glistening, perfect and, despite what the Daily Mail will have you believe, nothing bad happened.

Sure it has to get up to pressure, but it doesn’t take long to get up to 40. After 7 mins you release the steam fast, add 100 ml of stock, some peas what I had had in boiling water for the last 7 mins (as in just chucked frozen peas in a jug and poured boiling water over them) and some parmesan.

It was so good I wanted to open the door and scream. It served three of us but you could easily double this.

More officially:

Some good olive oil, about a tablespoon

An onion, chopped

Bacon, snipped into pieces

200g risotto or short grain rice

600g home made stock – divided up into 500/100ml

An amount of peas to please you all

Parmesan to stir into once cooked.

Of course you could adapt this but this is the basics of what I used. 200g rice to 600g stock.

Leek and butter bean soup with crispy kale and bacon.

This is a lovely soup. What I also love about it is that you can leave the bacon off and it instantly becomes veggie/vegan. It’s stuffed full of probiotic-friendly leeks. It’s from the BBC Good Food magazine.

You need

4 tsp olive oil

500g leeks sliced

4 thyme sprigs, leaves picked

2 x 400g cans butter beans

500ml vegetable stock (or chicken if you like)

2 tsp wholegrain mustard

half a small packet of flat leaf parsley

3 rashers of streaky bacon

40g chopped kale, stems removed

25g hazelnuts, roughly chopped

You do

Heat 1 tablespoon of oil in a large saucepan, add the leeks, thyme and seasoning and  cover and cook over a low heat for 15 mins until soft, adding a splash of water if need be – don’t let the leeks stick.

Add the butter beans with the liquid from the cans, the stock and mustard. Bring to the boil and simmer for 3-4 mins until hot. Blend with a stick blender in the pan (or put in a blender). Stir through parsley, check seasoning.

Put bacon in a large frying pan, medium heat. Cook until crispy, set aside to cool. Add the remaining 1 tsp oil to the pan and tip in the kale and hazelnuts. Cook for a few minutes, stirring under the kale is wilted and crisping at the edge and the nuts toasted. Cut the bacon into small pieces and stir into the kale/nuts.

Reheat the soup, adding a bit of water if too thick (or have both operations going on at once) and sprinkle the bacon/nuts/kale on top.

Chorizo and kale cheesy gnocchi

I adapted this from a Delicious magazine recipe. There is 200g of kale packed into this recipe. And you could substitute spinach if you wanted to.

This is really tasty, wonderful  autumnal dish that’s easy and fast. And if you have a cast iron frying pan that can go in the oven, you can cut down on the pots and pans needed.

Serves four.

You need

200g curly kale or spinach. If using kale take the time to shred it into smallish pieces and cut out the bigger stems.

500g potato gnocchi

1 medium onion, finely chopped

Olive oil for frying

125g approx of chorizo – a bit more if you really like it. Slice in half length ways then finely slice so you end up with half moon shapes.

200g passata

a handful of basil leaves

100g grated or sliced mozzarella

Method

Oven to 200C. Bring a very large pan of water to the boil with a dash of salt in it and drop the gnocchi and kale in, together. Cook for just 30 seconds, drain into a colander and rinse through with  cold water.

Gently heat the olive oil in a frying pan (if it can go in the oven make sure it is quite a large one that can hold the whole dish), now gently cook the onion until it’s soft. Add the chorizo for a few minutes, until the onion takes on the colour of the chorizo. Now add the passata and the basil and cook for three minutes.

Add the gnocchi and kale into the frying pan if it will fit, and mix to combine everything; if not transfer everything to an oven proof dish of about 1.5litres. Mix everything through well. Add some ground pepper (I think the chorizo has enough salt but add a bit more if you like). Sprinkle over the mozzarella or place the slices on top and put in the oven (uncovered) for a scant 15 minutes until golden and bubbly.


Polenta ‘pizza’ with cherry tomatoes and some sort of cheesy topping.

This is not, of course, pizza. But it is delicious.

Polenta featured large in my father’s home cuisine – northern Italy. But it didn’t feature in my mum’s – southern Italy. And because my mum was the cook when we were growing up, I feel I can safely say we never had polenta. I would hear about it, but I could not get my head around what it was. Sometimes it was a powder, then it was solid, then like mash.

When I got older I tried making polenta and it was a disaster. Since then things have improved and it features in my home cuisine and I always find it comforting.

This recipe is from Delicious magazine. I like that the making of the polenta doesn’t involve loads of butter and parmesan – sometimes you want that, but not all the time. Of course you can vary the topping to have what you want on it. Because my children aren’t so keen on dolcelatte I bought some brie with truffles in it as a treat.

Anyway this is just delicious. It easily fed four of us and I had the left overs for lunch the next day (heat up for a few minutes in a dry frying pan, if you can cover it to catch the steam) and it was wonderful.

2 courgettes, sliced thinly (I used a potato peeler)

200g or so of cherry tomatoes, halve them

Olive oil for drizzling

600ml of milk

400 ml of chicken stock, either your own or made from a cube

250g instant polenta

50g cheddar, grated (or use some other cheese it’s okay)

80ml of passata

80g of dolcelatte or brie, thinly sliced

a handful of basil leaves to scatter

Method

Heat the oven to 200C. Spread the courgettes and tomatoes over a large baking tin, drizzle with the oil, season with salt and peper and roast for 10 minutes. This bit is important as you won’t be cooking the finished pizza for long enough to get the courgettes and tomatoes sufficiently roasted. When done set aside but leave the oven on.

Meanwhile, put the milk and stock in a large sauce pan and bring to the boil. Put the polenta in a jug and when the liquid boils, pour the polenta in a stream and stir continuously with a wooden spoon or large whisk. You want the mixture to thicken and bubble on the surface, like larva. Now turn down the heat and stir in the cheddar and season well.

Pour the polenta mixture onto a baking sheet (I find some baking parchment helps but is not essential), spread out thinly to a circular or rectangular shape. Spread the passata over – it will be very thin. Top with the roasted courgettes/tomatoes and the thin slices of cheese. Bake for 15-20 minutes until golden. Scatter basil leaves atop.

You can serve this with a salad but I like it on its own, with one fork, and my feet up on the sofa.

Farinata and Friday night Tray of Treats

We used to do our main shopping on a Saturday as this is how things naturally fell, and it coincides with market day. And I do love a market. This meant that, come Friday, the fridge was a little bare and, often, my partner would be away on Friday. He is really good at conjuring something out of nothing in the kitchen, a skill my mother also has but not one that I’ve inherited.

I’m not bad at cooking but I need to a) be in my own kitchen b) have ingredients c) have a plan. Thus it was that, often, on a Friday, I would want and need to pull together a dinner for me and the children made out of not very much. And this is where I invented the Tray of Treats.

This is basically a fun and slightly misleading name for leftovers and bits dragged out of the depths of the fridge and cupboards. Although, these days, it’s become such an institution that we do tend to shop specially for Tray of Treats, back in the day it was crudites, bits of cheese, ham, bread sticks and whatever else could be cut up and look small and canape sized.

This is where these farinata come in. (Farinata literally means a ‘flouring’.) They are great as last minute bread, easy to make, gluten free and need almost no prepping. The slathering of extra virgin oil and salt makes them, so don’t skimp on this bit, because that would be to miss the point of them.

I use a 26cm skillet and it makes two big ones, which you slice up into wedges. Chickpea, or gram flour, is high in protein so these are gut-bustingly filling. These are also great little snacks to serve with a drink of an early evening.

150g chickpea flour

Two tablespoons of extra virgin olive oil plus extra for drizzling and cooking – use the best you have

half a teaspoon of baking powder

One teaspoon of salt, plus sea salt for sprinkling

Fresh rosemary sprigs, chopped

Pour the flour, the two tablespoons of olive oil, baking powder and salt in a mixing bowl and, using a balloon whisk, whisk through 300ml of cold water. I use filtered water. If you use normal water be aware you might get a bit of scum on top of your batter after resting, if so, just skim it off. I never get it, and you may not.

Whisk this up until you get a batter. Now if you want to make the farinata now, rest the batter for ten minutes and heat up the oven to 240C, if not, put it in the fridge for later and just remember to heat up the oven before you start. The batter keeps for a day or so so you can also make one pancake today and one tomorrow (they are delicious with curries).

When ready to cook, put some extra virgin olive oil – about a tablespoon – in a frying pan that can go in the oven. I know it seems wrong to use extra virgin to fry with, and I don’t normally, but it works here trust me. Spread the olive oil around so it coats all of the pan, let it heat up and then pour half the batter in. When the mixture starts to bubble, scatter over the snipped up rosemary leaves and cook until the sides are golden, then transfer to the oven for ten minutes.

You know it’s ready when it’s crisp at the edge and has a soft centre. Flip it out of the pan (it should come out easily) sprinkle with sea salt and drizzle, generously, with the extra virgin olive oil. And marvel, at how few ingredients can make something so delicious.

My lovely Italian friend Sonia, who is a very talented chef, and from Livorno (where farinata originates, although it’s called torta di ceci there and they sometimes have it in between two slices of bread!), contacted me to tell me that the way I make it isn’t authentic: you shouldn’t use rosemary or extra virgin olive oil as it ‘overpowers the delicate taste of the chick peas’. This is apparently how you do it properly (it’s in Italian, sorry). But I love my way so will continue to do it like that, but, you know, authenticity is important so it’s good to know what one is mucking about with…

Lovely, nutty tasting (but with no nuts) poppy seed oatcakes

These are wonderfully nutty tasting, and you’ll be convinced there are nuts therein. But there are no nuts. They are very frangible, so don’t roll them too thin, and when cooked don’t be too rough with them. Lovely with some cheese, of course, but I also sometimes have them for breakfast with some almond butter and a smidge of apricot jam on top.

Being full of oats ‘n’ seeds, they are particularly good for you, too.

(Note: I’ve put these under gluten free, oats are naturally gluten free but some have gluten in due to the manufacturing process so look at the packet your oats come in.)

These are from Hugh F-W’s Light and Easy book.

150g medium oatmeal

150g porridge oats (not the jumbo variety, if you have those, give them a quick spin in a food processor)

One tablespoon of ground linseeds

One tablespoon of poppy seeds

One tablespoon of sunflower or pumpkin seeds, or half of each

half a teaspoon of salt

75ml of sunflower or other tasteless oil

You will also need 100-150ml of boiled water

Baking parchment


Oven to 180C.

Put all the ingredients, save for the oil and water, into a bowl. Make a well in the middle and now add the oil and mix the ingredients around. Add 100ml of just boiled water and mix to a sticky wet dough, if you need to, add up to 50ml more but try not to if possible. This will seem like an unpromising dough and won’t be like a smooth dough, such as you may be used to.

Now you need two sheets of baking parchment to roll the dough out. Not too thin. Cut into squares – just free form with a knife, you don’t need to be madly exact. Hugh recommends cutting the square in two so you get triangles and I like this shape, too.

Don’t be tempted to use a cookie cutter. But do ball up and re-roll any off cuts. I shaped the last one by hand, in a butter-patting style.

Put on baking parchment lined baking tray and cook for 20-25 mins until just coloured. These give out a lot of steam (cos of the water) so be careful when you open the oven. You don’t want them too cook too much and be too dark, but equally they do need to be cooked so if your oven is temperamental, check after 15 minutes. The surface should be dry – no bubbling bits of steam – but not too coloured. Mine took about 22 minutes in a quite fierce oven. You may need to cook in two batches, I did.

This makes about 20-24, depending, on course, on the size.


My breakfast smoothie

Seriously, like we need another picture of a green smoothie. But, nevertheless, here is mine.

But I wanted to share this because I think it’s so nice, it’s healthy but it’s not so scary that it alienates perfectly ordinary people, like me and you. I absolutely love it and will either have it first thing (after my mad Italian woman habit of lemon and psyllium husks in hot water), or after I’ve had a ‘proper’ breakfast and at about 11am. Depending on what time I have it I will vary the ingredients. I don’t add spinach if it’s too early because WTF am I turning into? But. My big discovery is frozen spinach. The one you get chopped up in ‘pods’. This way you don’t have bags of fresh spinach going off in the salad drawer (yuk) mocking you; it’s always fresh, and adds a nice cold element to the smoothie.

There are three key ingredients, to my mind, to make this smoothie really nice and friendly. And those are the almond butter, the cinnamon (who would have thought I’d become obsessed with cinnamon?) and the dates which must be those lovely expensive medjool dates. I buy mine from the market and £3 worth last me, easily, all week. I would probably also add banana as a must have. Remember that if you don’t fancy a whole banana, you can freeze it, chopped up in pieces, in a box in the freezer to add to subsequent smoothies.

So this is my basic smoothie:

One and a half medjool dates, two if you like

One banana, nice and ripe if possible

One teaspoon of cinnamon – don’t skimp on this

A big old tablespoon of almond butter

Handful of blueberries

200ml or so of almond milk or milk of your choice. I fill it up to the ‘max’ on my Nutribullet container. If you like a thicker smoothie add less, if you like it runnier add more etc.

You can blend it up now for a minute or so until smooth. But, if you want to ramp up the nutrient content you can add any, or all, of the following.

quarter of a teaspoon of spirulina

half a tablespoon of linseeds

big pinch of hemp seeds

1-2  tablespoons of oat flakes

some kefir if you culture it – I add two tablespoons

a pod of frozen spinach

The spirulina makes everything go really green. Don’t be scared. And you don’t have to add it if you don’t want to.

Just remember to blend until really smooth. I do it for about 30-45 seconds in my Nutribullet.

This fills you up for, ooh, maybe 30 minutes. Seriously it doesn’t fill me up for long in that ‘full up’ way. But I do feel REALLY good after drinking it. Until I pollute my body with a cappuccino. Sssh.