Category Archives: Picnics

Date and ginger biscuits (gluten, refined sugar and dairy free)

I haven’t gone gluten, or dairy free. I am incredibly fortunate that I can, thus far at least, eat what I want. And I do. Last night I stuffed my face with cheesy Wotsits (I love a flourescent food stuff sometimes). Today, for the first time in eight years, I went into a supermarket and bought a loaf of white sliced and we had toasted sandwiches for Sunday lunch.

But generally, I do eat really well and also, I do like to try new things and double-also I like to have a little biscuit or something every day, and it kinda helps, now that I’m no longer 19 years old and seven stones, to think of my health ‘n’ stuff.

(Whilst I’m vaguely on the subject of healthy eating, has anyone else noticed that saying you’re on a ‘whole food plant based’ diet seems to have replaced saying “I’m vegan”? I’m not saying this recipe is vegan btw, because it’s not – it contains eggs – but I’ve noticed this phrase a lot lately..)

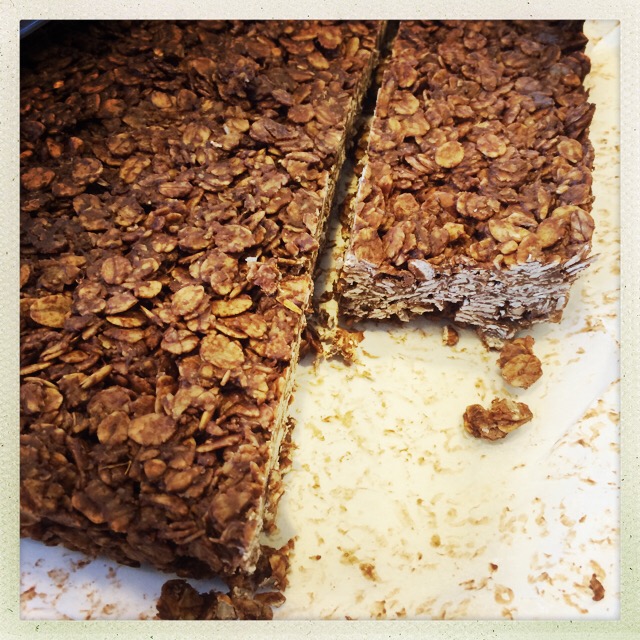
So I found these in Hugh F-W’s new book Light and Easy (which thus far I really like although have only tried a few things). They are choc-full of good-for-you ingredients, have no refined sugar, no dairy, no wheat, no gluten and although they absolutely won’t be to everyone’s taste, they are to mine and also my youngest loves them (incredibly). They are not overly spicy or gingery, and make a great little snack when you need a treat. But are also – thanks to the fibre and protein – rather satisfying and sustaining.

You need:

200g pitted dates

15g peeled ginger, roughly chopped

2 eggs

250g ground almonds (this is not a cheap biscuit recipe..)

a quarter of a teaspoon of bicarbonate of soda

One and a half teaspoons of ground Chinese five-spice

Pinch of salt

Flaked almonds for topping if you so wish

What you do:

Oven to 170C. Baking parchment or magic carpet type sheet onto a baking sheet.

Put the dates and ginger into a food processor. Not a blender, but a processor (it’s sticky and if you put this in a blender I wouldn’t want to be you cleaning up afterwards). Whizz up for a couple of minutes until the mixture is really sticky and everything is evenly chopped up. This is also the time you realise you have bought unpitted dates as the processor will start making an awful sound and then start smoking.

When the mixture is all mixy, then you add the eggs and process again until you get a nice sloppy mixture – takes seconds really. Now add all the other ingredients and pulse for a few times until everything is, how can I put this? Mixed. You will have a very sticky dough. Either drop spoonfuls onto the tray or wet your hands slightly, roll into a ball and then flatten – which is what I do. I make mine about 5cm wide. They don’t really spread out so you can pack them fairly tight – but not touching – onto a baking tray. Top with flaked almonds if you so wish (this is my addition).

I bake mine for 15 minutes and this is plenty. Hugh says 20. They should be golden but not too dark and have a ‘slight give’ in the middle. I can lift my straight off the tray, with my hands, onto a wire rack to cool.

That’s it. Eat and feel virtuous.

Chocolate and nut oat bars

I live in hope of finding some sort of cereal bar, that I can make, that my children will like. I think a good cereal bar is an excellent thing to be eaten when you don’t have much time, but need something that will keep you going. But so many bought cereal bars are full of crap.

Many years ago, I co-ran a parenting website called I Want My Mum (because that’s all I said when I was pregnant and not long after having my baby, “I want my mum, I want my mum!” I would lament. Luckily she wasn’t far). I posted a recipe on there for some sort of healthy cereal, chewy bar. Loads of people went crazy for it, saying that their children loved it.

Not mine. My children have never liked any sort of bar that I’ve made, but they look at the Kellogg’s Special K Raspberry and Chocolate bars with longing every time they go past them in the supermarket aisle.

So I saw these in my Dale Pinnock Healthy Every Day book. He’s the one I got the chocolate/coffee smoothie idea from. I adapted his recipe, changing the proportions and also, he said you should sandwich the chocolate/peanut butter layer in between the layers of oats. But this didn’t look great to me, and also, in a bid to entice my children, I thought it’d be better to coat the whole lot in chocolate. I even wrapped them up in little bags to make them look shop bought. Did they love them?

No.

The ungrateful bastards. But I really like them (just as well as I have about 18 of them now) and if you need a healthy but delicious, quite treaty snack, you can try these. Or, if you’re lucky, your children might like them.

65g unsalted butter

50g coconut oil

45g raw honey

1 teaspoon of vanilla extract

300g porridge oat flakes

125g 70% cocoa chocolate

80g nut butter of choice – not one that’s full of sugar but if your nut butter doesn’t have salt in it you may want to add a pinch

Melt the  butter, coconut oil and honey in a pan. Add a pinch of sea salt if your nut butter doesn’t have it. When melted, add the vanilla extract and the oats, and coat everything.

In a bowl atop another pan of simmering water, melt the chocolate and nut butter. When melted, add to the oat mixture and stir really well.  Tip into a tin (I use one that’s about 20cm square but you can see how much mixture you have so use a tin accordingly. I line mine with baking parchment to make thing easier). Then just chill for an hour or two, cut into slices and offer to your children and when they refuse, sit down and eat the lot yourself whilst writing them out of your will.

IMG_1243

Prune and almond loaf

This is a magnificent bread recipe, adapted from the equally magnificent Donna Hay magazine that was out this summer.

It’s fantastic when you need something bready, fast, and it is SO delicious. No yeast or proving is necessary. And come on it’s got nuts and prunes in! Good for you..

I’m not going to pretend some of the ingredients are ‘store cupboard’ but aside from the buttermilk, nothing will go off quickly so if you get them in you’ll have something to rustle up over the Christmas period if you (gasp) run out of food, or even if you need to bring something to someone’s house as a little present.

This loaf, with some nice cheeses and a cheese humidor, would make an excellent gift for a cheese-loving friend. But it’s also good with pate.

Ingredients

125g plain flour (not bread flour)

125g wholemeal plain flour (not bread flour)

1.5 teaspoons of bicarbonate of soda

half a teaspoon of salt

100g whole blanched almonds (not the end of the world if you have them with their skins on) – you could also, if you wanted to, use other nuts such as walnuts or hazelnuts.

85g pitted prunes, chopped up

40g maple syrup – this really adds something to it so try not to substitute it for something else

190g buttermilk (you can use kefir if you make it, instead)

65ml of sweet sherry (one of my readers has said she uses very strong Earl Grey tea for this)

Method

Preheat the oven to 200C. Lightly grease and flour a 2lb loaf tin. (I use this one.) Place the flours, bicarb, salt, almonds* and prunes into a bowl and mix up. Make a well in the middle and add the maple syrup, buttermilk and sherry. You will have a very sticky dough, slop it into the tin, whack it in the oven for about 35-40mins and that’s it. Leave to cool for five mins, turn it out, let it cool and then eat it with joy.

(*The astute amongst you may notice there are nuts on top of my loaf. This is what the original recipe stipulated – that you reserve half the nuts and scatter them atop the dough before it goes into the oven. I’m not sure I would do this again as some of the nuts got a bit too brown, but see how you feel/what sort of effect you want.)


Dense chocolate loaf cake

This is a lovely chocolate cake that I’ve been making for years. It’s so simple, yet so good. I’ve put it up here for my friend Kate who has never, to my knowledge, asked me for a recipe. But she did after tasting this on Saturday. It’s a cake that keeps, a bit like gingercake, for a good few days wrapped in parchment and foil. Ideal for taking for weekends away, picnics, lunchboxes

I don’t know a child who doesn’t like this – and it’s rare I can say that; and, slightly warm, and with custard or maybe some cream, makes a nice, simple pudding.

It’s originally from Nigella Lawson’s How to Be a Domestic Goddess, but, like a lot of Nigella’s recipes, God love her, I’ve cut down the sugar dramatically (yes, really and it’s still at 250g!) and changed the flour around a bit.

225g very soft, unsalted butter

250g dark muscovado sugar

2 large eggs

1 teaspoon of vanilla extract

100g dark chocolate (70%), melted

150g plain flour

50g wholemeal plain flour

1 teaspoon of bicarbonate of soda

150ml boiling water

A 2lb loaf tin, about 23x13x7. Mine one is bigger. If you want to use two smaller loaf tins you can, cook for less time: 20min for first part, then 10minutes.

Preheat oven to 190C.

Line the loaf tin – this is really important as this is a very moist cake and it will fall apart if you have to wrestle it out of the tin. If possible leave some baking parchment overlapping so it lifts out easily.

Put the chocolate on to melt – in a bowl above a pan of simmering water, making sure the bowl doesn’t touch the water. When melted, set aside to cool slightly.

Cream the butter and sugar together with a wooden spoon, then add the eggs and vanilla. Now fold in the cooled chocolate. Mix the flours and the bicarb together.

Now you’re going to add the flour mixture and the water, a spoon at a time, stirring well between each. This is important. If you add the flour and water too fast, the boiling water will cook the flour into little balls and you’ll end up with little white flour balls in the cake. I know because I’ve made this many, many times and tried to cheat the system and it doesn’t work.

You’ll end up with a very runny batter. Put – pour- in the cake tin, and if your tin is very up to the brim already, it may be prudent to put a baking tray underneath to catch any spills. (This is why I use an even bigger loaf tin than recommended. I can’t bear to lose any to the oven.)

Cook for 30 mins, then turn down to 170C and cook for a further 15 mins. I do this exactly and end up with a very squidgy, moist cake. If you use two smaller loaf tins, cook for 20mins and then 10 at lower temperature. The top should be set and there shouldn’t be any discernible ‘wobble’ (or not much) but a skewer inserted may still have some crumbs attached due to the moistness of the cake. Don’t overcook.

Let it cool completely before taking out of the tin. It will sink a bit in the middle, don’t worry, it’s meant to. If you don’t eat it all immediately, wrap in parchment and foil and enjoy a slice every day.


Pear and Hazelnut cake

I am a fiend for cutting recipes out of magazines and filing them in big Muji PP document files, which I then mark things like ‘Puddings’ or ‘Everyday’ or ‘Christmas’. People who come to visit look at my bookshelves and I know they think I’m bonkers. I AM bonkers. But, it does mean I have custom made books.

And it was in such a book, called ‘Cakes’ that I found a recipe I’d cut out years ago. Most unassuming it was and by the lovely Nigel Slater. It involved pears. I’m usually a bit suspicious of people who say, when I ask them what sort of cake they’d like me to make them, “something with fruit in it”. I think a cake is a cake and if you want fruit, eat fruit. But there are exceptions, of course, and this is one of them.

And it is an exceptional cake. I must have eaten half of it all by myself which is really rare for me. I customised it by using:

a) ready toasted and chopped hazelnuts which seemed like such a luxury it made me feel quite heady. Because my packet came in 100g, I then scattered 20g of the chopped hazels onto the crumble topping and…

b) the cake calls for 165g of flour and I substituted half of that wholemeal, adding a quarter teaspoon of baking powder as the wholemeal flour I have is plain.

c) I also used about 40g of wholemeal in the crumble topping. The cake didn’t suffer for it at all. By that I mean it didn’t become overwhelmingly worthy. But I do like to avoid 100% white flour cakes if possible. The thought of adding wholemeal flour may scare, but as long as you don’t overdo it and do it in appropriate cakes – i.e. NOT ones like Victoria sponge – then it just adds a lovely dimension to your baking and a good flavour.

This is lovely warm, with cream. It reheats easily with a ten second blast per slice in the microwave. I don’t know why it’s so addictive exactly but it is. A superior cake. Eat it and cry gently.


Chocolate banana cupcakes with a chocolate cream frosting

My friend Vicky made this chocolate banana loaf the other day with her ducks’ eggs. I’m not usually a fan of banana bread. I want to like it, ever since I read that Nigella says making banana bread fills your house with domestic fug, or some such. But I just don’t really like it. I’m not a fan of an overly banana taste in anything other than in a, you know, banana. But this looked different, thanks to the abundance of chocolate and cocoa in it and on it. And then I had a child off sick the other day and so we decided to make it together; but into cupcakes not a loaf. And it worked brilliantly.

As you will see in the comments below the actual recipe in BBC Good Food magazine, lots of people have modified the recipe to make it even healthier with less sugar, more bananas, honey etc. I am obedient so, as it was the first time I made it, I followed the recipe.

I used Isigny Creme Fraiche instead of ‘sour cream’ (it’s the same thing anyway isn’t it?) and I used Tesco’s Finest Cooking Milk Chocolate with 40% cocoa content which is fantastic, even if you do have to go to Tesco to buy it (stock up). I hate hate hate buttercream icing so this is great for me.

IMG_5644

My youngest didn’t like the topping so I left some clear for her which was convenient as, making it into cupcakes rather than one loaf, I didn’t really have enough frosting (if you want to cover all of them, make double of the topping).

You can top with a banana chip if you want. I make my own, using my dehydrator, but obviously you can just BUY THEM.

Update: I have since made these again using coconut oil instead of sunflower oil (v nice, you don’t really taste the coconut) and also half wholemeal flour plus half a teaspoon of baking powder. Just to make it more healthy. If anything, I think the cupcakes tasted better..and because I’m lazy, I’m reproducing the recipe, as I now use it (i.e. adapted) here for my reference..

for the cupcakes

100g coconut oil, or olive oil or butter

110g caster sugar

90g white self raising flour

85g wholemeal, plain flour

half a teaspoon of bicarbonate of soda

half a teaspoon of baking powder

4 tablespoons of cocoa

100g chocolate chips – I use plain

175 very ripe banana (about two) – I weigh them with the skin on

3 medium eggs, two separated

50ml milk

For the topping (double this quantity if making cupcakes and you aim to ice the whole batch)

100g high cocoa content milk chocolate

100g creme fraiche/sour cream

a pinch of sea salt for real wowness

banana chips if desired

Line each cupcake mould with a case – this makes about 16 so you may need to cook in two batches.

Heat oven to 160C. Mix the sugar, flour, bicarb, cocoa and chocolate in a big bowl. Mash the bananas in another bowl and mix in two egg yolks plus one whole egg. To this, add the coconut oil/olive oil or butter and milk.

Beat the egg whites until stiff.

Add the banana mixture to the dry flour etc mixture, mixing well but not overmixing (I never understand why, what happens if you over mix it??). Stir in a bit of the egg white mixture to loosen it all up, then fold in the rest to keep the air in as much as possible.

Spoon into cupcake cases and bake for about 25 minutes – 30 mins. A skewer should come out clean, unless of course you hit a bit of melted chocolate chip.

Let them cool completely. In the meantime, melt the creme fraiche and chocolate together, in a bowl over simmering water, with the pinch of sea salt if desired. Then spread over cupcakes (if it’s really gloopy let it firm up a bit in the fridge first, but not too much). Top with a banana chip if you like.


Blueberry and yoghurt loaf cake

Ever since I started making my own yoghurt, I’ve looked out for recipes involving yoghurt. Prior to last year, I’d never used yoghurt in cakes. I’d used it, with much success, in pancakes, but cakes? No.

Last year I found an amazing recipe for a very plain, but none the less delicious, lemon yoghurt cake. I’m not reproducing that one here because although the actual cake was delicious, the topping it recommended, was not. Using yoghurt in a cake makes the cake really moist and light, making it a bit more ‘shop bought’ in texture, which sounds mad, but sometimes I do like the texture (if not the taste) of supermarket cakes.

This cake is a Donna Hay recipe. It’s light, easy, delicious, wonderful. And sometimes you need something easy, yet spirit lifting. Especially on a Monday. I hate Mondays. I find it so difficult to wrench myself from the bosom of my family and send my children out to school and me out to work. Cake makes it all better, and if it’s made of yoghurt and blueberries, that can’t be bad, can it?

You need:

150g unsalted butter, melted or very very soft.

220g caster sugar

2 eggs

140g thick plain yoghurt

Zest from a small lemon

1 teaspoon of vanilla extract

225g self raising flour

125g blueberries

icing sugar to dust.

This is what you do:

Oven to 160C. Put the butter, sugar, eggs, yoghurt, lemon zest and vanilla in a bowl and whisk to combine (I use a food mixer with a whisk attachment but it’s fine to use a wooden spoon/hand whisk and some muscle). Now add the flour and whisk until well combined Gently fold through the blueberries and spoon into a lined loaf tin of about 22cm x 8cm x 7cm. Smooth the top and bake for about an hour, bit more if it’s still very moist. A cake tester should come out clean. Cool and dust with icing sugar.

Another favourite cake recipe that uses yoghurt in the icing is here and it’s delicious.

Simple sushi for the beginner

My eldest and I used to make sushi from her children’s cookery books and whilst it was okay, it wasn’t great. This however, from the Maisie Makes series in the BBC Good Food magazine makes for really delicious sushi, thanks to the addition of a few key ingredients that other, simpler, recipes leave out; such as the Japanese mayonnaise – which is absolutely essential I think. I do understand about simplifying some recipes for children, but if they leave you with a lesser product, I don’t really think they give an accurate picture of what children can achieve.

Anyway, nothing here is hard. But it does take a bit of practise and do get all the ingredients because it really makes a difference, and if you like sushi I think this will become a regular thing and the cost of each make will go down… The sushi shown here was made entirely by my ten year old and she took it in her school lunch box. Her father and I had the rest for our lunch, with lots of wasabi (I am slightly addicted to the stuff) and soy sauce.

We don’t have access to sushi grade fish here, and my daughter doesn’t like pressed sushi, so we make only the rolls.

Here is the recipe, although if you can get hold of the January 2014 BBC Good Food magazine, I’d recommend you do as there are pictures which makes this much easier!

Do give this a go. It makes for a terrific packed lunch, we make the rolls the night before and it makes that whole packed lunch thing much easier the next morning. And when you are quaffing eight of these rolls for your own lunch, you can marvel at how much you would pay for them if you bought them out.


How to make your own salted caramel wagon wheels

What I want to know is, when did this blog become almost exclusively about food? I used to write about coffee machines, and fridges ‘n’ stuff. I think it’s partly to do with laziness, greed and also that as I get more serious in my day job, I want to write about things that comfort and soothe.

This is my excuse for writing about Wagon Wheels a week before Christmas when I have at least twenty-three other things to be doing.

I never liked original Wagon Wheels. So this wasn’t about trying to recreate something I loved, but in more, ahem, nutritious format. This is entirely about being seduced by a picture in a Donna Hay magazine in which she makes them. I hesitated before posting the recipe. These are, by no stretch of the imagination, good for you. They use Fluff – jarred, spreadable marshmallow – which contains corn syrup which is really really bad for you. So you must ASSURE me that you will only make these once a year.

These biscuits are, however, really fun. They are not difficult to make, and can be made in stages. The trickiest bit, I found, was the dipping them in chocolate. There is no easy way to do this and you end up making a great big mess. I made the biscuits differently to how Donna recommended – she uses three tiers and smaller biscuits. In an attempt to recreate a more authentic WW look I went for two tiers and larger.

Big mistake. They end up being quite a biscuit. I’d say probably 500 calories a piece. Which isn’t good. I definitely wouldn’t serve these if Gwyneth were coming round to tea. When I first made them I stored them in the fridge which was a mistake as they go kinda crispy and I didn’t like them so much (so perhaps not a mistake after all). After a few hours out of the fridge and stored in a biscuit jar, they were just perfect. Strangely addictive. People I gave them to started making weird, primal noises. They started telling me they loved me.

Be warned.

Don’t go fooling yourself you will only take one bite of these and not eat the whole thing. So make them small. And make them when you have lots of people coming round so you’re not left alone with them. I made a few changes: I substituted salted caramel for jam as I had a jar of caramel that my friend Helen had made for me and everyone preferred them to the jam version (I made a few with jam to try).

And I used about 2/3rds 34% cocoa chocolate and to 1/3rd 70% cocoa chocolate to coat them instead of doing half of them with white chocolate and half with plain as Donna Hay suggested. I actually think I’d slip into a diabetic coma if I made these with white chocolate.

Anyway, enough chat, here is the recipe as I did them, and the low down.

170g unsalted, softened butter

160g icing sugar

1 teaspoon of vanilla extract

2 teaspoons of honey

1 egg

335g plain flour

1 teaspoon of baking powder

half a teaspoon of bicarbonate of soda

A jar of Fluff – marshmallow spread in a jar

Either a jar of blackberry jam/jelly or salted caramel (I say jelly as that’s all I could fine, not because I’ve gone American)

About 200g high cocoa content milk chocolate (I used Green and Blacks, which is 34%)

100g 70% cocoa chocolate (I always use Waitrose Continental)

Put the butter, sugar and vanilla extract in an electric mixer (I used the whisk attachment) and beat for 5-7 minutes. Imagine doing this by hand?! Scrape down the sides and then add the honey and egg and beat again for a bit until combined.

Now add the flour, bicarb and baking powder and beat on a low speed until combined – just a minute or so. Flatten the dough into a disc. It will be very soft. Put in cling film and put it in the fridge for about an hour (longer is fine). It should be firm before you start to roll it out.

Now, preheat the oven to 180C and line a baking tray with baking parchment. Roll the dough out bit by bit between two pieces of baking parchment until about 5mm thick. This is a very soft dough so after a few rollings out it will be hard to handle so put it back in the fridge if need be.

Cut circles of 5cm. I did larger but as I said, I think that was a mistake as I ended up with a really calorific biscuit!

Place on baking trays – they don’t spread out much so you can go quite close together but not too close. About 1cm is fine.

Bake for just a scant 4-5 minutes, until the edges are just tinged with a golden brownness. Take out of the oven and leave to cool completely. You will need to cook these in batches.

When the biscuits are completely cool it’s just a case of assembling them, then dipping. So, spread one biscuit with the salted caramel, one with fluff and sandwich together. Don’t be too mean with the filling but don’t go mad either. When they are all sandwiched together put in the fridge to firm up for a bit whilst you melt the chocolate in a bowl, atop a saucepan of boiling water.

When melted, dip the biscuits in the chocolate. If there’s an easy, non-messy way to do this, I haven’t discovered it yet. I tried painting the biscuits with chocolate and that worked but left brush marks. After several goes I discovered the best thing to do was coat the edges then dip quickly one side then another. If you end up with bald patches where your fingers were then you can remedy by just spreading a bit over with the back of a spoon. Leave to drip for a few seconds over the chocolate bowl, then leave to set on a rack. Be careful though. If you do like I did one time and put it straight in the fridge, the chocolate will set around the bars of the cooling rack and you will end up with half a wagon wheel when you prise it off.

This is no bad thing in a way, as you immediately lower the calorific value, but it makes a mess. So be aware this can happen.

Do leave them to set in the fridge at some point, then you can store them in a biscuit jar in a cool place, preferably at someone else’s house.

IMG_4336

Chocolate sponge and chocolate custard

These have to be five of my favourite words.

And yet, when I was in my first year in primary school, two traumatic things happened to me at lunchtime (we all had to have school dinners). First, having come from a safe and loving home, I was one day confronted by a very troubled boy kicking me in the back and nobody doing anything about it. Second, another troubled boy spat in my chocolate sponge and chocolate custard. I didn’t, of course, finish eating it, but amazingly, it didn’t taint my memory of this pudding which I still see as elementally comforting. Despite history proving otherwise, I think nothing bad can happen when you’re eating a chocolate sponge and chocolate custard pudding.

I have made this several times over the years. And each and every time, I forget to take a photograph of it because everyone is in such a scramble to get it. This has nothing to do with me, other than I make it, but I think, everything to do with people’s associations with it.

This time, I only remembered to take a picture of it at the very last minute, when we were on the last slice; which is why it’s a close up, and not a very good photograph at that (still, better than Martha’s). Just out of shot, is my partner’s spoon, hovering in anticipation and annoyance at my interruption, and half the pudding already gone.

A note about the custard: it doesn’t make enough unless you eat giant portions of this at once. If you eat it like we do, in smallish portions, then you need more custard. Second, Waitrose does a perfectly good chocolate custard which you could easily use instead. It’s not as ‘good’ for you (no eggs) but come on..

A note about the pudding. It travels really well. I have made this in advance and taken it on a holiday rental, warmed it up in the microwave (10-20 seconds per portion) and it is glorious. I’ve easily kept this cake for a week and just zapped it in a microwave to make it soft and springy again.  If you like it cold cold (cold pud cold custard) then this could also travel, separately, to a picnic and be reunited to make a quite decadent pudding on the grass.  My children actually like this pudding cold, with cold custard and you can try it either way: hot hot, cold cold, hot cold, cold, hot. Knock yourself out.

This recipe originally came from Delicious magazine.

250g unsalted butter at room temperature (so soft, because room temperature in my house at the moment results in pretty hard butter still)

200g caster sugar

50g dark brown sugar

4 medium eggs

250g self raising flour

1 teaspoon of baking powder

2 tablespoons of cocoa powder

50g dark chocolate grated or chopped up very, very, very small (grating chocolate is one of my most hated kitchen jobs, I’d prefer to de-giblet a chicken)

1 teaspoon of vanilla extract

125ml warm milk

Oven to 180C. You’ll need a square 20cm cake tin which you have lined with baking parchment. I love this cut into squares but for goodness sake don’t sweat it if you don’t have a square tin and improvise.

Beat the butter and sugars together, whisk in an food mixer if you have one. If not doing it by hand is fine. BUT it does need lots of beating so if you have an electric whisk do use that for five minutes.

Gradually add the eggs and now sift over the flour and cocoa with the baking powder and grated chocolate. * Add the vanilla extract and the warm milk. It should be fairly gloopy. Put in the tin and cook for 45-50 minutes until a skewer comes out growling. I’m joking, a skewer comes out clean-ish. You know the score.

If you want to make the custard you need:

300ml whole milk (although I have used semi-skimmed and the world did not fall in)

300ml double cream

4 egg yolks

3 tablespoons of caster sugar

3 tablespoons of cocoa powder

1 teaspoon of cornflour

Heat the milk and cream together until almost boiling. Whisk the egg yolks with the sugar, cocoa and cornflour. Pour the hot milky cream over the eggy mixture, whisk and return to the pan. Cook gently until it thickens. Serve hot, warm or cool.

2016 note: I now just add chopped up chocolate to the warm milk and melt it that way if I’m in a rush. Nothing awful seems to happen. I’ve also improvised chocolate custard – the recipe above is lovely but it’s a faff and never quite makes enough – and used good quality shop bought custard and added melted chocolate and a tablespoon of cocoa to it.